Continuing our tour of Market-Garden, Patch and I went to the second scenario in June 2009…:
This one may be very short….
Patch and I have played this one FtF before, but I can’t really remember anything of it. But, it’s the second scenario in the A’91 Market-Garden set which we’re going through, so here we are again. I lost last time as the Brits when Patch managed to nail my feet to the floor at get past me. So this time I’m the Germans.
Both of us look at this one and wonder just how the British are supposed to win, with the German advantage in numbers, and 11 turns to exit a mere 3 EVP.
Poor German dice look to help a lot.
I set up with a couple of sacrificial squad and a half groups on either flank. Their main job was to keep him honest as he’d have to make sure both board edges were adequately covered or risk one group getting through and beelining for the exit. The rest clumped near the center, looking to see a way forward. Patch put the 9-2 and MMG in the center of the village at Q4, with a backup force nearby and more off to the north in S7/R6.
His first shot was the MMG at my northern flankers, and broke the MMG on a ’12’.
Past that, he spent time developing his flanks.
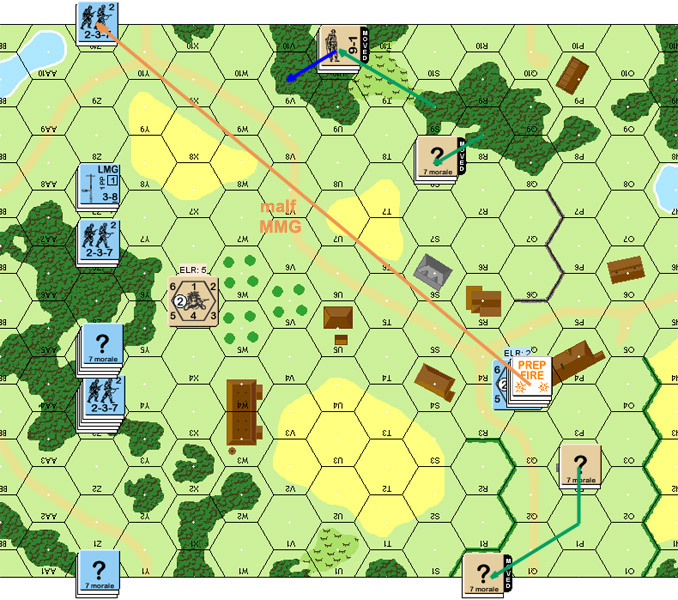
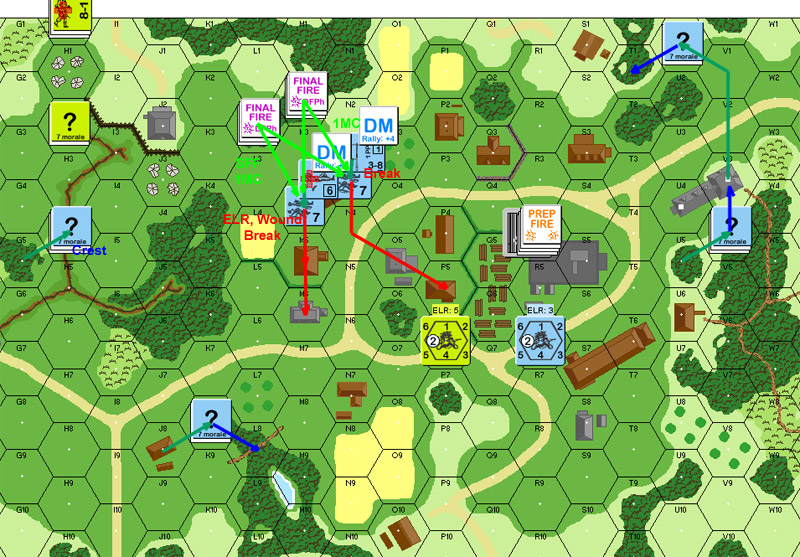
Situation, DFPh, British turn 1.
My movement started out fine, other than a HS eating a 2KIA, but that’s what he’s for. Then Patch nailed the north flank. The squad that started out all the way to the north broke, and being a conscript squad, disrupted. The 7-0, squad and LMG meant to really hold that flank down broke, with the squad being reduced on a ’12’. Then, on a later shot, I rolled a ‘2’, and Patch’s sniper activated and wounded the 7-0.
Holding together that flank could get complicated….
And after surviving the rest of his First Fire, he got a 1KIA in DFPh to kill another squad and it’s LMG.
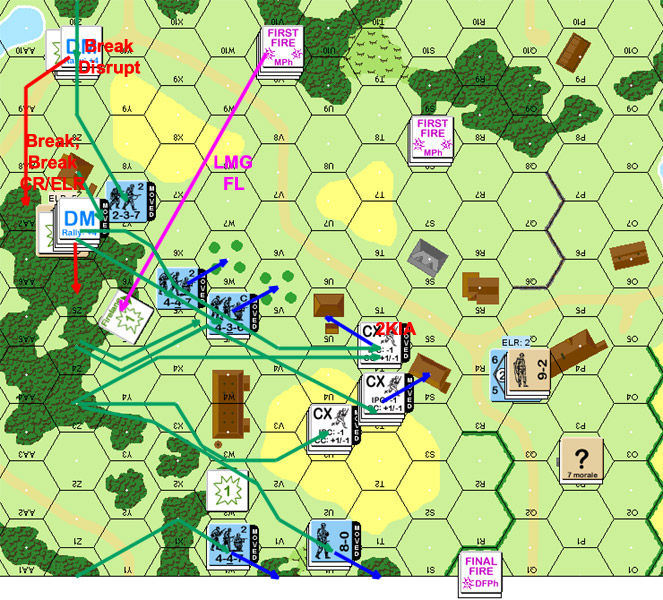
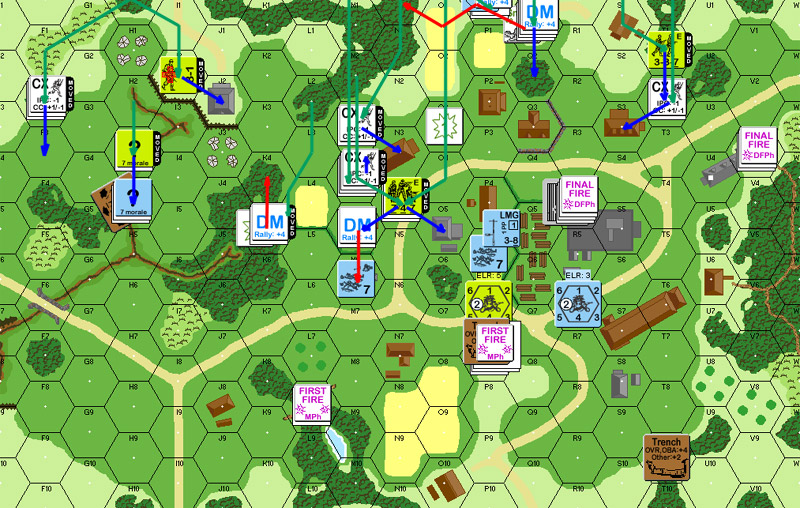
Situation, end of MPh, German turn 1.
The second turn started poorly with Patch getting his MMG back, and went downhill from there. He actually prepped everything he had (except the unit at P2, which has to be his 8-0), and got some sort of result on every shot. My lowest roll was a 5, and my average was 9.75, with three 11s and a 12 in there. At the end of it, I had 2 squads, 2 HS, and my 8-0 intact. The ELR of 2 is being very punishing with quality reductions all over the place, and my 8-1 leader reduced to an 8-0, eliminating the only negative modifier I had.
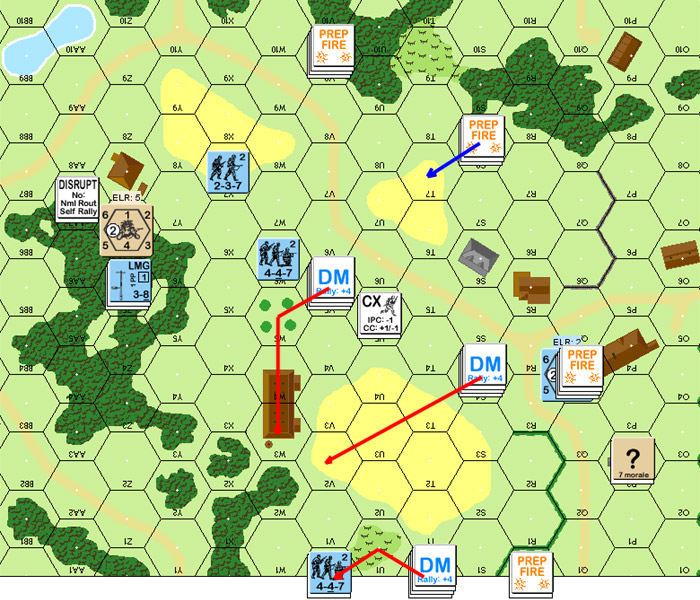
The disaster, British turn 2.
My plan no longer exists….
↓ Read the rest of this entry…