
Patch and I finally finished up our tour of the A’91 Market Garden scenarios in December 2009…:
Last week me and Patch started the last of the Market-Garden scenarios from Annual ’91. Thankfully, we have the errata from FKaC, since it’s not very balanced in the original.
I’m playing the Germans, who are trying to drive the British away from their remaining foothold near the Arnhem bridge, and the river. I have 7 SS squads, good leadership, two Tiger IIs, and seven turns. The Brits have 4 squads, better leadership, a Hero, a 57mm ATG, and Ammunition shortage. Oh, and thanks to the errata, 8 OB-given ‘?’ (and I enter on turn one, so everyone else gets freebies), and I don’t know who has his 3 PIATs until he uses them. Four AT weapons, none of which can penetrate the front armor, but since I don’t know where they are, a back, or at least flank, shot is probably going to come up sooner or later. At least I know the PIATs can’t be where he isn’t.
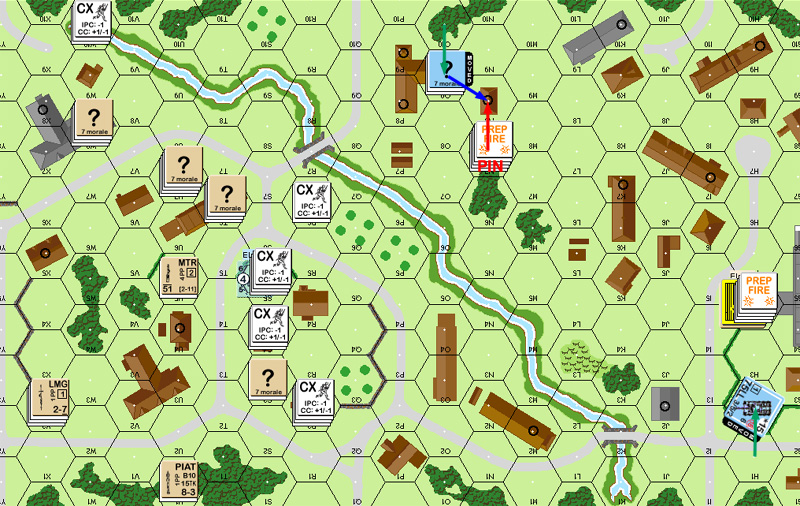
Patch set up a loose perimeter at the north edge, with a couple of high observation posts. Not liking the open west terrain for entry, I went for the east half with the hopes of driving a wedge into the 21U6 building area. The Brit 10-3 turned out to be in one of the high posts (of course) and managed to break my 9-2 and a squad shortly after entry, also pinning a second squad. Naturally, the Brit 9-2 was in the other high location (which my eyes seem to have skipped over), who then pinned the 7-0 and a squad.
Thankfully, that was all the mischief he was able to accomplish, while I got a lucky PTC on 21Z8, and revealed it to be dummies.

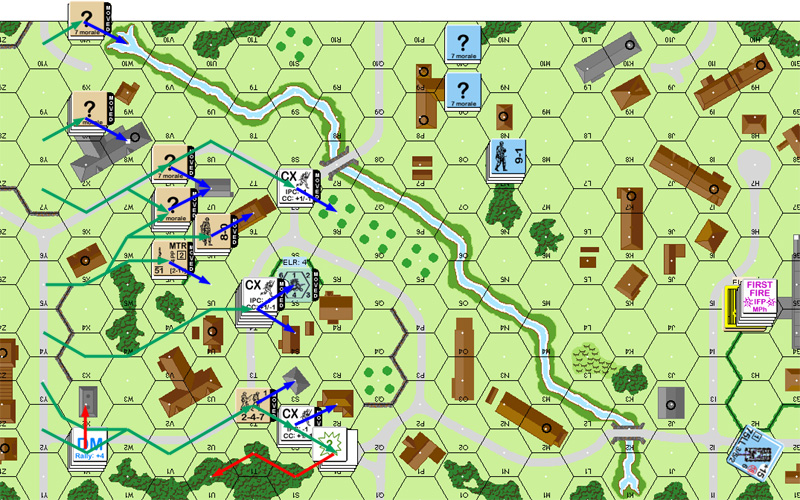
Situation, German Turn 1 DFPh.
↓ Read the rest of this entry…

 I just finished reading this early Osprey book, and while it’s well done, I don’t think I can recommend it. It covers the Battle of Agincourt, and the campaign that led up to it, quite well, but Osprey’s later Campaign book on the subject should do the same thing in more detail. The color plates are not bad, but they’re not very good either. That leaves the discussion of the actual equipment and troops in both armies, and those are at least partially covered in MAA 337