After going through the last tutorial scenario for Operation Dauntless, Mark and I spent a little time with the classic pocket game GEV, and it’s initial “Breakthrough” scenario. I haven’t played it in decades, and while Mark is well aware of Ogre/GEV, he’s never played the series.
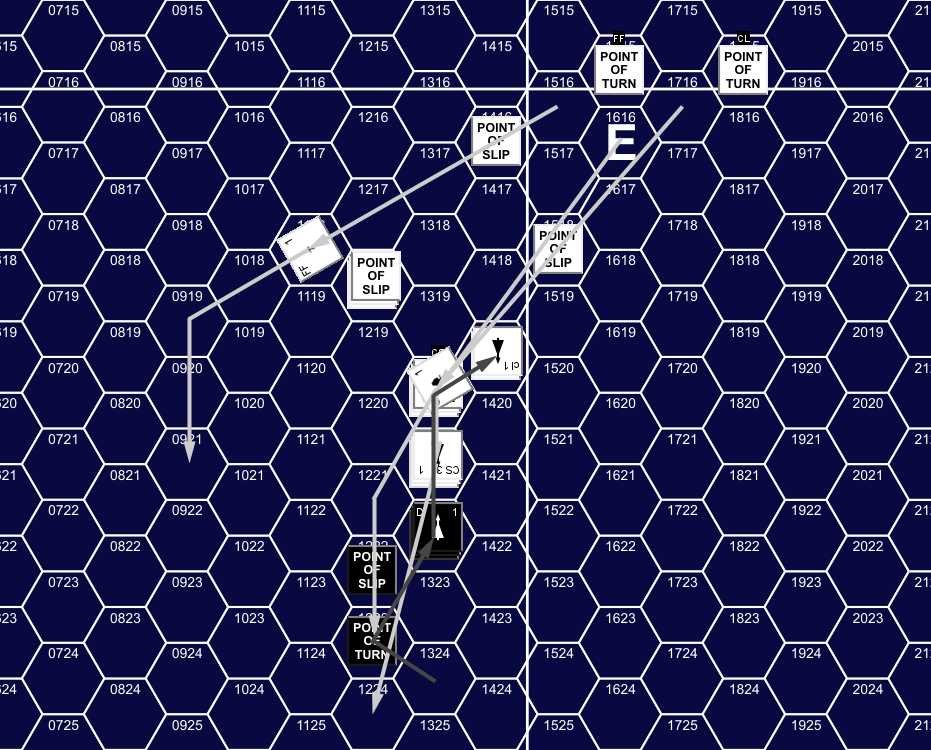
I took raiding Combine GEVs (12 for the basic scenario) for our first playthrough, while Mark took 2xheavy tanks, 2xmissile tanks, 2xlight tanks, and 2xlight GEVs for his six armor units (yes, we used the full range of ‘standard’ units, including Shockwave units, but not the more advanced bits like the GEV-PC and marine infantry). I came in with two groups, one of six GEVs unequally split between three hexes cruising up the river, and then three sets of two GEVs each headed through the gap in the forest nearby. Mark redeployed a little, but mostly hung near his initial posts as I got closer.
For my second turn, five of the GEVs continued up the river and then into the lake, while one went ashore to help the other set who advanced up to the stream before crossing it on the second move. Mark hurried a second heavy tank east, and sent a light tank and infantry that way, but other parts stayed put (including a missile and light tank in the west). I concentrated 6 GEVs against the heavies and killed one and disabled the other before scattering away from the infantry, while the group on the lake came ashore during the second move.

 This was recommended to me by someone who’s opinion I trust, so I expected a good book going in. It exceeded my expectations.