During December, Mark and I returned to Great War Commander, and tried out the first scenario from the British expansion. It (and the next two scenarios) are set during the battle of Mons on 23 August. It features a German attempt to take a critical bridge over a canal from a British covering force. It’s by far the most lopsided we’ve seen so far from a number of troops standpoint: fifteen German platoons to six British.
But the British have a trench and two foxholes plus a machine gun, and two “2” leaders. The Germans get a pair of machine guns as reinforcements, but have to make do with bodies and three “2” leaders until then. Also, the Germans have possible artillery support, but the British have none. An interesting SSR is that one of the British leaders is effectively immobile in a railroad station, and can’t participate in normal fire attacks, but can attack on his own with 0 firepower and 4 range, but treats one enemy unit morale as “0”, meaning that his attacks start from a base of 0 offense vs 0 defense, with modification for cards and terrain. A couple final notes: The German surrender limit is quite high (13), and the game starts on turn 5, and goes to turn 11(ish); this generates a six turn game that is highly unlikely to go overtime once sudden death rolls start on 11.
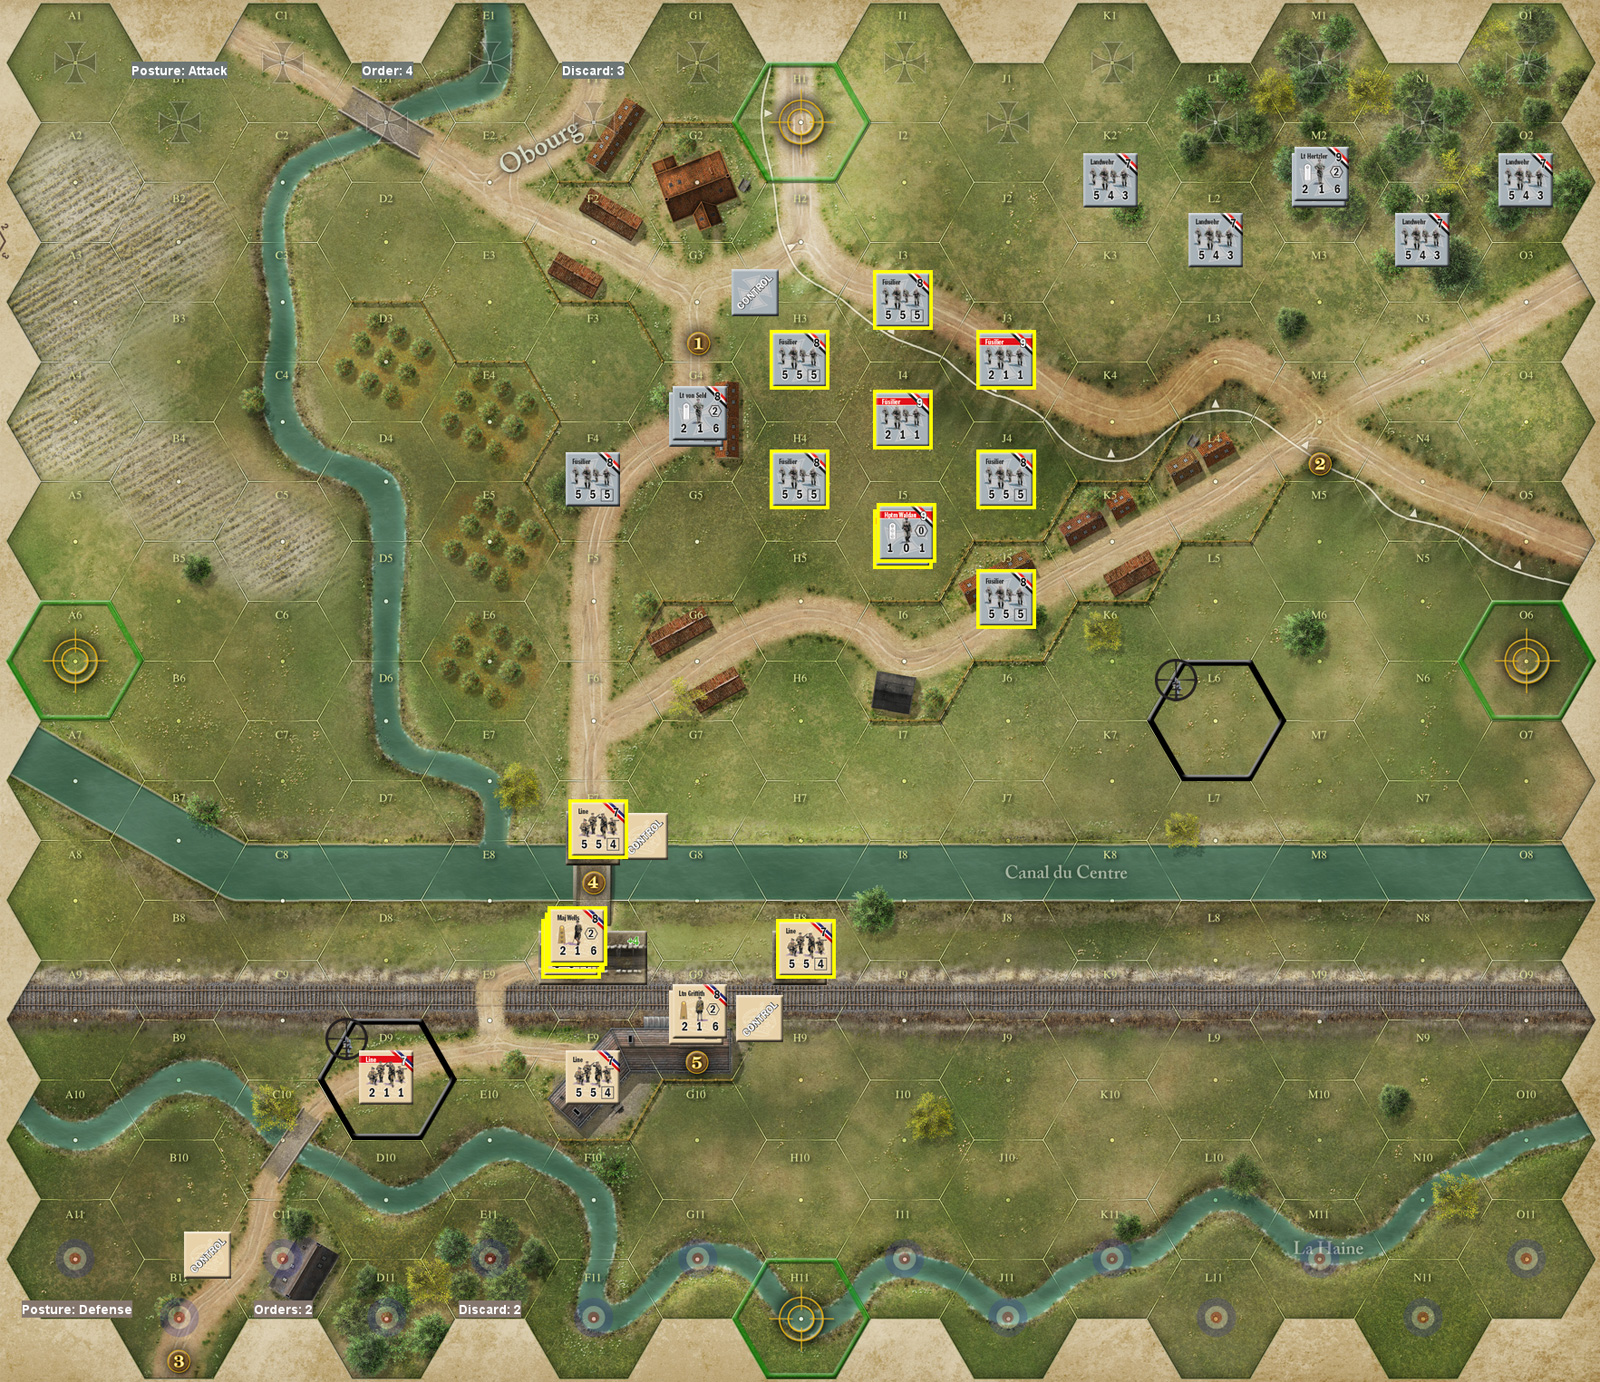
I had the defending Brits, and of course clustered around the bridge with a foxhole in that hex (I think that’s legal…?), and a trench with the MG in the hex behind it. The other foxhole went a couple hexes away, another platoon was in the rail station, and the last platoon was behind the rail embankment. Three of the five victory hexes are in the fairly limited British area, with one being the bridge (4), another the rail station (5), and a third being a road leading off the British side of the map (3). The public objective gave one VP for a crossroad on the German side of the map (2), while mine was one VP for the rail station, and Mark’s was two VP for the bridge.
The Germans only get one hexrow for their setup, and have enough platoons to have one per allowed hex. Mark put the inferior five platoons of Landwehr on the east side, and the leaders were distributed to control everything. He led off with a Move to bring the west side forward and through objective (1) (Obourg village itself), and then Advanced the center section. For my turn, I Fired at his leading troops, and a poor roll caused Mark to re-roll and pass the Initiative to me. However, they broke anyway, but a second shot at the same unit did nothing.
Mark immediately Recovered… which failed, and then called for Artillery, which was accurate on the bridge… which still meant it drifted off-target where no one was. He then tried a second Request (using the FAO instead of his leader), which was inaccurate to end up near where the first one went. He finished up the turn by Advancing the east-edge troops. I passed, and Mark Recovered to rally the broken platoon. He then Moved the bulk of his center, and my OpFire broke Waldau (his ranking officer) and three out of eight advancing platoons (the Maxim right behind the bridge was being very handy). Moreover, the final defense roll was a ’12’ for a time trigger.
↓ Read the rest of this entry…


 Long ago, my Dad recommended the novel Sword at Sunset to me. Before I ever got around to it, I found out that it was part of a series of novels Rosemary Sutcliff wrote about Roman and post-Roman Britain. So, I’ve now (much later) gotten to reading the start of the series.
 Okay, in parts, this is well-trodden fantasy ground. You have an order of warriors dedicated to fighting demons. You have a scrappy girl who prefers martial pursuits to marital ones. She joins the aforesaid order in disguise because girls aren’t supposed to fight.