With Patch and I’s journey through Budapest finally over, we’ve started in on the scenarios from Hatten in Flames (wait, isn’t that a World in Flames expansion?). It’s a nice mini-HASL set, though I’m disappointed that there’s footnotes to the rules. It’s always good to see the thinking behind some of the special rules.
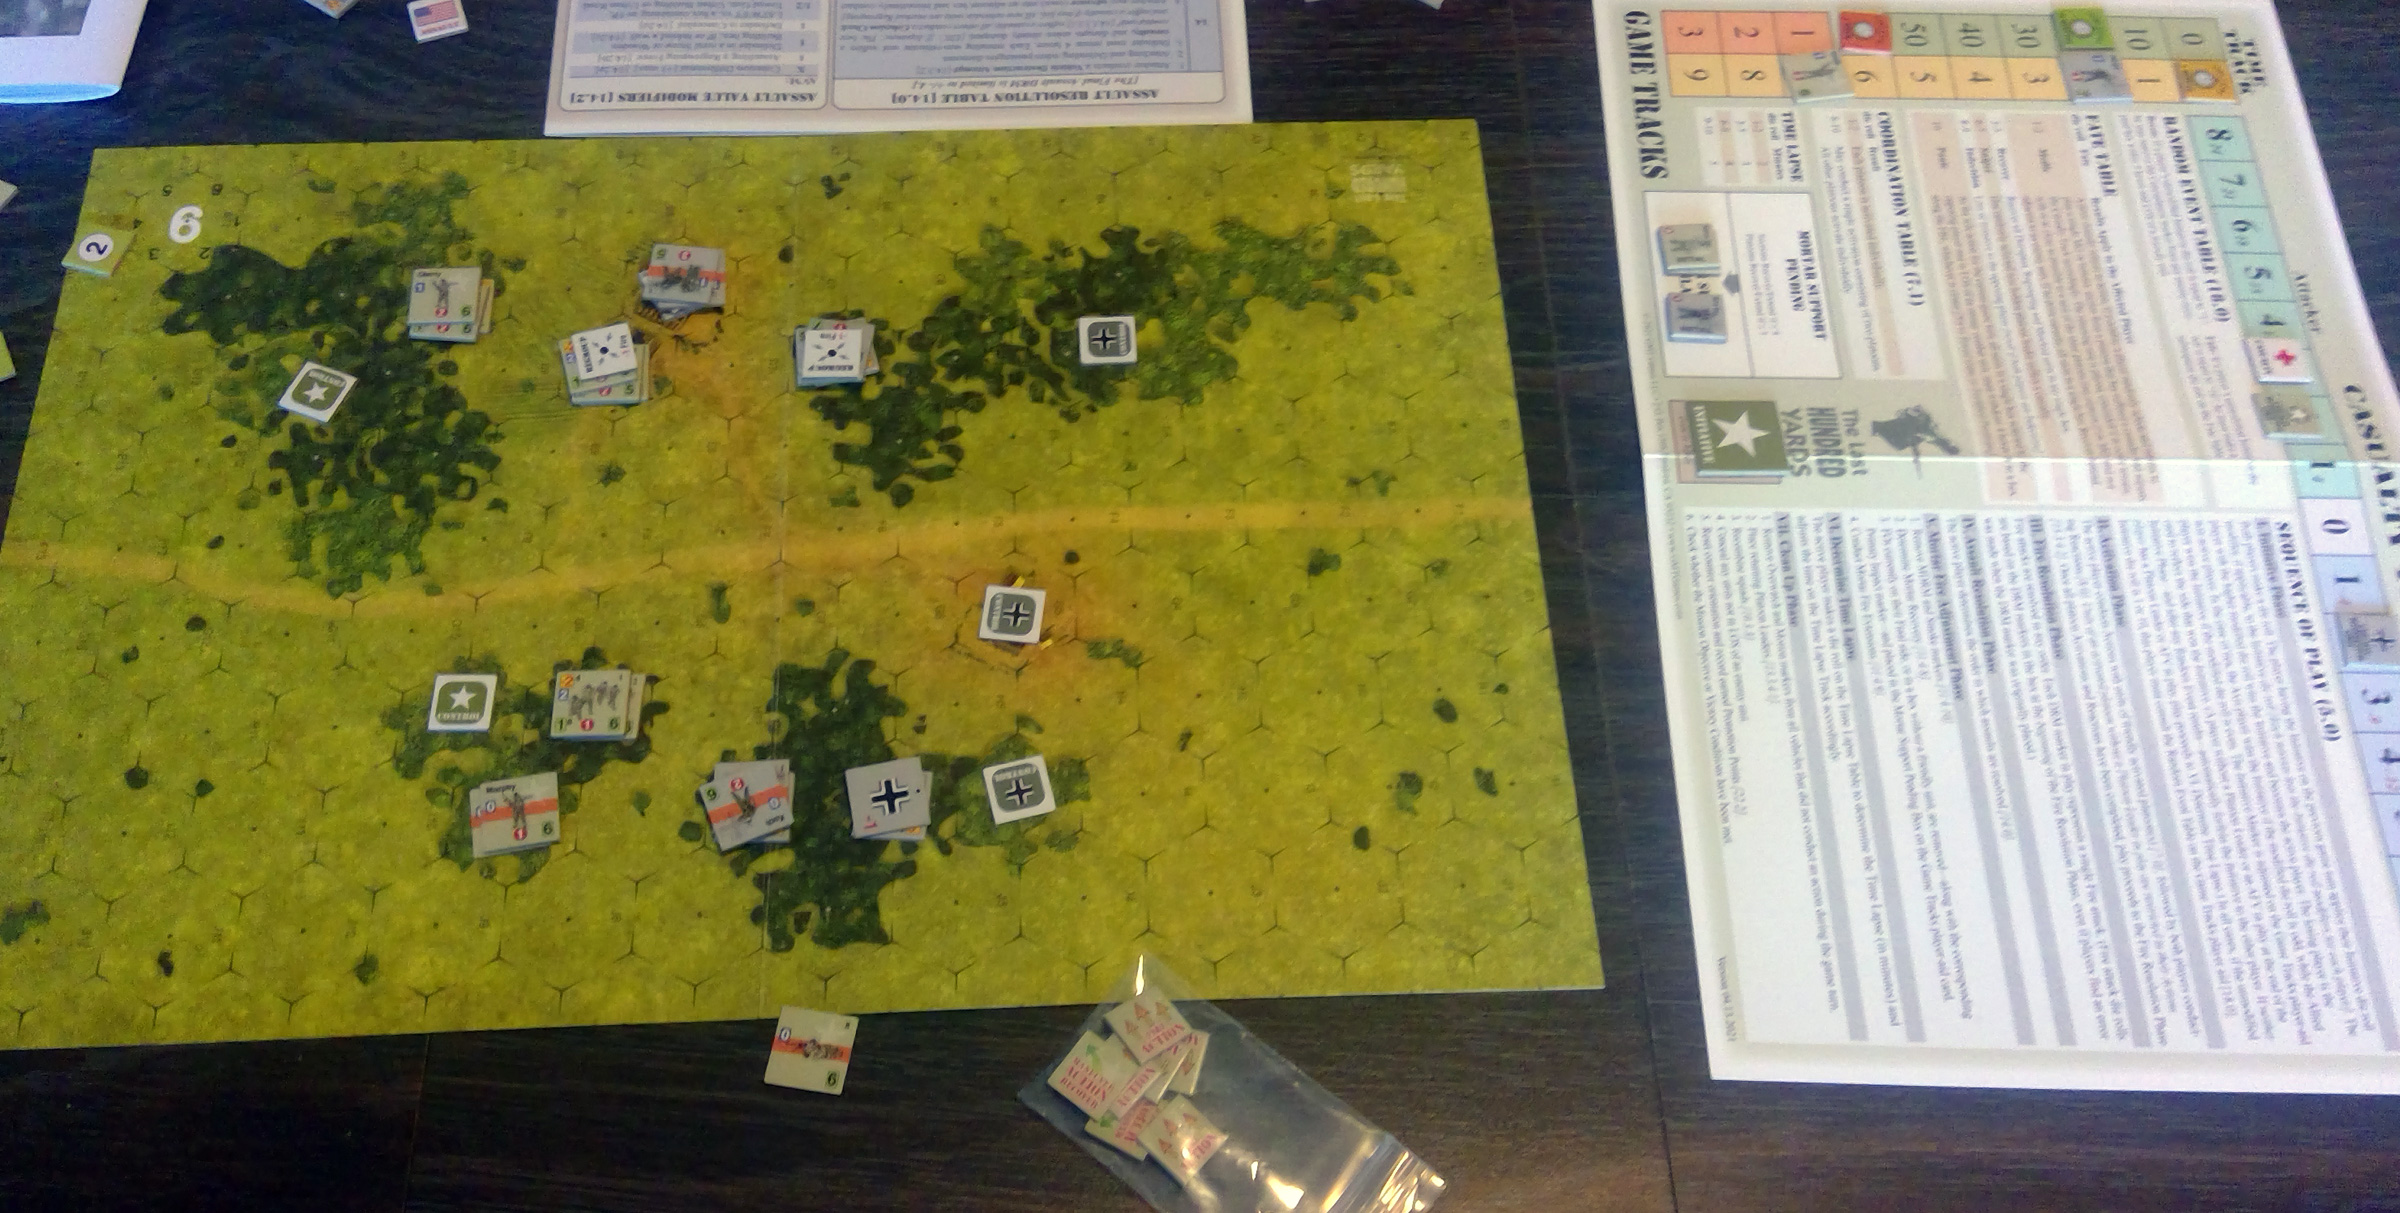
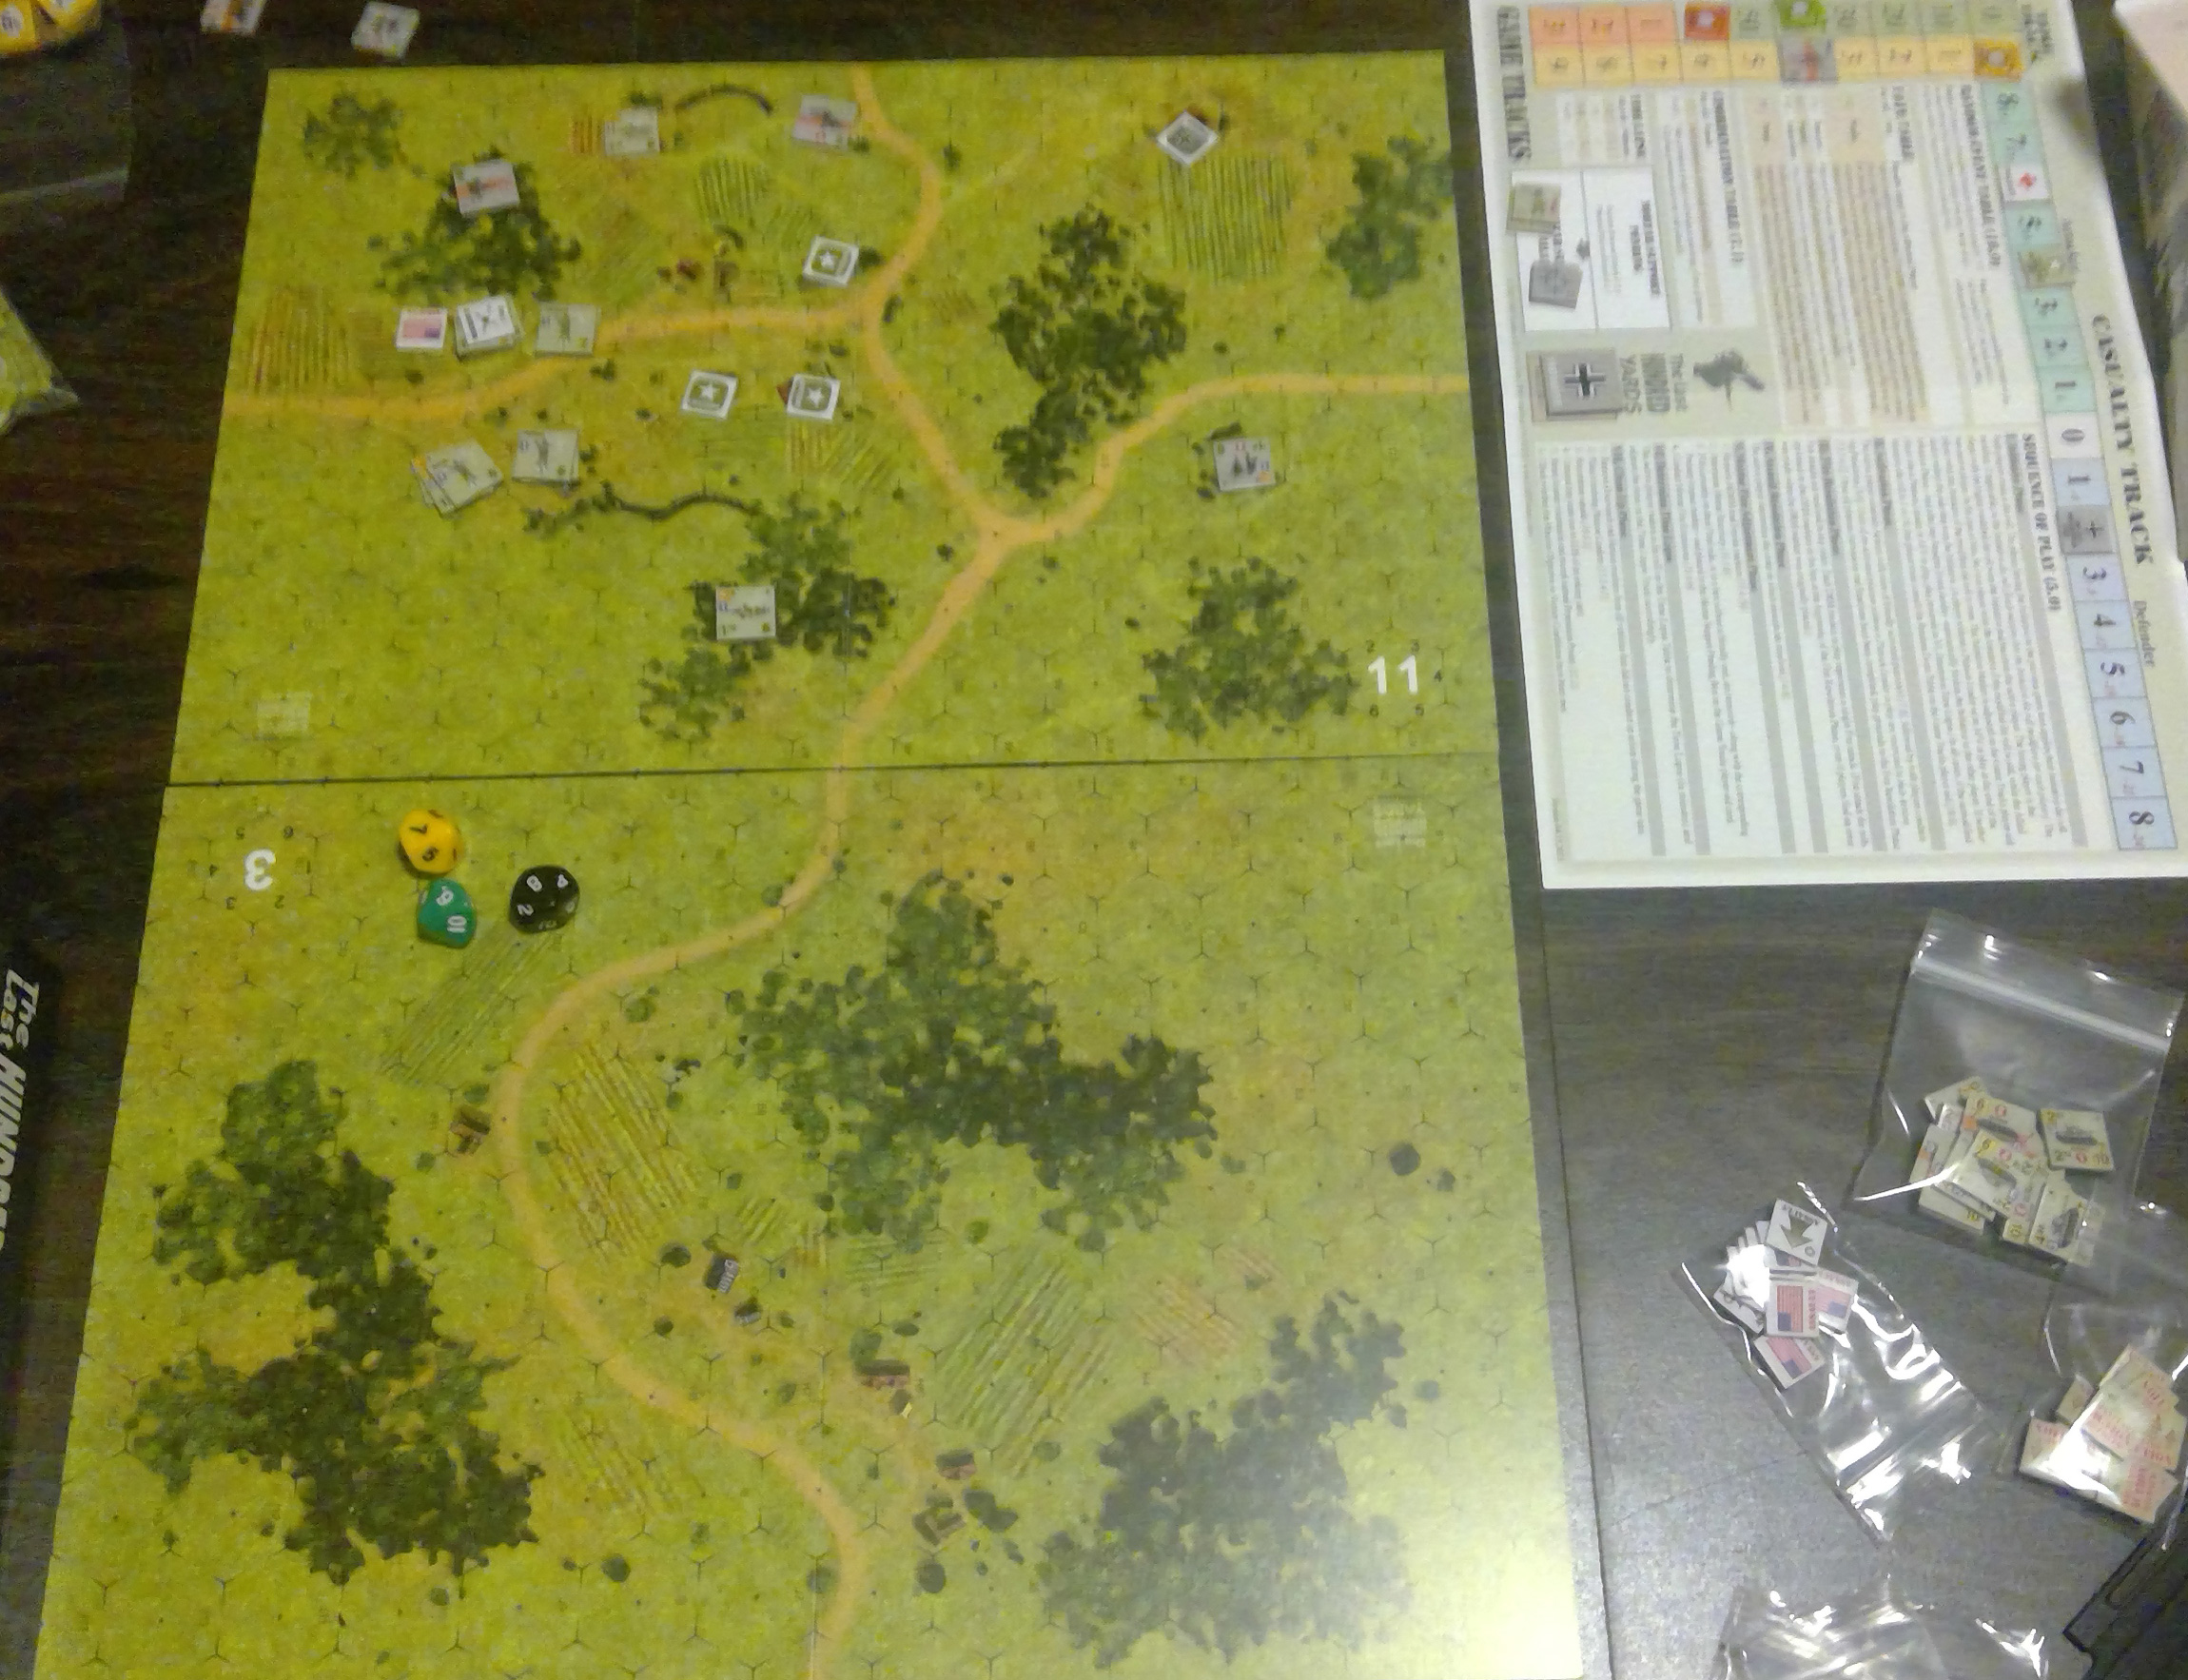
The first scenario is in the northeast corner of the map, and surprisingly features an American counterattack after the Germans have gotten into the town in the early morning of the 9th of January. I took the German defenders who have nine squads, the usual machine guns, a DC, a PSK, and a light infantry gun, as well as some concealment. They get three more squads partway through, and are trying to defend seven hexes for six turns (the first two of which have a dawn LV penalty to fire). The Americans get to line up on the other side of the street with thirteen squads ranging from elite to 2nd line, three MMGs, two BAZ, two 60mm MTR, and three M18 tank destroyers. An important note is the Americans only need to take six of the victory locations as long as they still have a functioning M18.
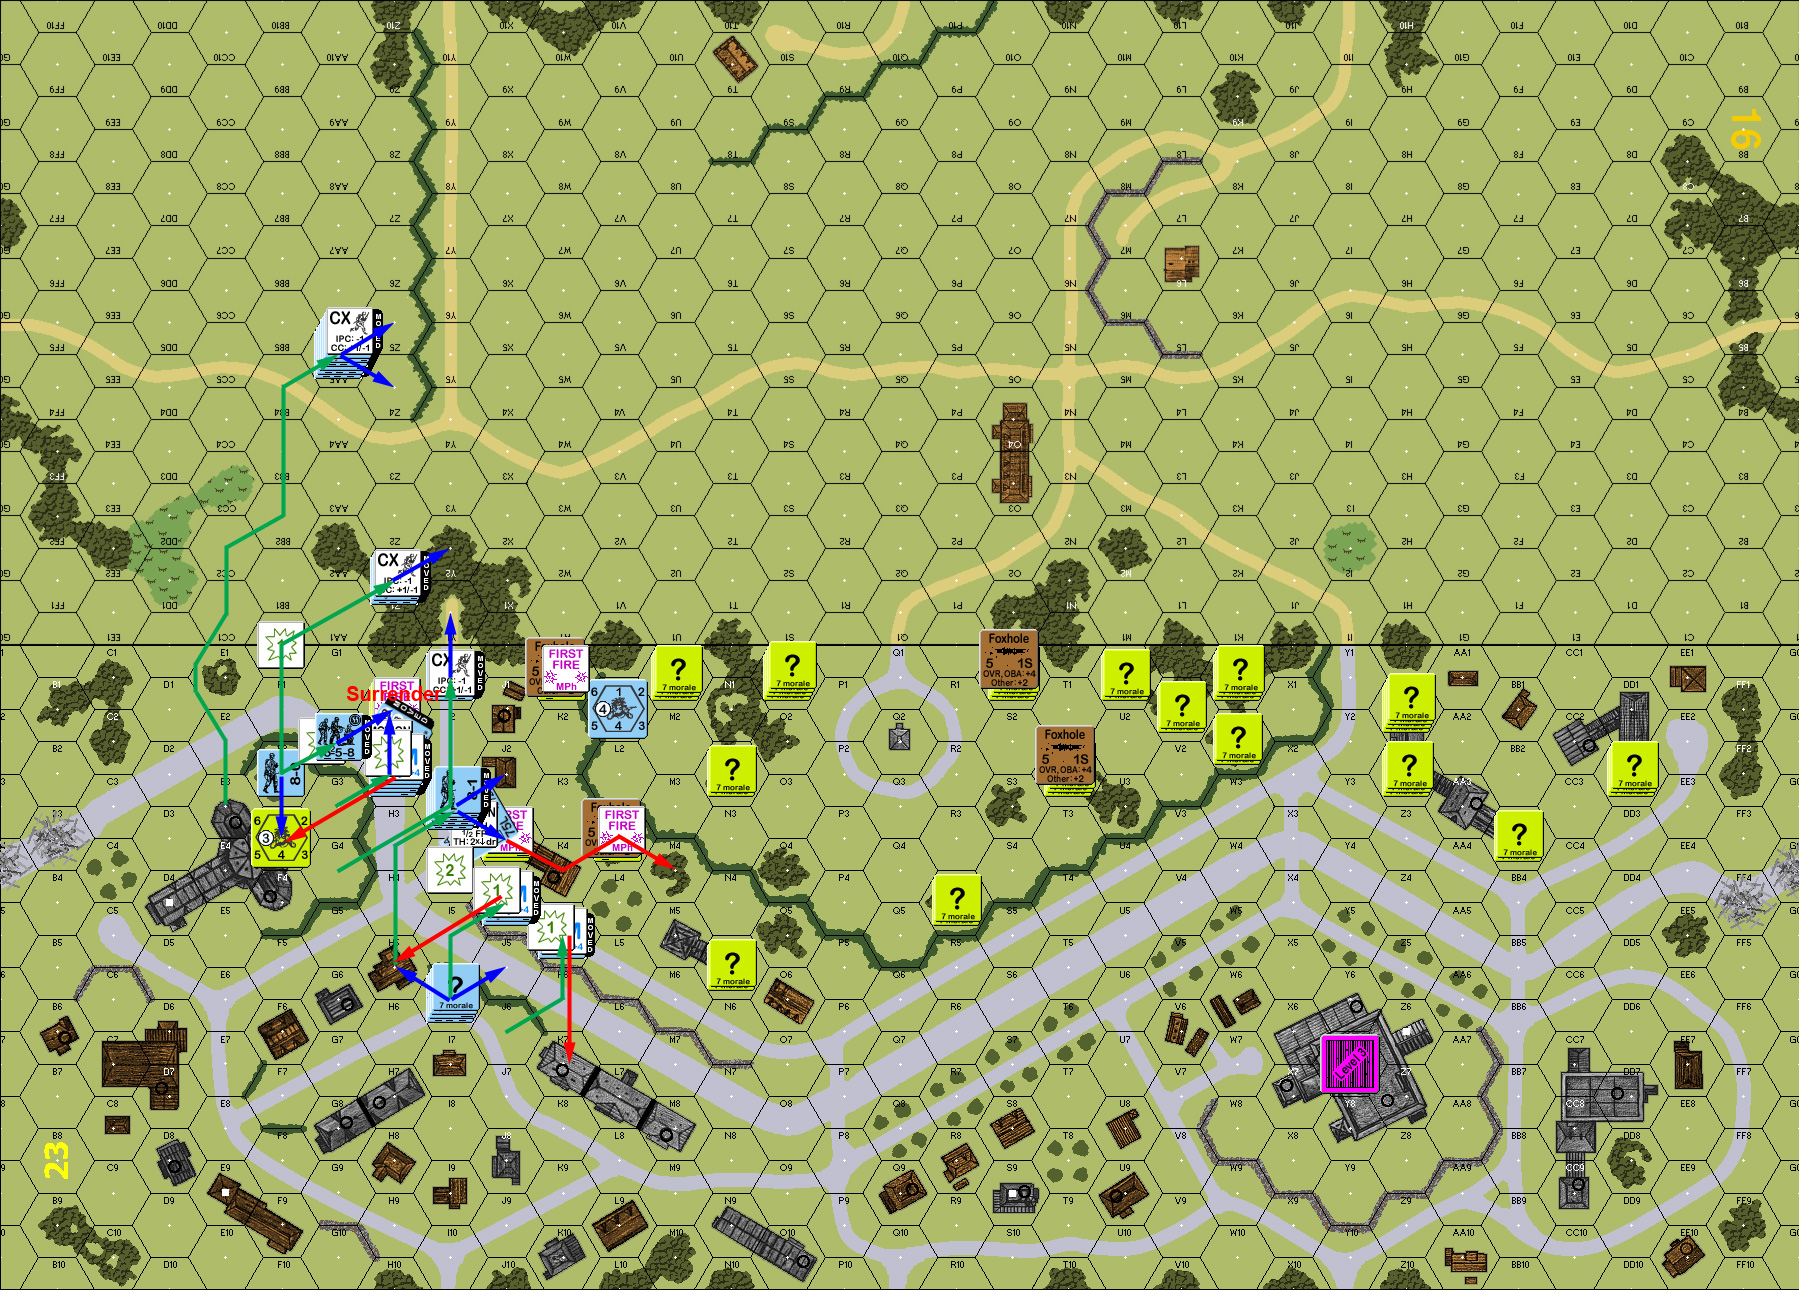
I had to setup defending everything, and went for a couple of layers, with the final defense planned for I4, which got the INF. From there, it can see three other victory locations, which should give it targets as the game goes on. The second concentration was H7, which had one of the LMG squads and an 8-0, with E11 and L9 being the main forward defenses. Patch set everything up in the south, ready to cross the Rue Principale (and near all four of my dummy stacks). He also forgot to setup two squads, which he noticed during turn 2, and explained some of his early trouble (I let him set them up behind the lines in M15 and P13).
Patch started with finding one of his MTRs had no WP, and setting all the TDs to OpFire. His one effective attack eliminated my dummies in N9. He sent a HS dashing across the road to search… and rolled a 6 to not find anything. Thankfully, none of our fire did anything (thankfully, since he had a lot more of it than I did) except put out acquisition markers.
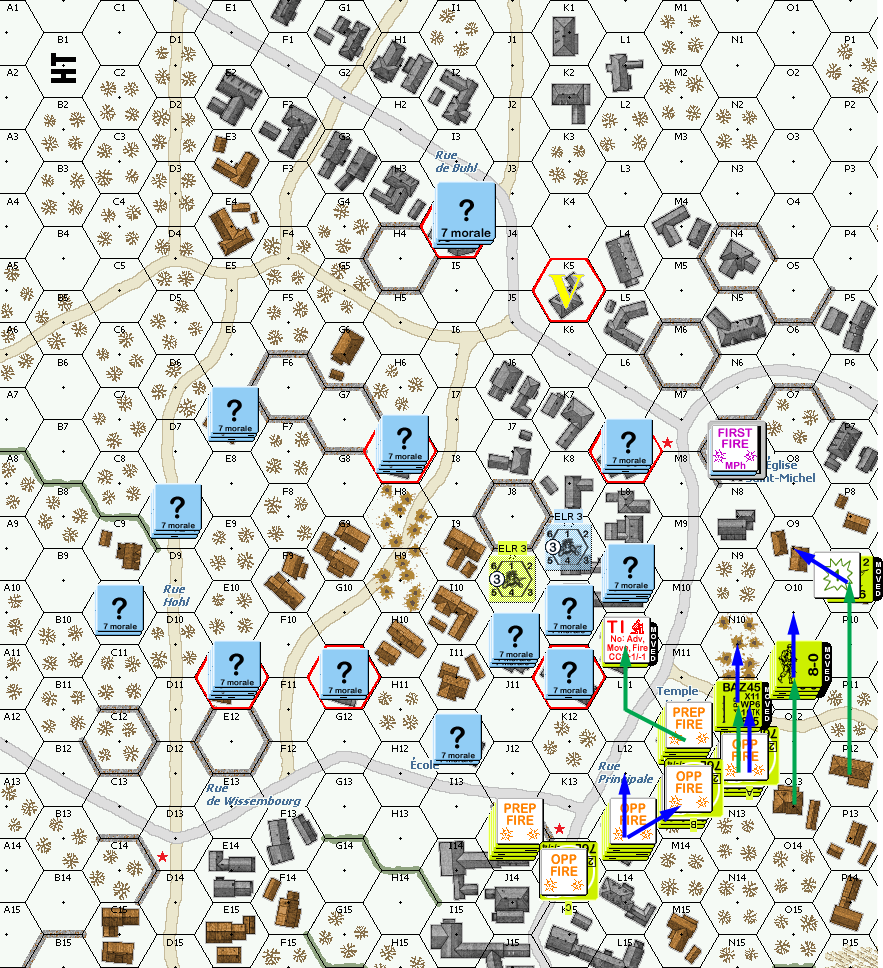
Situation, American Turn 1. North is to the left. The board goes another five hexes down (west), but the full width and east edge are shown. Victory locations are outlined in red.
↓ Read the rest of this entry…