After Patch retook a hill in North Africa, we returned to Hatten in Flames. Up this time was the final scenario of the set, “Fahrenheit 352”, featuring an American attack on the village and a couple Flam Hetzers. I decided to take the defense in this one to try them out.
The main goal is a little unusual; there are two victory buildings, and all the Americans need is to have one non-crew Good Order MMC in each at the end of six turns. The Germans get eleven 467 squads, plus the usual other assortment of goodies, six foxholes, and four pre-game rubble Locations (plus the HF standard matching locations). On turn 3, three 548 squads (each with an LMG) come in with a 9-2, DC, two Flam Hetzers and two Pz IVs. The Americans are coming from the south, and there’s enough room to come at the victory area from either direction. Setup is along X11-N26 road, which means the distance to the road the victory buildings is on varies from four to nine hexes.
This last bit had an effect on a setup I was never happy with. I had a big dispersed zone in the east, and then a smaller one in the west. The general idea wasn’t bad, but I just couldn’t adequately defend the west end with all the resources the east gobbled up, and I didn’t see where the problem was in time.
The Americans get thirteen squads with good leadership, three each MMG, BAZ 45, a couple light mortars, and three Shermans. On turn 2 they get another three Shermans, with a 9-1 AL. Patch logically set up on the west side of the line, facing was suddenly a too-thin defense at two-hex range.
Things led off nicely with both of Patch’s MTRs running out of WP immediately (and this with an SSRed depletion of 9 on the first turn). The only other result of initial prep fire was breaking my PSK squad in N25 (which was more exposed than they should have been, but I certainly wanted to contest that area and keep tanks out; M27 and M25 might have been better locations, though the former is still vulnerable—it just has a building right behind it).
I didn’t have any defensive fire, and AFPh revealed L28 to be dummies after a failed search in movement (a ‘6’…).
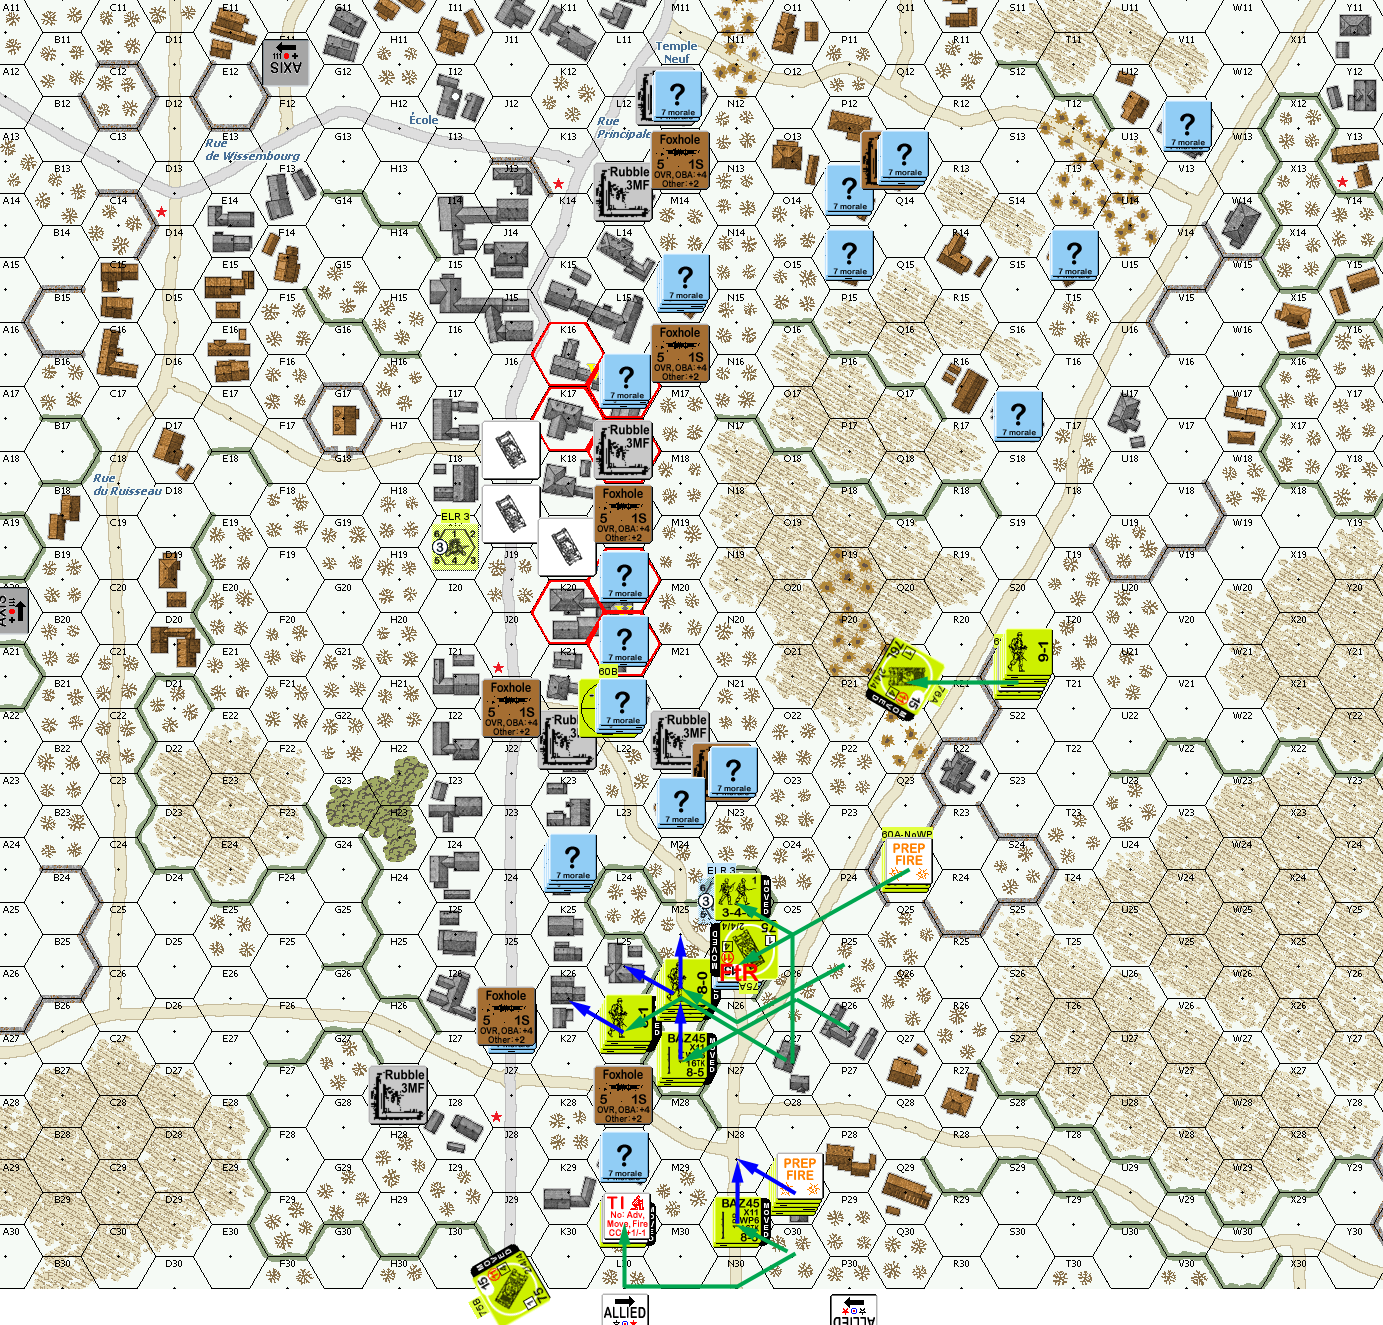
Situation, American turn 1, showing the full area of the map. North is to the left.
↓ Read the rest of this entry…