Crossposted from the SFU blog on BGG.
As the war drags into its third year, Klingon occupation of Kzinti space earns a VP (actually, 0.1 comes from a province disrupted by the Lyrans). The grand total of 5.6 VP earned for taking enemy territory (including one-time bonuses for capturing a planet at all) is still the smallest component of of the VP totals, showing that this isn’t really a war of conquest.
The Lyrans left a lot of repairs undone, but that was purely because of a lack of facilities. The Klingons had a fairly hefty bill, but managed to get almost everything repaired, and still had money to overbuild a D7 and F5.
Builds:
Klingons: 2xD7, TGB, F5L, F5, F5S, 3xE4, E3, PGB, BS->BATS, D6->D6S, D7->D7C
Lyrans: BCE, CA, CL, CLS, 2xDD, 2xFF
The first truly heavy scouts are introduced with the Klingon D6S and Lyran CLS at this point, which are going to be needed to counter the effect of all the Kzinti drone bombardment platforms.
The Lyrans raided the Hydrans with a new CA and destroyed a called up POL to disrupt the province, while the Klingons went deep into Kzinti space, hoping to pull a ship out of a Reserve. However, they pulled a BC out of a different nearby fleet, and destroyed the raiding D6, retreating back to the capital in process.
The Lyrans drove back across the Kzinti border, and Kzinti forces reacted into them generating a large fight in the neutral zone, and further forces pressed on to BS 0701. Meanwhile, Klingon forces probed into the same area, and after some initial indecision, I made a stab at the planet in 1001 instead of the SB next door.
The Lyrans didn’t do anything on the Hydran border. With both borders in bad shape, they wanted as little overall activity as possible. The Klingons raided the border, going after individual ships, and generated a few small fights.
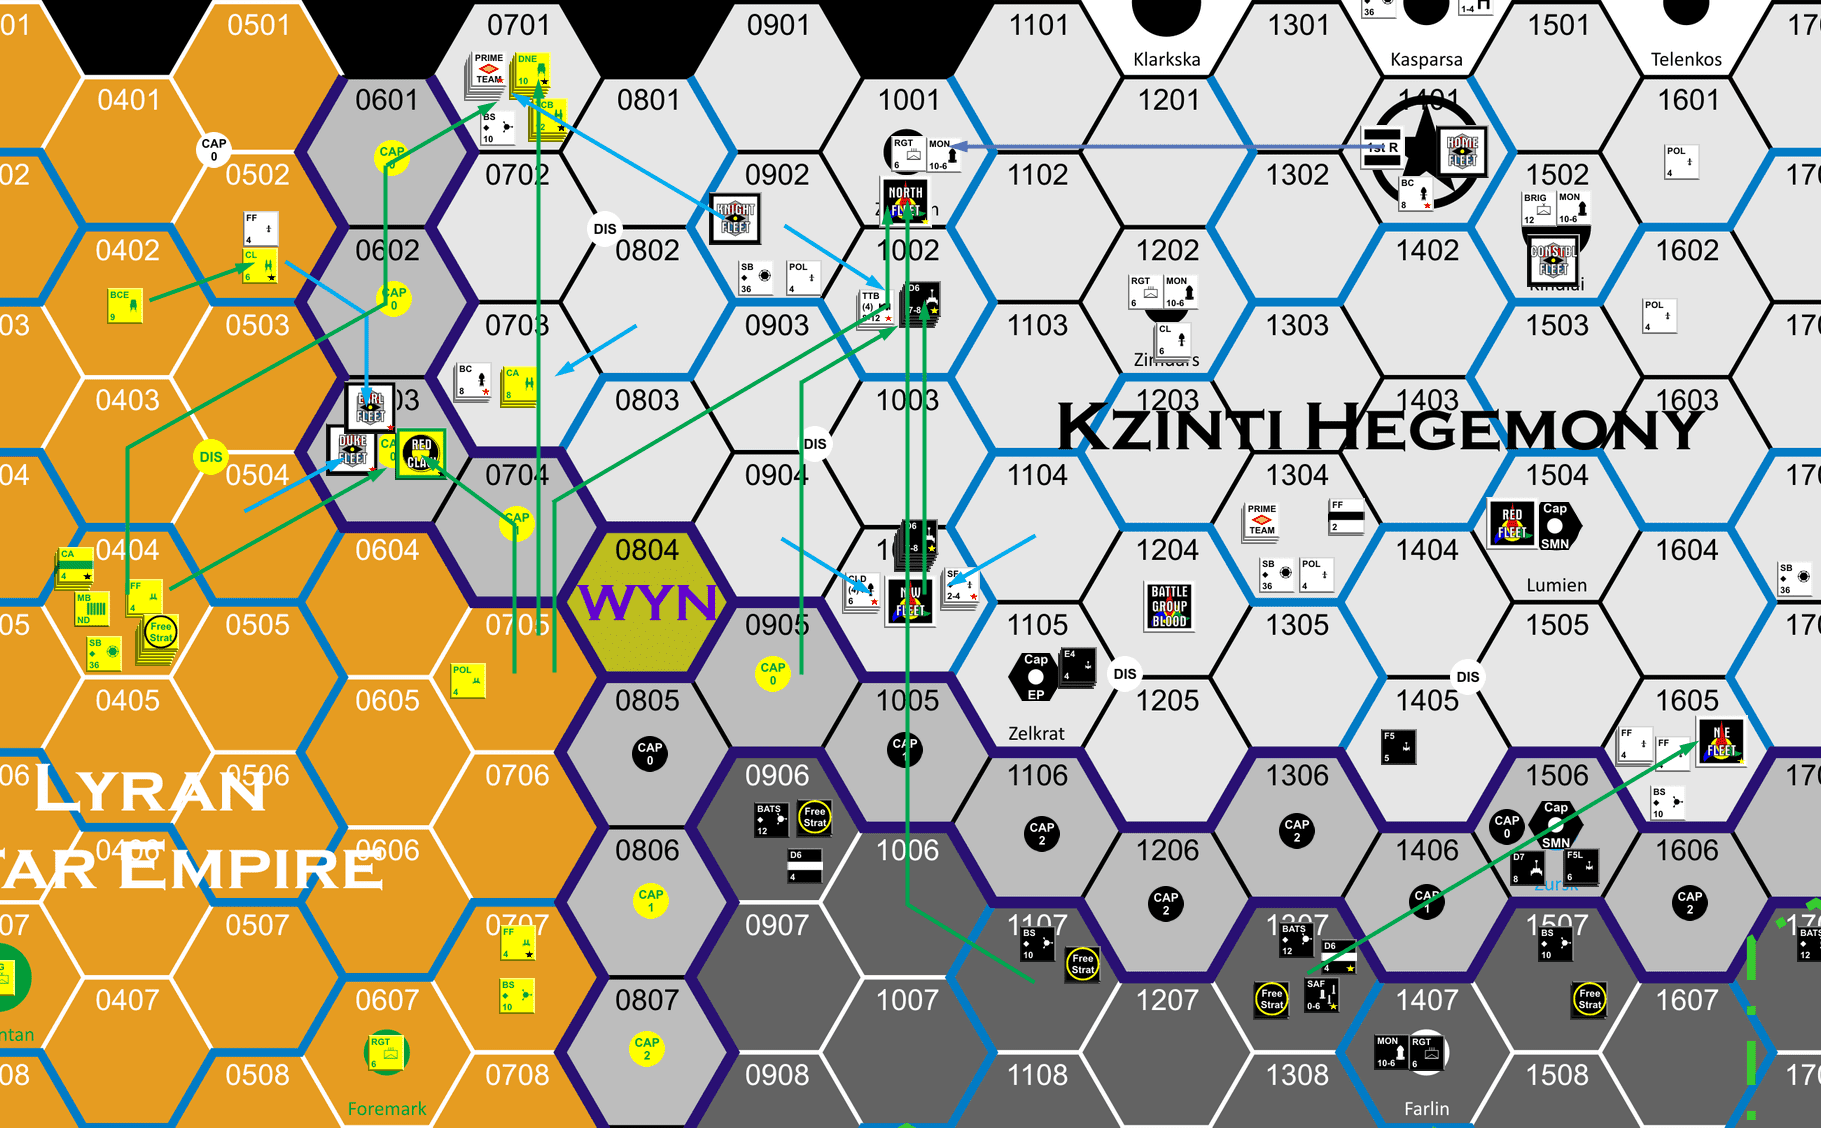
The Kzinti front.
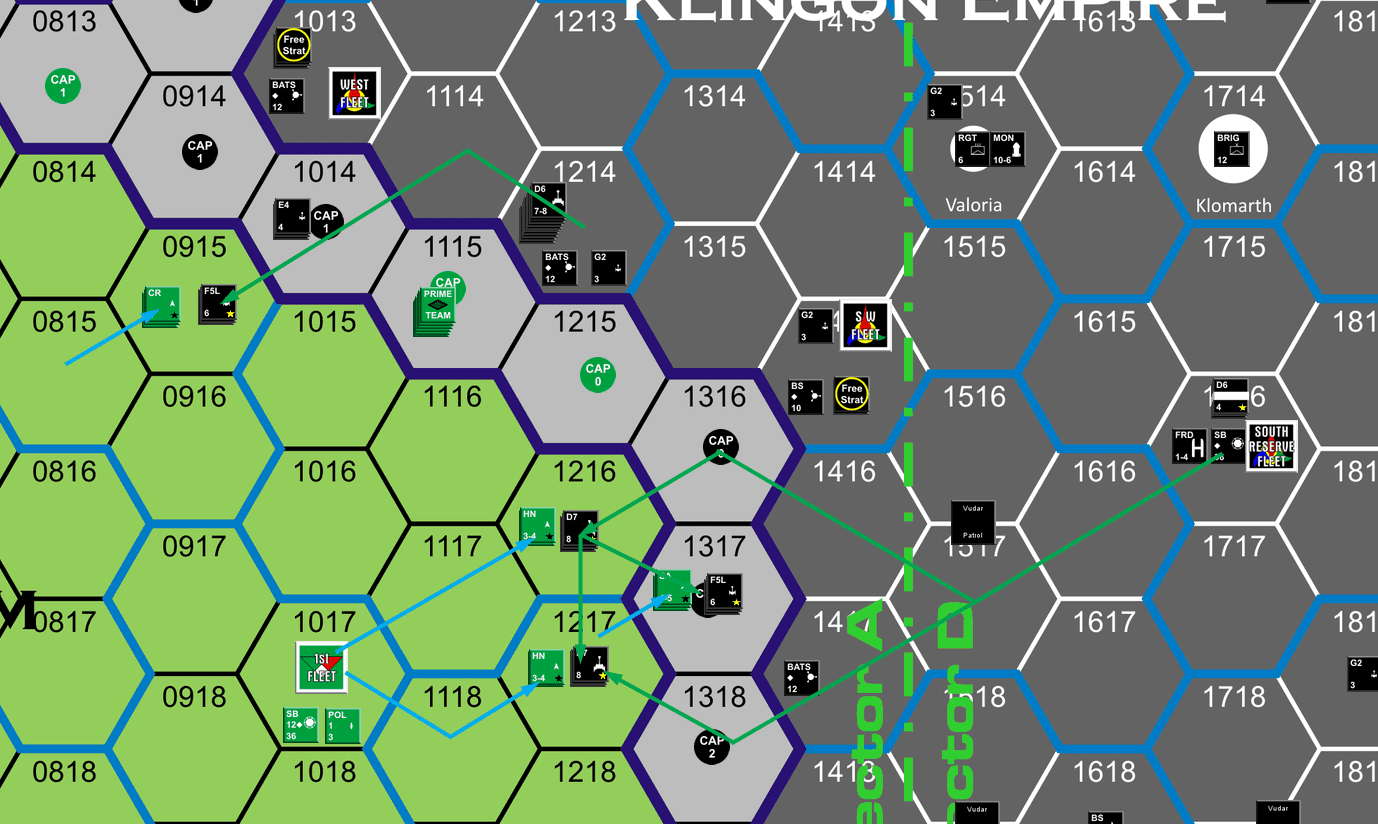
The Hydran front.
Combat:
0502: SSC: Lyran retreat
0701: Kzinti: dest BS, CC, BC; Lyran: dest CL, crip CA, 2xDD
0703: SSC: both sides retreat
0603: Kzinti: crip CC, CL; Lyran: dest 2xCL, crip DD
1001: Kzinti: crip CL, FF; Klingon: crip D6, F5, F5G
1002: Kzinti: dest CC; Klingon: crip E4
1004: Kzinti: dest FF, SF; Klingon: crip E3
1605: Kzinti: dest BS, FF; Klingon: crip D5, F5
0915: SSC: Hydran: crip CR, 2xCU, retreat
1216: SSC: Hydran: retreat
1217: SSC: Hydran: dest LN, HN
1317: SSC: Hydran: retreat
1217: SSC: Hydran: retreat
0502 was another annoyingly bad roll in SSC (2), which saw a CL retreat from a FF (which is a +2/-3 combat).
The BS at 0701 took three rounds, with the remaining Kzinti forces retreating out on round two after my DDG successfully scored a SIDS to cripple the base. I stayed in the hex, which has turned into a problem as the later retreat out of 0603 closed their retrograde path, and the hex is also out of supply range.
Even with the maneuvering I did, I didn’t have nearly enough to take out planet 1001. My ComPot was slightly lower, and I couldn’t keep up with Kzinti EW (boosted by the defenses) and then I rolled 3 under the Kzinti to take nearly twice as much damage. With good rolls, I was prepared to try and force the issue, but not the other way around.
0915 had a full hellbore-armed squadron against an F5 squadron, but this time the rolls were 10 vs 2 in my favor.
1217 continued good SSC rolls with a ’12’ to wipe out both Hydran ships. Later, the squadron from 1317 retreated into the hex, and both sides rolled average to merely force another retreat.
Despite problems, I still destroyed another two BS this turn. Combined with another eight ship kills and a slowly growing repair bill, my VPs are up to 104.4. Meanwhile, the my repairs have overcome last turn’s cripples to Alliance VPs to 94.6 (and another BS->BATS conversion is underway to reduce that total further). This is a Marginal Victory, down from a Minor Victory as of my previous turn, thanks to how bad Alliance Turn 4 was.
We seem to be solidly in the middle part of the war, with all the easy targets taken out, except for the Klingon border stations, which I have so far managed to protect, and three Hydran Lyran-border bases, which the Lyrans have been in no shape to get to.