
Patch came over yesterday to try out GMT’s Flying Colors series through my copy of Blue Cross, White Ensign. I discovered at the last minute that I had missed a sheet while punching and clipping it, so I was a little under-prepared, and picked the Battle of Revel as a relatively short battle with relatively few units. It features a Russian fleet at anchor as a much larger Swedish force sails towards it (with over half the fleet trailing off off-map to enter along the same line as the at-start fleet). After a little back-and-forth, Patch ended up taking the outnumbered Russians.
My initial plan was to continue on course, and then turn to break the Russian line between the first and second ships and then… well, I wasn’t too sure what I’d do once through, since the edge of the bay would be right there, but the continued string of Sweedish ships would keep coming to let me concentrate power at that forward point.
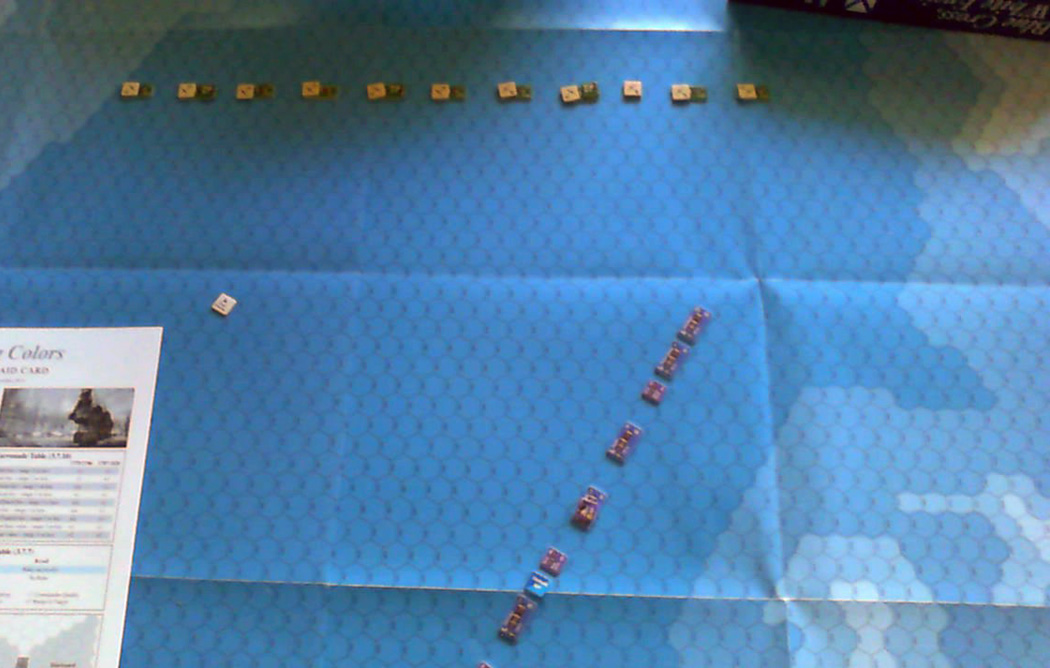
After the end of the first turn. I’ve backed sails a couple times with the lead ships to have a more solid ‘punch’ once I started getting into range. Note that the light blue are shallows, and the even lighter blue areas are automatic grounding (effectively the coast).
That plan started going wrong on the second turn, when the wind turned two point (120°) clockwise, meaning that my line was now beating against the wind (thanks to the breezy conditions, this meant a speed of three for the entire line). Since the wind was now coming from the rear of the Russian fleet, there was no way to turn to make speed, since the only options would carry me away from the Russians. Only one ship got in range on turn two, and the range didn’t start getting close until turn 4. Patch had been content to sit and let things develop, but slipped anchor on his rearmost three ships at this point, and started sailing them towards the emerging melee.
During all of this, most of the marked Russian advantages started showing themselves. In this scenario, Audacity is 2 for the Russians and 0 for the Swedes, so Patch was generally firing two columns higher, and being at anchor gave him a +2 for all the die rolls. Also, the Russians have a special rule that allows them to fire twice out the same side, so long as they don’t do it in the same activation. All this is fairly needed in their situation, but it did mean that each ship was firing twice when mine could only fire once. Finally, as I was firing into the wind, I was generally firing at the rigging against anchored ships just to improve my odds of hitting anything, while Patch was firing at the hull.
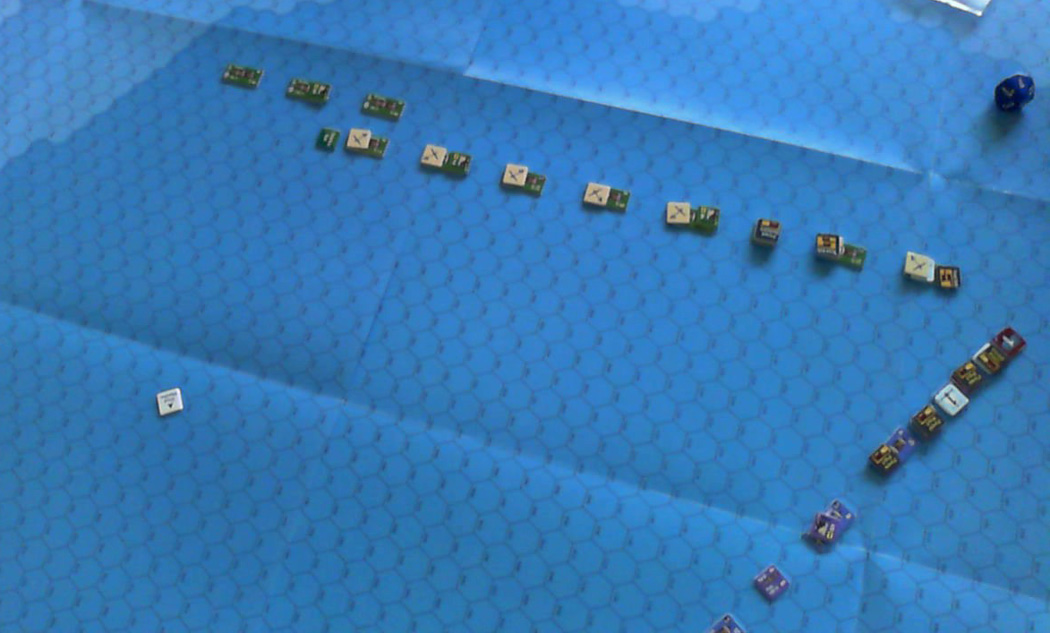
End of Turn 4. My lead ship would anchor on the next turn to deliver broadsides while partially out of the Russian’s arc.
I abandoned formation on turn 5, leaving the forward commander to control by proximity for the rest of the game. I slowly fed in ships, getting them beaten up, as Patch broke off a second squadron to slip anchor and sail towards the fight that I was already losing. On turn eight, the wind finally shifted again, after five turns of staying steady, turning another point clockwise to put the entire Swedish line In Irons! Most ships turned to port to beat against the wind toward the rear of the Russian line, while Patch’s advancing squadrons were slowed by needing to beat against the wind themselves.
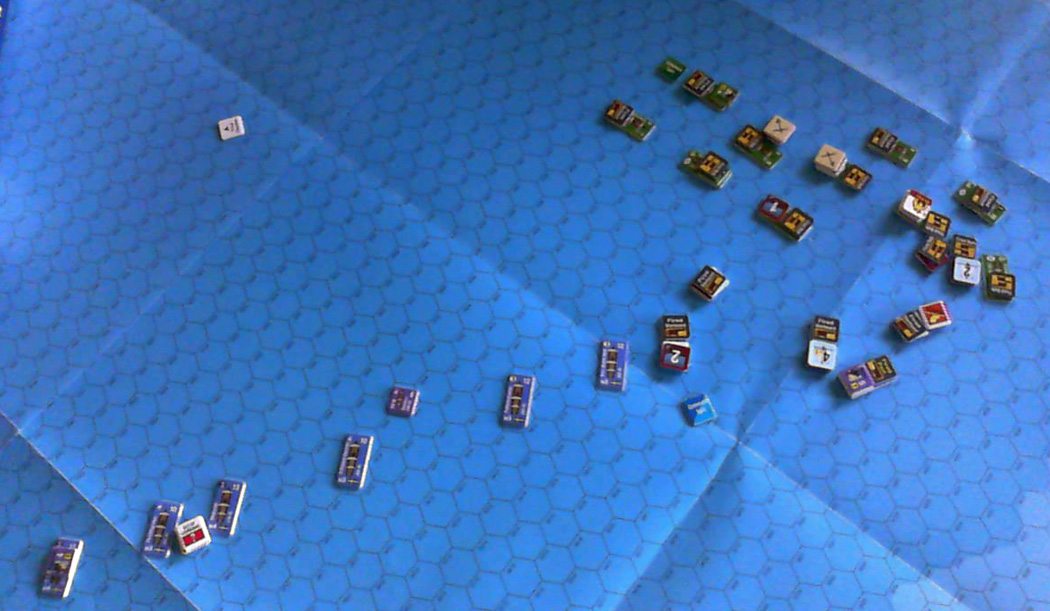
End of Turn 9. One ship has struck it’s colors and another will follow in a couple turns. This one will get captured by Patch.
The last Russian advantage is that they have two 1st Rate ships, while everything else present is 3rd or lower. Neither of them is near the front of the line, but when Patch’s mobile squadrons came up, I started taking an even higher firepower drubbing (though it was nice to be getting fire that wasn’t constantly at +3). I forgot to check to see if my fleet broke off after my first ship struck it’s colors, but at least it’s low odds (I had plenty of undamaged ships) and it was getting near the end of the scenario anyway.

End of Turn 12/Game. Yes, those are my ships on fire, though Kir Ioann was on fire for a couple turns.
I think I did better than the Swedes did historically (a ‘handful’ of Russian casualties), but still did not actually get to the point of dismasting or flipping any Russian ships over as ‘damaged’ (some were getting close). The wind just absolutely killed my ability to do much; I needed mobility and didn’t have any. The Russians got 22 VPs:
Dristigheten – Captured
Dygden – Sunk
Riksens Stander – Sunk
Gota Lejon – Struck
Aran – Damaged
Camila – Damaged
Froja – Damaged
About a third of the Swedish fleet never got to the combat, and another third never even got on the board, as they have to enter in one place, in one direction, and the wind was directly against it for the end.
Patch says he enjoyed the game and would like to play again, which makes me very glad. He’s never really had the naval bug, and this is the first time he’s played a Age of Sail game. I certainly enjoyed it a lot, though it got depressing towards the end as more and more Russian ships got involved, and I just couldn’t do anything. I’ve been wanting to try out my set for the last month or so, and am happy I finally did.
However, there are a surprising number of places where the rules and charts still need some clean up. The sequence of play is never given in the charts (just near the beginning of the rules), and the various parts of the end-of-turn status checks are hidden in other rules rather than put where one can find them for that particular segment. A number of modifiers on the charts could do with an explicit reference to it’s particular rule. The modifier for a black or white background on the rate is looks like it says ‘+1 [to] Rate value’ instead of ‘+1 [if] Rate value…’ at first glance (I’d say “White background Rate value if base firepower is shaded”, or better, “Shaded base firepower with white background Rate value”). Actually, I’d like a cheat sheet of all the various different symbols associated with the relative rate value. Finally, taking 6 hull hits increases the relative rate by one, but the counters say ‘-1’ and only start at 7 hull hits (I suspect it used to be a -1 firepower modifier instead of +1 rate, but the counters need updating).
/pic2623535.png)


/pic500333.jpg)