Rindis.com

All my hobbies, all the time
  • Home
  • My Blog
  • Games
  • History

Categories

  • Books (504)
  • Comics (10)
  • Gaming (918)
    • Boardgaming (674)
      • ASL (155)
      • CC:Ancients (83)
      • F&E (78)
        • BvR – The Wind (26)
        • Four Vassal War (9)
        • Konya wa Hurricane (17)
        • Second Wind (5)
      • SFB (78)
    • Computer games (162)
      • MMO (77)
    • Design and Effect (6)
    • RPGs (66)
      • D&D (25)
        • O2 Blade of Vengeance (3)
      • GURPS (32)
  • History (10)
  • Life (82)
    • Conventions (9)
  • News (29)
  • Technology (6)
  • Video (50)
    • Anime (48)
  • Writing (1)

Patreon

Support Rindis.com on Patreon!
Become a patron at Patreon!

Other blogs:

RSS Inside GMT

RSS Playing at the World

  • Playing at the World 2E V2 Arrives May 5, 2025

RSS Dyson’s Dodecahedron

  • Scavengers’ Deep – Map 33 July 16, 2026

RSS Quest for Fun!

  • The Expense Post May 24, 2026

RSS Bruce Heard and New Stories

  • Pain, Exhaustion, and Morale in D&D BECMI June 7, 2026

RSS Chicago Wargamer

  • The 2 Half-Squads - Episode 310: Cruising Through Crucible of Steel January 27, 2023

RSS CRRPG Addict

  • Game 581: Dragon Quest (1982) July 15, 2026
SF&F blogs:

RSS Fantasy Cafe

  • The Leaning Pile of Books July 5, 2026

RSS Lynn’s Book Blog

  • Review: The Tinder Box by MR Carey July 16, 2026
ASL blogs:

RSS Sitrep

  • Cardinal ASL Sins March 18, 2026

RSS Hong Kong Wargamer

  • FT114 Yellow Extract After Action Report (AAR) Advanced Squad Leader scenario April 16, 2025

RSS Hex and Violence

  • This still exists? March 25, 2025

RSS Grumble Jones

  • Grumble Jones July Scenario GJ162 You Will Engage the Enemy July 1, 2026

RSS Desperation Morale

  • How to Learn ASL March 16, 2025

RSS Banzai!!

  • October North Texas Gameday October 21, 2019

RSS A Room Without a LOS

  • [Crossing the Moro CG] T=0902 -- Rough start July 18, 2015
GURPS blogs:

RSS Dungeon Fantastic

  • Felltower - Monsters Fleeing between Sessions vs. PCs replenishing June 28, 2026

RSS Gaming Ballistic

  • B-Scale Detail and Examples July 16, 2026

RSS Ravens N’ Pennies

RSS Let’s GURPS

  • Review: GURPS Realm Management March 29, 2021

RSS No School Grognard

  • It came from the GURPS forums: Low-Tech armor and fire damage January 29, 2018

RSS The Collaborative Gamer

  • Thoughts on a Town Adventures System January 18, 2022

RSS Don’t Forget Your Boots

  • GURPS Supers Newport Academy #7: “Invitation to the future.. of the 1970’s” July 5, 2026

RSS Orbs and Balrogs

  • Bretwalda - Daggers of Oxenaforda pt.4 - Fallen King May 27, 2017

Wooden Horses Could Not Stop Me

by Rindis on December 29, 2014 at 10:16 am
Posted In: Boardgaming

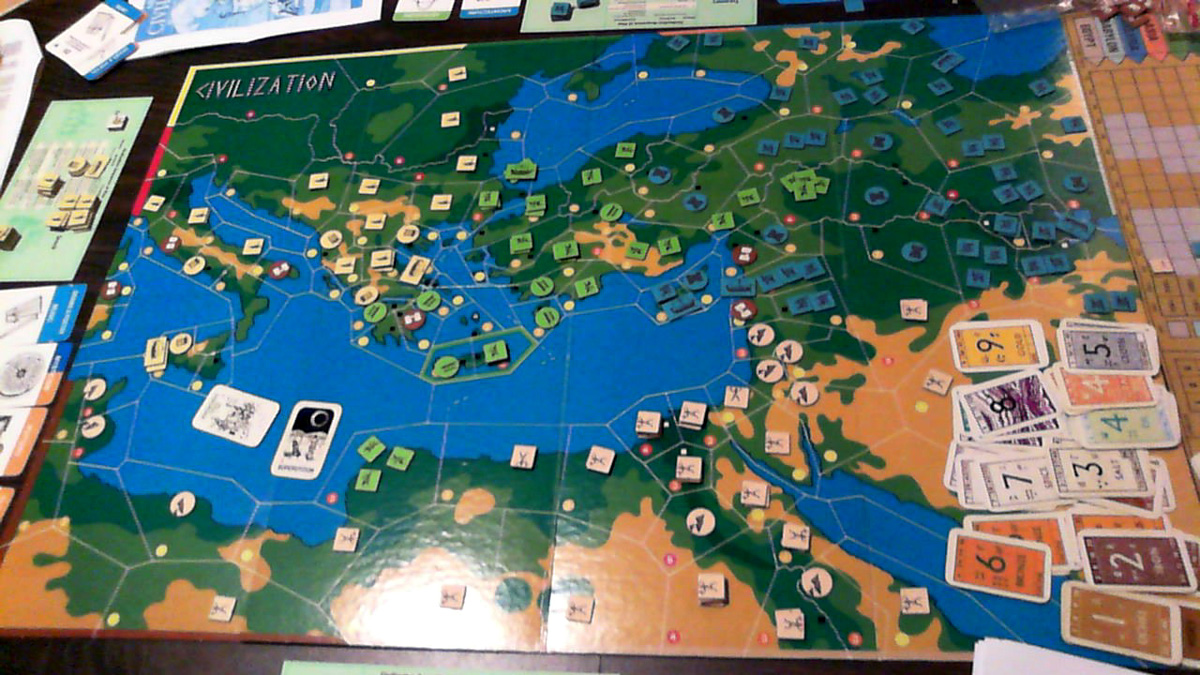
Had the gang over for one last game day of 2014 yesterday. We were scheduled for a five-player game of Advanced Civilization, but Mark was down with the flu. Normally, this would also strand Jason, who gets a ride from him. He’s renting a car this week, and showed up just a little late. While I was out checking the train station for him, everyone else decided to stick with a four-player game, using the full map (by the rules, it should be three of the four panels…).

This definitely bent the game a bit, as everyone had plenty of room to spread out in, and minimized conflict. It also made larger civilizations more stable, and helped us get through the later stages of the game, where we normally stall out. Everyone was happy about that part, though I think some kind of slightly tighter format would be better. Also, it meant everyone needed to pay more attention to their token cycle, so it was instructive that way too.

Anyway, I took Egypt (picking second after Patch’s Illyria), Dave took Assyria, and Jason Crete. The opening stages were fairly standard, with Crete heading into Asia Minor and me taking a one-turn bounce before building two cities to pass into the Early Bronze Age. The first calamity of the game was a Treachery that Patch passed me to take one of the cities in upper Egypt. Thanks to the fact that there’s only a 2-space and a 1-space (and another city) adjacent, it survived as such for a long time, as there was no way to get seven people in to break the city. I eventually reduced the other city in a later calamity (probably Epidemic) and then tore down that one before rebuilding both.

Before that point, Patch passed me Treachery again, to take a city on the North African coast. And then Jason passed me Treachery to take another North African city. Horses, rabbits, ducks… are any of these giant wooden animals safe?!

Patch and I got into a lead as the mid-game commenced with Dave and Jason falling behind, partly thanks to various calamities. I figure I had a slight edge going into the Early Iron Age (got in slightly early with a three-advance purchase), and then got pounded by three round of calamities. Patch had been maintaining nine cities fairly consistently, while I was struggling between seven and nine. When the disasters got me, I couldn’t get the token cycle to kick loose the population to rebound properly (probably too spread out), and I sunk down to five cities without a lot of growth.

And then Patch drew Civil War. He was at the height of his power, and for most of the game, the recipient would probably been Jason (Crete). But at this moment, I had more in my Stock than he did, and was suddenly boosted to a fairly stable nine-city configuration. Patch had already hit the first space of the Late Iron Age at this point, but couldn’t pick back up before we quit for the day, and I finally hit the Late Iron Age on the last turn.

Here’s the end of the day photo (African cities are from a couple rounds of Piracy):
Wooden Horses

And the final scores:

Side Player AST Cities Civ Cards Trade Cards Treasury Total Place
Illyria Patch 1300 250 1350 48 3 2951 2
Crete Jason 1200 300 760 3 3 2266 4
Assyria Dave 1200 450 900 5 0 2555 3
Egypt James 1300 450 1470 40 7 3267 1

It was a fun time, and way too long since we’ve played AdCiv (2 and a half years? yikes!). The win is very nice too, especially since I’ve noted a tendency for Patch to do very well if I’m not adjacent to him.

Oh, and I finally drew Treachery myself near the end of the game. Along with two other calamities in a round with little trading. I passed Barbarian Hordes off to Jason in return for Epidemic. To my chagrin, random draw picked Treachery to not happen, leaving me with the Epidemic and Piracy.

└ Tags: AdCiv, gaming
 Comment 

King’s Bounty: The Legend

by Rindis on December 15, 2014 at 9:34 am
Posted In: Computer games

Way, way back when, New World Computing released King’s Bounty; a game where you were a hero leading a band of hired mecenaries doing quests for the king. You visited towns to hire more men (there were a bunch of options on what to hire in a limited number of stacks), fought monsters and so on. This was basically the prototype for Heroes of Might and Magic, where you went from being an independent adventurer to a warlord that actually controls the towns you visit.

In 2008, the name was revived by a Russian company, with King’s Bounty: The Legend. It wasn’t developed or published by the same Russian companies responsible for HoMM V two years before, but it’s impossible not to make comparisons between two Russian revivals of old New World Computing titles.

I got this on a GoG sale recently, and have been trying it out in various stolen moments. I’ve gotten through the first map, short of some especially tough encounters, and am currently a little lost. The area the next ‘main’ quest goes into is obviously way too tough for me. I’ve now gone off to the south, and it looks like I can get a few things done there.

My first impressions of the game were a bit poor, as GoG offers three wallpapers, and two of them were heavy on the cheesecake. (I wish they’d offered the title screen image as a wallpaper.) The game itself, however, has been good. It is no surprise that like HoMM V, it is all in 3D; but where HoMM V felt crude and uninspired, this one feels polished. The models look good, and are well textured. The camera is more limited than I’d like, especially when I’m trying to see into the distance, but I’m not struggling recognize items either.

The combat is turn-based on a hex grid, with your troops moving around and attacking or using abilities, while the hero (you) can also cast a spell once a turn. So it feels much closer to traditional HoMM combat than HoMM V does. Just about all the troop types have one or more special abilities, which is a nice touch, especially since even the easiest ones are limited to being used no more than once every other turn.

There’s three classes of hero to pick from: Warrior (might), Mage (magic) and Paladin (mix), and then there’s a a set of three skill trees for extra abilities which each class can use, but obviously each class should have an easier time with one of the skills. There’s also ‘leadership’ which limits how many of each troop type you can command, which is an interesting way to keep you from just loading up on a large number of troops early on and plowing over enemies.

The questing is fairly clear, other than the earlier problem of not knowing what’s supposed to be easy, and what’s hard. I’ve seen a few quests already that branch off in different directions depending on what you say and do, which is very nice.

I think it’s better than HoMM V, though I’m starting to feel a little lost.

└ Tags: gaming, King's Bounty
1 Comment

Where Wisdom Fails – Part 2: The Pursuit

by Rindis on December 12, 2014 at 6:59 pm
Posted In: SFB

Crossposted from the SFU blog on BGG.

[See Part 1.]

Patch and I did the second scenario of the UL2 mini-campaign this Tuesday.

I knew, going in, that this was going to be bad. It wasn’t until I started looking at the DG again for repairs that I realized how bad.

The idea is that there are three Klingon ships available to counter the two-ship Hydran raid that assaulted their BATS. The raiding ships head their separate ways, trying to lose their pursuers, and the Klingons also split up. In the campaign structure, each Hydran ship goes through two follow-up scenarios, “The Pursuit” and “The Ambush” against either a D7 and F5 or a single D6.

In my case, only the Dragoon survived, so all three Klingon ships were present. As there is no time to visit a base, the only repairs allowed are the standard Continuous Damage Repair set, which on a cruiser is four boxes, and pulling out spare shuttles, which gave the DG its full complement of shuttles and a second fighter (there had been one recovered during the first scenario). And all shields are repaired, which was good, since the DG only had two left in decent shape.

I had already repaired one Warp box during the previous scenario, and so selected two more Center Warp and one of the hellbores for the rest of the CDC.

Because of the unbalancing caused by the newer base rules, I also did a round of Emergency Damage Repair as if I had done it on turn 0. There were only three labs left, so I eliminated the top ‘4’ box on the DamCon track for chances to repair another C Warp, Ph #3 (FA+L) and another hellbore.

All three repairs succeeded, giving me 27 power (19 warp), two phasers and three hellbores. I had 10 turns to disengage by separation from all Klingon ships, which meant finding some way of slowing them down significantly.

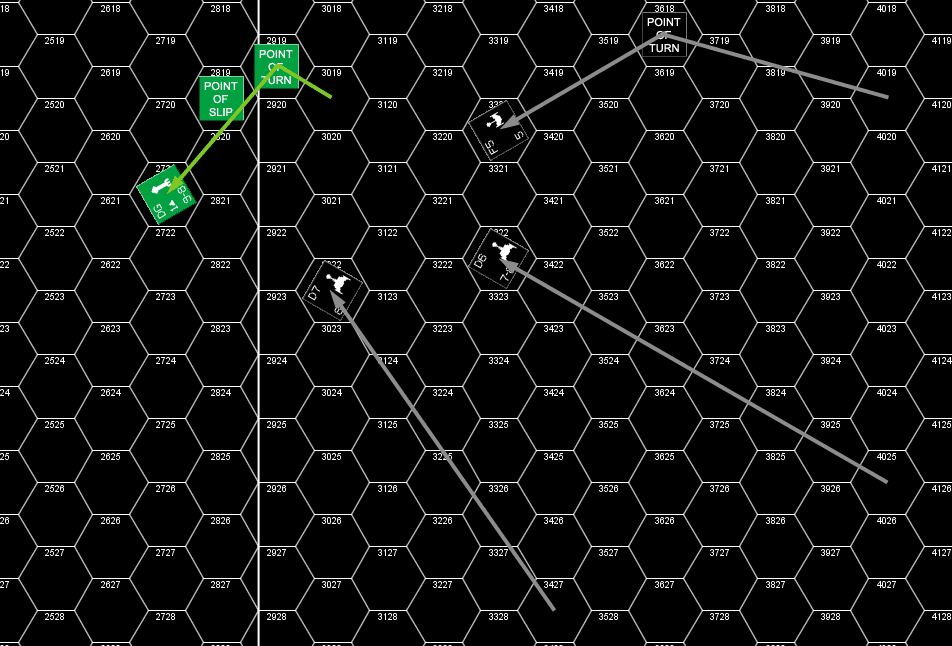
The best I could manage was speed 14, arming all three hellbores and holding a suicide shuttle. The Klingons start 10-11 hexes behind the DG, and all went speed 22, putting up 1 ECM and one 1 ECCM.

I ran straight for a few impulses, and the D7 and F5 (which start on either side of the DG) started sideslipping in, and so I turned to the left, to bring the what I had to bear on the D7.

We both opened up at range three on impulse 11. The Klingons launched drones, and I launched the suicide shuttle. The D7 fired the five bearing phasers (mostly 5s and 6s), and hit with 3 disruptors, to do 7 internals through the #5. The DG fired both hellbores on that side, but one missed (again!) to seriously dent the weak #4 without actually bringing it down.


Impulse 11; too expensive, and no meaningful result.

I turned off after that, but I couldn’t afford internals at all and lost 6 power, and the one bearing phaser in that exchange. I could have set up a longer range pass, but wanted the hellbores in the 15 damage bracket… not that it did me much good.

Patch took a couple of phaser shots to kill the shuttle before he reached it, and the D7 managed to get back onto the #5 shield to do another 3 internals (a ‘6’ at range 3…) to knock out another power.

I then turned the other way to get the #5 away from him, and fire the third hellbore at the F5. I hadn’t counted on the #3-5 shields being equal, so even with a hit, it didn’t do much. I launched the two fighters at this point, since they had a chance of living until they could fire as long as he concentrated on the ship.

He managed to pick off one of the fighters while all the disruptors on the D6 and F5 fired on the DG with two hits at range 1 (!!) The D6 then tractored the DG and then fired bearing phasers, which rolled only slightly better and the disruptors to put 15 internals through the #4 shield. The F5 followed up several impulses later with the RX phasers for another 12.

At that point, I was down to four power, a FA ph-2 that had never been hit (never bore on anything…), a probe launcher I didn’t have the power to arm, and two shuttles. We called it at the end of the turn for a Klingon Substantive Victory.

In the more ‘normal’ form (D7 & F5 vs a DG with about six internals) it should be a challenging scenario. The hellbores will punch through the weak rear shields fairly easily, so some lucky hits can definitely give the DG a real breather. Though its top speed is 28 (only 27 warp), so getting away from speedy Klingons is a problem.

We’re going back to our usual ASL next, but hopefully we’ll be playing SFB a little more regularly next year.

└ Tags: bgg blog, gaming, SFB
 Comment 

HoMM V: The Queen

by Rindis on December 6, 2014 at 12:02 pm
Posted In: Computer games

I picked up the Heroes of Might and Magic V bundle in a GoG deal recently, and tried it out to see how the new ‘post 3DO’ games are. First gripe: Each expansion is a separate program with its own campaigns and scenarios, instead of wrapping up into one big interface.

Mostly, it’s HoMM. Heroes wander around a map of paths and choke points defeating monsters and taking cities. They went with a low-poly somewhat clunky-looking full 3D environment that reminds me, stylistically of WarCraft III. It’s certainly not bad, but I’d prefer not to have to wrestle with the camera (there is a ‘Classic HoMM view’ which fixes the camera pretty well vertical, but there’s still a problem of things tending to get hidden, especially in underground caves). It’s pretty clear visually most of the time, though I don’t think I can tell most mines apart at a glance like in previous games.

Both the main map and battle maps are pure square grids now, unlike the hex grid battles from earlier HoMM games, though I recall HoMM IV went to a square grid also, though it was a finely-grained one, where even the smallest units were several spaces. Now units are one or four (2×2) spaces large. An annoying visual loss here is that the hero’s movement trail is just a series of dots, whereas they used to be arrows whose length gave you an idea how much movement you were consuming. On the other hand, combat now shows the order everything is going to move in, and you can see how many creatures you expect to kill in an attack.

Heroes can attack physically in battle as well as cast spells, but aren’t on the battlefield the way they were in IV. In fact, the game seems fairly close to HoMM III, but touches of IV do show up, notably, peasants are back, and can be upgraded to conscripts. They move at a semi-decent clip, so they aren’t the absolutely useless troops they were back in II.

All I’ve played so far is the first campaign (five scenarios), which gives less of an impression of the game than it should. Some of the scenarios take quite a while, as they have expansive maps with lots to explore. That isn’t necessarily bad, but at the same time, it’s more of a tutorial sequence with only two of the scenarios even featuring an AI player, who has limited resources. There’s a couple of full cutscenes… that I wish were better done. The rest is handled with in-game machanima, that often just consist of a couple of hero characters standing and talking. The plot is-well worn, but well done enough for me to be happy with it.

But all it features is the human (Haven) faction, and a variety of enemies. The only other faction I’ve got any handle on is the demon (Inferno) faction, which serve as the main enemy. I don’t have a very good feel for the game as a whole. I had to do quite a bit of flipping through scenarios to find that there are six factions in this version (the same number II had) but I have no idea what the others are like.

└ Tags: gaming, HoMM
 Comment 

Cross Keys

by Rindis on December 5, 2014 at 10:14 am
Posted In: Boardgaming

I’m on my usual trip down south to see my parents, and hopefully get in some wargaming with my dad. After some discussion, he decided to try out the GCACW series. We went with the fourth scenario in Stonewall in the Valley, “Cross Keys and Port Republic”, which is on just the south map, and is probably the biggest basic scenario (though only six turns) and looks about the most even in forces on each side. (I thought I had played the second scenario before, not just the first one twice….)

My dad took the Confederates, and since all of their infantry starts exhausted at Fatigue 1, they stayed in place the first day, while the cavalry advanced to screen them. I tried getting around behind the cavalry to cut them off, but lost one cavalry regiment to an attack by Ashby for my trouble, while almost the entire Union force had a case of the slows.
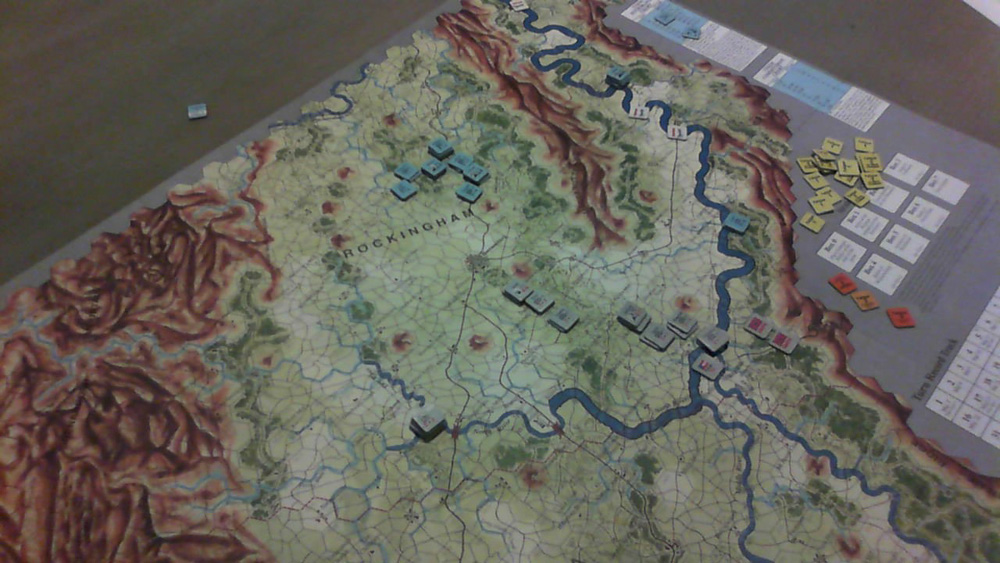
Cross Keys 1

I got lucky on the rolls for Shields’ division, and had activated everyone by turn 2. The Confederates naturally got to go first, and set up a fairly strong line from Pleasant Run Church to Cross Keys. I decided to continue down the main road, and threaten to go around his west flank while Shields slowly advanced behind the Shenandoah River.

Ewell’s division moved up into contact with the brigades that Fremont was leading (not organized into a division), and a couple of fights followed, one of which drove off Stewart’s brigade behind the North River with some losses and a Demoralize-1 marker. On the other end of the line, both Schenck and Taylor’s brigades were exhausted in a fight.
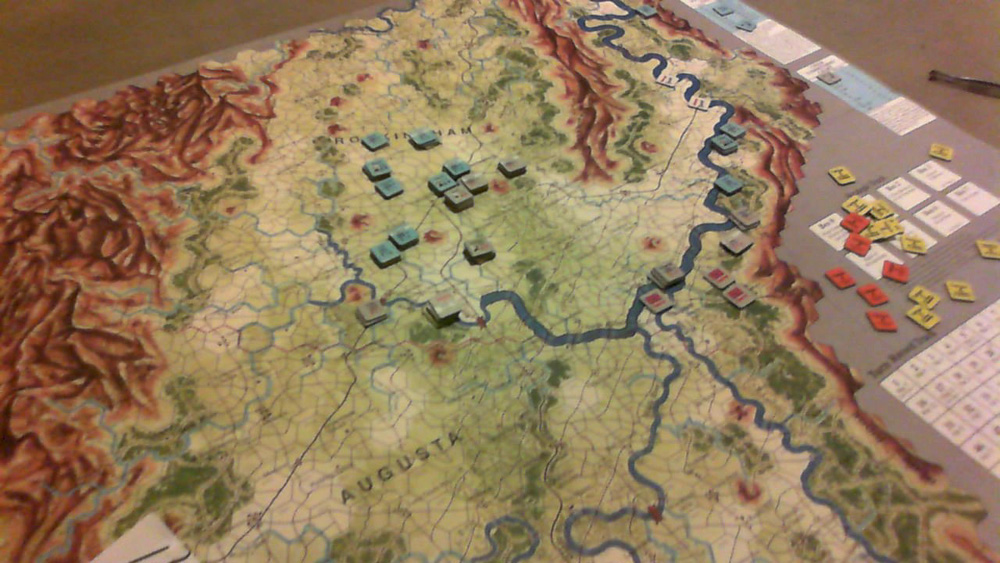
Cross Keys 2

Not liking how exposed Stewart was to a possible Union advance, my dad moved him out to just north of New Haven. This would keep him demoralized, thanks to the extra fatigue, but got him out of any danger. I moved Cluseret forward to sweep Ashby out of the way, but he stood, and I rolled horribly to lose two strength points. With the Confederates still blocking the main pike across the river, Blenker moved his entire division to the same hex at the west end of the main line, adjacent to Ewell’s position (lots of minuses for a potential assault, but 13-3 odds if he could pull it off). This forced the Confederates to pull back 2-3 miles. Fremont attempted to follow, but a series of poor rolls kept me from doing anything fancy, and Shenck lost a strength point in stragglers.

Shields’ division got close to the solid Confederate position between the Shenandoah River and the Blue Ridge, and the Stonewall brigade moved to joined Taliaferro’s bridgade there.
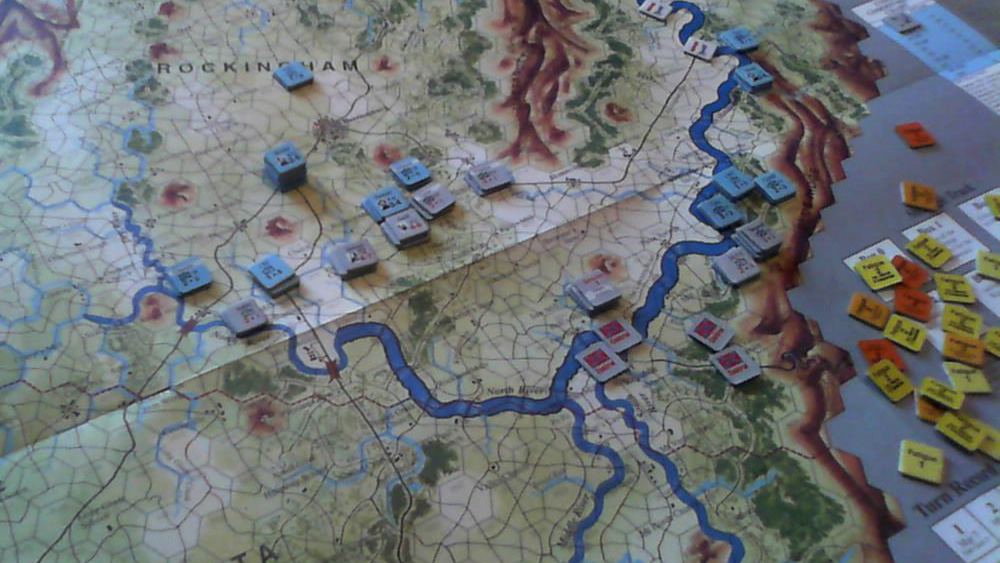
Cross Keys 3

About my best plan was to continue as I had started. Patton’s brigade moved over to eject the 1st NJ Cav before I could do anything, which made getting at Ashby difficult again.

After three ‘2’s for movement in a row (and I did that well  only because of using the division commander), Blenker’s division hadn’t gotten to where I had hoped for my first movement. Steinwehr caught up to Ashby, who then retreated over the North River, which I had hoped to reach at least a turn earlier.

I managed to get three activations in a row to get the 4th NY Cav into a small gap in the line and then attack Taylor near the middle of the line. Everything went right for Fremont, getting a Grand Assault off for 2-1 odds with a +1 flank bonus… and then blew the combat itself for a final -1. This lost another strength point, and finished two brigades for the turn (1 fatigue for the attack, +3 from the battle).

After that, the Confederates pulled back another couple of hexes, and then I got a couple of good initiative rolls and very good movement to surround Patton’s brigade. This attack went better (final +2, after +3 flanking bonus…), disorganizing both brigades, but retreating Patton out of his bad position so I couldn’t hit him again.

The turn 5 check showed that the river had fallen, and it was now possible to cross the Shenandoah. I got the first activation and moved Tyler’s brigade from Shields’ division across the Shenandoah river to circle behind the Confederate defenses. Jackson then activated both brigades there twice to get between Tyler and the victory hexes, and then activated Stewart to block the ford I’d used while activating the main two to attack Tyler. With a +3, the first attack drove off Tyler, causing two losses in a retreat though bad terrain.

Shields then sent two more brigades across the river, hoping to find some way to threaten to get to the victory area. The Confederates got the next initiative, and pulled back into a ring. After some maneuvering, I finally got a +2 flank attack on Stewart, which wore out both units, and followed up with another from the other flank which sent him retreating south of the Shenandoah River.

Taylor moved over to cover that gap, which left Patton disorganized and without immediate support. I moved Cluseret up to Patton, and then Ewell moved over to attack him, exhausting both units. Ashby pulled out of covering the river to cover the victory area. The 1st WV wore themselves out putting themselves onto Ewell’s flank, but then Ashby moved up to cover that flank, which negated any bonuses I could get. Freemont sent Stahel in anyway, and forced a retreat. Patton pulled out after that, leaving the Confederate line just north of the river.
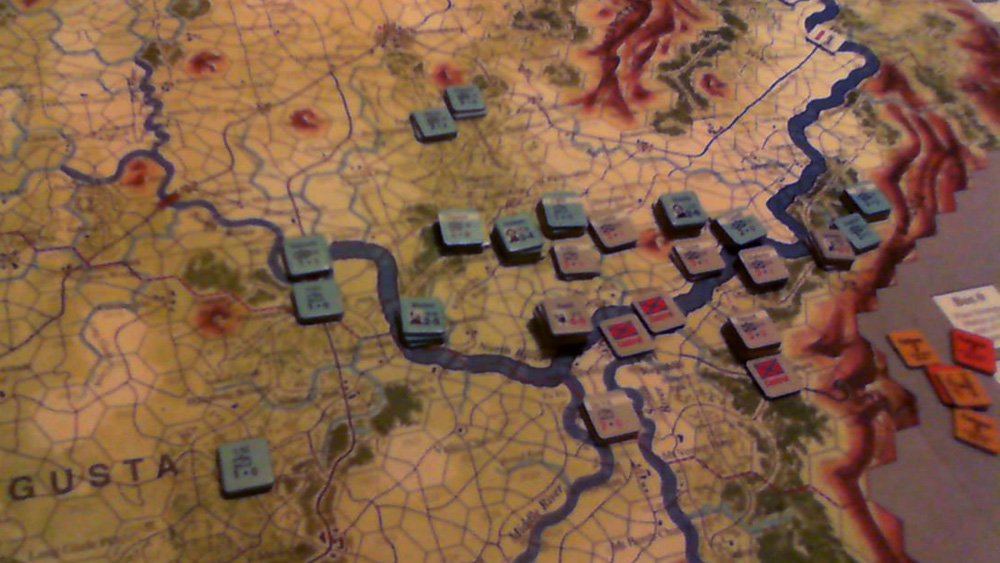
Cross Keys 5

The river was still crossable for turn 6, and the Union got the first initiative again. Blenker activated his entire division, with two brigades crowding Ewell’s main position, and the third setting off around the North River. The Confederates then fell back on positions right along the river. The Union cavalry went on a ride wide around south, finally arriving near Port Republic. Over several activations, the entire Confederate force crossed south of the Shenandoah, abandoning Newhaven to eventual Union control, and then eliminated the 1 NJ Cav in a sharp battle with Ashby.

With everything compacted down, and the Confederates solidly in the lead from Union losses, there weren’t a lot of options left. First, Shields tried to force a Confederate line that ran from Lewis Mill on the Shenandoah to the victory area in Mt Vernon Furnace. Two attacks disorganized the defenders, but couldn’t force a retreat or losses, and caused one loss to each of the attacking Union brigades. I then tried to get at the Confederate cavalry that was screening the western approach to the area, but they moved out before I could try to eliminate them, and the troops were too worn out for anything more. I called it at that point, with the understanding that I’d have no trouble actually taking Newhaven, or getting a unit within five hexes of Staunton.
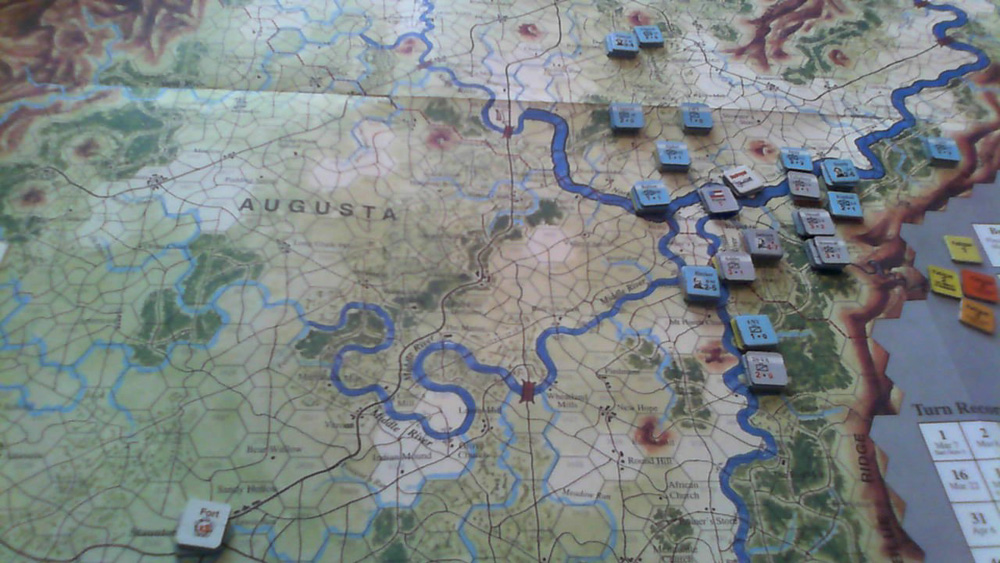
Cross Keys 6

The Union losses amounted to 10 strength points (plus another from an extended march), and the Confederates had only lost one (plus two more in extended marches on the last turn). With 3 points for taking Newhaven, and one more for being close to Staunton, the total was -5 for a Confederate Substantive Victory.

Ashby certainly lived up to his reputation in this game, being a constant problem for me to deal with. Losing a cavalry regiment early on did me no favors either. Overall, my dice were fairly cold in battle; most fights were at around +1 for modifiers, and while the first fight went well for the Union, the next three all saw the Union roll poorly. One more winning fight at that point probably would have made a dramatic difference. Lots of opportunities were missed thanks to the superior Confederate initiative, but I got some good streaks that forced positions to be abandoned, and allowed me to stick my neck out with Taylor near Three Springs, but not to fight on my terms.

My dad generally likes the system, but finds it a bit too procedure heavy, which I have to agree with. I think it’s a rule set that could do well with introductory sections giving the basic concept of the rule, and then going into the all the exploit-resisting procedure. Some early problems just came from the fact that it is an usual system for a hex-and-counter game.

└ Tags: gaming, GCACW
1 Comment
  • Page 213 of 315
  • « First
  • «
  • 211
  • 212
  • 213
  • 214
  • 215
  • »
  • Last »

©2005-2026 Rindis.com | Powered by WordPress with ComicPress | Hosted on Rindis Hobby Den | Subscribe: RSS | Back to Top ↑