
Cross Keys
I’m on my usual trip down south to see my parents, and hopefully get in some wargaming with my dad. After some discussion, he decided to try out the GCACW series. We went with the fourth scenario in Stonewall in the Valley, “Cross Keys and Port Republic”, which is on just the south map, and is probably the biggest basic scenario (though only six turns) and looks about the most even in forces on each side. (I thought I had played the second scenario before, not just the first one twice….)
My dad took the Confederates, and since all of their infantry starts exhausted at Fatigue 1, they stayed in place the first day, while the cavalry advanced to screen them. I tried getting around behind the cavalry to cut them off, but lost one cavalry regiment to an attack by Ashby for my trouble, while almost the entire Union force had a case of the slows.
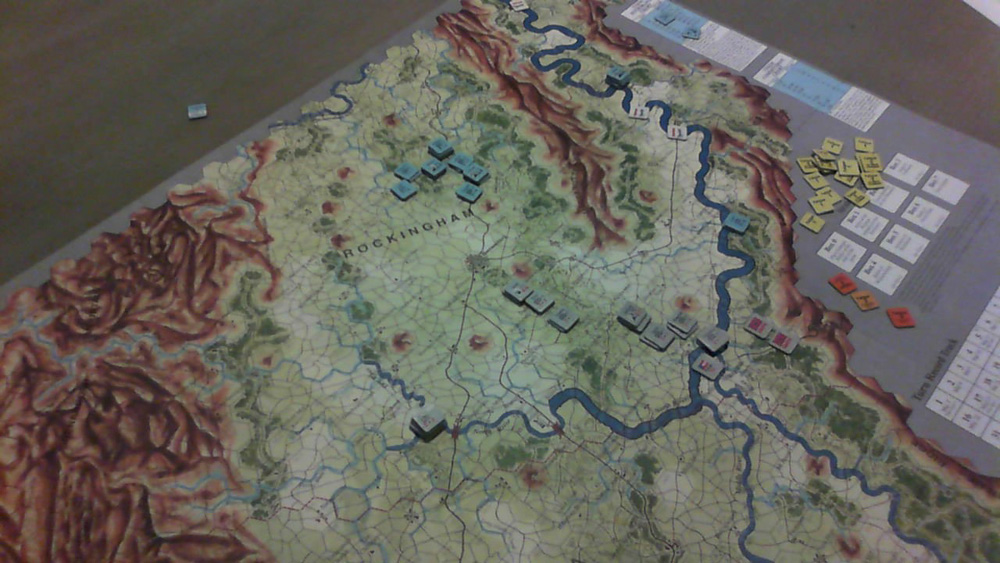
I got lucky on the rolls for Shields’ division, and had activated everyone by turn 2. The Confederates naturally got to go first, and set up a fairly strong line from Pleasant Run Church to Cross Keys. I decided to continue down the main road, and threaten to go around his west flank while Shields slowly advanced behind the Shenandoah River.
Ewell’s division moved up into contact with the brigades that Fremont was leading (not organized into a division), and a couple of fights followed, one of which drove off Stewart’s brigade behind the North River with some losses and a Demoralize-1 marker. On the other end of the line, both Schenck and Taylor’s brigades were exhausted in a fight.
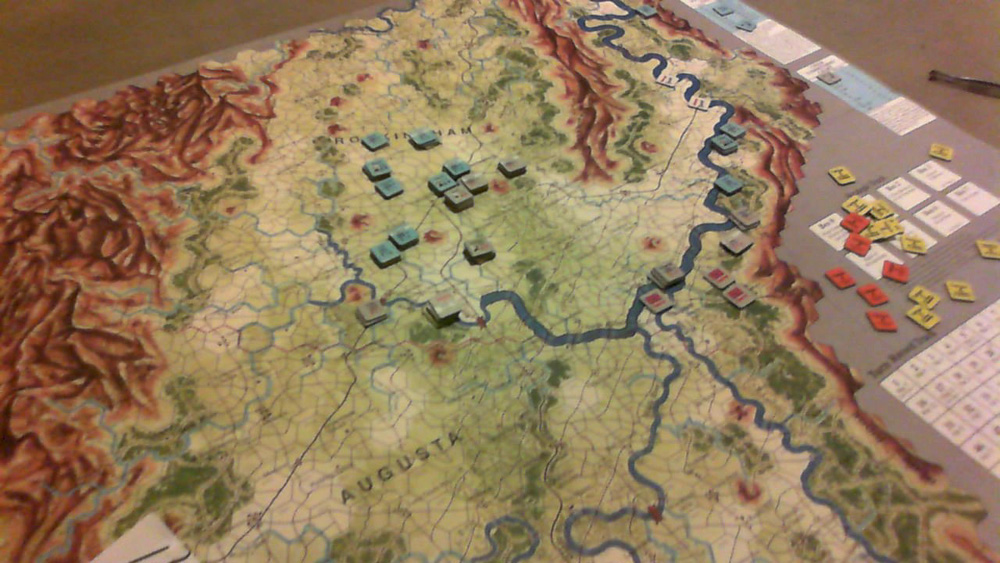
Not liking how exposed Stewart was to a possible Union advance, my dad moved him out to just north of New Haven. This would keep him demoralized, thanks to the extra fatigue, but got him out of any danger. I moved Cluseret forward to sweep Ashby out of the way, but he stood, and I rolled horribly to lose two strength points. With the Confederates still blocking the main pike across the river, Blenker moved his entire division to the same hex at the west end of the main line, adjacent to Ewell’s position (lots of minuses for a potential assault, but 13-3 odds if he could pull it off). This forced the Confederates to pull back 2-3 miles. Fremont attempted to follow, but a series of poor rolls kept me from doing anything fancy, and Shenck lost a strength point in stragglers.
Shields’ division got close to the solid Confederate position between the Shenandoah River and the Blue Ridge, and the Stonewall brigade moved to joined Taliaferro’s bridgade there.
About my best plan was to continue as I had started. Patton’s brigade moved over to eject the 1st NJ Cav before I could do anything, which made getting at Ashby difficult again.
After three ‘2’s for movement in a row (and I did that well only because of using the division commander), Blenker’s division hadn’t gotten to where I had hoped for my first movement. Steinwehr caught up to Ashby, who then retreated over the North River, which I had hoped to reach at least a turn earlier.
I managed to get three activations in a row to get the 4th NY Cav into a small gap in the line and then attack Taylor near the middle of the line. Everything went right for Fremont, getting a Grand Assault off for 2-1 odds with a +1 flank bonus… and then blew the combat itself for a final -1. This lost another strength point, and finished two brigades for the turn (1 fatigue for the attack, +3 from the battle).
After that, the Confederates pulled back another couple of hexes, and then I got a couple of good initiative rolls and very good movement to surround Patton’s brigade. This attack went better (final +2, after +3 flanking bonus…), disorganizing both brigades, but retreating Patton out of his bad position so I couldn’t hit him again.
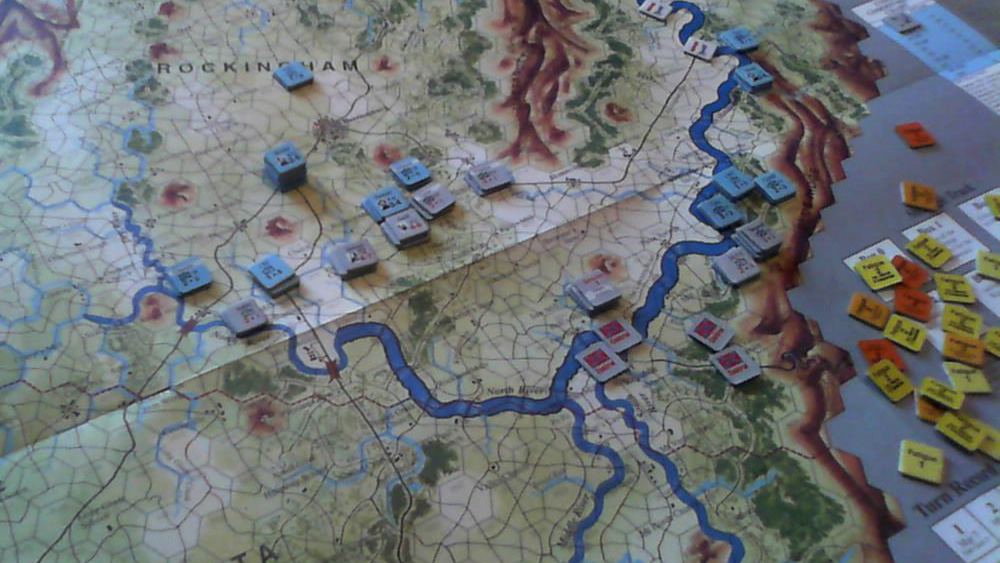
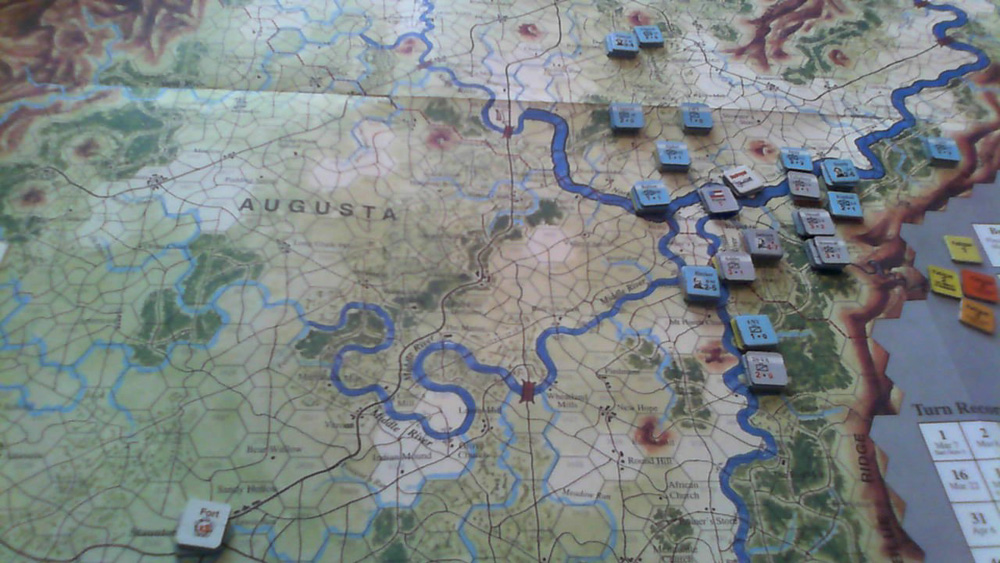
The turn 5 check showed that the river had fallen, and it was now possible to cross the Shenandoah. I got the first activation and moved Tyler’s brigade from Shields’ division across the Shenandoah river to circle behind the Confederate defenses. Jackson then activated both brigades there twice to get between Tyler and the victory hexes, and then activated Stewart to block the ford I’d used while activating the main two to attack Tyler. With a +3, the first attack drove off Tyler, causing two losses in a retreat though bad terrain.
Shields then sent two more brigades across the river, hoping to find some way to threaten to get to the victory area. The Confederates got the next initiative, and pulled back into a ring. After some maneuvering, I finally got a +2 flank attack on Stewart, which wore out both units, and followed up with another from the other flank which sent him retreating south of the Shenandoah River.
Taylor moved over to cover that gap, which left Patton disorganized and without immediate support. I moved Cluseret up to Patton, and then Ewell moved over to attack him, exhausting both units. Ashby pulled out of covering the river to cover the victory area. The 1st WV wore themselves out putting themselves onto Ewell’s flank, but then Ashby moved up to cover that flank, which negated any bonuses I could get. Freemont sent Stahel in anyway, and forced a retreat. Patton pulled out after that, leaving the Confederate line just north of the river.
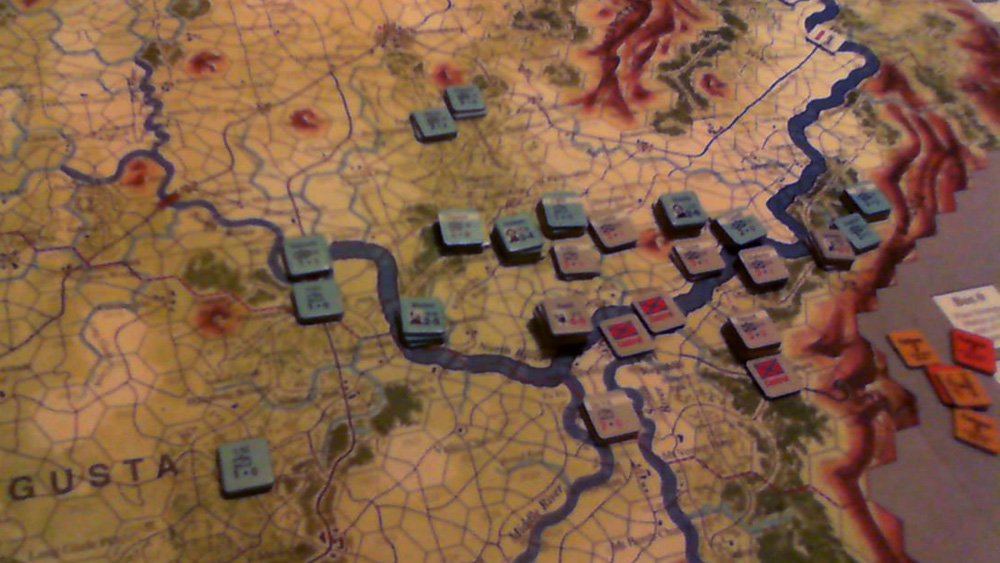
The river was still crossable for turn 6, and the Union got the first initiative again. Blenker activated his entire division, with two brigades crowding Ewell’s main position, and the third setting off around the North River. The Confederates then fell back on positions right along the river. The Union cavalry went on a ride wide around south, finally arriving near Port Republic. Over several activations, the entire Confederate force crossed south of the Shenandoah, abandoning Newhaven to eventual Union control, and then eliminated the 1 NJ Cav in a sharp battle with Ashby.
With everything compacted down, and the Confederates solidly in the lead from Union losses, there weren’t a lot of options left. First, Shields tried to force a Confederate line that ran from Lewis Mill on the Shenandoah to the victory area in Mt Vernon Furnace. Two attacks disorganized the defenders, but couldn’t force a retreat or losses, and caused one loss to each of the attacking Union brigades. I then tried to get at the Confederate cavalry that was screening the western approach to the area, but they moved out before I could try to eliminate them, and the troops were too worn out for anything more. I called it at that point, with the understanding that I’d have no trouble actually taking Newhaven, or getting a unit within five hexes of Staunton.
The Union losses amounted to 10 strength points (plus another from an extended march), and the Confederates had only lost one (plus two more in extended marches on the last turn). With 3 points for taking Newhaven, and one more for being close to Staunton, the total was -5 for a Confederate Substantive Victory.
Ashby certainly lived up to his reputation in this game, being a constant problem for me to deal with. Losing a cavalry regiment early on did me no favors either. Overall, my dice were fairly cold in battle; most fights were at around +1 for modifiers, and while the first fight went well for the Union, the next three all saw the Union roll poorly. One more winning fight at that point probably would have made a dramatic difference. Lots of opportunities were missed thanks to the superior Confederate initiative, but I got some good streaks that forced positions to be abandoned, and allowed me to stick my neck out with Taylor near Three Springs, but not to fight on my terms.
My dad generally likes the system, but finds it a bit too procedure heavy, which I have to agree with. I think it’s a rule set that could do well with introductory sections giving the basic concept of the rule, and then going into the all the exploit-resisting procedure. Some early problems just came from the fact that it is an usual system for a hex-and-counter game.
Discussion ¬