My primary reason for asking for a new ASL PBeM game was to get more early scenarios done, so I has specifically asked after scenario 7, “Dash for the Bridge”, from Beyond Valor. A couple people warned of it not being very fun, but DaveH contacted me on GameSquad, willing to give it a go. Neither of us was set on sides, so I did a random roll and took the Germans. Since the record is lopsided, we’d already decided to use the Russian balance.
And… it is an unusual scenario. Two city boards representing Warsaw in September 1944 are set up end-to-end, and the Russians either have to exit three (out of six) tanks off the far end in 11 turns, or get 10 CVP while taking less than twice as much damage as they do. The Germans defend with 8 SS squads, some MGs, a roadblock and two 37mm AT Guns, all HIP, and can’t have more than half their forces on the first (eastern) board (20). The Russians have six 447 squads and six T-70s. And as an extra wrinkle, an SSR allows the Russians to exit a number of vehicles off the north or south edge roads, and make a secret dr. That many turns later, the Russians come back, a number of road entry hexes further west equal to dr. This can result in them having successfully exited while offboard, but if the ‘turn of entry’ is later than the end of the scenario, it doesn’t count. But, the Germans can hold a number squads (or manned Guns) from their opening setup, and modify the secret dr for where they come back (but not when) by one per squad/Gun. The Germans have to keep out a leader for every 2.5 squads/Guns not used, and the Russian balance says that the Germans must sacrifice their best leaders.
Figuring out how to set up the Germans drove me to distraction for a while. Not only do I have to stop the Russians, but I have to deal with the fact that they could end up in my rear at some point. The first thing was the roadblock. The only real chokepoints on these boards are at the board ends, and the far east was out of bounds, and the far west has no proper location for a roadblock. So I put it in 20B5/C5; the only place where there’s one road, and there’s buildings to connect a roadblock to. I wanted some decent long ‘shooting galleries’ for the AT Guns to fire down in the crowded terrain. One went in 21H9 as the final ‘last ditch’ defense: if the Russians re-entered on the last possible road from the south, they’d have to drive through its CA at point blank range, if from the north, they’d go through H1,where I set the Gun’s boresight. If they drove through the H5/H6 traffic circle, I’d probably have had a shot in L7 as well. I eventually put the other Gun in 21FF8, with the boresight in FF2. Other than sending all the tanks offboard, the Russians should have to go through that area sooner or later, and the only real worry was it getting outflanked by an advance along the south edge. Also, a HS was in GG7, who would help push the gun if needed.
In fact, I noticed that the road structure on board 20 naturally flows towards the south as you advance west. So the area near the roadblock turned into the major focus for my resistance, and designed to discourage an advance along the south edge. A forward HS was in V4 (I tended to set up in what woods there are, to aid PF shots), as that was the main avenue of the board, and a squad+LMG with the 8-0 was in N8. The 8-1 was with another squad and the HMG in 20E7h2, with the boresight in J7, as that was nearest cover if he went into the J8-L8 intersection. He could see most of the area, with clear terrain to the south, and with the other group, probably make the Russians decide to go around, to the north. Squads went in 21EE3 and 20A4, to try and surprise the Russians once they did go north. The 7-0 and a squad went in 21EE6 as a final reserve for the main point of resistance. A squad went in 21X0 to cover the Y1 entry, and would move back to the next couple as needed. One squad and the 9-1 were held offboard to give the re-entry dr a –1.
And if Dave exited off the south edge early (20Y10 or Q10), I could be in a lot of trouble.
To my surprise, Dave organized the radioless T-70s in to three platoons of 2, instead of two of 3, which would make it easy to exit a potentially game-winning force. He probed on a broad front, and only got to the edge of my legal set up area on the first turn.

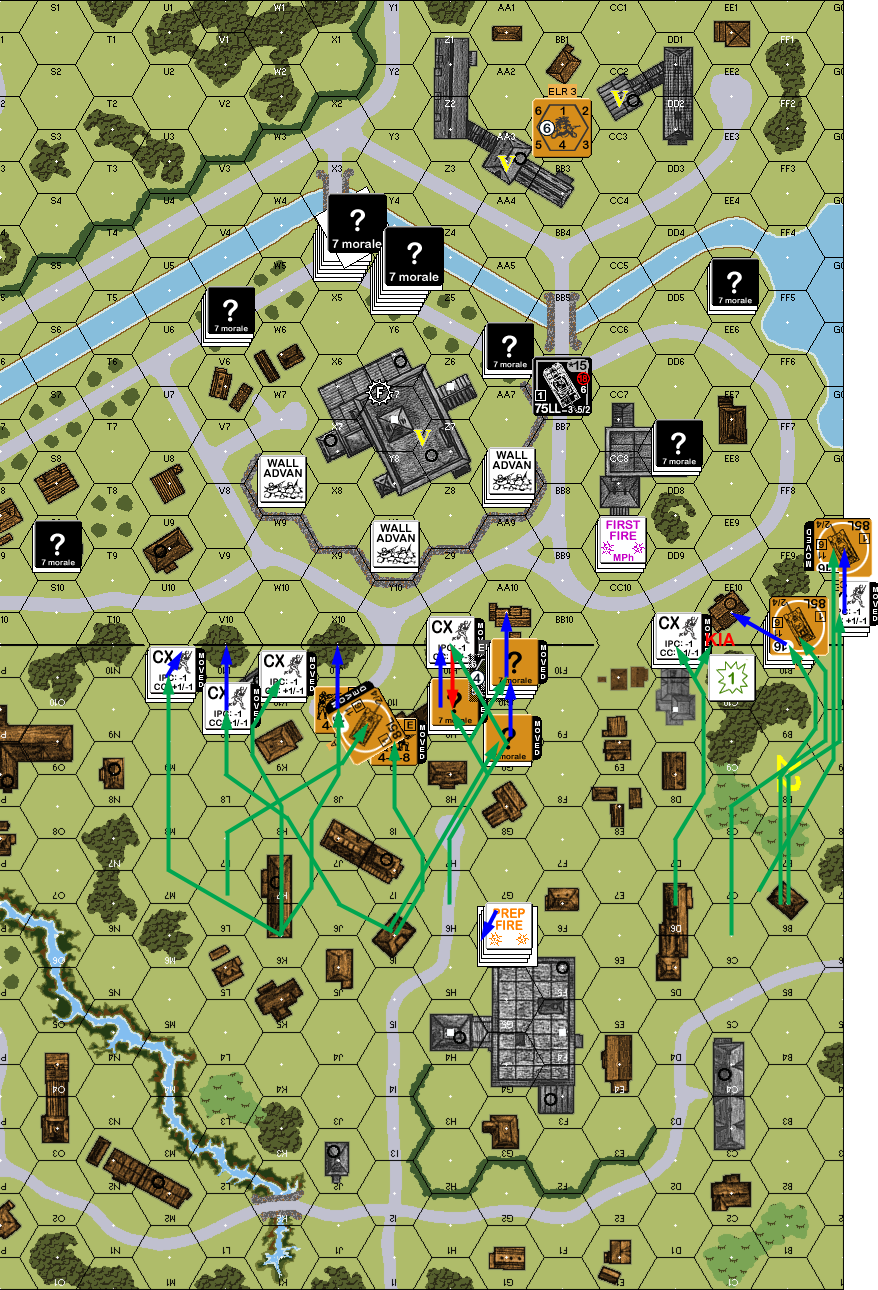
Situation, Turn 1, showing my full setup (all HIP).
↓ Read the rest of this entry…