Rindis.com

All my hobbies, all the time
  • Home
  • My Blog
  • Games
  • History

Categories

  • Books (504)
  • Comics (10)
  • Gaming (919)
    • Boardgaming (675)
      • ASL (155)
      • CC:Ancients (83)
      • F&E (78)
        • BvR – The Wind (26)
        • Four Vassal War (9)
        • Konya wa Hurricane (17)
        • Second Wind (5)
      • SFB (78)
    • Computer games (162)
      • MMO (77)
    • Design and Effect (6)
    • RPGs (66)
      • D&D (25)
        • O2 Blade of Vengeance (3)
      • GURPS (32)
  • History (10)
  • Life (82)
    • Conventions (9)
  • News (29)
  • Technology (6)
  • Video (50)
    • Anime (48)
  • Writing (1)

Patreon

Support Rindis.com on Patreon!
Become a patron at Patreon!

Other blogs:

RSS Inside GMT

  • Defiance AAR: North Jersey, July 2026 — Chili Dogs and Chit Pulls July 20, 2026

RSS Playing at the World

  • Playing at the World 2E V2 Arrives May 5, 2025

RSS Dyson’s Dodecahedron

  • Barin’s Stonehold July 20, 2026

RSS Quest for Fun!

  • The Expense Post May 24, 2026

RSS Bruce Heard and New Stories

  • Pain, Exhaustion, and Morale in D&D BECMI June 7, 2026

RSS Chicago Wargamer

  • The 2 Half-Squads - Episode 310: Cruising Through Crucible of Steel January 27, 2023

RSS CRRPG Addict

  • Al-Qadim: Bottle Shock July 20, 2026
SF&F blogs:

RSS Fantasy Cafe

  • The Leaning Pile of Books July 5, 2026

RSS Lynn’s Book Blog

  • Top Ten Tuesday: I’ve gone with a freebie July 21, 2026
ASL blogs:

RSS Sitrep

  • Cardinal ASL Sins March 18, 2026

RSS Hong Kong Wargamer

  • FT114 Yellow Extract After Action Report (AAR) Advanced Squad Leader scenario April 16, 2025

RSS Hex and Violence

  • This still exists? March 25, 2025

RSS Grumble Jones

  • Grumble Jones AAR for Crucible of Steel Scenarios on the YouTube page. July 20, 2026

RSS Desperation Morale

  • How to Learn ASL March 16, 2025

RSS Banzai!!

  • October North Texas Gameday October 21, 2019

RSS A Room Without a LOS

  • [Crossing the Moro CG] T=0902 -- Rough start July 18, 2015
GURPS blogs:

RSS Dungeon Fantastic

  • Felltower - Monsters Fleeing between Sessions vs. PCs replenishing June 28, 2026

RSS Gaming Ballistic

  • Mission X and Genre Fidelity in Combat July 19, 2026

RSS Ravens N’ Pennies

RSS Let’s GURPS

  • Review: GURPS Realm Management March 29, 2021

RSS No School Grognard

  • It came from the GURPS forums: Low-Tech armor and fire damage January 29, 2018

RSS The Collaborative Gamer

  • Thoughts on a Town Adventures System January 18, 2022

RSS Don’t Forget Your Boots

  • GURPS Supers Newport Academy #7: “Invitation to the future.. of the 1970’s” July 5, 2026

RSS Orbs and Balrogs

  • Bretwalda - Daggers of Oxenaforda pt.4 - Fallen King May 27, 2017

Medieval Maritime Warfare

by Rindis on July 16, 2019 at 12:00 pm
Posted In: Books

It is hard, at first glance, to see just what a book dedicated to naval (actually, the ‘maritime’ of the title is a better fit than ‘naval’…) warfare in the Middle Ages would have to say. However, Stanton has done a good job of rounding out the subject, and presents it well.

He starts with an excellent introduction, which lays out a few things: First he talks of the Olympias, the modern recreation of the classical trireme, and things that will carry over to later galleys, such as the need for great amounts of fresh water for a crew operating for hours in an extremely enervating environment, namely about one metric ton of water for the crew of a trireme per day. Available cargo space says that about four days of water would be on board at best. This says much the need for any sort of galley fleet to have access to the shore for replenishing water.

There is then a discussion of how the classic trireme had become outmoded in this period, as ships became more robust (in the Mediterranean; they were always more solid in northern Europe to have a chance of surviving outside the relatively placid waters of an inland sea), and ramming was no longer sufficient to break hulls. I’m a little surprised that classical rams weren’t retained to break oars and the like, but it looks like warfare shifted to boarding actions and archery.

Overall, the book is broken into two major sections, one on the Mediterranean, and one on the North Sea, Baltic, and English Channel. Both are relatively chronological, but not exclusively so. And the subjects are indeed ‘maritime’ in nature; much of the book is really about various land-based wars, but they still have an important sea-based component. Some parts, like the conflicts between Genoa and Pisa are actually naval in character. And the War of the Sicilian Vespers is about land (control of Sicily), but much of the war was decided by naval actions in the best Mahanian tradition.

I found the book very informative, and while it informed me well on a few subjects I don’t have any real background in, I do recommend having a basic knowledge of European history in this period before going to something more specialized like this. I was also a bit annoyed by his constant giving of basic stats (generally length and beam) of various types of ships known to be used at various times and places, but only because that info is hard to place by itself. I would have appreciated a few diagrams showing some relative sizes and general layouts (for the ones we know…). That’s more the province of a naval encyclopedia, but it was hard to keep that generally useful info straight in a pure reading.

└ Tags: books, history, reading, review
 Comment 

100 Regalbuto Ridge

by Rindis on July 12, 2019 at 12:00 pm
Posted In: ASL

After finishing up “In Sight of the Volga“, Martin and I arranged a second game. This time we went to the For King and Country set, and picked scenario 100, “Regalbuto Ridge”, which originally appeared in ASL Annual ’89 as a Squad Leader scenario, and was turned into an ASL scenario in Annual ’90. The original seems to have been very pro-German, and the reprint shortens the scenario by a full turn. The limited stats on it suggest the balance is much better now.

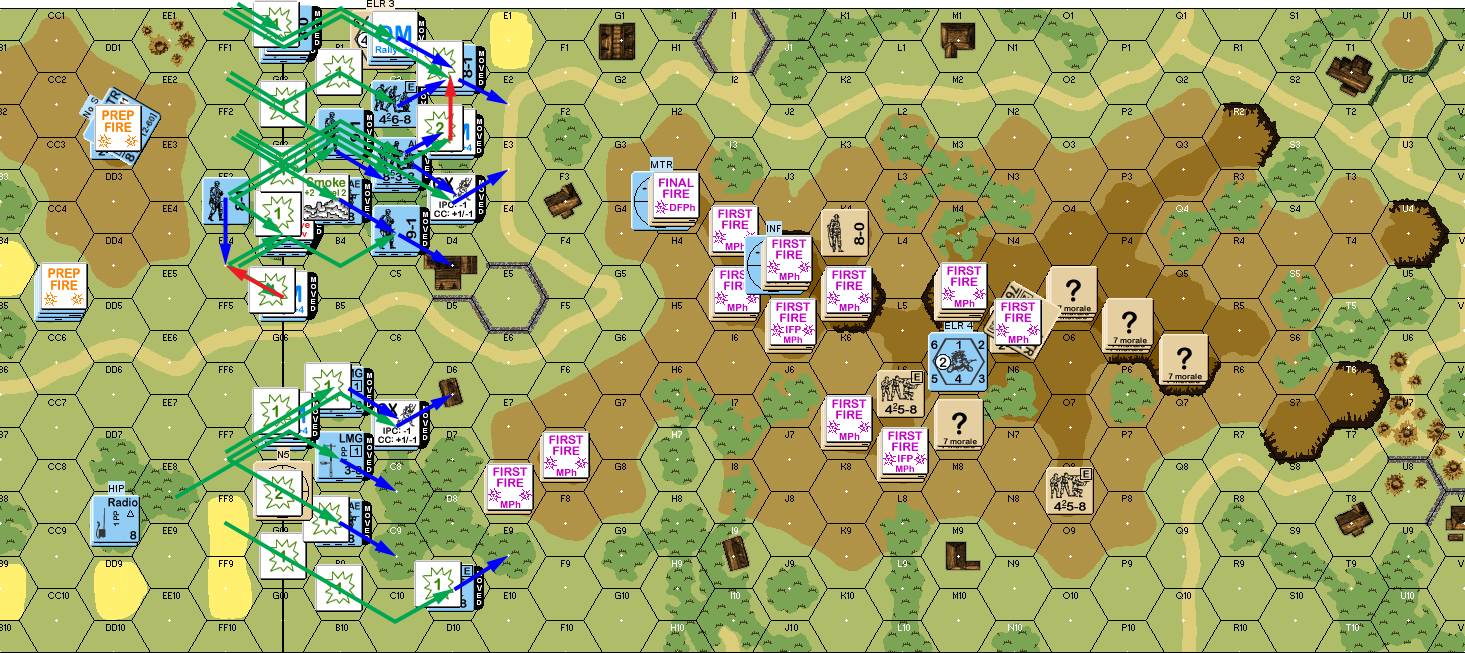
It’s July 1943 and the Brits have taken a dominating ridge in southern Italy. Naturally, the Germans are counterattacking to retake it. The Brits have fourteen elite squads with good leadership, a MMG, six LMGs, a 51mm and a 76mm MTR to hold the board 2 hills. The Germans have fourteen elite squads, plus six 838 Assault Engineers, a MMG, five LMGs, an 81mm MTR and an off-board 75mm INF (one leader starts HIP with a Radio and uses Spotted Fire for the INF, which can’t malfunction by SSR). The Germans start anywhere on board 3 (which adjoins on a short end), but the real reason for all of board 3 to be there is that the INF is off the far end of that board, and counts it’s length as part of the range.

The real twist on this ‘assault the hill’ scenario is SSR 2: All woods are brush. There’s almost no cover out there. There’s a few buildings scattered around at level 0, but the Germans have to advance in full view of the hill, and the British have nothing to work with either, unless they can dig in. The Germans need to have more squad-equivalents on board 2 hill hexes than the British at the end of the game to win, with units at level 3 counting double. I saw a partial AAR on Grumble Jones’ blog (only talking about the middle of the game), which comments that elite troops were dying left and right. Having taken the attacking Germans, this did nothing for my confidence….

Martin had what looked to be a fairly solid set up, with the large MTR and MMG on the back peak of the hill, and all of level 3 occupied. There was a cluster on the mid ‘arm’ of the hill, and the lighter MTR and most of the LMGs on the forward slope. I mostly lined up in one area, where I could crawl through some brush towards a cluster of houses that I could use as a jump-off/rally area. A secondary group (five squads, including one Assault Engineer and a 8-0) would work the other side of the ridge with level 2 hex 2F7 as the initial goal. The MTR was in 3DD2, which as a level 2 hex had decent LOS to much of the hill, while the MMG was in CC5 with the 9-2 leader. As soon as things were supressed at all, it would move forward, and the -2 with light cover would make even long-distance fire scary. The radio was in DD8, where it could see much of the hill, especially level 3, and stray shots shouldn’t be a problem.

I tried putting smoke down on 2I5 to provide cover for the advance, but it seems no one thought to pack smoke rounds for the MTR. It did manage to hit H3 with normal HE for no effect. The INF turned out to be firing at range 41, and so needed a 5 +2 shot (after getting radio contact) with ROF 1; it never actually got a hit the entire game, though I maintained contact the entire time with the exception of one player turn. The MMG did better, with a 1MC, but his LMG squad passed it without trouble.

As a sign of what to expect, my initial probing HS along the south flank was fired on three times, with each shot getting a result. And they passed both MCs and the PTC. It wasn’t until my fourth move, and his fifth shot that he pinned an 838. It wasn’t until my ninth unit moved that he finally broke a squad. In fact, it wasn’t until fairly late when disaster struck at all, when an NMC broke my 8-0 on the south side (my only leader down there), and pinned one of two squads moving with him. This did set off his sniper, who then broke an already-moved HS. Overall, the total carnage from a large number of shots, and moving through lots of residual with -1 and -2 DRMs was a broken 8-0, a broken 468 and broken HS, and three pinned squads.

Martin’s dice weren’t that bad, but mine were better. He averaged ~7.85, which isn’t horrible, and he never rolled over a 10. The problem is there was one roll under a 6 (5). That still should have been enough to cause more problems than it did, but I averaged under 7, though I never rolled a 2, and rolled 4 (his SAN) once. There was also a good number of doubles in there, which would have hurt anyone other than the Brits a lot. My one problem was trying for Infantry Smoke three times, and only getting it once; the first squad pinned before getting in position, the second one rolled a 6, and the third finally gave part of my line some cover. There were only two Final Fire shots, which were about the same. Advancing Fire was a little limited, but I had two blob attacks that pinned units.


Situation, German Turn 1. Note that all of boards 2 and 3 are in play, but the rest isn’t generally important here.
↓ Read the rest of this entry…

└ Tags: ASL, For King and Country, gaming
2 Comments

The Final Reflection

by Rindis on July 8, 2019 at 12:00 pm
Posted In: Books

I’ve long known of The Final Reflection as one of the better Star Trek novels, but I’ve only recently gotten a chance to find out for myself.

It lives up to the reputation.

These days, it needs to be remembered that this came out in 1984, when the known universe was all original series-related, plus 15 years of fan development. At that point the Klingons were still under-developed, and this novel does a great job with one of the first looks at them from the inside. Ideas like the “Black Fleet” still show up in number of places.

The book itself is multi-layered, with a frame showing that The Final Reflection is a novel that exists at the time of TOS, an in-universe “Researcher’s Note” explaining that while fiction, it’s based on as much info as the author could get about events (an amazing number of people were just not available for interviews…) of around forty years previous. And then there’s the novel itself.

There’s some interesting decisions made. The Klingons are generally more advanced than the Federation (they have transporters first, their ships are generally more powerful), and seemingly have been in space longer than Earth, though looking between the lines, the Federation is probably catching up.

The central plot of the book doesn’t get going until late, and just what is going on in a couple places is obscure, with the main character apparently having been several steps ahead of everyone else… and that was largely off-screen. But the real purpose is to present the Klingon world-view. And this is 250 pages of that, and all of it is excellent. John M. Ford could definitely write, and one of his strengths was to take someone else’s world and make it his own by fleshing out a part of it. This book is largely overwritten by later Trek lore, but is well worth a read on its own strengths.

└ Tags: books, reading, review, Star Trek
 Comment 

AP53 Far From Home

by Rindis on July 4, 2019 at 12:00 pm
Posted In: ASL

For my next ASL game with Patch, I ended up looking at the earliest scenario I had available, which is set in the Spanish Civil War (this is actually our second scenario set there, though this one is even earlier than “Italian Brothers“). Patch easily agreed to another SCW scenario, and I took the Nationalist side as it may be my only real chance to drive Pz Is.

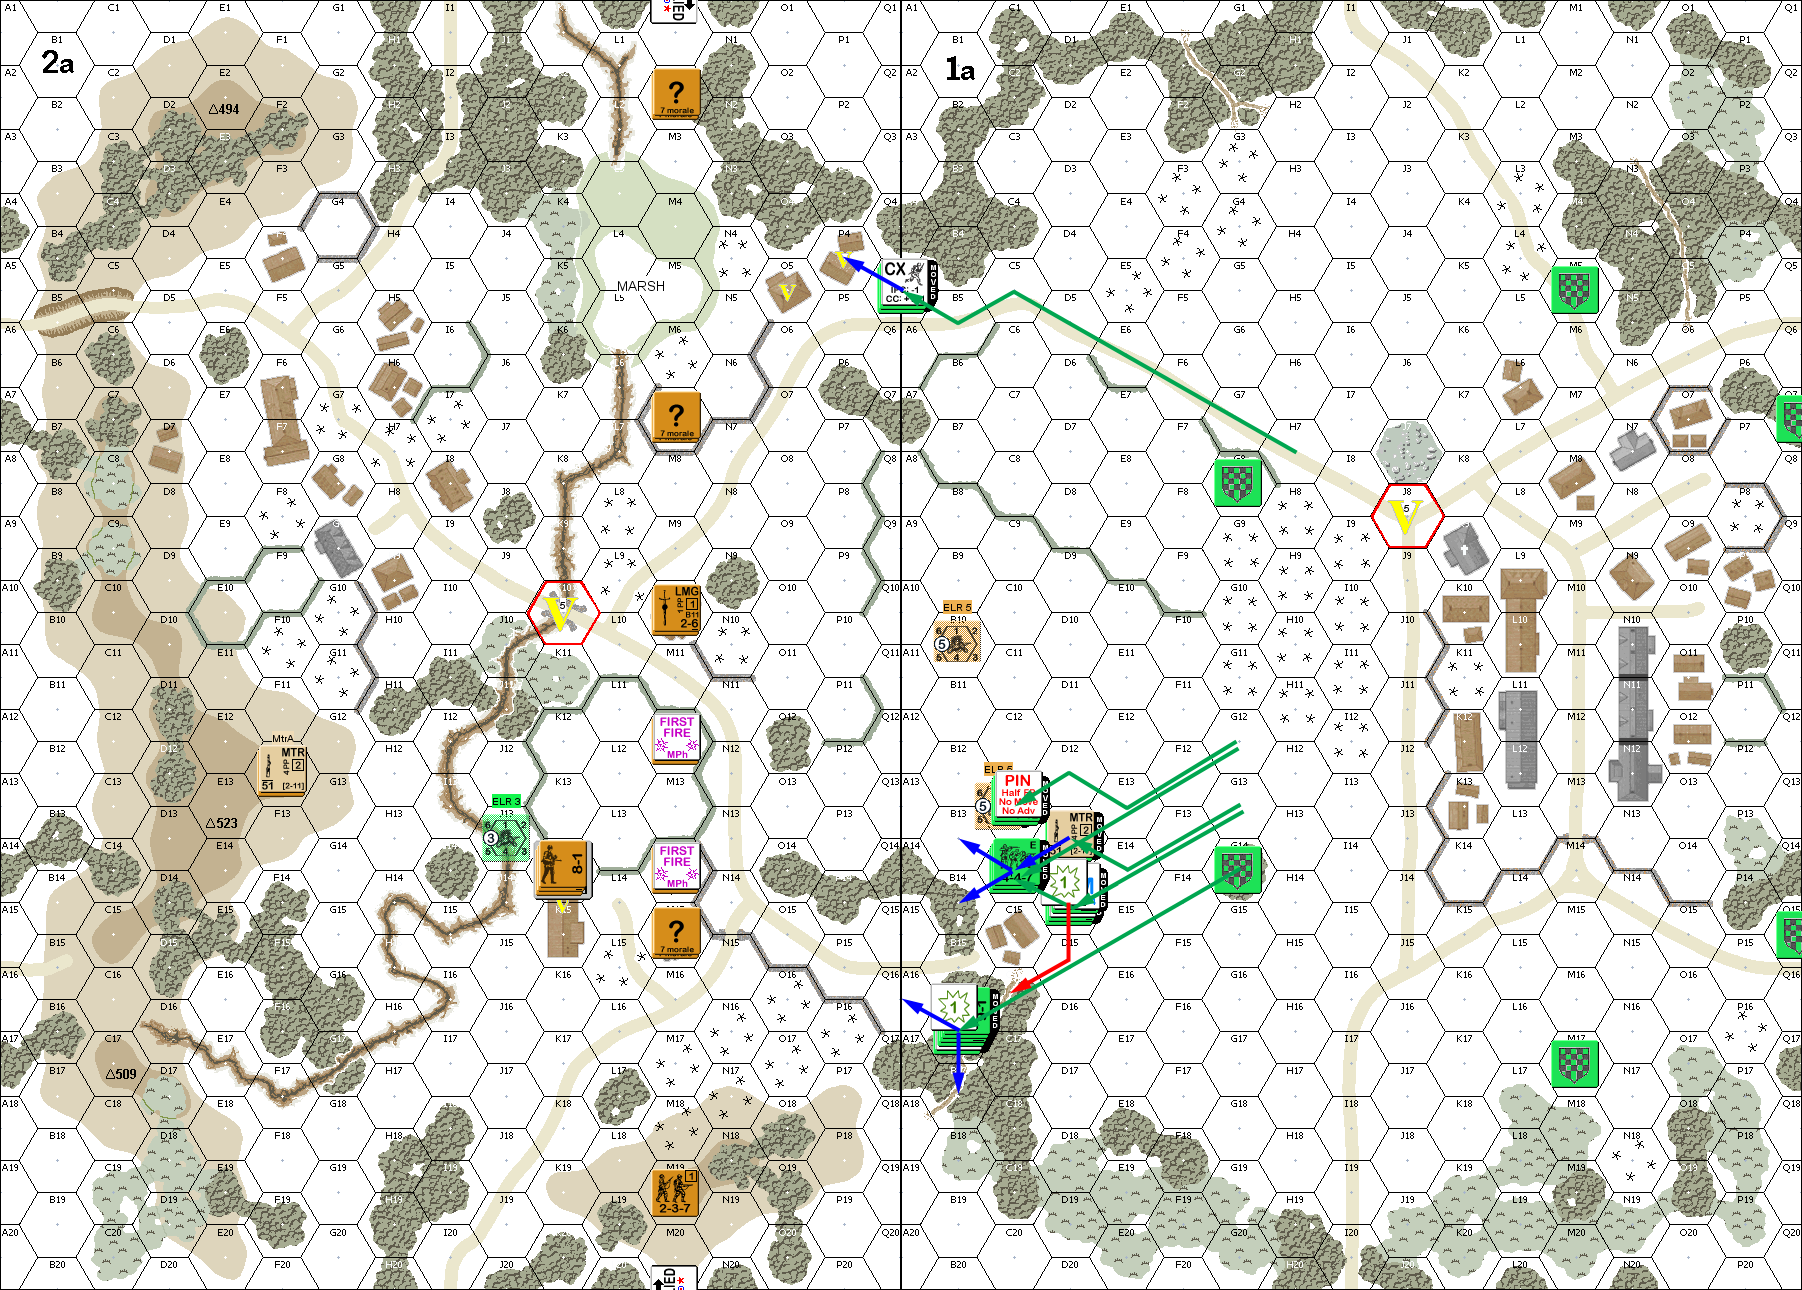
“Far From Home” is from Action Pack #6, and is set in December 1936 during the Madrid campaign. The Republicans set up six first line (Russian) squads and three HS on the bulk of board 2a with Control of three of five victory buildings. The Nationalists set up in/near the town on board 2a with nine elite (Axis Minor) squads, a MMG, and an ATR. On turn 2, they get another 10 squads, better leadership, another MMG, a DC, and six mobile machine gun nests Pz IBs. The Republicans then get a pair of T-26s (with an AL) on turn three, and then twelve squads, a Commissar, MMG, two DCs (and two crews… for the DCs?) as well as another pair of T-26s. Each side also has one British 51mm MTR which doesn’t count as captured (representing a common Spanish design?).

Victory is by a custom schedule of points. You get one VP for each of five buildings there is a GO MMC in at the beginning of your first three turns, and then a point for each one you Control at the end of the game. There’s also a bridge in the Republican area and a crossroads in the Nationalist area that are worth 5VP each at the end of the game (only). Since everything but the crossroads is out of the Nationalists setup area, they can’t get any VPs on their turn 1, and it is physically impossible to take one of the Republican buildings on the first turn. Taking the two ‘unoccupied’ buildings isn’t hard, but with Patch’s setup, getting at the second one on the first turn would mean braving a 4 -2 shot. That implies a standard opening of 3 VP for the Nationalists and 9 for the Republicans. Staying like that would be a 10-17 loss, but taking the bridge would make it 15-12; or taking the buildings without the bridge is 13-14…. Not liking the idea of throwing everything into taking and holding the bridge (and I had real doubts about that), I went against every instinct I had from looking at Patch’s set up, and came up a plan to try and disrupt Patch’s control of his initial buildings before the beginning of his turn 3. The Nationalists win on ties, so just lowering the Republican VP total opens up possibilities.

And a word about those Pz IBs… They use the Axis Minor version of the counter, which is exactly the same as the normal German one, but the scenario makes them much less useful. First of all, they have no radios (and neither do the T-26s), and second, they have Inexperienced Crews. Normally, that’s bad enough with the 6 ML and all, but the CMGs are also the MA, so the +1 applies to every shot it makes. This is a +2 TH (since a 1MT must be buttoned up to fire), and CMG use is 6 +1, plus any TEM…. The good news is that they do still have the two TK rolls against tanks; the base TK# is low, but Patch wasn’t happy with taking the two rolls on each hit….

Oh, I should note that it is snowing at the start of the scenario, so the boards are in winter colors to remind us of that, even though Ground Snow is not in effect. Of course the snow stopped on the first roll of the game….

Having decided to go after Patch’s victory buildings from the start, the bulk of my troops lined up and headed for some woods that would be a good jumping-off point for the main assault. Despite the cover, there was a gap through all the trees where Patch could fire, and he promptly caused an ELR failure in my 8-1 leader, which also pinned a squad. In addition, my squads set off his Sniper while passing the same 1MC, and he pinned my ATR squad. In DFPh his MTR zeroed in on 2aQ17, which was a natural place to want to advance, and to emphasize the problem, his second hit was a CH (not that that meant anything, but…).


Situation, Nationalist Turn 1, showing the full board. North is to the left, and remember the winter colors are purely a reminder of falling snow (which has already stopped).
↓ Read the rest of this entry…

└ Tags: Action Pack 6, ASL, gaming
1 Comment

Moving to Win

by Rindis on June 30, 2019 at 12:00 pm
Posted In: Boardgaming

Had a Jason over for a three-player day of Space Empires 4x (Dave lives here…) on the 16th. Mark was originally scheduled to come, but didn’t make it; thankfully adjusting from four to three is easy for this game. Dave ended up on the long side, while me and Jason had the corners. We stuck with what’s currently the standard rules for the group (pipelines, carriers, heavy terrain, warp points) without adding anything, though no one went the carrier route this time.

Jason and I ended explored our two deep space hexes early, and neither of us found anything bad. However, while Jason found a 10 mineral in one hex, I found a barren planet in one of mine, so I went for terraforming as early as I could, and settled it immediately afterward. For the regular planets, Jason had a fairly good setup for the first rounds of colonies, and was slightly ahead on base income for a while. Dave, however got himself into trouble with over-aggressive exploration of deep space early, and was noticeably delayed in exploring his own space (and of course, he lost a lot of scouts over the course of the game).

Still, Dave became my first worry as his exploration started opening up the area between us. That changed because of two things. First, Jason found a space wreck in the space between us. I managed to get in there, fight him off, and haul the wreck one of my colonies for a +Defense bonus. Second, I moved to colonize a new planet in that area just outside my home space… and realized that Jason had one just outside his home space, two hexes away. That prompted a round of build up and aggression that never really stopped.
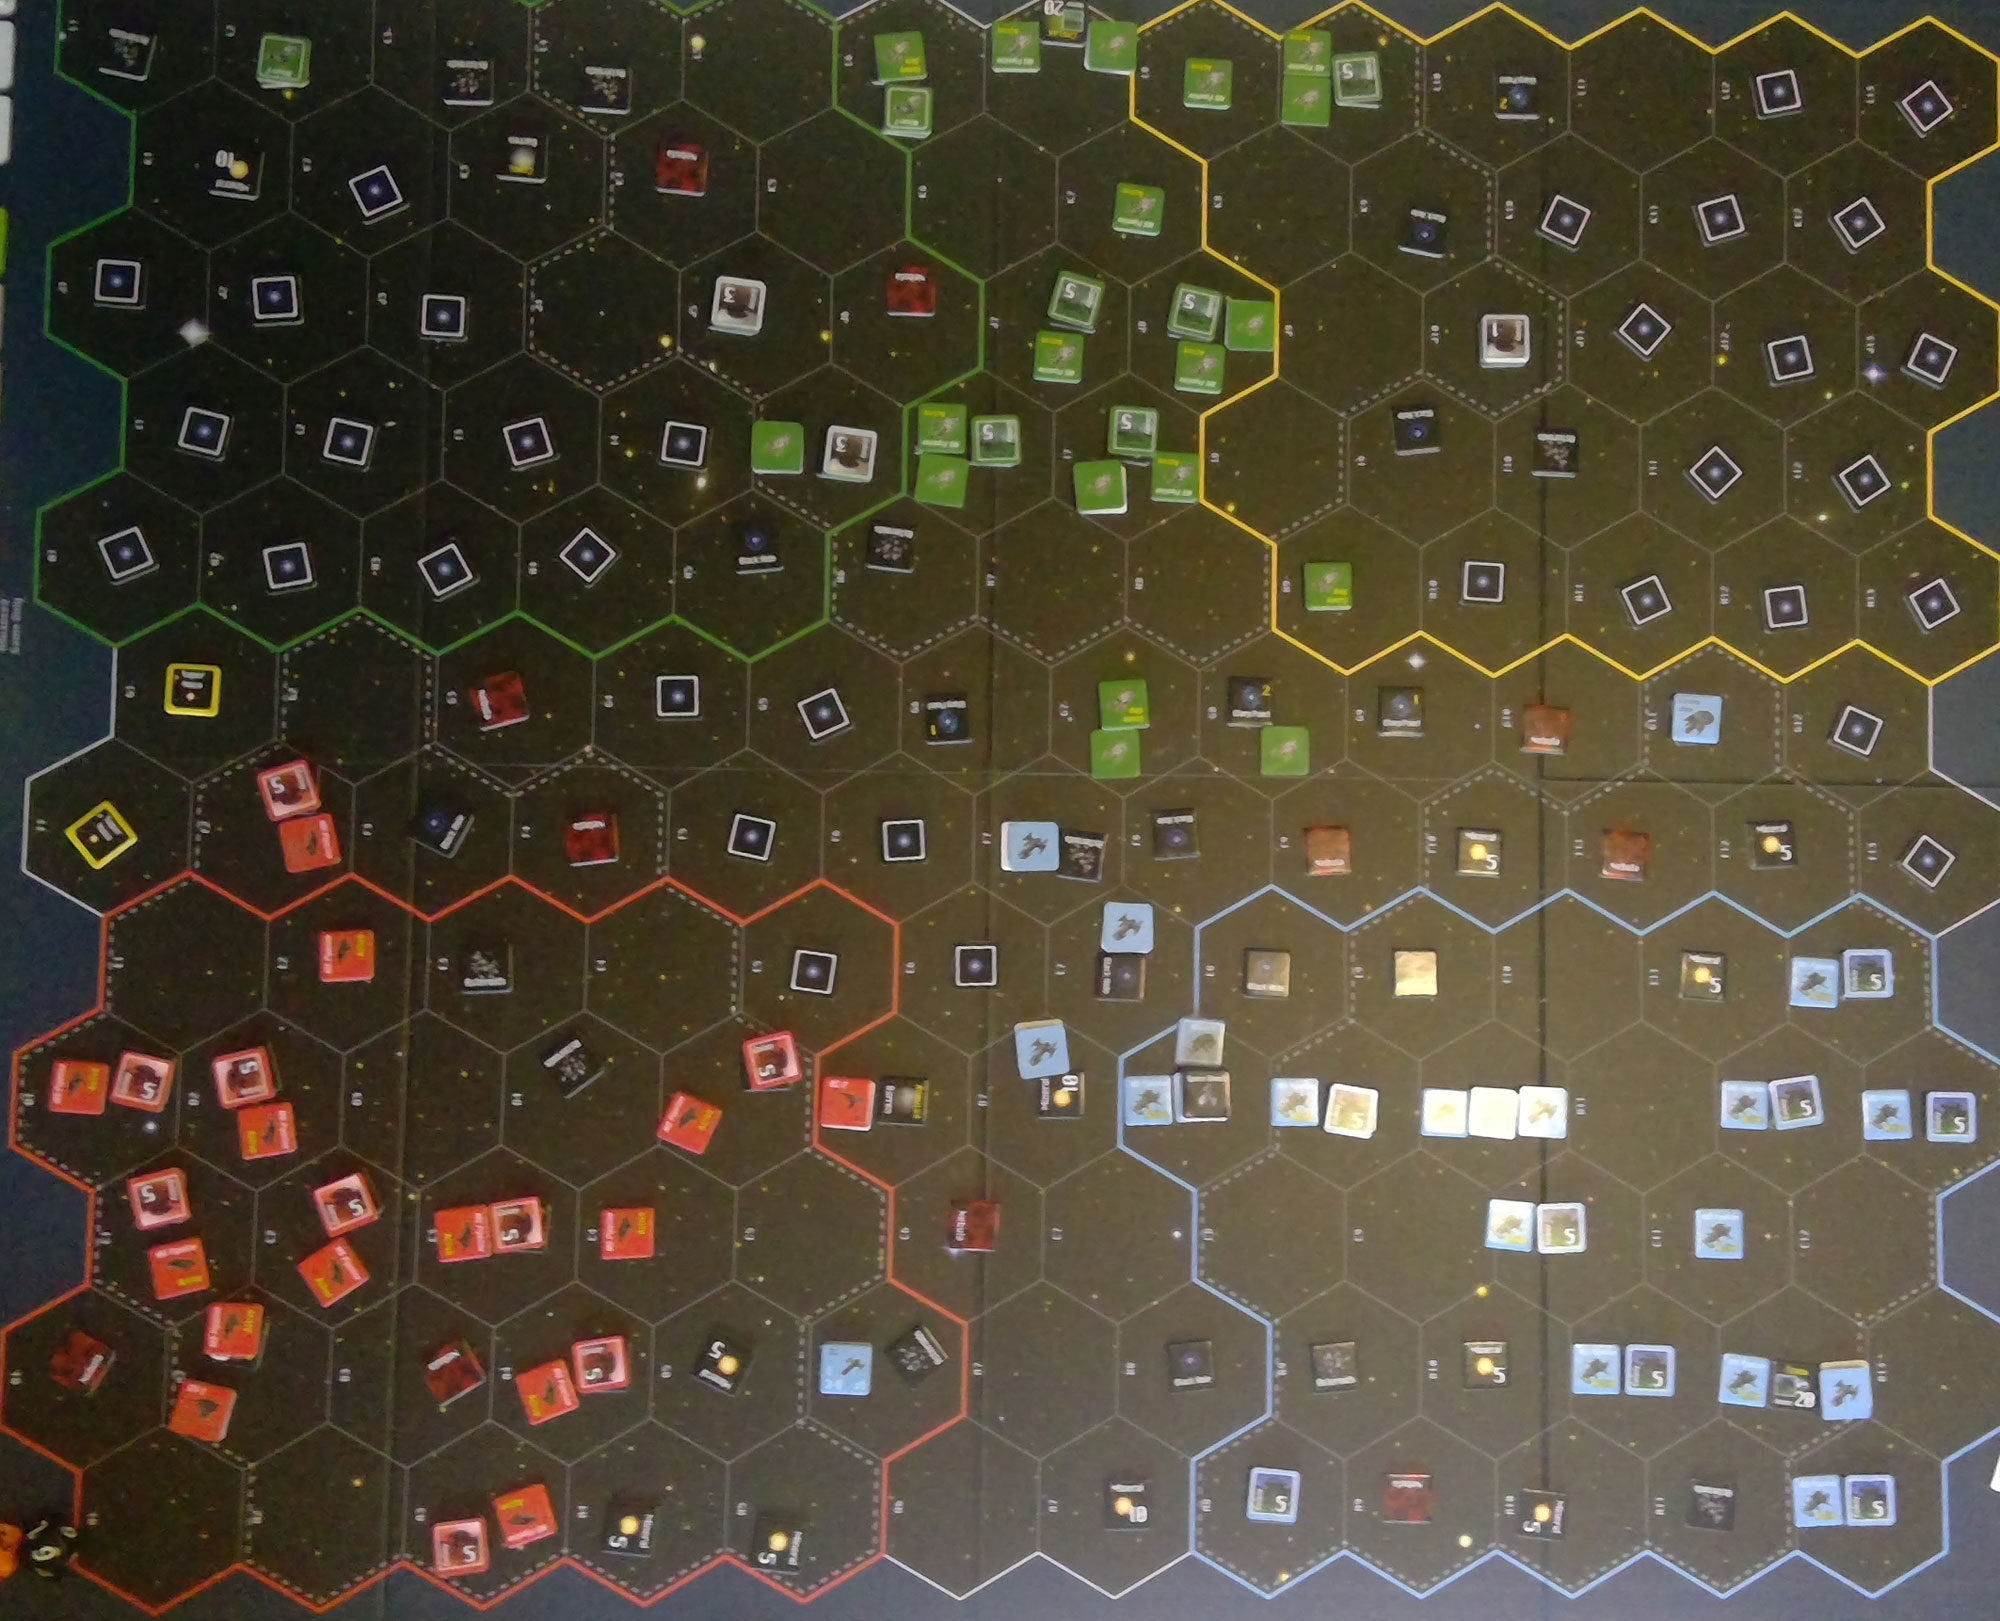

Stopping for lunch. I’m blue, Dave is green, and Jason is red. You can see the space wreck at my newest colony.

It might have stopped as other pressures got into the act, but… things went well. First of all, I was lucky, both in the combats that got me the alien wreck, and the next couple in the aftermath. But, at this point I was on CAs with +2/+2 (the initial cruiser was +1/+2 thanks to the wreck), while Jason was on +1/+1 BCs. The BCs are slightly nicer, but the extra bonuses I had meant that I had better odds to hit than he did, and a bit of luck just made it go from victory to slaughter.

I had a forward base that I could build new ships at, and I upgraded that shortly before going to BCs myself, so I was building 3 BCs there a turn for the rest of the game (my escalating maintenance costs meant I bought no more technology after getting to Move 4 and Size 4). My higher move (3 during most of this, and I didn’t reveal 4 until very late) also gave Jason lots of trouble as I would move around him to cut off pipeline routes and devastate colonies. It took a bit, but his economy eventually collapsed under the strain.

Meanwhile, Dave got himself together, and had explored the area between us fairly well (there was still a group of unexplored hexes between him and Jason at the end). This included a string of black holes between him and the route I was taking into Jason’s space. This was a bit unfortunate, since I couldn’t move toward Jason while also protecting the frontier, as anything aimed at me would inevitably head the wrong way around. And the large build up out there forced me to send one turn’s reinforcement to shadow him. A small fight had revealed a decent number of ships, and BBs. The good news is that they were still +1/+1s, and my fights with Jason showed that that hurts more than might be supposed. I figured I could probably sweep up most anything other than the BBs if I needed to.

But, my wave of conquest had finally reached it’s goal: Jason’s homeworld, which basically had a base and several shipyards. It looked like I might not take it, but I could sweep the shipyards up, and really put the lid on. I needed 6s to hit, and rolled seven 7s in a row for the first couple rounds. I did eventually clean up the shipyards, but lost nearly the entire fleet to do it, and suddenly needed reinforcements out there that had been diverted by Dave.

I actually built a Decoy after that to help make what stayed behind look more menacing. Dave started marching toward my homeworld at speed 1 (paralleling my main pipeline out), I prepared to fight it, and the next round of BCs arrived to help the remnant of the earlier fleet, and managed to take out the base and homeworld.
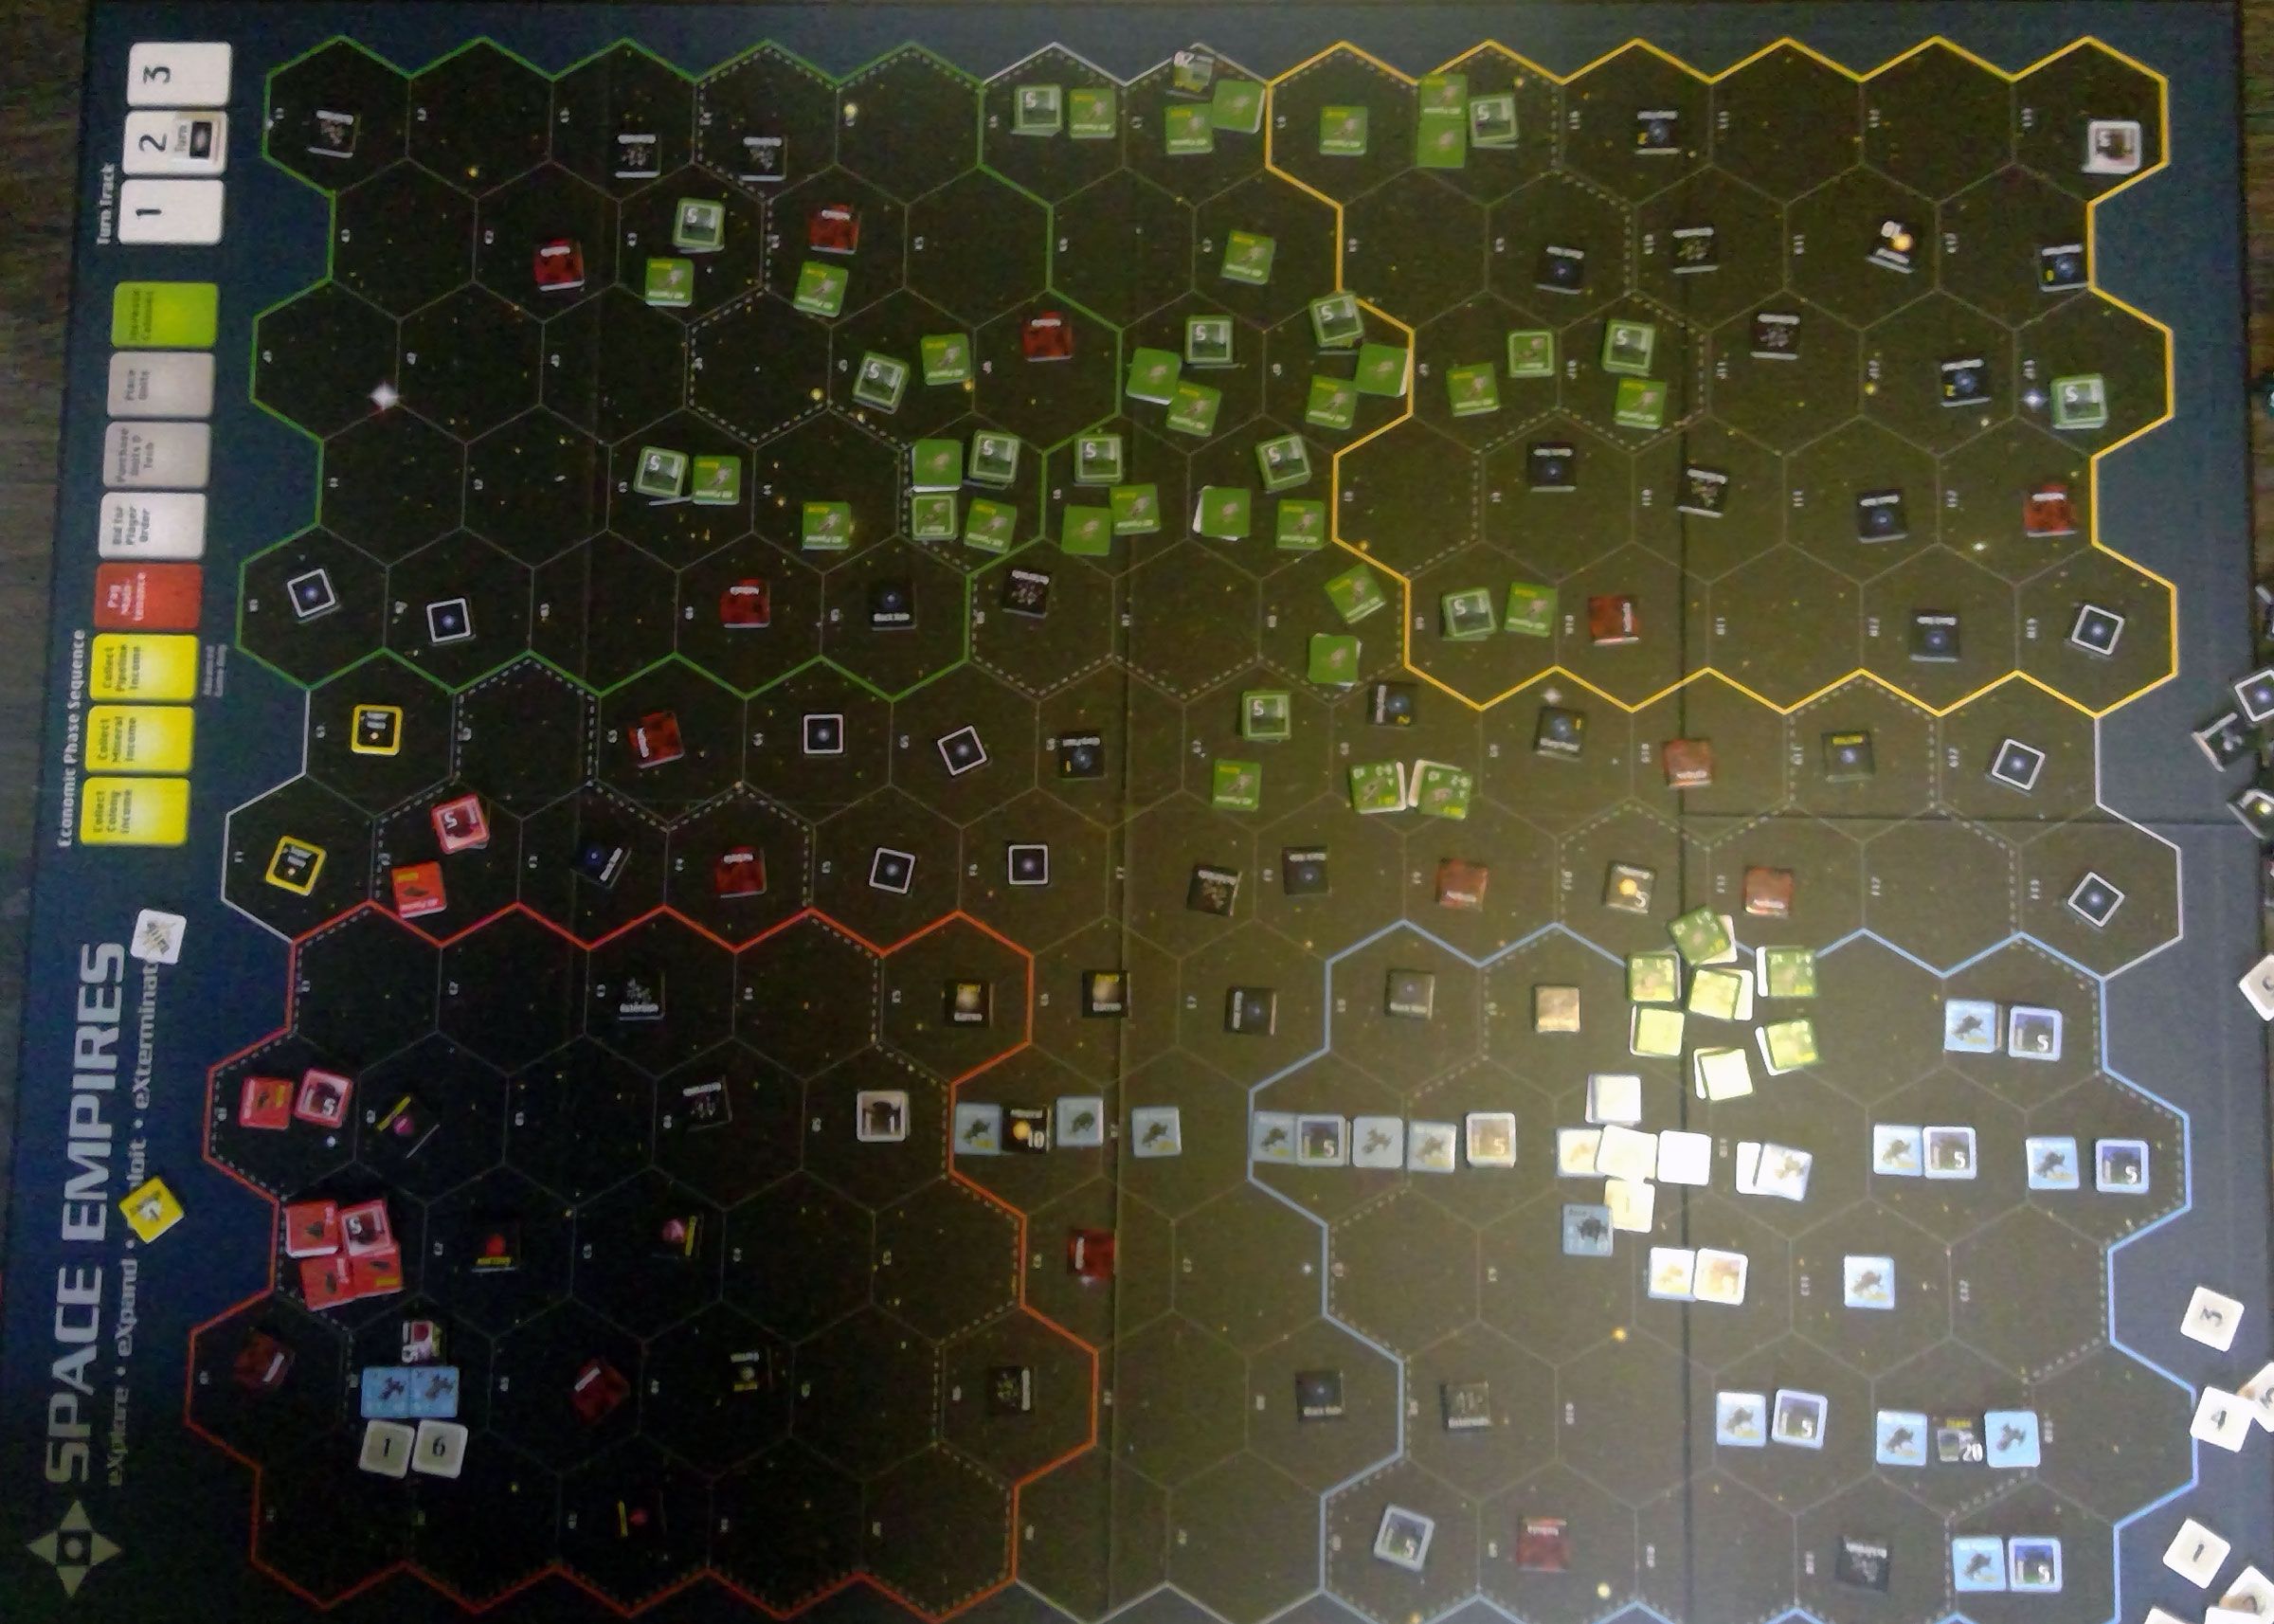

End of the day, with Jason’s homeworld wiped out.

This is the first time one of these has gotten close to a legitimate win for any of us. It’s been a far enough out worry that Dave didn’t realize that was the end goal at first, and was a bit slower going after me than he could have. I think if he’d gone with his initial force, I could have defended myself well, but it would have really de-railed the offensive vs Jason. That said, I was already building out colonies and pipeline into Jason’s area, and I think I could have gotten a shipyard up and running there. Either way, we had a fairly dramatic end, and took us through 15 econ turns.

Jason and I had taken Shipyard 2, which means Dave was building a lot of shipyards to get those BBs out. Jason and I had also gotten to Size 4 (BCs) and stopped there, while Dave had gone to BBs. Jason had, too late, gotten to +2/+2 like me, but Dave was still at +1/+1, though needing three hits against the BBs would give them a lot of staying power. Jason and Dave had both gotten Tactics 1, and I as usual had skipped that. My second to last tech purchase (right before BCs) was Move 4; Jason had taken Move 2 to try to counter me before his economy had faded too much, and Dave stayed at Move 1. My final economy was 71 + 10 pipeline, but I had another colony started, and was getting pipelines out to the colonies I was establishing in Jason’s former area. I technically was capable of 80 + 12. Dave’s econ was up to 91 + 12 already. All the exploration had finally paid off, and I think he was maxing out the countermix for colonies and pipeline. Jason’s highest income was 65 + 9 (back on Econ 9, when Dave was 60 + 8, and I was already 69 + 9), and you can see me picking off some of the pipelines from then on.

Movement is always on the list of ‘I need to get to spending more on it’, and I deliberately went after it as my early focus, with +1/+1 Move 3 DDs. A good amount of DD construction as I went over to fleet build up also helped with getting the fleet size bonus in a couple early combats, and it meant that any lose groups could potentially get around defenders to cut pipeline routes, which caused Jason more angst than I expected. I imagine we’ll see more movement purchases in the future.

└ Tags: gaming, Space Empires
 Comment 
  • Page 131 of 315
  • « First
  • «
  • 129
  • 130
  • 131
  • 132
  • 133
  • »
  • Last »

©2005-2026 Rindis.com | Powered by WordPress with ComicPress | Hosted on Rindis Hobby Den | Subscribe: RSS | Back to Top ↑