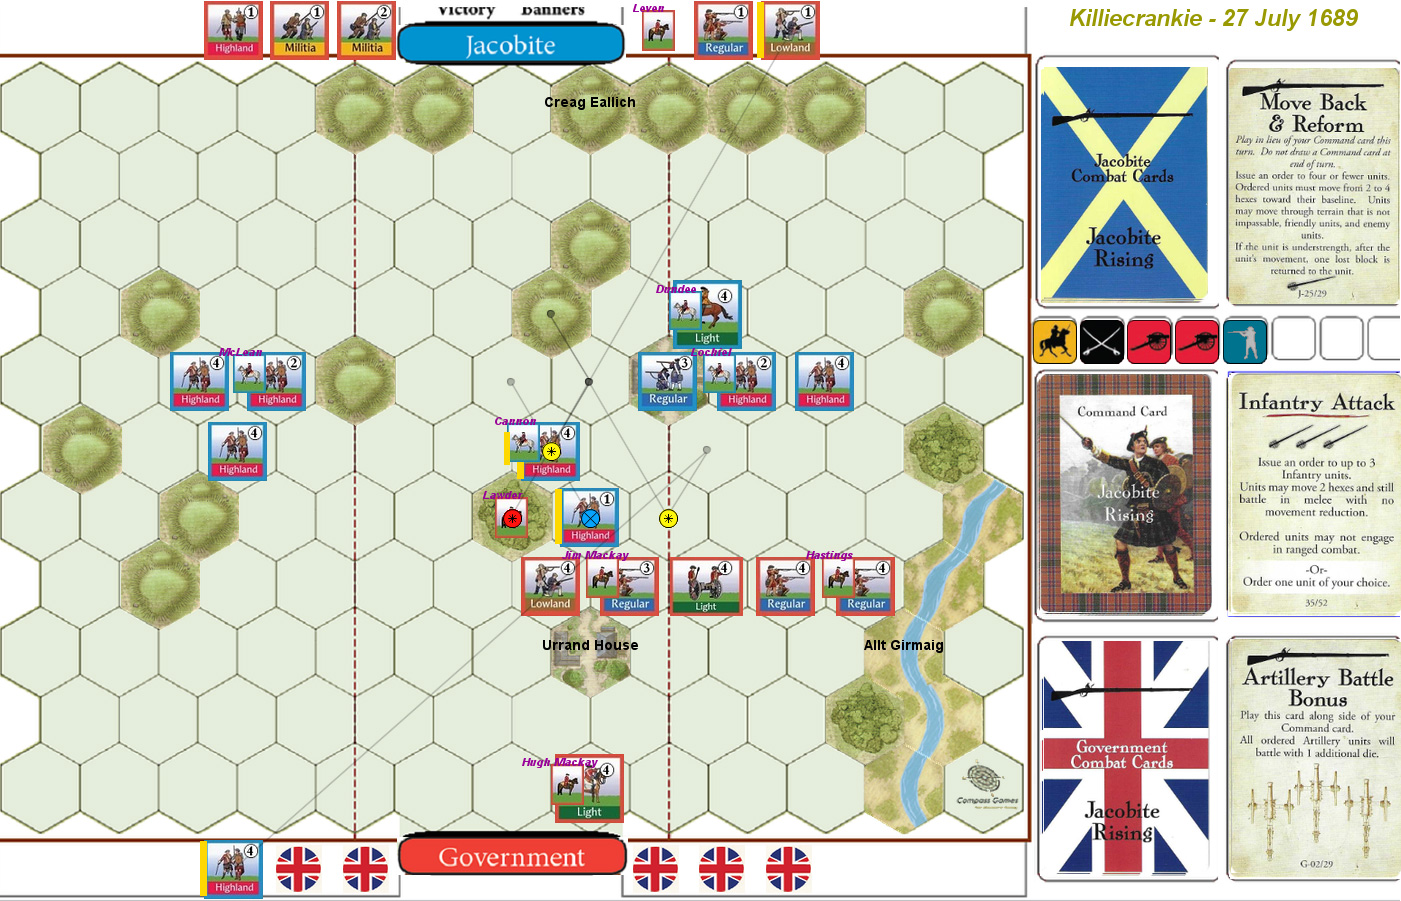
A little bit ago, Mark got the Jacobite Rising stand-alone expansion for Commands & Colors: Tricorne. I’m not sure why he got this while skipping Tricorne, but we ended up trying it out recently. The first scenario deals with the initial Scottish rebellion after the Glorious Revolution, and pits a mostly Highland army vs a mixed government army on a field with a number of scattered hills.
I had the Jacobite forces the first time, and decided that my left wing was probably the strongest compared to their opposite numbers. This first scenario uses the “opening cannonade” rule (which is only used when the scenario specifies it), though there’s only one light artillery unit on board, and it must retire and reform afterwards. The cannonade didn’t do anything, and I went Forward to shore up my entire line. Mark brought the the artillery back up, while Advance Right let me get closer and get a hit on his regulars, but his flank charged in At the Quickstep, with his regulars having a Melee Bonus that was preempted by a First Strike for four (!!) flags, and he could only ignore two of them. He then forced my highlanders to retreat with three flags (one ignored), and then traded two blocks for three on attacks against another highlander. I Assaulted Right, finishing off his highlanders and nearly getting his militia at no cost to myself. Mark countered with Assault Left, and failed to Reform his militia, but did a hit to a highlander. Inspired Leadership let me work on the crumbling Government flank letting me get all three units there and Leven for a cost of one block.
Mark used Scout to get Lawder into the center, and I Moved Back and Reformed to get that flank consolidated, and return a couple of blocks. Mark Probed Right to do a hit to my regulars, and I Probed Left to get into charge range. Line Command ordered the bulk of the remaining Government units who mostly stayed still and fired to do two hits to a highlander. Infantry Attack let me get my center into contact, and a lost a full strength highlander to a failed rally roll, nearly lost another (took three hits), but got his lowlanders in two attacks. 6-1
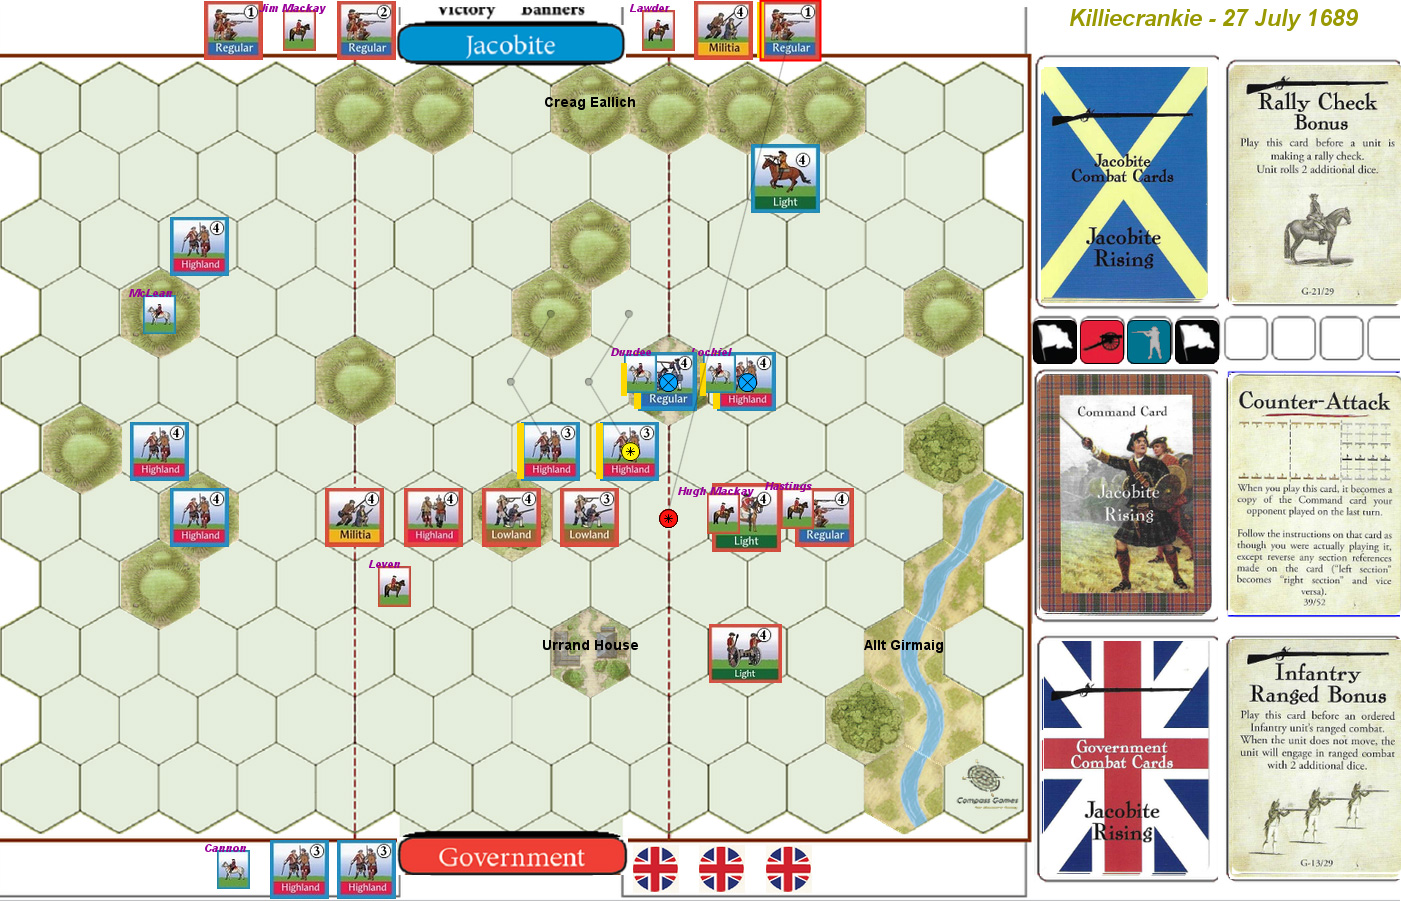
For the second game, the opening cannonade again did nothing, and Mark led with At the Quickstep to move his right flank up and do one block to my regulars. I failed to repair the damage with Reform, and ordered an Infantry Attack in the center to force him out of the center building and occupy it. He Advanced his Center to do a block and force me back out, while also doing a block and retreating my lowlanders. Line Command let me get the left and center up, and a lucky hit killed Cannon. Line Volley forced me back a little, while Assault Center let me take the building again after taking a hit, though I retreated back out on a Scout.
I failed to Reform again, and Out Flanked, getting no results. Mark then Out Flanked, coming into contact on both flanks. He eliminated my forward regulars, the regulars on my left, the leaders with them, and a militia, all of whom failed to rally after being forced to retreat. I Assaulted Right, and forced two highlanders to retreat, the second of which also failed to rally, even after a Rally Check Bonus. Mark moved up At the Quickstep, and I had an Inspired Leader Right, who routed another highlander. Mark Counterattacked and eliminated a regular in two attacks. 3-6
Afterword
This is the sixth Commands & Colors game I’ve tried, and it continues to be a fun light series with a different feel each time. Here, every time you retreat you have to roll to stay on the field at all, which seems a little harsh; the dice have two flag results on them, so there will be lots of retreats and most of the time they will rally. There’s a lot of modifying the number of dice you roll, combined with different numbers of dice at range for each unit type. However, it’s consistent enough that it’s not nearly as annoying in practice as I would have assumed.
Both games had a fair amount of luck going into them, though nothing like the five routs in a row I suffered in the second game. It was being fairly close until parts of my line collapsed, and I’m lucky to have gotten any banners at all during that game.