Dragon’s Egg is a story assembled out of a few disparate parts. There’s the formation of a neutron star from a supernova, the discovery of said star by astronomers in 2020, an expedition to said star… and then there’s what’s happening on the surface of the neutron star, which proceeds through several different arcs.
That last, of course, is where the main imaginative elements of the novel come from. Incredibly, this is an exercise in hard SF, with the main speculative part dealing with the idea of the surface of the star hasn’t quite collapsed all the way to neutronium, allowing for complex interactions (and the evolution of life) utilizing the strong nuclear force. The resulting (very) alien ecology is never explored in any detail, but there’s plenty of details given in the chula’s (the intelligent life that evolves) biology(?) to drive home just how different everything is.
Since strong nuclear reactions are much faster than familiar chemical ones, it is posited that everything happens on the Egg at an accelerated pace, and this is continually driven home by each section being given a timestamp down to the second, with not a lot of time passing for entire generations of chula. The rise of an advanced civilization takes a few hours. This leads to a cast of characters that, in one part, is constantly shifting (“These fifteen-minute lifetime relationships are hard on the emotions.”), but are generally well-drawn.
This is ‘idea’ SF at it’s best. A suitably strange-seeming idea is proposed (what would life on a neutron star look like?), and then a story explores the ramifications of the idea. In this case, both the science and the plot are very good, and the novel is an overall fascinating read.
I’ve been meaning to get some more PBeM gaming in this year, and at the time I happened to be in a real F&E mood, a new player asked for a teaching game on the ADB forums. I accepted.
As usual when I do something like this, I ended up with two games. The second one with a fairly experienced player. I had been wanting to try out the revised Hurricane scenario, which starts the action as the Romulans invade the Federation in support of the Klingons who invaded three turns earlier. In addition to getting the Romulans into the action early, it also gets us to the introduction of later carrier types and some new mid-war ship types that I haven’t seen in action.
So, despite saying ‘turn 10’ in the title, this is the start of the game. With the title of the scenario being “The Hurricane”, calling this game “Konya wa Hurricane” (There’s a Hurricane Tonight) seemed obvious. But for those who need the reference:
I’m playing the Coalition, and Byron Sinor is playing the Alliance, and we’re using what I consider the ‘main three’ expansions, Fighter Operations, Combined Operations, and Advanced Operations (short of the optional rules), which is about what I think I can remember in terms of new rules. We also adjusted the OoB slightly to account for older ships that show up in Gale Force (which was revised last year, and starts after this scenario):
Also, we’re testing out a bunch of new Auxilaries that have been added to the on-line SITs but have yet to be published. At least in theory; we’ll see if either of us does much with them. Guidelines:
1) Auxes generally use the FO2016 unified rule.
2) All Aux production (and conversion) takes ‘pods’ as well as EPs. Federation & Klingons get 8/year, Tholians get 4/year, everyone else gets 6/year.
3) The existing limits for particular types of Auxes still limits them. (Probably just count the jumbo and heavy auxes as part of the large limit.)
4) Auxiliary combatants are not tied to provinces as in CL43 playtest rule, but they don’t exist for activation either. Only built Auxes are available.
As a large scenario, setup is actually complicated, as certain ‘strategic reserves’ are set up after most everything else, and can be shifted between fronts, while most forces are assigned to a particular region. I started ignoring my own plans there, not concentrating them in a few places as I had meant to as I worried about various problems. Production was certainly nice, as the Coalition has the luxury of occupying most of Hydran and Kzinti space to swell their economies.
The Lyrans raided the Kzinti capital province (most everything else was likely to be disrupted anyway), while the remaining six hit Fed space (the Romulans only put two ships into the Raid Pool this turn). Only three raids succeeded, but only one raiding D5 was crippled, and no raiders were lost. In addition, the BATS in 2308 lost its fighters fighting off an adjacent raid.
With everything in good shape (the scenario decrees a number of ships crippled at start, but you can easily set them up on bases to repair them), I did offensives across the board. The Hydrans somewhat inexplicably have an intact planet after everything else is wiped out, and I sent in the fleets to there, including some of the Aux CVs, which was a mistake. I went after the Kzinti capital as it has several planets that have recovered from devastation, but still have no defenses. In NW Federation space, I tried going after several planets and BATS, but blew my sequencing so the 4th Fleet could react to save 2306 (Cygnus) as all the other major fleets in range of the SB had moved. I actually saw the problem, but just didn’t want to go back and re-record a long log I was in the middle of. The Romulans naturally poured over the border to take out the border BATS and threaten the 6th Fleet SB and adjacent planets, with the Home Fleet coming up to set up shop on one the NZ planets.
[Green arrows are movement; light blue are reactions, and darker blue is Reserve movement.]
Kzinti space and the Federation border.
The Klingon-Federation border.
Day of the Eagle
Out of the capital, but not off the map.
Battles:
0217: SSC: Hydran: retreat
0218: SSC: Hydran: dest POL; Klingon: crip F5
0416: Hydran: dest NSC, DDS, crip 2xHR; Lyran: dest STJ; crip 2xCW, DW; Klingon: dest D6M, 2xE4A, SAV, crip D6G, F5
1702: SSC: Kzinti: retreat
1902: Kzinti: dest BATS, CLD, SDF; Klingon: dest D6J, F5L, crip D7C, D5, F5
1802: Kzinti: dest FKE, crip CVE, DDE; Klingon: dest D5, E4, crip 2xD7, F5E
2006: Federation: dest BATS
1702: Klingon: dest F5
1401: Keevarsh I: devastated; Keevarsh II: devastated; Vielsalm I: devastated; Vielsalm II: devastated; Vielsalm III: devastated; Vronkett: devastated; Kzinti: dest CLD, 2xFKE, SDF, SAD, crip CL, CLD, 2xSF, capture DWG, E4A; Lyran: dest CWS, 2xDW, DWE, crip CA, 4xCW, CWE, STJ, DW, DDE; Klingon: dest F5, crip F5, E4A
2004: Federation: dest BATS; Klingon: crip F5
2106: Klingon: dest 2xF5
2308: Federation: dest BATS; Klingon: crip D6
2311: SSC: Federation retreats
2306: Federation: dest 3xPDU, DD, crip DD, SWAC; Klingon: dest MD5,F5L, 2xF5, F5E crip D7, D5, F5; Lyran: crip BC, 2xCW
2211: Retreat after declined approach
2312: Klingon: dest F5L
2509: Federation: dest FF; Klingon: dest D5A, crip F5
3212: Federation: dest BATS; Klingon: crip F5
3215: Federation: dest BATS; Romulan: crip WE, SNB
3415: Neutral: dest 2xPDU; Romulan: crip WE, capture planet
3414: Federation: dest BATS; Romulan: crip BH
3613: Federation: dest BATS; Romulan: crip K5L, K5
3812: Federation: dest BATS; Romulan: crip SK, SNB
3912: Neutral: dest 2xPDU; Romulan captures planet
3612: Romulan: dest KE
3711: Federation: dest 2xPDU, crip 3xFF; Romulan: crip K7R, capture planet
3611: Federation: dest CC, DD, crip DD, FF, 2xFFE; Romulan: dest SUP, K4, crip SP, 2xSN
Tackling the main Hydran fleet turned out to be a lot tougher than I had anticipated. Not only does the IC allow for high ComPot (even for Hydrans!), but they were able to force a -2 shift with relative ease. (I started chipping away at that.) I decided to pull out before I exhausted all the fighter reserves, and left a large Hydran fleet loose with a lot of Coalition cripples around. I had anticipated pushing him off the last intact Hydran planet, and so brought along the Klingon SAV, which I promptly lost in the slow unit battle.
A D6 and F5 vs 2xPOL rolled a ‘2’, allowing one to retreat after the other withdrew to 1802. Meanwhile, a decent force took out the last Kzinti BATS, and both sides then retreated onto 1802 (further talks about the meaning of ‘units’ in retreat says I may not have been able to do that; it would have been close though). Sadly, a successful ground assault took out a defending ‘G’, but couldn’t do more on a second roll. Both sides then retreated off the planet, with the Kzinti going to 1702 to kill the F5, and re-open the supply grid to 1802.
The raid on the Kzinti capital went well, since I was fighting his ships without defenses backing them up in the outer systems. I re-devastated everything outside the main system and managed to pick off a few valuable ships. However, the we finally saw good capture rolls for the retreat and the slow unit retreat, letting the Kzinti get two poor ships: a DWG and an E4A. The slow unit retreat tripped me up again, with Byron able to bring extra ships to balance the non-slow escorts I was using. Still, I have a number of spare E4As at the moment, and nothing bigger went.
I went in for a round at the major planet at 2306, and regretted it when the Feds rolled a ‘6’ with a larger line than I had expected. I mauled half the the PDUs, and then got an approach round to burn off most of the resulting involuntary minus points before retreating. He killed the MD5 in form, so at least it saved killing the BC.
Having already taken more damage for less gain on the Klingons than I wanted, I retreated out after a declined approach battle with the 3rd Fleet SB. The Federation also retreated off, hitting a little two-ship holding force in 2312, and reestablishing main grid supply.
Byron was understandably surprised when I put the D5A on the line in 2509, but I wanted the extra ComPot, and wasn’t expecting to be facing yet another -2 EW shift, which canceled my plans for actually using the SFG. And, I’m not a fan of the marginal abilities of the D5A, so I’m not too unhappy at losing it.
About half of the Federation 4th Reserve went to 3612, which was still far better than what the Romulans had in the hex. I didn’t want to kill a KE, but it was that or cripple 3xWE, and probably lose them all in pursuit.
Overall, I can’t help but be disappointed with the results, though I wasn’t really expecting to take planet 3711. I knew there would be some problems, as I’m stepping into a big war in progress without a great idea of what shape everyone is in. There’s no immediate ‘history’ to provide momentum. In addition, I made a number of mistakes, and did not really focus on just a few goals. Over our years of play, Bel has been playing catch-up to me, and now I’m facing someone who knows the game much better than I. In retrospect, I needed to pay a bit more attention to mauler and scout builds, as the Alliance EW situation is a lot better than I expected.
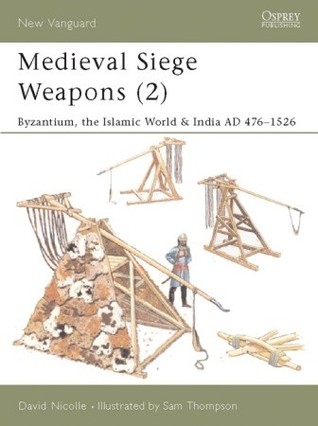
The second volume of Osprey’s New Vanguard books on medieval siege weapons is pretty much just like the first: Thompson’s gouache illustrations do a good job of showing some specific examples, while the text goes through variations on terminology and tries to make sense of them.
India probably should have just been left out of the book, as most references are ‘there’s no evidence’. The Byzantines talked about siege machinery often enough, and Islamic writers somewhat less so, but there’s very few known references to siege machines in India. In fact, all but one of the illustrated machines are from Byzantium or the Islamic world, and the one exception is surprisingly enough from Russia. That one is a little unsatisfying, as there doesn’t seem to be any indication that an idea of the size or form of the ‘fire wheel’ (other than the name) is given in the source; that said, the reconstruction given is more logical than anything I’d come up with.
India isn’t entirely absent, and there’s even a mention or two of siege machines in SE Asia, so the effort is there. In combination with the volumes on China, and Greece and Rome, Osprey has probably covered all the pre-gunpowder siege engines of the world. At least as far as scholarship has uncovered mentions of them.
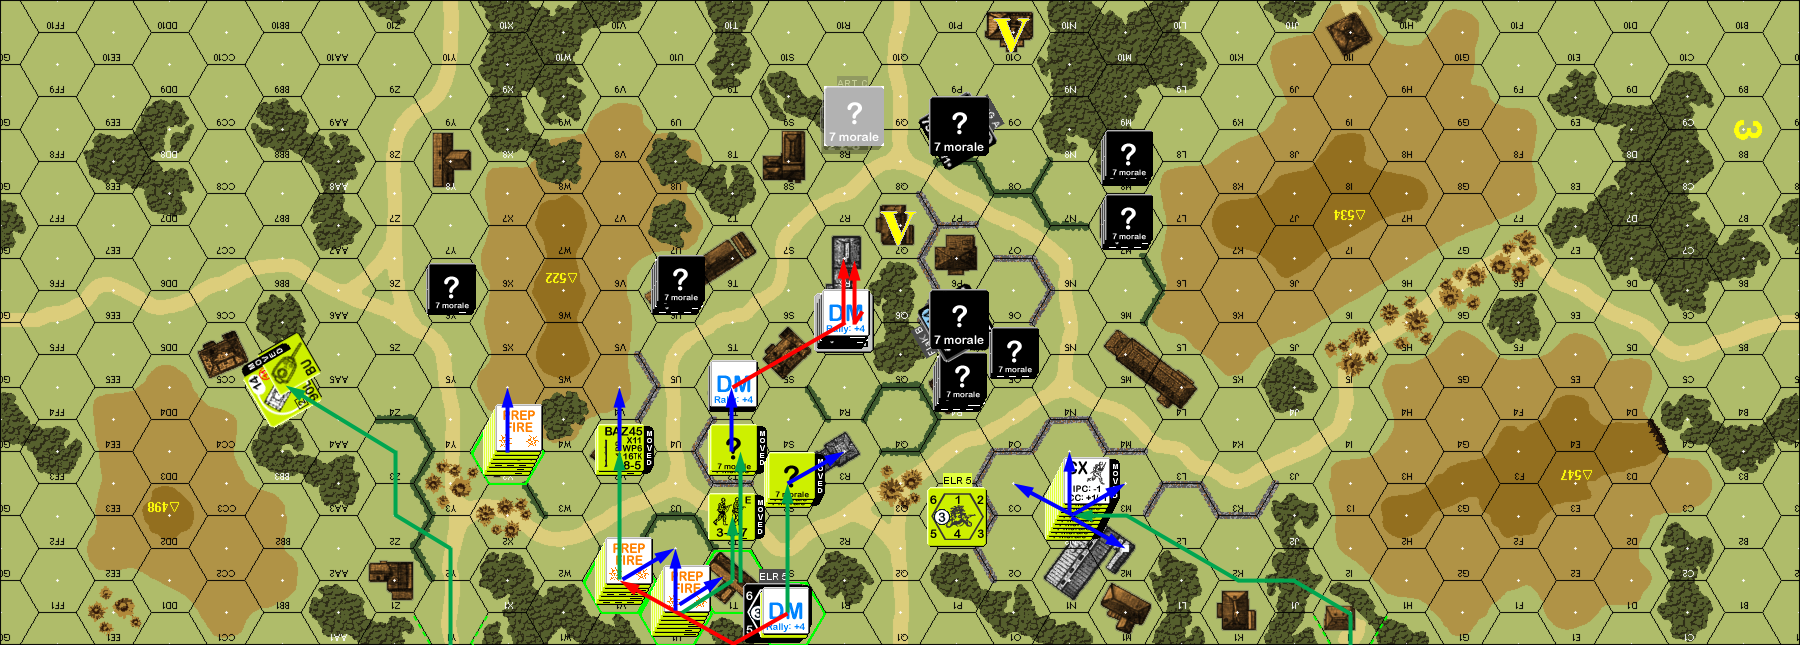
For our next game, Tom and I ended up with a small scenario from the new Yanks (and originally from The General), 195 “Rocket’s Red Glare”. The SS are defending the board three village against a large number of American paratroopers backed up by a M36 GMC… and a number of captured panzerfausts. Setup is a little odd, as the Americans get to start in a fairly restricted area (five hexes) on board, or enter on turn 1, and must first decide which troops are doing which. Then the SS sets up, and then the Americans set up the on board troops and prepare for entry.
The Germans have 7 regular SS squads, reasonably good leadership, a MMG, HMG and LMGs, a PSK, a StuG IIIG (L), a Wirbelwind, and a 105 ART to defend two buildings on board 3 for six turns (and I should point out at this point that we missed the MMG, so I played this with just the HMG and LMGs). The Americans have 12 paratrooper squads, great leadership (four leaders ranging from 10-2 to 8-0, and all but that last have a negative modifier), with four MMGs, four BAZ (two each 44 and 45) and four PFs (normally marked with DC counters, but Vassal has American PF counters, which we used), and they win immediately upon getting Control of Q7 or O10.
I would have liked to set up on top of some of the hills to get good LOS, but the restriction to setting up in woods and buildings precluded that. The StuG and ART were part of the final line of defense, with each one pointed down the road loop near the close victory building. Most of the rest of the setup was scattered through the village, with some outliers on each flank in case he tried to go around everything towards O10. Tom put most of his forces onboard, with the M36 entering at Y1, and a platoon entering at I1.
He started by deploying two of the on-board squads, and one off of I1. He tied a fair number of men up in Prep Fire, but rolled well, and killed a HS in W4 outright, as well as breaking two squads and a 8-0 in the village, though my sniper broke a squad of his in return. This allowed him to occupy the south-west end of the village without trouble, and entering platoon took up positions around N2, while the M36 strayed out of contact with anything else in the west.
My biggest regret about Reed Browning’s book on the War of the Austrian Succession is that he never wrote any other military history. His normal subject seems to be the British government of the early 18th Century, which is probably a bit too detailed for my general tastes (and also, somewhat surprisingly, ’20s baseball).
But this volume is an excellent one-volume history of the war as a whole, concentrating on the military and diplomatic activities of the principle actors in Europe. The New World and India do get coverage, but it is at least as peripheral as the events would have seemed in Europe. For an overview that is more than fair, but the narrative for both theaters felt not fully formed. (Similarly, the ’45 Jacobite rebellion gets about a page, which is fair.)
The main event is more than complicated enough to need all the attention and focus that can be brought to bear. He starts with a good overview of the political conflicts that led to the outbreak of war, and presents the main theaters of the war. However, while the maps follow this outline well, they’re very primitive, and do not have any of the details needed for later in the book.


 Dragon’s Egg is a story assembled out of a few disparate parts. There’s the formation of a neutron star from a supernova, the discovery of said star by astronomers in 2020, an expedition to said star… and then there’s what’s happening on the surface of the neutron star, which proceeds through several different arcs.
/pic3676780.png)
/pic3676783.png)
/pic3676784.png)
/pic3676786.png)