
SL157 The Fog of War, the Frenzy of Space
A little bit ago, Patch and I finished our play-through of Y161 scenarios. The finale was a fleet battle of the Four Powers War. Patch initially looked at it and refused as it had far too many ships for what he wanted to handle. Then, I started reading off the terrain effects going on, and he changed to, “I gotta see this.”
Basically, the Hydrans attempted to hide a fleet concentration with the emissions of an unstable star. The Lyrans find out anyway, and send in a fleet, and just as the battle begins in earnest, the star goes supernova. This simplifies the scenario, as the blast wipes out all the fighters. On the other hand, supernovas are a combination of terrain types: nebula, radiation, heat (which we did wrong, as it only extends 20 hexes from the wave front…), pulsar, and asteroids (representing stellar debris flung out by the star). The Lyrans have the bigger force (eight ships, ranging from a pair of CAs down to three DDs and a SC—that last is nearly useless here), but the Hydrans have some hellbores and can take a hit (six ships, LM command cruiser, RN and DG, and three Lancers).
The scenario specifies that the initial pulsar burst (with an assumed base strength of 60) happens on impulse 0 (or impulse 32 of turn 0, if you prefer), so you resolve that, and then do EA for turn 1. It does not say if the nebula rules should be in force at that point, or if that’s supposed to follow right after the initial blast hits. I kind of suspect the latter, but what language there is more implies the former, so shields were at minimal levels (thanks to the nebula) when the initial blast hit, and rolling the damage on fourteen ships took the entire first session. The three Hydran cruisers came out of that in relatively good shape thanks to the unified hull and Hydran ability to take the first hit.
I still lost two out of six hellbore torpedoes on that first round, and they’re the ones with the best reach thanks to their 2d6 to hit roll, and the nine points of ECM caused by the nebula (+3 shift, easy to lower to +2, but getting down to +1 is hard). The Lyrans were hit a bit harder, and all the smaller ships had trouble, including one of my Lancers being Out of Control (all three one-box control spaces were knocked out).
Once that was resolved, this is what we were looking at over the next turn: Impulse 4: heat and radiation damage, Impulse 5: random movement from the nebula, Impulse 12: heat and radiation, Impulse 15: nebula, Impulse 16: supernova wave front advances, Impulse 20: heat, radiation, and pulsar burst, Impulse 26: nebula, Impulse 28: heat and radiation. In addition, every impulse two new seven-hex asteroid clusters are generated at the wave front (in a bit of ‘neat game physics trumps reality’, these move across the map at speed 20, warp 2.7). Patch managed from speeds 14 to 16 with his ships, while I was going speeds 11 and 12 (largely with reinforced #4 shields, planning on turning them to face the pulsar blast on impulse 20).
The fleets start about 20 hexes from each other, so terrain worries were uppermost in both our minds. The heat damage on 4 (since the first blast had helpfully knocked down a shield for everyone) largely hit weapons (or a battery on each of the three Lancers as the initial volley had taken out all hull). Then the nebula movement on impulse 5 caused havoc. This always moves a ship one hex in a random direction, and will often turn the ship 60° (leaving turn mode status where it was, so you can turn back immediately if it’s already satisfied). Most of my ships did not turn, but largely got shoved backwards, while Patch’s ships ended up pointing all over the place, including the two CAs pointed back towards the wave front, who then started turning further in that direction to keep the down shield away from me.
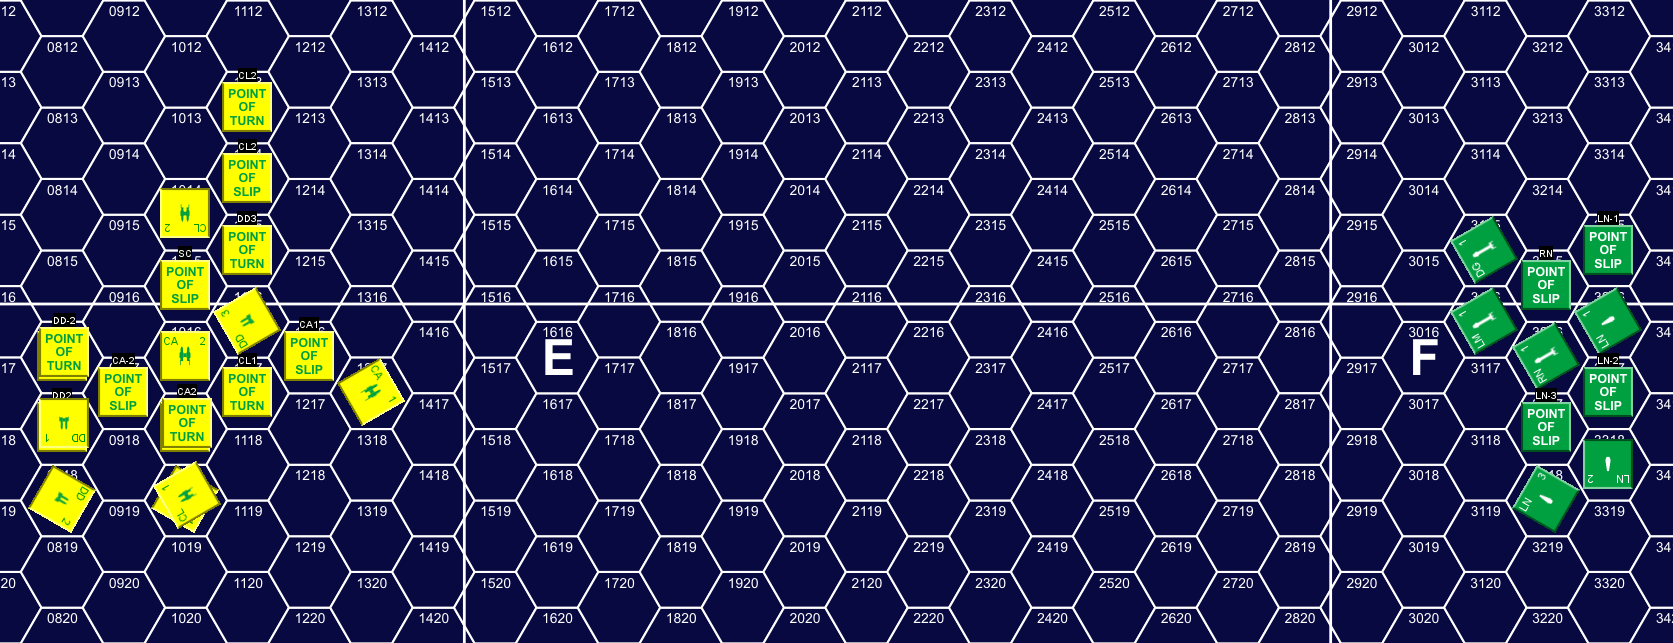
Turn 1, Impulse 5 after all movement.
The Lancers started taking APR hits on the second round of heat damage, while everything else was taking warp damage (the Lancers are center warp only designs like the Fed DD, they can often avoid warp damage, but other things are vulnerable). On Impulse 14, I tried a pair of hellbore shots at a CA, missing with both (one of them purely because of the ECM shift), and on 15 the second nebula movement happened. I had largely sorted myself out again, while Patch’s fleet was all over the place, but most of my ships were hit by turn results this time, but the DG was still able to get the remaining hellbore fired, which hit CA-1, getting through reinforcement for five internals. (I had one hellbore left after this, a LF+L on the DG, which would never get a chance to be in arc.)
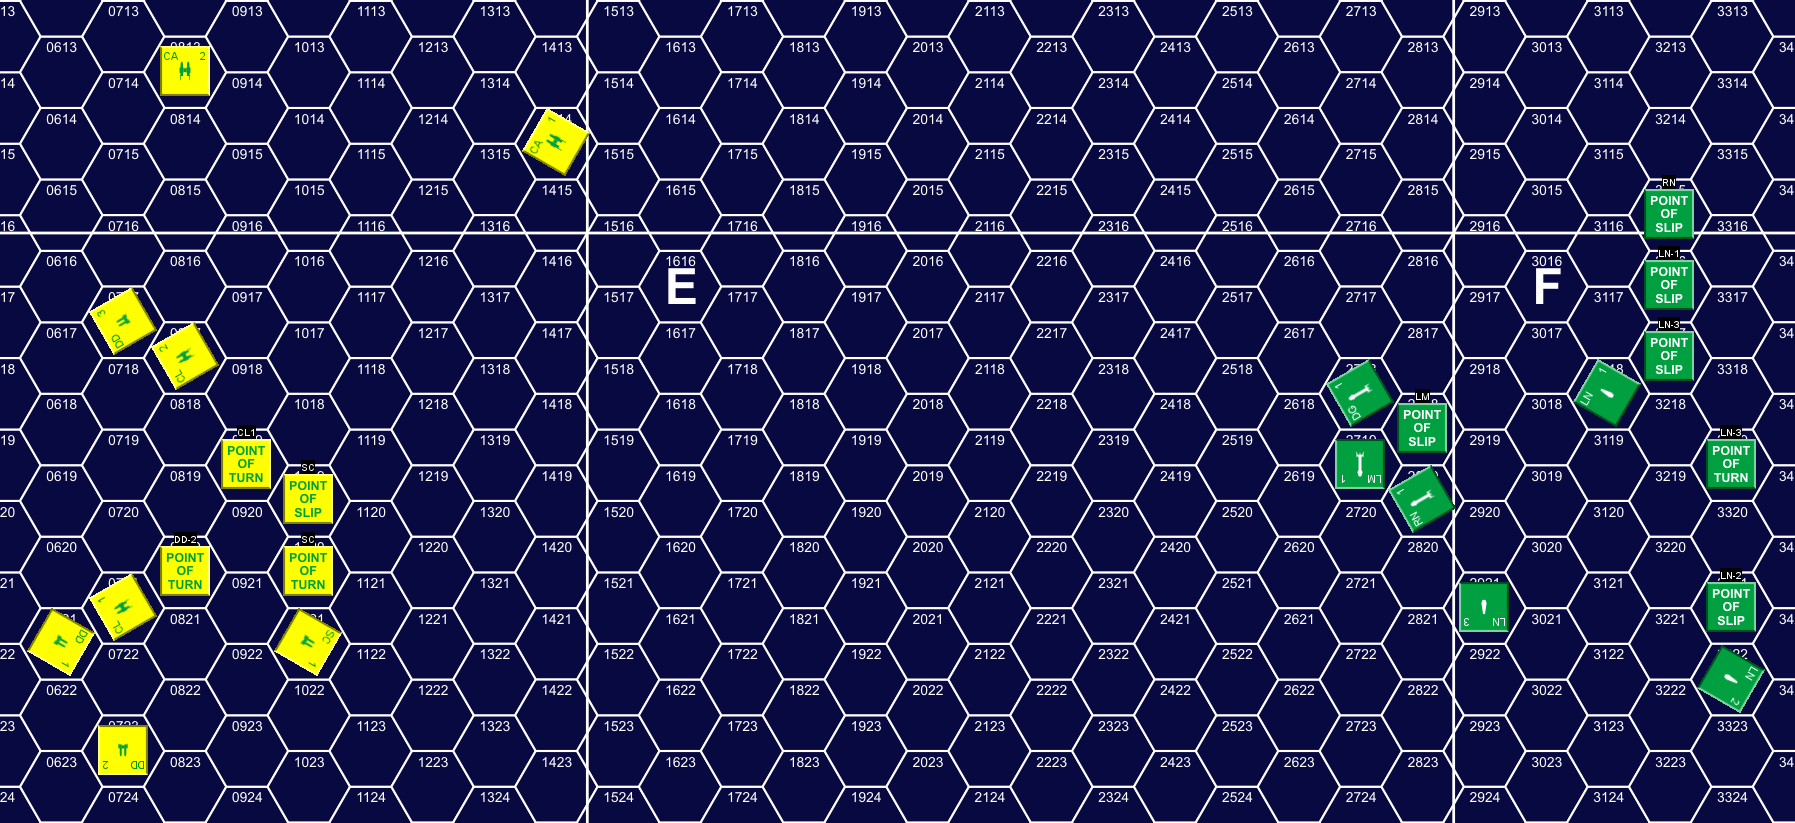
Turn 1, Impulse 15 after all movement.
Impulse 20 saw last-second adjustments as the pulsar roll was… 5! 50 base damage, or 25 for most ships, with a few past the 20-hex mark to take a mere 13. This turned into about fifteen internals on all my cruisers, and worse on one of the Lancers with predictable results on heavily damaged ships. The Lancer was in dire straights with center warp starting to evaporate. The other two Lancers, thankfully, were at range 21, and only took six internals each. Patch’s CAs each took seventeen internals, while one CL took eighteen, and the other was far enough to only take seven. One of the DDs took nineteen internals, two further away took eight, and the SC, with the down shield towards the blast took twelve even at range 21.
Heat damage is per down shield, so while some ships escaped it by being at range, most ships took two damage from it. The nebula couldn’t do too much more to our formations, but by now the ‘asteroids’ were catching up to us, and becoming a real hazard.

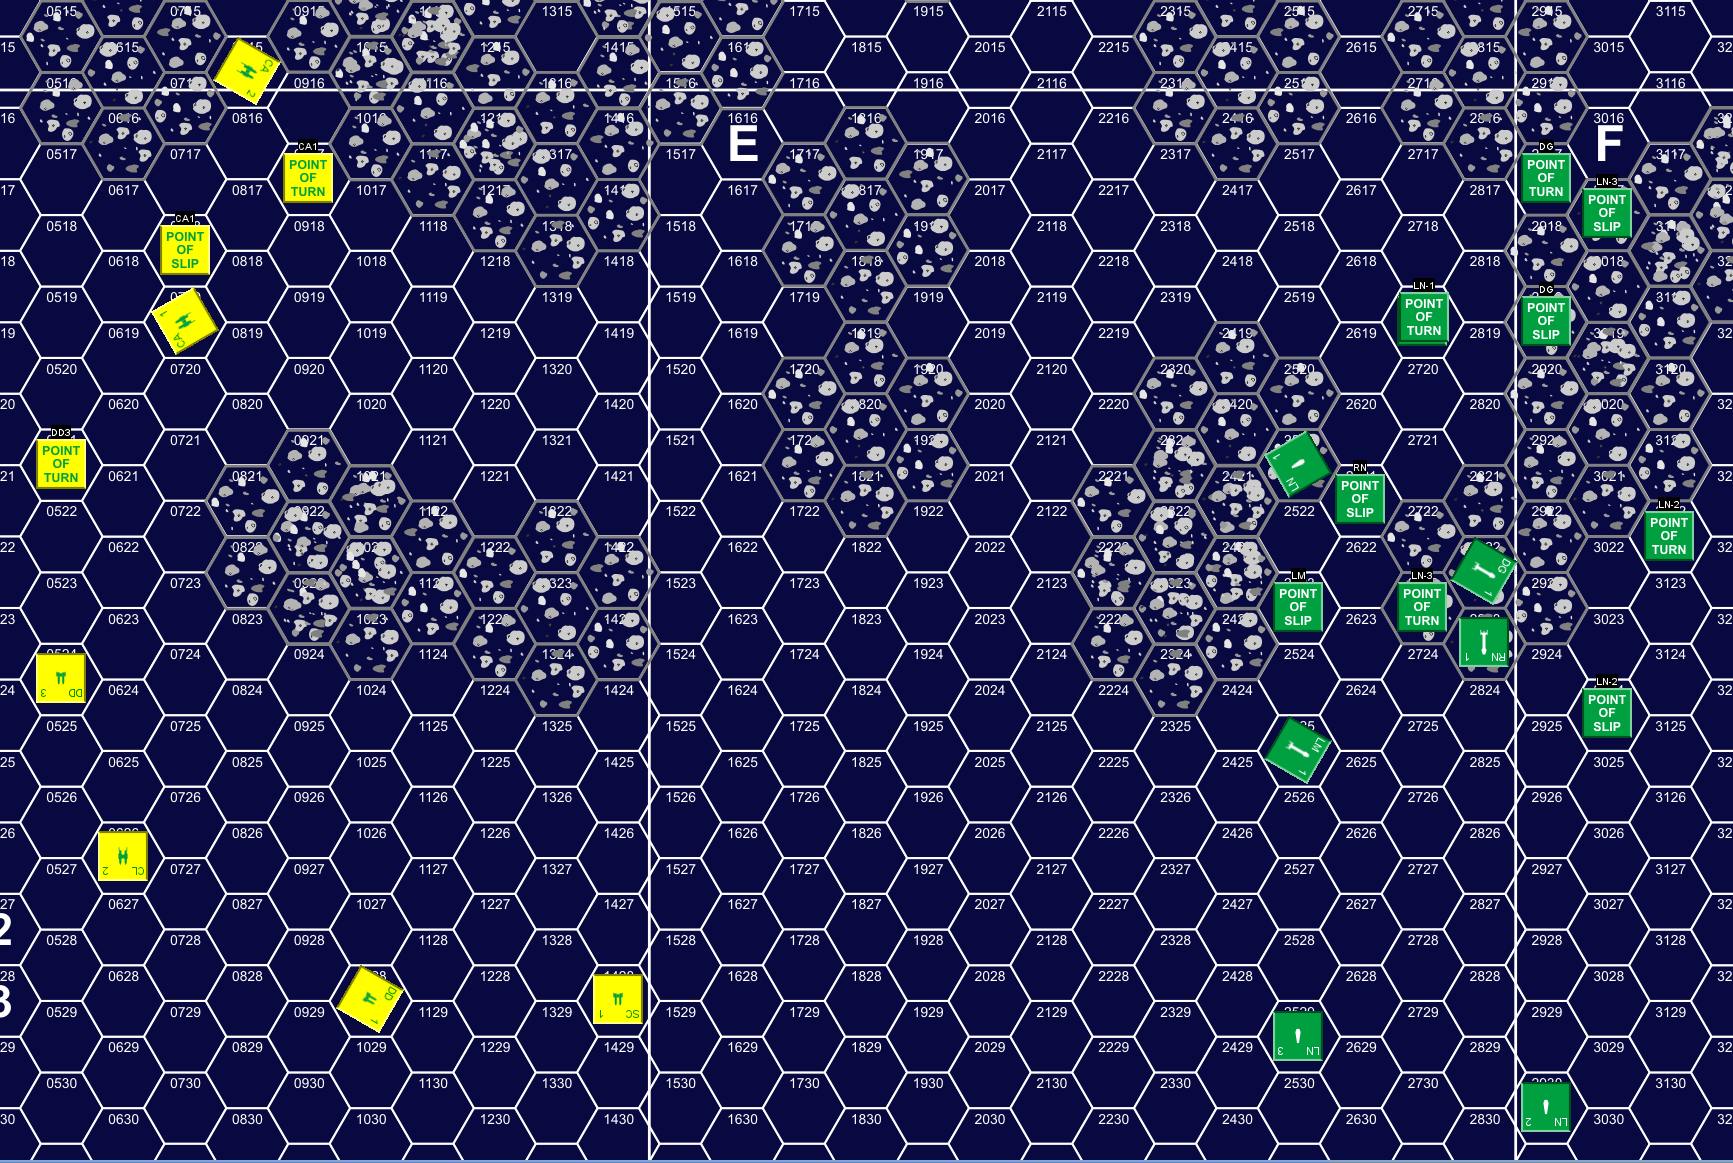
Turn 1, Impulse 26 after all movement. Bottom is the edge of the map.
Asteroids caught up with CA-1, knocking down the rear shield and doing five internals. DD-2 exited on impulse 28. The next impulse, the asteroids hit CA-1 as it turned to get out of the way, taking six damage through a down shield, but managed a zero-damage roll next time and then was out of the path of that cluster. CA-2 was still much further back, and entered asteroids on impulse 31, rolled zero damage, but then got clobbered by a max roll of fifteen damage which crashed the #6 and did ten internals. DD-1 managed a single disruptor shot at this point, hitting (needed a 1!) LN-3, but the shield could take the two points of damage.
With us concentrating on getting our ships off before too much more could happen to them, speeds actually picked up some for turn 2. CL-1 went 22, while CA-2 went 20 and CA-1 went 16. Most other speeds were 12-14, but DD-3 could only manage speed 6. Unfortunately, all the havoc and multiple different speeds meant I didn’t set up my impulse chart correctly, and some ships missed a few moves. On impulse 4, LN-1 was forced into some of the debris, but managed to avoid hitting any of it. The impulse 5 nebula movement caused its usual chaos, though it helped the SC get towards the exit (and CL-1 did exit), while the RN and DG ended up inside a debris field. The DG took maximum collision damage, but had reinforcement and batteries back, and held the damage to four internals, while the RN took nothing.
Turn 2, Impulse 5 after all movement.
LN-1, in the middle of asteroids that were faster than it, slipped towards the back side of the cluster, and again dodged damage, but then took a max damage hit on the next impulse, putting it in critical condition with two excess damage hits (but 6 center warp left). And then, it took another 15 on impulse 7 before it could exit into clearer space. We didn’t bother rolling, as was far more internals than it had left; odds were that it’d still have a couple center warp when it blew.
The third pulsar blast went off on impulse 8, and thankfully rolled low for 20 base damage, with most ships taking 5, but the DG and both CAs took 10. CA-2 took it on an intact shield to absorb half of it, but the other two took nearly all of it in. LN-3 exited on impulse 10, and DD-1 was caught by the debris on 13, but dodged any damage.

Turn 2, Impulse 15 after all movement.
DD-1 dodged the asteroids one more time, then took a 3-point hit just before exiting. (It could have probably taken even a 15-point hit at that point, but if the previous two rolls had not been 0s, it would have been in big trouble.) The SC got off the map at the same time, while the LM had to dodge asteroids at the edge of the map, taking one last internal before exiting on impulse 21.
The impulse 26 nebula movement actually saved the DG, which had started the turn with barely enough speed to exit, and then had to shift out of the way of oncoming debris after taking a lot of damage on a pair of asteroid hits. This was going to leave it one hex short on impulse 32, and I was wondering if it’d manage a speed that could get it off the board before anything caught up. But the shift put it a half-hex closer, which was just enough to allow an exit again. CL-2 exited right after the nebula movement, and the DG and RN managed to dodge more debris, but CA-2 took another ten internals.
The DG took a small hit on 27, and both it and the RN big ones on 28. The pulsar burst on that impulse was another ‘2’ for 5 damage on the few ships still on the board. The RN took more asteroid damage on 29, and then exited on 30. The two CAs exited on 30 and 31, and the DG exited on 32 with two warp and two APR left.
DD-3 ended the turn two hexes from exit with no power left. With no shields, either more asteroids or the next pulsar blast would finish it off on turn 3.
Afterword
So, both of us actually had a lot of fun with this. Surviving the burning house took just about all our attention, but the crazy combination of deadly terrain types makes it a real spectacle to see. It was mostly solitaire as we barely got any shots off at each other, but that doesn’t detract from the fun here.
Survival is the main goal here, and the points work in reverse for getting ships off the board. So surviving with damage gives you 90% of the value of your ship, but the enemy only gets the 10% for it taking internals if he caused some of it. So, I got 10% credit for CA-1, and that was it. On the other hand, the LM is the only thing that got off-board without being crippled, so all the other survivors are worth 50%. This works out to 352 VP for Patch and 316 VP for me, with a marginal victory to Patch.
The Lyrans have a bigger fleet worth more BPV, so this kind of largely even result is going to favor him. I assume the thinking is that the Hydrans can take the punishment better, and those hellbore torpedoes are pretty much free points if they can hit, since they’ll always put damage onto a down shield.
As for as a more… active play of this scenario, the main idea I have is plotting for a decent speed and trying to get to close-ish range before the turn 1, impulse 20 pulsar burst goes off. Following the other fleet off the board would give plenty of opportunities at down shields, but stick you with more pulsar damage. And that is risky. Patch was lucky both his CAs got off the map. If you assume that the nebula effect starts in between the initial pulsar burst and the start of turn 1, that would give full shields and make the initial situation one you can do more with.
Discussion (2) ¬