
12 Confusion Reigns
A while back, I got contacted by Tracey Love on BGG for a teaching game of ASL. He’s played the Starter Kits, and was in the middle of making the leap to the full system. This was an interesting experience for me, as there were plenty of things he was already proficient with, and then others that were completely new (including bocage, which I needed to brush up on). After a little discussion, we went with scenario 12 “Confusion Reigns” originally from Paratrooper, and now reprinted in Yanks, with me as the defending Germans.
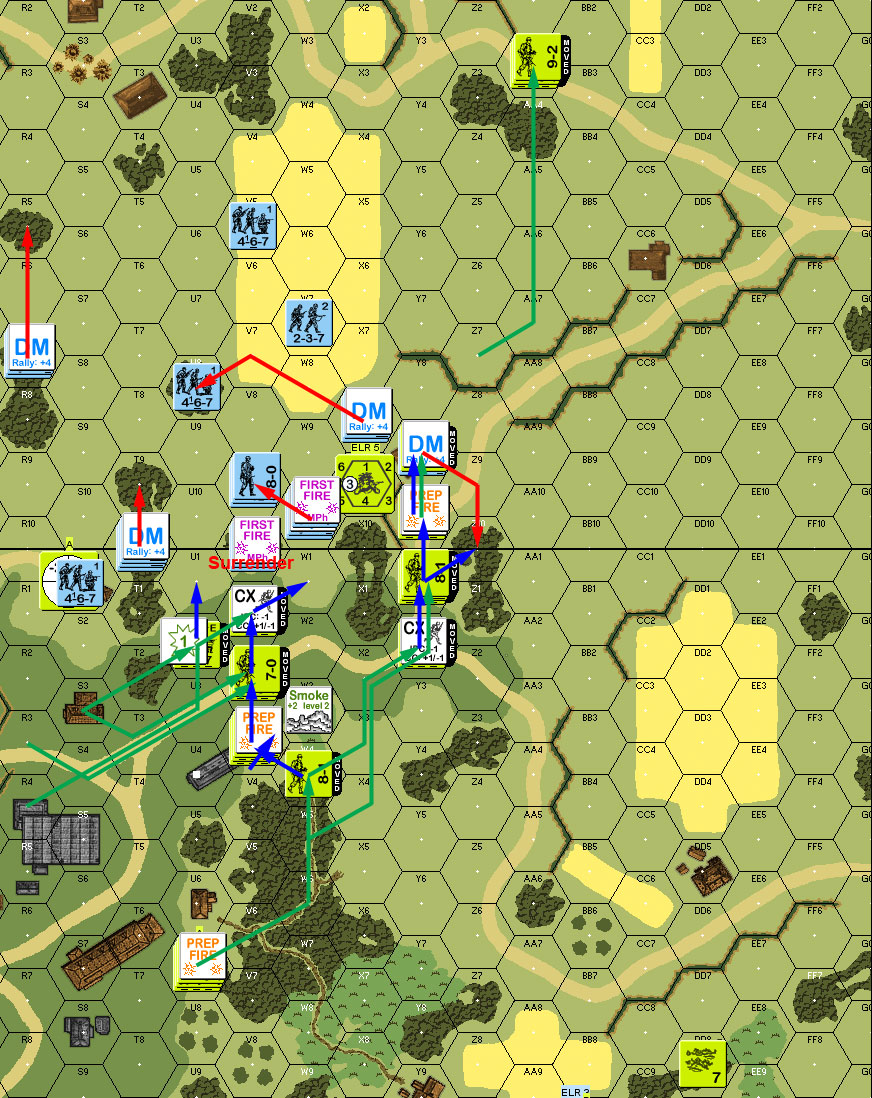
At first glance, it seems an ordinary enough straight-up fight for St. Mere-Eglise with twelve squads on each side. However, the Americans need to get 12 CVP (and at least double the German CVP), and have better leadership with their excellent 747 squads. The German commander and his staff were killed just before the scenario begins, so the Germans can move a number squads equal to the turn number plus one per GO leader (they start with two), plus a unit that sticks with a leader for the entire MPh. This freezes parts of the defense in place, which must setup within 4 hexes of 24X5. The Americans get half of board 1 to set up in, and on the opposite side from there is board 4, which the Germans can exit from without granting CVP to the Americans.
I set up with a mass in the woods that dominate the setup area, with some forward HS, and my two main MGs in buildings. The MMG went in 24T6h1 where it could see what was going on at ground level elsewhere, and the HMG in 24V3h2 where it could see most everything. The main worry was keeping the Americans from getting around the main defense, and not only leaving me nowhere to go, but inflicting encirclement. Retreating through the woods was inevitable, and I hoped to withdraw to the north in an orderly fashion.
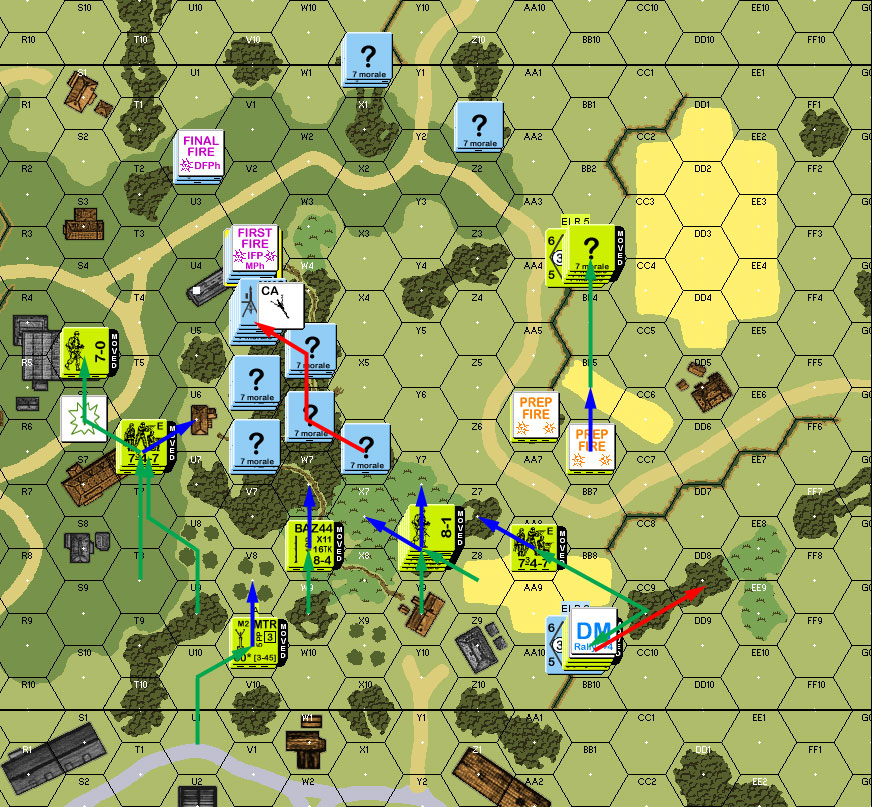
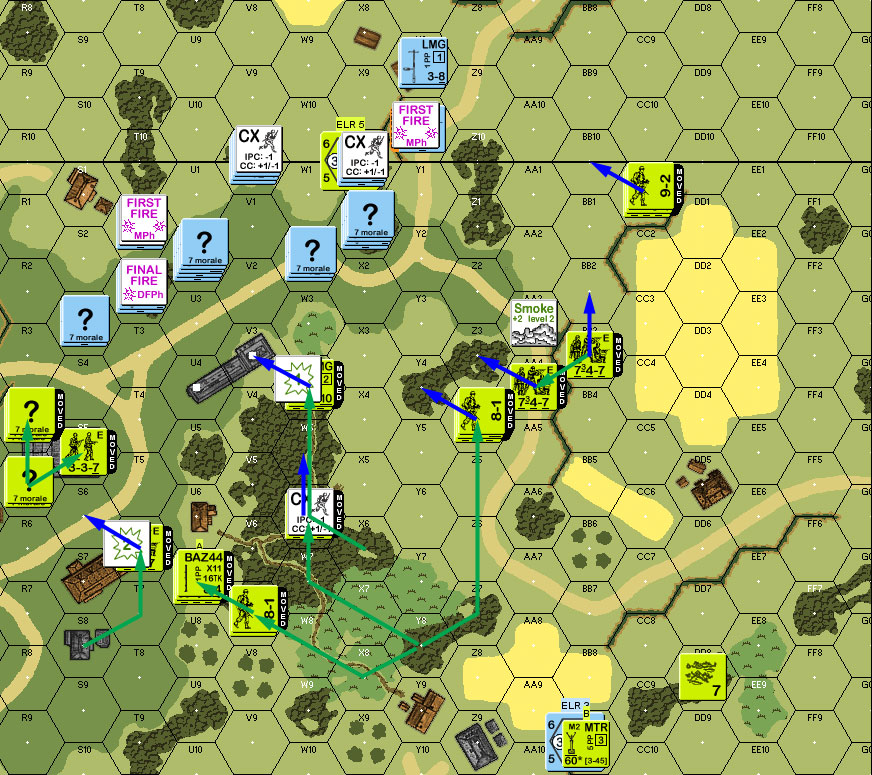
The initial American bombardment took a few logs to run, as Tracey got used to ordnance/mortar rules, and broke two of my forward HSes and his sniper pinned a LMG squad in 24BB3. His advance was fairly cautious and conservative, but he advanced nicely on his right. I managed to break one squad as he tried to get into the valley, but had no other effect, while his advancing fire managed to kill one of the broken HSes, and another good shot reduced my LMG squad with a K/1.
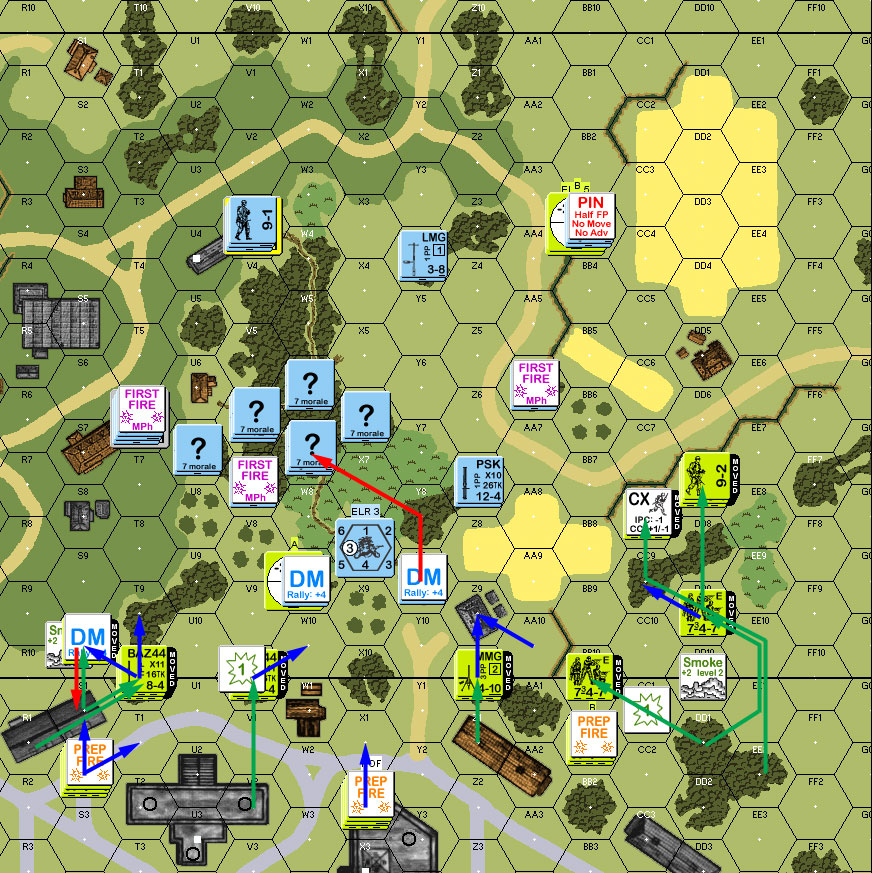
Situation, American Turn 1. The full map is half each of boards 4, 24, and 1, going from north to south.
Naturally, my remaining broken HS failed to rally for my turn, while the American squad did. With limited mobility, I had a some prep, which pinned one squad and broke another. The 8-1 passed over to the woods to work on rallying guys, and as soon as he left American fire broke the MMG squad in T6, who then routed to rejoin the leader.
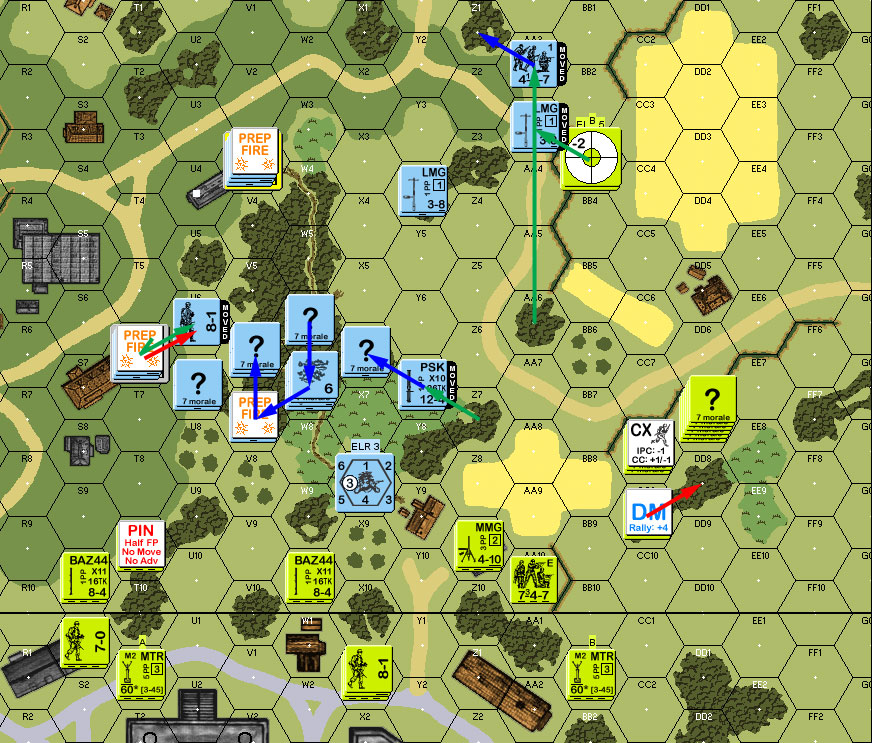
Situation, German Turn 1.
The one broken American squad self-rallied on a ‘2’ to generate an 8-1 leader, while my rally failed. One of his MTRs shelled W7, and eliminated the broken HS by a failed NMC thanks to Air Burst. Movement was fairly normal, with Tracey moving up cautiously, with plenty of smoke grenade usage, and poor rolls keeping me from doing anything with the occasional good shot beyond breaking one squad.
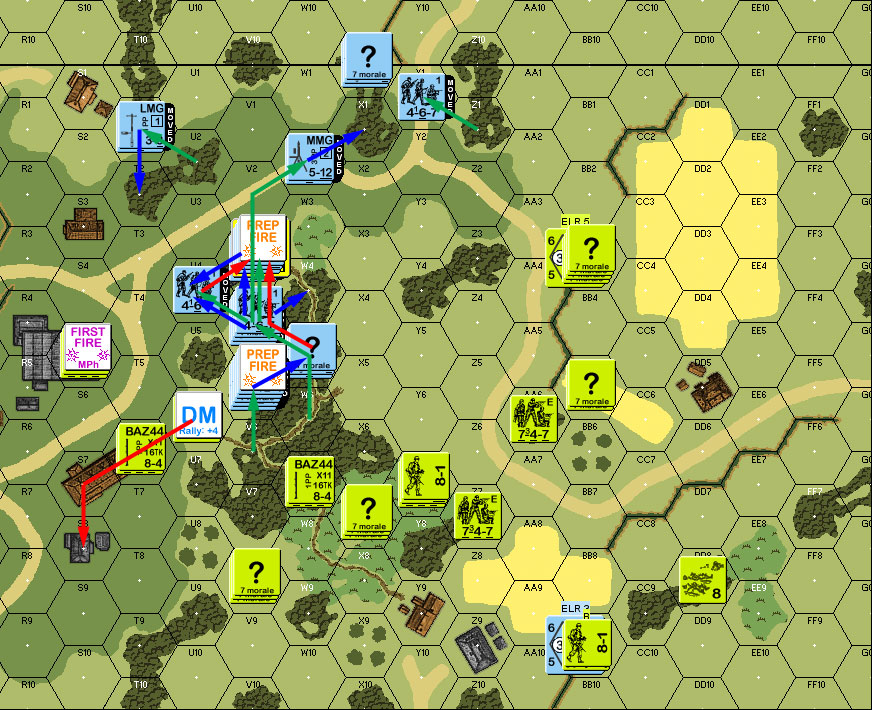
However, a good Final Fire shot, combined with a good MC roll activated my sniper, and pinned his MMG squad in Z8, safely behind a line of woods. His line opened up in AFPh, and revealed and broke the squad in U7, but my sniper activated again, and broke his MTR squad in BB9.
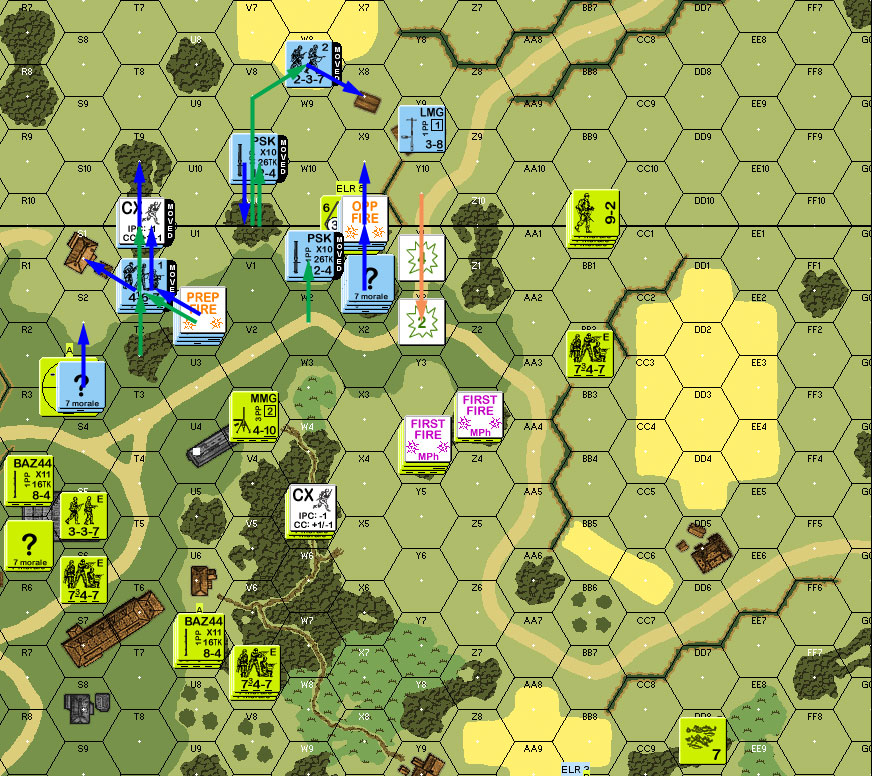
Situation, American Turn 2.
My turn 2 was gusty, and I didn’t rally anything, though Tracey rallied one of two squads in CC9. With paratroopers swarming all over the AA/BB hedgerow, my flank pulled back, leaving the rest of my movement to cycling a couple units at the front of the forest line. He managed to reveal and break another squad in X6, which the other two broken squads in V4.
Situation, German Turn 2.
Tracey got his squad back for his turn 3, while I got my two non-DM squads, which at least meant I could stop worrying about a mad rush at U5 (…which would still have to take fire from V4h2, but a hex full of brokies was uncomfortable). He pushed forward in the valley, and despite a couple decent opportunities, I couldn’t do anything about them. He tried to recover the MTR in BB9, but fire from 24V3h2 broke the squad and pinned the leader. However, a double-MMG stack formed in Y8 and a shot at them malfunctioned my HMG.
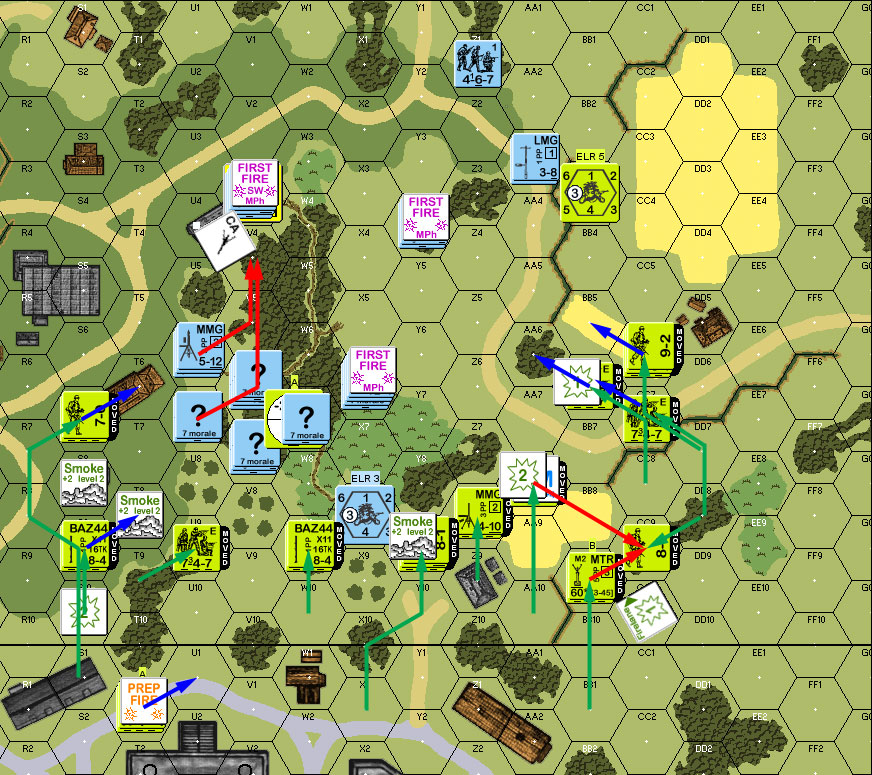
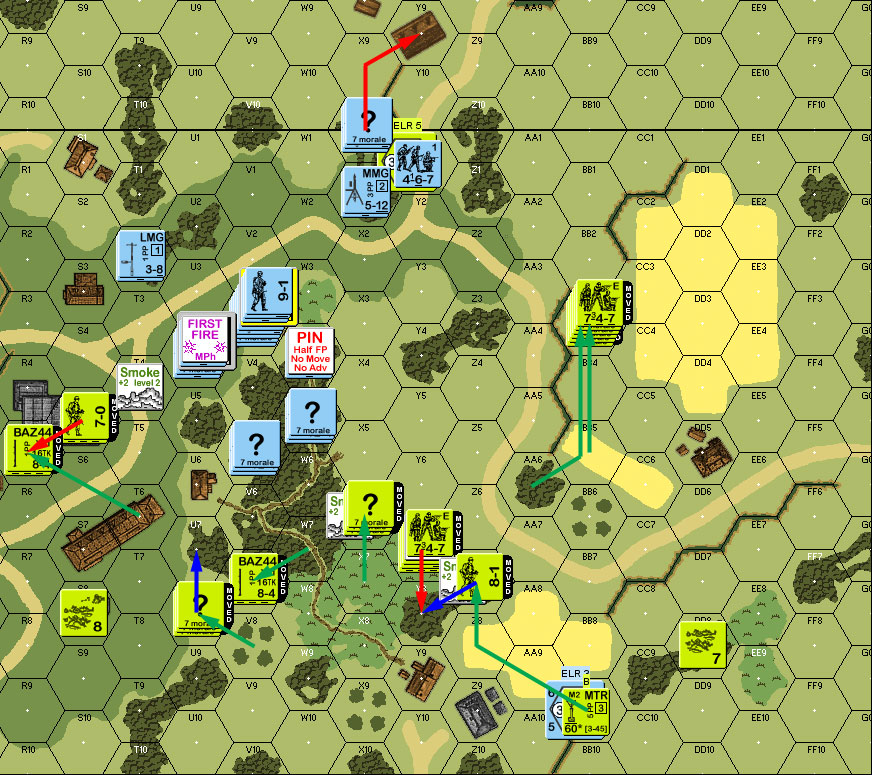
Advancing fire broke my squad in X6 (this was too regular of an occurrence…), and revealed Z1 on a passed MC. Advance pushed into the main woods from the south and west, creating a real do-or-die situation.
Situation, American Turn 3.
Thankfully, I repaired my HMG, and rallied both broken squads for my turn 3. For Prep, I revealed a PSK HS in V5 and got a hit on U6 to break that squad. Sadly, the HMG had no effect. With the Americans pressing into the woods, two of my rallied squads took up positions in building V3, and the MMG squad headed for X1, where it had a nice shot down the valley to R4, and could see AA3.
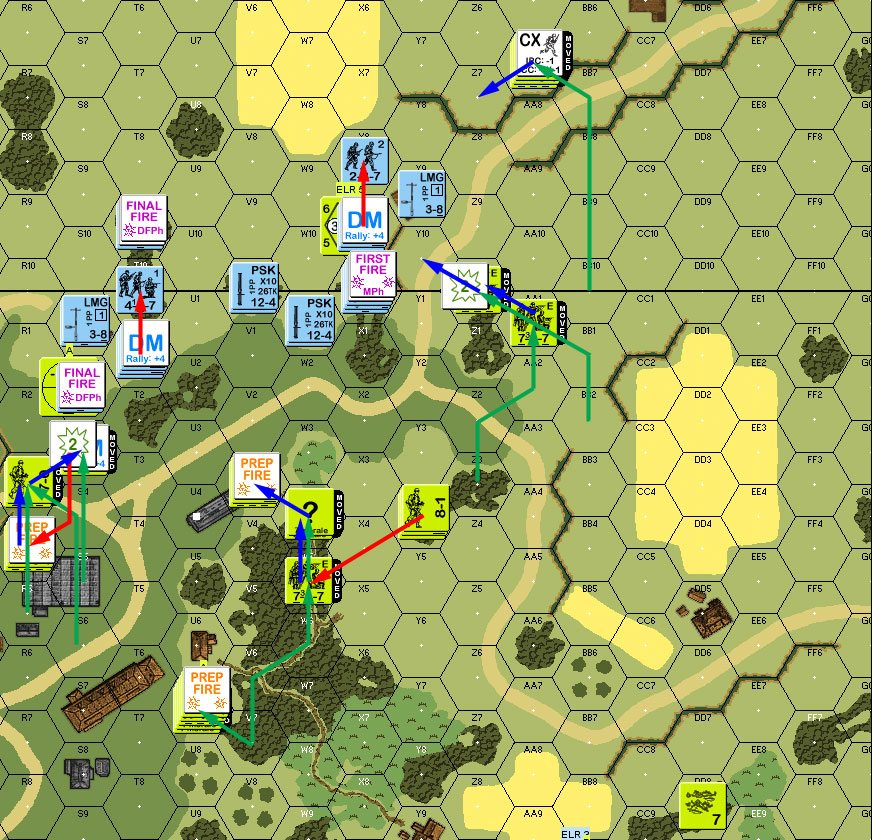
Defensive fire waited for movement to end, but still broke a squad in U4 and W5. Worse, my AF caused his sniper to go off, and pinned Y1. I needed him to go back into Z1 and keep Tracey’s flanking force from just running off into board 4.
Situation, German Turn 3.
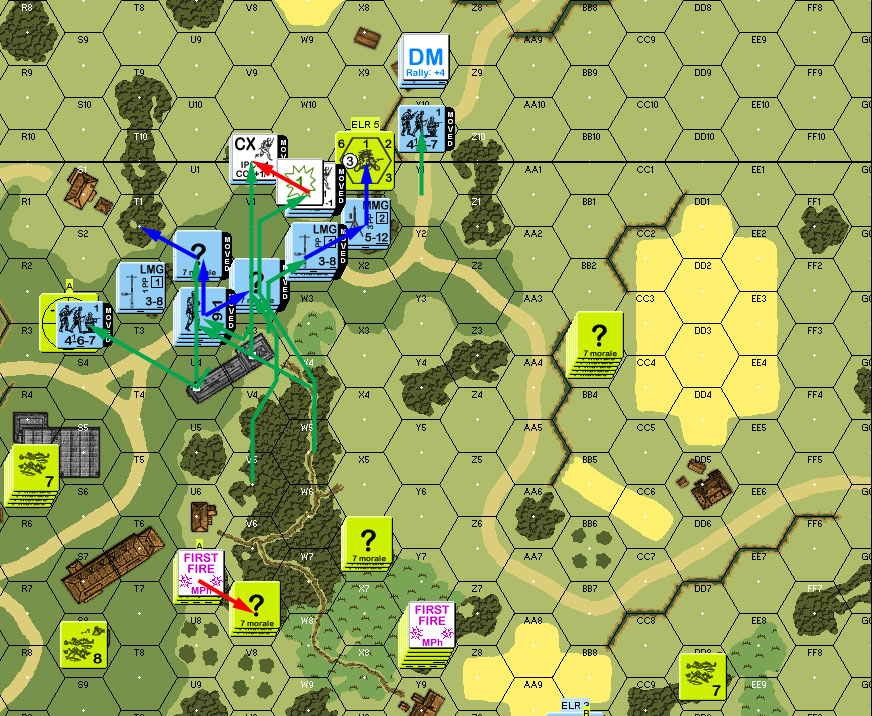
Tracey only had a self-rally for his turn 4 RPh, and the squad CRed to a HS on a 12. Sadly, my two rally attempts only managed to CR a squad on another 12. He used lots of smoke while continuing his deliberate advance. A great attack on Y7 broke two squads and the 8-1, and another reduced a squad in S5, but then his sniper broke my LMG HS in X10.
Situation, American Turn 4.
For my turn 4, I got both MMC back in V3, while Tracey didn’t manage his one rally. With movement options opening up, and Tracey temporarily out of LOS of the valley, it was time to leave. If I stayed any longer, it was going to be a final stand for someone in V3, and now I could head for board 4, try to open up the range a little, and try to exit before he could get his CVP count up (currently 4-2).
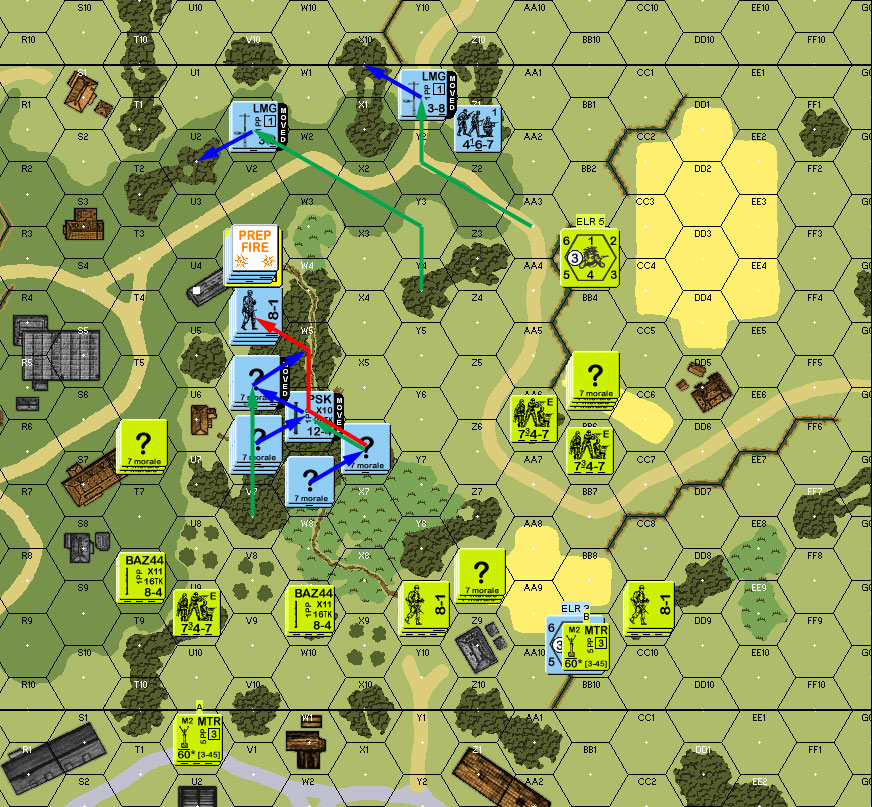
And things went pretty well, as I maneuvered towards various cover spots in the valley, with a limited amount at level 0 north of it. There were two exceptions: he broke a PSK HS in W1, and the squad in 4Y10… went berserk. That would have been more than bad enough during MPh, but this was in DFPh, so he had an entire turn to see it coming. In return, I broke his MTR squad in U7.
Situation, German Turn 4.
Tracey self-rallied S8, and a squad and a half for his turn 5. The advance continued, most worryingly, the 9-2 worked his way around the flank. He tried putting smoke in BB2, but failed, and the 9-2 took the slower route through grain and bocage, though I don’t know where he was wanting to get without that. My only shot at him was still through smoke, and didn’t do anything. Worse, they fired on the broken LMG HS in AFPh, and CRed it out of existence.
Situation, American Turn 5.
I self-rallyed a PSK HS in 4V10, while Tracey rallied a a squad in V7 for my turn 5. My MMG declared Op Fire to clear CX, while the HMG managed a passed PTC against V3. The berserk charge went worse than I hoped (and I expected for it to end badly), with the squad taking a pair of K/2s to be eliminated before it even got close.
Getting out of the valley turned out to be a lot harder than getting in. I had gotten a lucky break that let me move around relatively unexposed, but climbing back to level 0 was a problem. That said, Tracey didn’t fire again as I moved, and thankfully, Final Fire didn’t do anything more than passed PTCs on the HMG. However, my MMG managed to break the MMG squad in Y4.
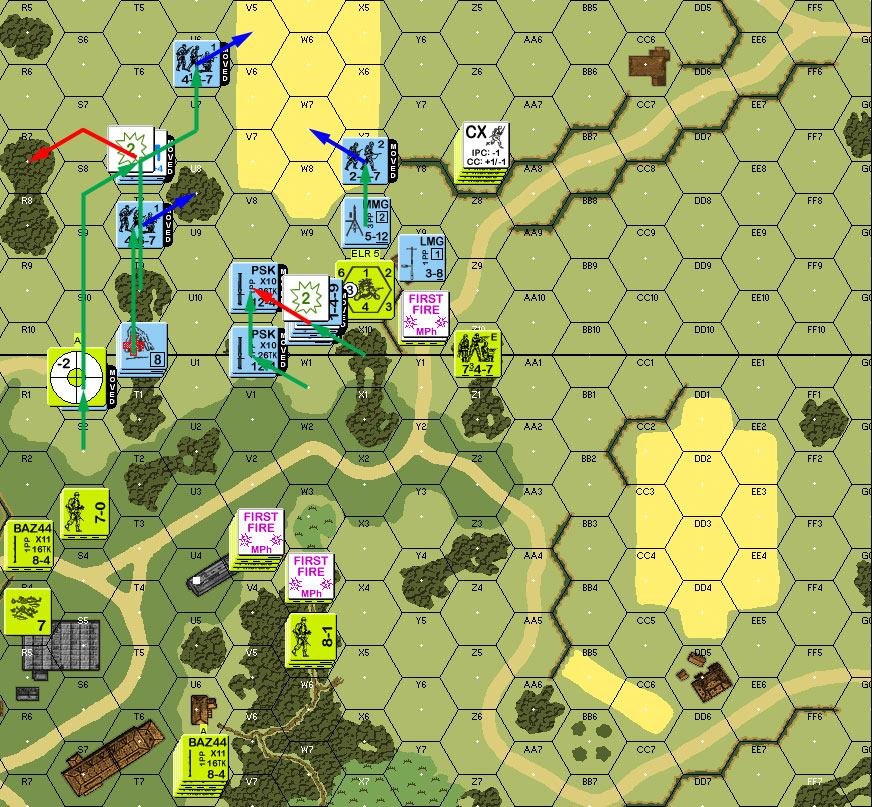
Situation, German Turn 5.
Tracey didn’t get anything on two attempts for hit turn 6, but his active MMG got a 2MC that broke the HMG squad and ELRed + wounded the 9-1. Worse, his sniper activated on a PTC, and broke the MMG squad, leaving my east flank open again. He promptly ran through the hole with his 9-2 and BAZ squad; having waited for 4X10 to fire, but that wasn’t necessary. Since it was in woods, it didn’t have WA over the X10/Y10 hexside, and couldn’t see past Y10. Of course, he needed the +1 TEM for everyone else, and the MMG was supposed to be covering that hole. (I took an illegal shot at Z10 before all that sunk in….)
As the final injury, he advanced into Y10 to take Wall Advantage, and turn my defensive line against me.
Situation, American Turn 6.
I didn’t get anything (all under DM) back for my turn 6, but Tracey rallied his MMG squad, who had routed out of the way of further shots at him. I didn’t have much choice but to try and gain some distance, and let Tracey get good shots at me. He got a K/2 on my other LMG squad to ELR it, and as I pulled out of 4X10, my leader ELRed, but the squad got a ‘2’ to battle harden and generate a hero, and then a second shot pinned the squad.
Situation, German Turn 6.
Tracey self-rallied his HS in R4, while my leader in in the open of V9 also managed to rally. Prep fire wounded my hero and CRed and broke his squad with a K/2. The hero got revenge by breaking a squad as it moved into 4Y9 to get my LMG and DM the MMG squad. The 9-2 continued its move to be between me and exiting board 4, though just shooting me up with a -2 DRM was probably all that was needed at this point. I managed to break the MTR squad in U7 again in DFPh (after a leader had moved away…), but still had far bigger problems that I had been unable to deal with. Advancing Fire broke the PSK HS in V0 (who wasn’t looking forward to having a lot of Americans adjacent anyway), who had to surrender.
Situation, American Turn 7.
At this point, I had two squads, two half squads, and a wounded hero (nothing rallied for my turn), and including the prisoner, Tracey was at 11 CVP, while I was still stuck at 2. I moved further north, taking chances, because he was close to being able to walk up and capture what he needed anyway. He ended up eliminating the hero and breaking both squads, and then Final Fire elimated a broken HS, taking him to 10 CVP + 2 for the prisoner. I called it at that point, since there wasn’t anything left to even try and drive up his casualties with.
Afterword
The eastern flank was a problem for me the entire game. My setup in BB3 was a problem that lead to an early HS loss, even with all the hindrances in the way. The area became an important staging area, and protecting it better would have been good. From that viewpoint, AA4 looks tempting, but I was worried about being shot at from the W9 region (and Y7 once he started advancing). Worse, two untimely sniper activations, and a berserk result suppressed what should have been a decent defense in the area from turns 3-6.
However, disengaging from an enemy your fighting is a heck of a trick, and that’s exactly what I attempted on 4, and nearly pulled off. I evactuated my positions, and had good coverage, mostly thanks to a little good luck, but I saw the opportunity and took it. Getting to the next line out of the valley turned out to be a lot trickier than I expected however, and things fell apart while I was sorting that out.
Tracey played a solid game throughout, using the time the scenario gives well, and keeping the pressure up. That said, I ususally find the problem with nice vantage points like 24V3h2 is that everyone can see them. I think he would have had better success tasking a MMG or two to duel with that position while advancing closer. Any lucky roll will at least make me nervous, and quite possibly cause a broken squad to abandon the HMG. Though that means giving that job to the 9-2, and he wisely kept him mobile, since coverage was my real problem.
Discussion ¬