
SH3 The Coming of the Meteor
Patch and I recently finished off a try at this old scenario (I think it’s from the original pocket edition) in the Basic Set. It has some of the ‘feel’ of the Original Series adventures, and is a neat premise:
In Y160 a massive meteor was spotted headed for the industrial colony on Pollux IX. The Federation heavy cruiser Kongo, under the command of Captain Phillip Kosnett, was dispatched to avert the disaster. When Kongo arrived on the scene, however, Kosnett discovered that a Klingon frigate was shepherding the meteor.
The meteor starts 10 hexes away from the planet (and moves on the first impulse of every turn, so it’s about nine turns away), with the F5 Khedive next to it, and Kongo 22 hexes from them. The asteroid can be towed by a ship facing away from it and tractoring it for 16 impulses (…speed does not matter). Victory is purely by how close to the planet the asteroid gets to the planet, with even two hexes being a danger as small fragments will still hit the colony, killing a tenth of the inhabitants, and causing a draw. The asteroid can be ‘destroyed’ (broken up into pieces by 400 points of damage), which does not affect the ability to tow it, and does make it less dangerous to the planet.
We had to have a bit of discussion about the MacGuffin, as while the scenario quite clearly calls it a ‘large asteroid’, it doesn’t call out that section of the rules (which I hadn’t known of, I remembered the general asteroid field rules, and the small moon rules…), and defines that it will destroy any unit in a hex the asteroid enters. Large asteroids don’t prevent ships from entering its hex (and they can even land on it), or block fire, or anything you might expect of something large enough to crush whatever is in a hex 10,000 kilometers across. We did go with the large asteroid rules, and drop the normal asteroid ‘dodge’ rules as it is supposed to be a singular object instead of a debris field. It’s one place where clearer instructions would help.
Patch volunteered to take the F5, and a few impulses in realized just what he was in for. (I had expected he’d stick me with figuring it out.) He went a reasonable speed of 16, while I went 18 to get near the asteroid on the first turn. The CA is at WS-2, or the second turn of arming of photons, and I fully overloaded one, while keeping the others standard, while the F5 is at WS-1 and had to charge up phasers, and it also put up 2 points of ECM to discourage longer-range shots.
On the first impulse, the asteroid moved, and Patch lowered shield #1 to put a transporter bomb in front of the meteor. This did change my initial approach plan, but we both commented later that while a great opener, a second mine behind the asteroid would have been much better, and forced more maneuvering from me (as it was, I just sideslipped enough to bring me around behind the meteor). As I headed in, the F5 got underway, and did a clockwise loop that ended with the disruptors out of arc until he turned directly in on Impulse 26, with the range 15 and closing. Patch fired at that point, hitting with one disruptor on shield #1, and we finished the turn at range 11.
Only being three hexes from the meteor, I slowed to speed 10, charged up a tractor beam, partially overloaded a second torpedo, set one for proximity fuse, and held a HET in reserve in case Patch got too close. Patch stayed at 16, and dropped all EW while I put up 6 ECM. Patch turned away on Impulse 2, and on Impulse 4, with him about to go out of arc, I hit him with the prox photon on the #3 shield. Patch then increased his ECM to 1, presumably to discourage any more of that….
On Impulse 13, I slipped in ahead of the asteroid, and attached the tractor beam. On 16 Patch started coming back in for a run at my rear, and I launched a shuttle to provide some cover and/or drone defense. On 20, Patch fired his overloaded disruptors at range 8 as he was about to go out of arc again; thanks to my ECM shift, only one hit on shield #3, partially countered by the one point of reinforcement I’d afforded there. On 26, he turned directly in, launched a drone the following impulse, and my towing took effect on 29 to get it out of line of a direct impact with the planet.
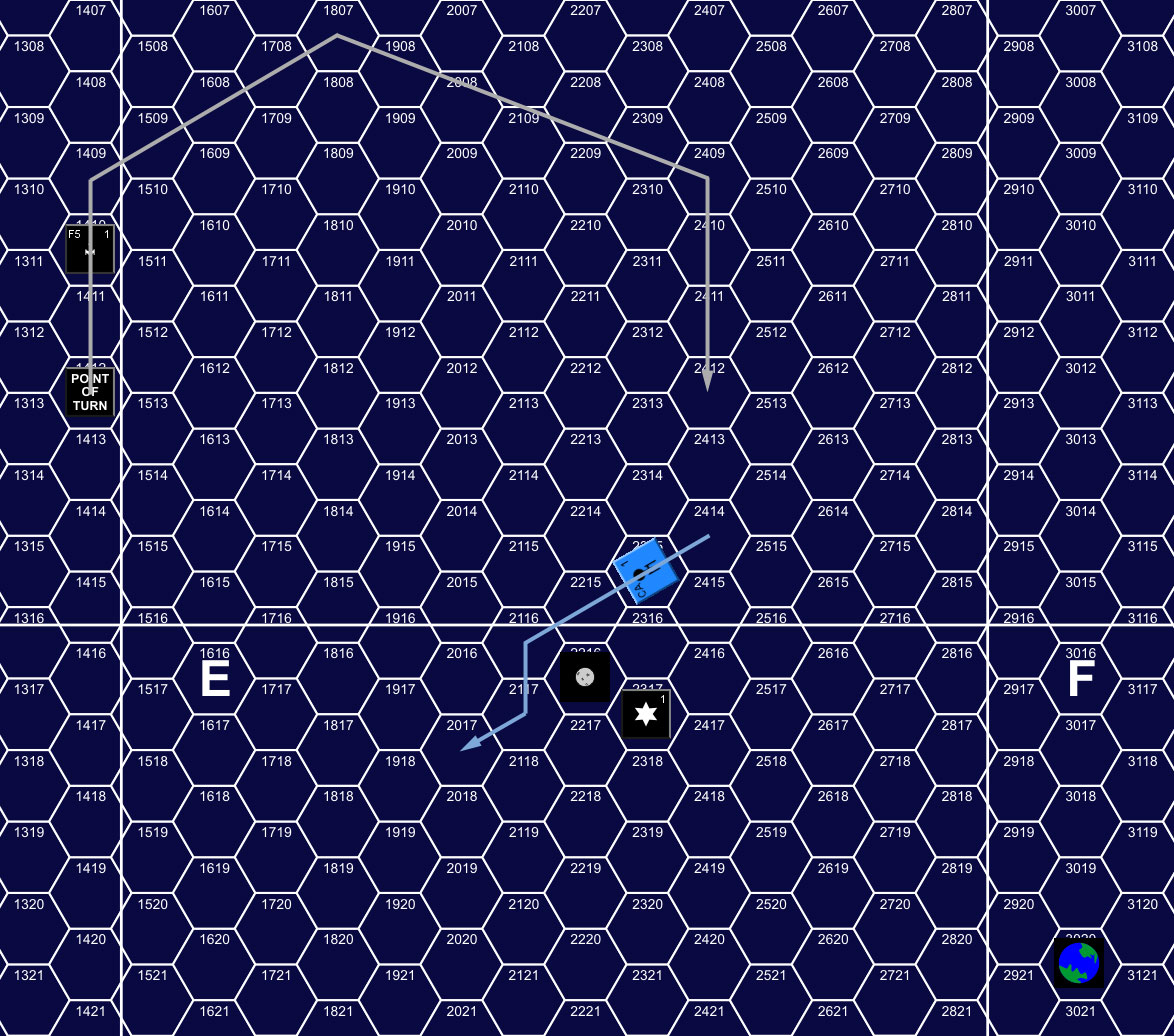
Turn 2, Impulse 4, showing movement throughout the turn.
For the third turn, I kept up the tractor while still paying for speed 10 and an HET, and 5 ECM with 1 ECCM which left very little power for everything else. I finished overloading the second photon, and started reloading tube D, and had to pay a half point out of batteries to balance it all. Meanwhile, Patch’s F5 dropped to speed 14 and didn’t bother with EW.
I launched a second covering shuttle on Impulse 4 as Patch continued to come in. The first shuttle fired at the drone, but only did three points on a bad shot. Patch came in with a second drone following, and the second shuttle fired at him on 14, doing 2 points to #4 on another bad roll at range 2. On 16, the F5 passed directly behind the CA on the oblique, and unloaded it’s best shot at range 1: with the +2 shift, one disruptor missed, and the five phasers did 18 damage, I blew the remaining batteries to take five internals, which knocked out two phasers and one power. I had fired back with two of the side phasers to do 11 to his #2, and the other two were used to shoot down the second drone and finish off the first one; which thankfully weren’t Type-Vs. (Patch pointed out that it’s really rough to take two-space drones when you only have one four-space rack.)
I seriously contemplated cutting the tractor as he came out of his pass, and burning the HET to pump three photons (two overloads) and two phaser 1s into a rear shield at point blank range (it was, after all, the general plan of all those expenditures), but I’d already had the second towing move, and the third one would come up before the end of the turn, and the F5 was empty. So, I stuck it out, got the third hex, which pulls the asteroid completely out of range on Impulse 29, and Patch basically conceded at the end of the turn.
Afterword
With the asteroid out of the way, I could basically go slow near it, and keep myself pointed at the F5. It would get pounded if it tried to tow the asteroid back into range. I could have pounded him during turn 3, but sticking with the asteroid meant I didn’t need to go back to it later.
There were a few more options that Patch had: He could have put another TB into where I’d go when I towed, he could have powered up a suicide shuttle (though he was probably a bit thin on power) and launched it during his pass. I wasn’t going anywhere, and it’d absorb even more of my fire. A scatterpack could have been interesting… but Patch still needs to get Advanced Missions.
I knew it was going to be an odd match, and wasn’t sure how it would play out. One thing I finally realized is that it was written back when plotted movement was the norm, and that could give the F5 the edge it needs here. Even with plotting, the F5 knows where the CA is going eventually; the CA has fewer guarantees about the F5.
Suggestions:
There seems to be a habit of not going back and really reexamining older scenarios when republished in later editions. Along with plotting, it looks like this was written before ‘speed is life’ became a real mantra, and it’s expected that things will proceed more slowly. Also, the asteroid really needs more clarifications in the rules. I’ve got a few ideas on how this scenario could be refitted, though I don’t have any idea how balanced any of it might be.
First, I think the variation in SH3.62 might work a lot better. Adding a CL and D6 to the mix could be very interesting. It evens the firepower out a lot, and more importantly, the D6 and F5 can threaten to try and dodge around one Federation ship to get at whichever one’s towing.
Second, it’s too easy for the CA to park next to the asteroid and just put everything into reinforcement for a turn or two. I deliberately didn’t do this, and kept to speed 10, but there was no reason go even that fast on Turn 3. It gets even worse if you use mid-turn speed changes to slow down right as you get to the asteroid, and speed up when it’s time to break the tractor. My thought is instead of spending sixteen impulses towing, you must spend so many movement points (calculated off of Practical Speed) to move the asteroid one hex. This could allow faster towing, though getting a CA to go really fast takes some doing, and possibly means cutting power elsewhere. Eight movement seems like a likely base figure to try, since that means speed 16 for the same rate as the original, though if you’re using mid-turn speed changes, it should definitely be something like 10 movement. (This could also be translated into energy expended if you want to make it harder for the F5 to tow back, or to make the CA and D6 the obvious towing candidates in the four-ship version.)
Lastly, this seems like a perfect situation to give the Federation some firing restrictions. Chasing down the F5, blowing it up, and then towing the asteroid out shouldn’t be too hard (it is a fixed map), but it’s not very Star Fleet. There’s already a rule that the Klingon captain can claim “it was all a horrible mistake”, and all combat halts. A simple solution would just be to use the Non-Violent Combat system (D6.4), which would allow the F5 to feel safer about losing a shield or two. (We’ve had a scenario where it was used once, and small ships can generally not worry about the big CA too much.) A more custom rule could be interesting though: Don’t fire unless the Klingon has. Don’t fire anything that could cause internals (on best rolls) unless the Klingon has done internals.
Discussion ¬