3 The Czerniakow Bridgehead
While we were gearing up for “Six Came Back”, Patch got a copy of Storm Over Arnhem, and we tried that out next. I have to say it didn’t do a lot for me, despite finding the idea of the system interesting. But it may be that I just need to get more experience with the game. In any case, after that we went back to ASL, and a scenario from Beyond Valor that I hadn’t played before (I can’t remember if Patch had or not) in October 2011.
“The Czerniakow Bridgehead” is a late ’44 scenario with the Russians having entered Warsaw, and are now defending it against a German counterattack with Partisan help. The Russians set up 15 squads on the east (bottom) side of the board 23 canal, with 12 Partisan squads backing them up on boards 20 and 8. The Germans get 15 squads, 7 leaders, the usual mix of MGs, and three crews (presumably for the HMG and MMGs) on the west side of the canal. The Germans have 10 turns in which to get 20 FP factors onto board 8 while earning more CVP than the Russians.
I ended up with the Germans and went into the scenario with a lot of trepidation; the last time I’d attempted to attack across a stream it had not gone very well, and I was worried that I’d spend too much time trying to get someone, anyone, across the canal. There are four bridges across the canal, two of which are close to each other (4 hexes), and troops trying to cross one could easily support an effort against the other. I looked at Patch’s set up, set up the Germans… experimented a little… went back to the original set up…. And scrapped the entire thing and started over, this time orienting around the bridge at the opposite side of the board. The two-bridge area was the obvious choice, and Patch had obviously set up for it. So I decided to go to the other end of the board and try to cross at H4, with a HMG and MMG upstairs to try and break his defenders and interdict his movements across the board. I also put enough near the P7 bridge to make sure he had to defend that as well.
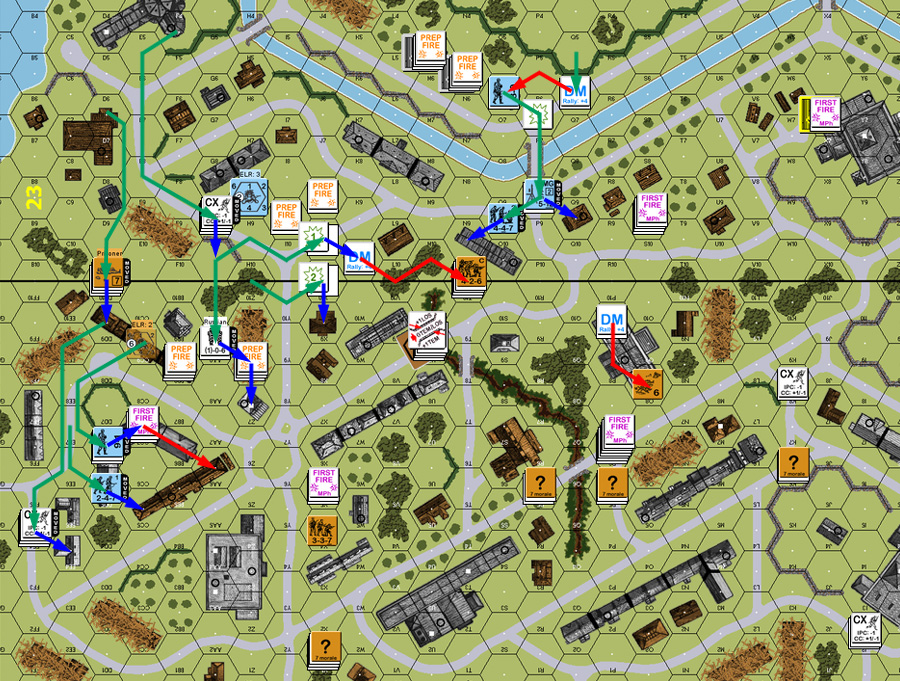
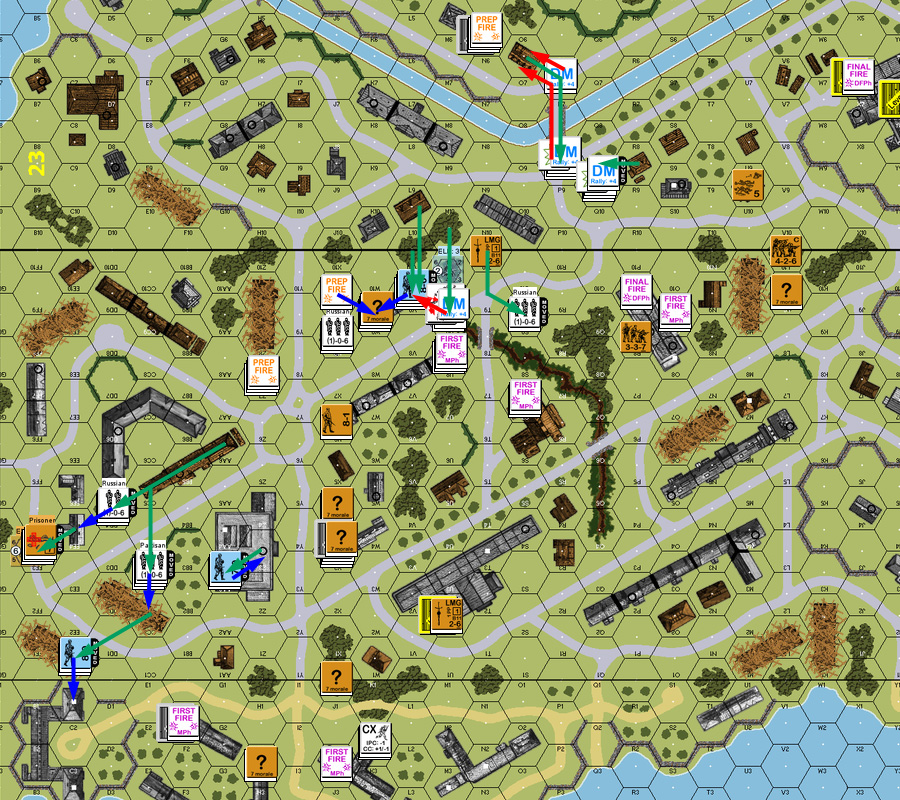
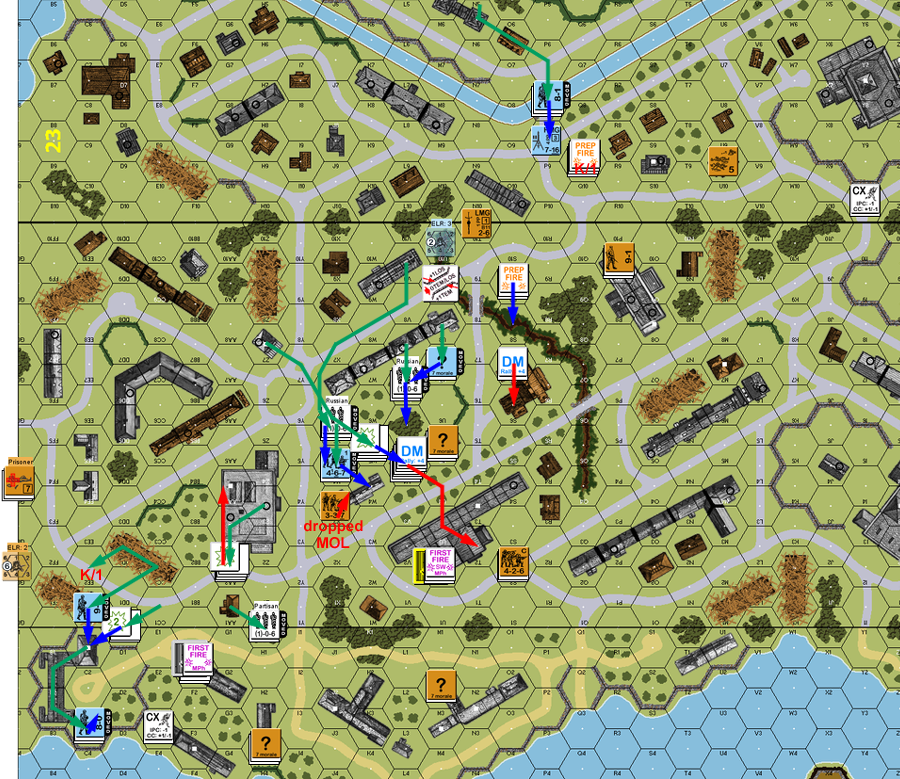
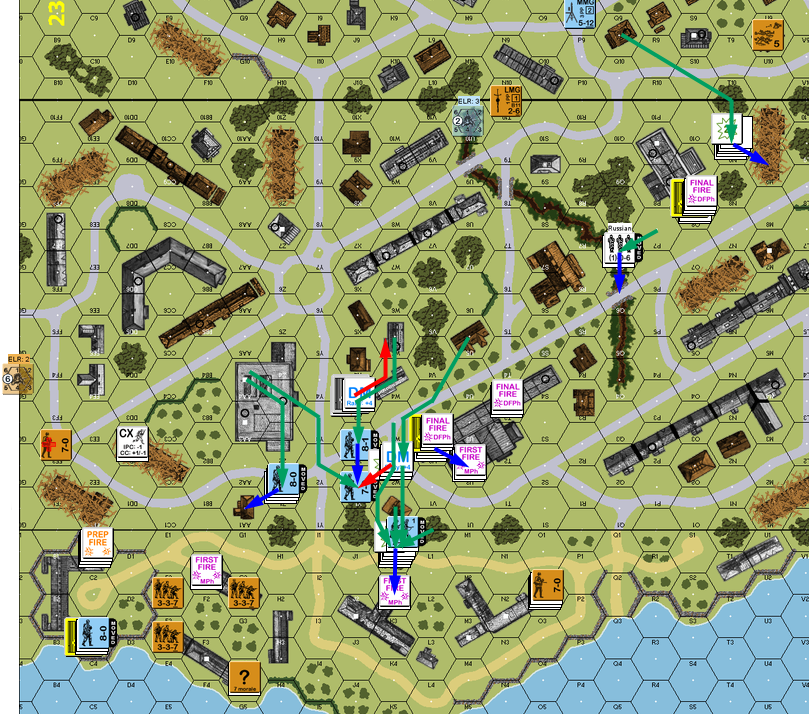
A final complication for Patch was that at the end of the initial RPh, all the Russian (not Partisan) squads take NMC. Patch rolled somewhat poorly with two squads pinning, six squads breaking (all but two of them undergoing ELR failure), one Battle Hardening, and one going berserk. Importantly, two of the four squads guarding my chosen bridge broke. The other two were actually my planned targets for the 1st level MGs, and Patch obligingly broke both of them under my fire, with the addition of ELR failure and CRs to boot. The only thing standing in my way was an 8-0 leader. I finished off Prep with a shot from the second MMG that broke a concealed Partisan squad in 20Q9.
Most of my movement was getting everyone lined up at the canal across the bridge and through the first couple of blocks on the other side. I did lose a HS to fire from his only remaining unit in the area (J8), but the remainder of the squad passed the MC and kept going. Over at the P7 bridge, I tried pushing with a couple of squads I had available for the task, figuring I would at least get him to reveal some of the Partisans concealed on board 20. Patch’s fire was very effective, causing ELR failure on both units, and getting a K/1 with the residual on the second one.
My advancing fire broke his 8-0 (reducing him to a 7-0 in the process), forcing him and the HS adjacent to surrender.
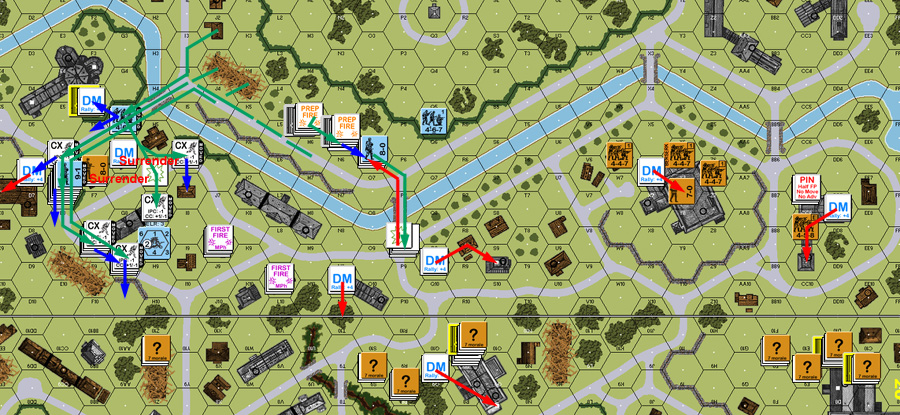
Situation, German Turn 1.
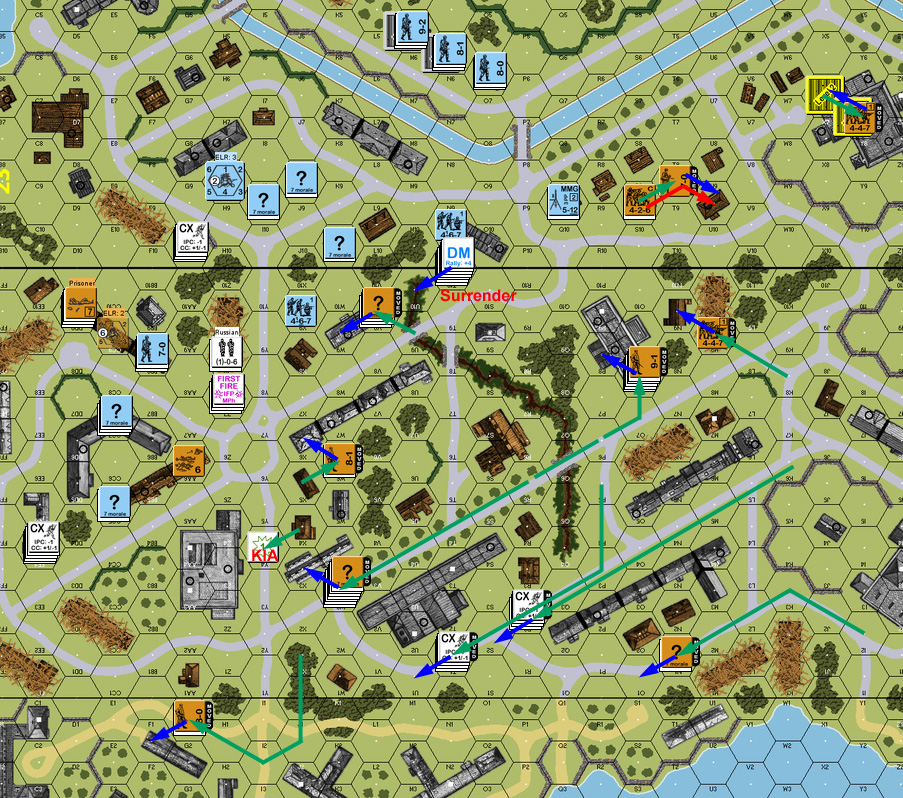
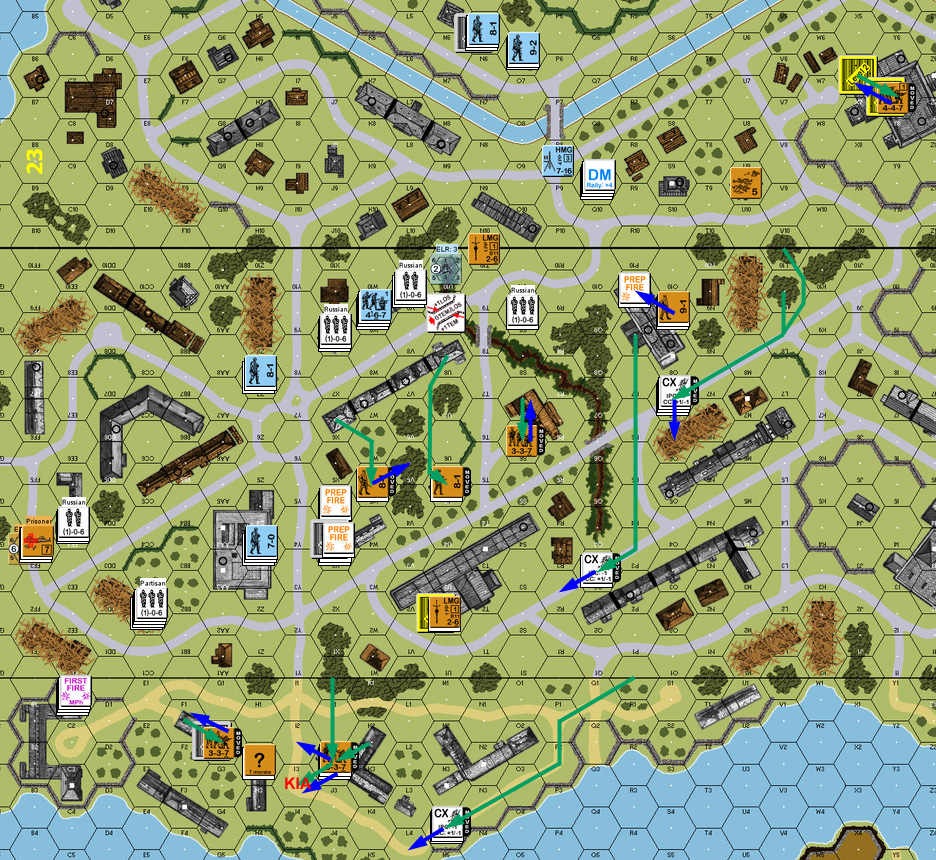
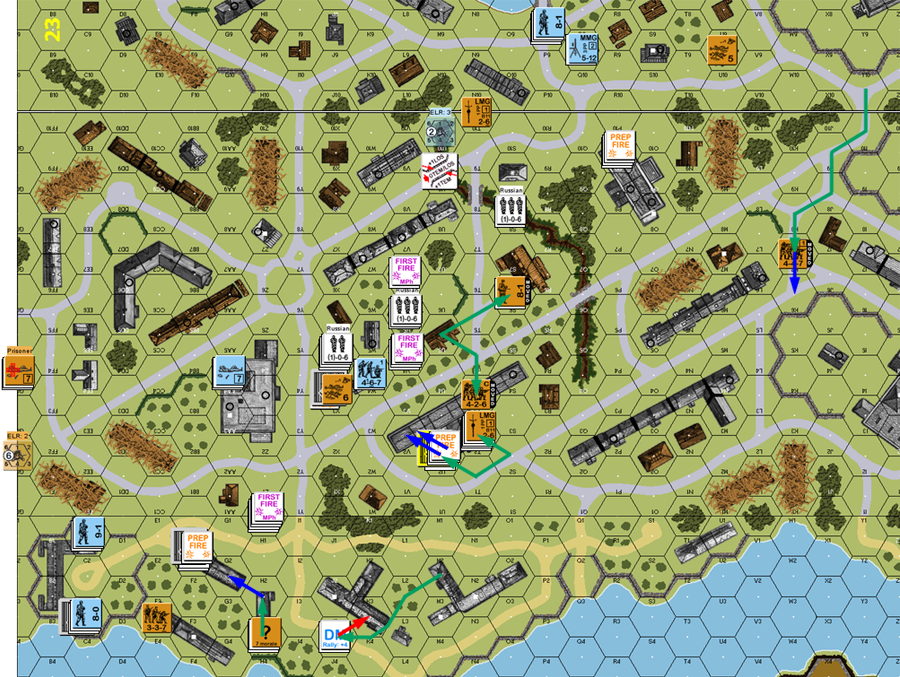
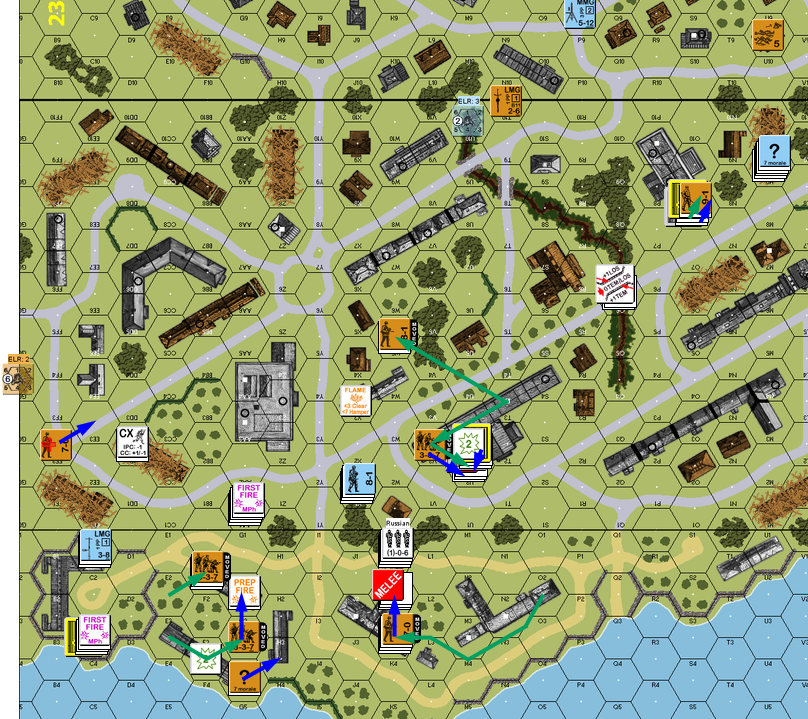
Nothing happened for rally, and Patch’s berserk squad was unable to reach its target in one turn, so I didn’t bother shooting at him. Patch attempted to pull his last remaining units out of the area, but I broke and ELRed the squad as he Dashed across K9. Mostly, though, he started racing everyone from the north side of the board south. This confirmed a worry I had: there are roads going straight from where he was to where he needed to get, and I didn’t have any way to interdict them.
My one broken squad did not come back for my rally, though the only unit Patch could attempt to rally did. I declared Mopping Up in 23F4 and D6 to clean up the remaining Russians in the area I’d overrun and keep from having to worry about them causing trouble at an inopportune moment later. I prepped with the HMG and MMGs again, but the only effect I managed was to pin his squad in 23X6h2. This did cut down on the amount of fire he could put on moves across the P7 bridge, but not by enough. I still attempted to cross the bridge with a squad and a half, but they broke to fire from the berserk squad up the road.
Most of my movement was concentrated on getting into board 20 and looking to secure the line of advance. I got the concealed squad in CC7 to reveal himself when a HS threatened to tie him up in CC. Sadly, I rolled a ’12’ on the resulting 1MC to lose the HS. Mostly, I confined myself to putting a lot of firepower opposite him and and getting what I could in position to guard the Y-column road.
Patch managed to self-rally his most isolated squad for his turn, while I got a squad back in O6, and lost my HS there to a ’12’. He didn’t bother with any prep, and continued repositioning during movement. The berserk squad charged into 23Q5, but despite the amount of FP I could bring to bear, I only reduced it to a HS. That was the only thing visible during the MPh. The stack in 20X6 pulled out, and some of his troops that had shifted from the middle of the board moved into the area, which implied that the first stack was largely dummies. Patch also pulled off some very nice moves using Bypass, which did a lot to start getting him into position. Finally, a HIP unit popped up in 20B4 and started racing south along with everyone else.
I’m really glad I didn’t take the obvious route.
In DF I took a couple shots at 20O9, which turned out to be less protected by the angle of the building than either of us expected. Sadly, I still couldn’t get an effect. In CC I got lucky and just barely CRed the HS out of existence while Patch missed his roll.
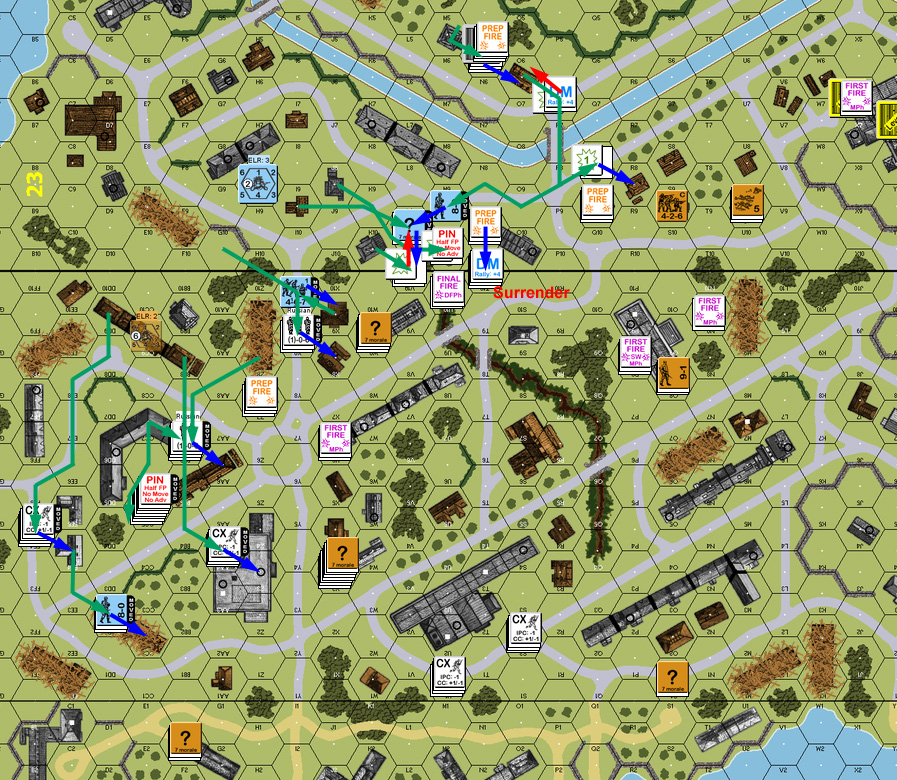
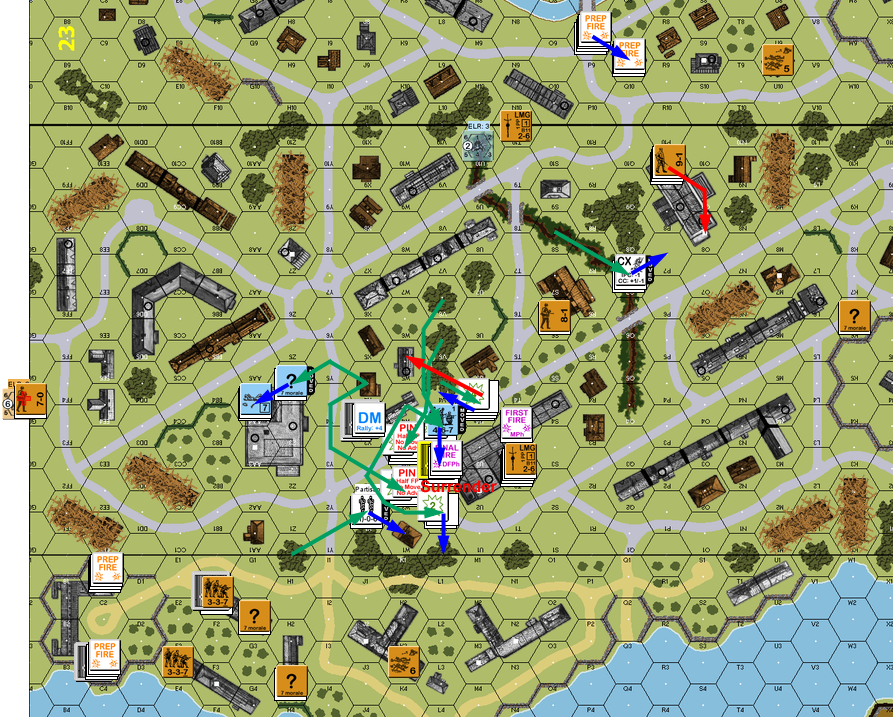
The only thing that happened in rally was that Patch got two broken squads in 23N10 back thanks to the 8-1 he’d just advanced in. While they couldn’t do anything immediately, it meant that my chance to overrun the squad in K10 and get to them before they rallied was gone. I spent a fair amount of effort in Prep trying to do something about the guys that Patch had gotten into position, but the best I could do was a couple of Pins. With each turn, the need to get my MGs moving became more acute, but at this point I still decided that I needed to do something about his stronghold in the middle of board 20, and it actually worked out this time, as I broke the guard squad in 20P9h0, and got a result against the stack in 20P9h1, which revealed them all to be Dummies. I had kind of expected that, but it was hard to know for certain.
Movement went fairly well for me. I decided to try and get at 23K10 while he was pinned anyway, and get across the street before the reinforcements could get up. My initial move into the adjacent woods got ineffective fire, and I followed it up with a second squad that moved adjacent in the street. This drew FPF that broke and ELRed Patch’s squad. I made another try across the P7 bridge, and this time there wasn’t enough to stop me. The fire from the far flank was ineffective, and there was no one in P9 to fire at the exit of the bridge, allowing me to get a squad and MMG crew across. I also tried to move my flank squad in Q5 across but Patch was able to fire S9 through the gap between buildings and broke him. Meanwhile, I also maneuvered my most forward forces to get and get around CC7.
This allowed me to continue to make good progress towards board 8, though there was still some relatively open ground coming up that would need to be crossed. However, I had forced him out of position enough that I was able to gain a fair amount of concealment.
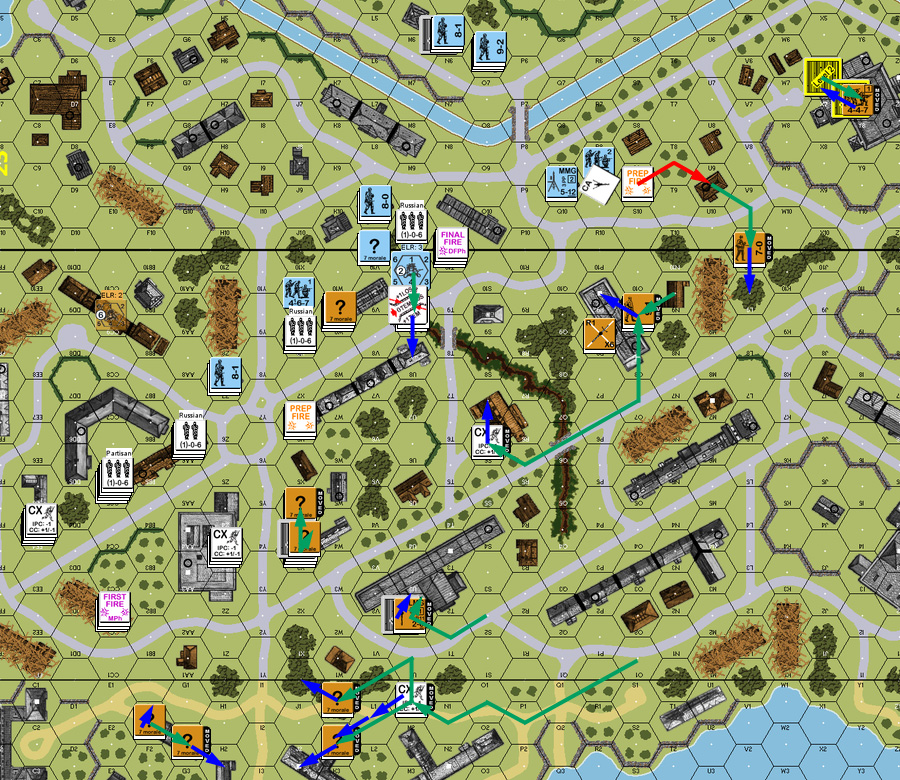
Patch wasn’t able to get anything back for his rally, though I got one of my two broken squads still stuck in 23O6 back. Patch prep fired at my squad that had get adjacent to him in 23N9, and rolled average, generating only a 2MC on a 20FP attack. I then rolled a ‘2’ to battle harden the squad back into the 467 they’d started the scenario as.
Patch continued shoving his guys into my path, and marched the large stack that had pulled out last turn onto board 8. This involved going into LOS of one my units, and revealed one Dummy and a 8-0+partisan squad. He also tried Dashing a squad across the road into the 20Z3 building, but I got a 1KIA to stop that. An interesting bit was that part of his main column of troops advancing down the main road he was using turned around and entered the O8 building, where everything had broken last turn.
I didn’t have a lot of fire, and my squad in 23N9 only managed to pin one of his adjacent squads. The one already broken squad there was forced to surrender. I wasn’t sure I really wanted to take on prisoners with my adjacent squad, but I really didn’t want to deal with the headaches of No Quarter.
In a rather singular event in our experience, my Wind Change DR actually increased the wind force to Mild Breeze (from the east). I got my one broken squad in 23O6 back, and Patch rallied one of his squads in 20O8. I Mopped Up 20CC5, capturing the broken squad in that building, and 23N9 generated a 2MC that broke and ELRed the squad I’d pinned last time who’d been forced to stay adjacent. I also prepped 20Z7 at X6 across the way, but he passed the resulting 1MC. The MMG in 23N5 couldn’t get a result, but I finally put the HMG in motion.
This consisted merely of moving it up to O6, after the force there attempted the bridge again. One squad broke, but one made it to help out the MMG crew, and the leader went over to the area near 20U10 (surviving an attempted FL that malfunctioned the LMG). Once that was done, I attempted to rush his squad and leader in the gully with my leader there to pick up any broken units. All I got was a broken squad and pinned HS, however. His squad then pinned to my Sniper on his first Final Fire shot; if I’d known that would happen I would have sent one last squad in to try to get to CC range. He still had to surrender the broken squad next door, which was turning into a problem, as I now had more prisoners than intact units in that area.
Patch got the remaining squad in 20O8, and the squad in 23U9 back for his turn. I got the freshly-broken squad in O6 back, and then rolled a HoB to Disrupt my squad in L9. He took a couple shots for Prep, but couldn’t get any result, even against my adjacent squad in 23R8.
Patch mostly stayed out of sight during movement. I tried a couple of shots, but they were blocked, and I malfed an LMG to boot (I needed that as part of my board 8 FP!). Final Fire wasn’t much better as I generally just missed getting a result, though I did break his conscripts in 20S9, and pin a squad in L10.
One small error… after finishing Advance, Patch thought he had forgotten to move a unit, and I certainly didn’t mind him going back to get it during a CCPh that only consisted of concealment gain, but as it turns out, he had already moved, and got a two hex advance from 8M1 to K2…. 😛
For my rally, I got my only broken squad back, while Patch eliminated his malfed LMG. I probably spent too much effort Prep Firing, especially as it was all ineffective. Movement was worse, as I finally had a turn that resembled some of the disasters that Patch had had early on. The 5th attempt to cross the P7 bridge ended with a squad, crew, and leader broken, even after Patch’s first shot Cowered. An attempt to reshuffle on the other side of the bridge broke (I have no idea where I was going… with that), and an attempt to put pressure on the center of Patch’s line by advancing up the gully broke (less surprisingly). On the south end, I attempted to get closer to board 8, and pinned on 1MC that wounded the captured leader and CRed the captured squad with them.
The worst part of it all was having to leave a HMG out in the street when I routed. I advanced into 20W9 to find it empty. I hadn’t been sure, one way or another until the very end, when Patch didn’t reveal anyone to scare my brokie away from my leader. I probably would have known if this was a normal game, but with weekly two-hour Vassal sessions, it’s easy to loose track of what you’ve seen.
The only thing in Patch’s rally was that I got my 9-2 back in O6. Things got much worse during his Prep when the crew in 23Q9 broke (and the broken squad there CRed). Patch couldn’t properly take advantage of the way my little push up the middle had come apart, but certainly all the pressure on him there was gone. This allowed him to pull another squad and leader out of building O8 and start moving them towards the main action, while he also abandoned the X6 rowhouse in the face of the firepower I was massing there. Patch also revealed his second HIP unit in 8R0, and sent him towards the main threat to board 8. He’d been hoping he’d still see use in R0, but the loss of a 458 while Dashing in I3 convinced him he needed to move.
For my rally, I got both units in O6 back (again), and repaired the LMG in 8C1. I probably prepped with too much, and managed to malfunction a LMG (not the one on board 8 that I’d just repaired) and the active MMG. I got a couple results on 20X4, which I was hoping break or pin to help my advance, but he passed both of them. Meanwhile, I did pin 8F1h1.
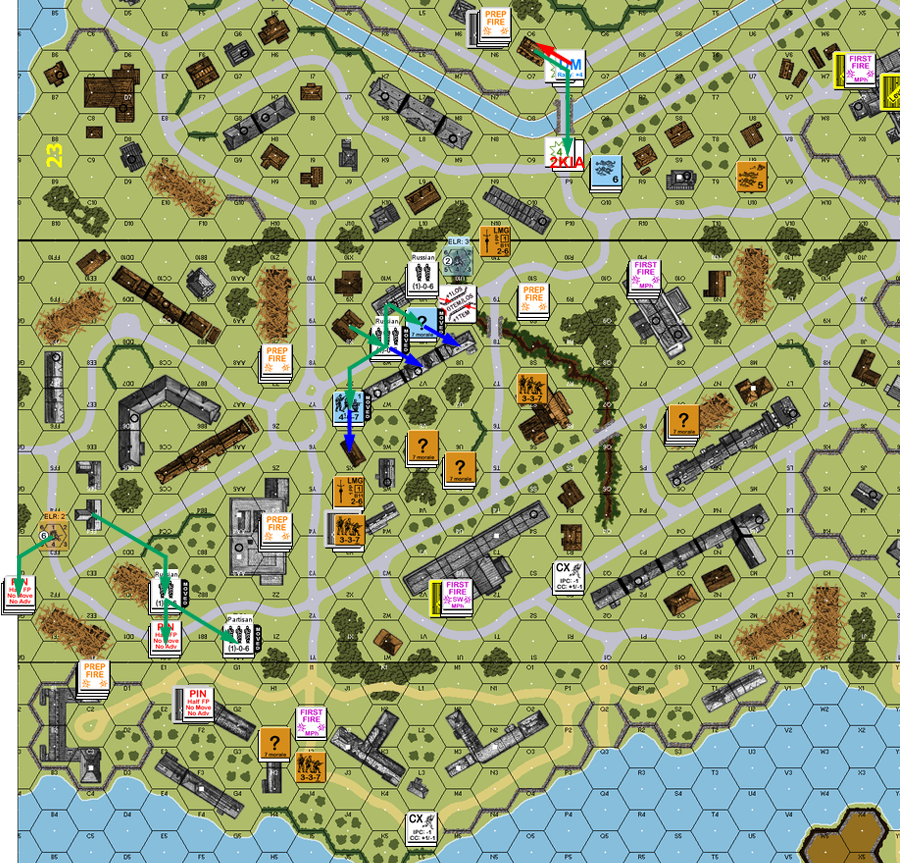
I wasn’t able to get anyone more onto board 8, but I did continue pushing closer to it. In the X6 block, I pushed into the rowhouse, still looking for an easy way to clear the Russians from my front. Unfortunately, I really blew it over at the P7 bridge. Patch had moved up a -1 leader, and now had a pair of 447 squads into 20P9, and I walked right into the bridge exit of P8, without thinking, having gotten used to the 1FP shots that the 337s had been generating all this time. As soon as Patch said ‘hold’, I snapped out of it, but it was too late, as he rolled a Final ‘1’ on the 8 column to wipe out the squad and leader on a 2KIA. Thankfully, he did no more than pin me elsewhere, and I passed a 1MC he generated in Final Fire without trouble.
Patch rolled a ‘3’ for Weather Change, but thankfully couldn’t follow it with another good roll for his self-rally attempt. I got my HS in 20V9 back, and repaired the LMG in Z7. He actually did a fair amount of Prep, trying to break up my advance, but couldn’t get a result. While trying to stop his shuffle on board 8, Patch’s Sniper went off, and broke my squad in 20GG2 (it had been amazingly inactive for a 6 SAN, so Patch was overdue).
I wasn’t able to interfere with his movement, but I did get some lucky shots in Final Fire, culminating with both squads in 20X3h0 breaking.
The only good news in my rally was the repair of my MMG. On the other hand, my crew in 23O6 died on a ’12’. I managed to break 20S7 in Prep, which helped make an an advance in the X-U region easier, though the squad that would advance directly on him had fired to do it.
My attempt to cross the street near board 8 ended poorly when Patch’s upper-story LMG got a K/1 which Yahtzeed to kill my HS and the prisoner HS he was escorting. Thankfully, a later shot from the same unit only generated a PTC, which promptly pinned my squad and 7-0 in the street. I stayed cautious with my advance in the mid area, and Patch couldn’t get any luck there, even using MOLs to boost his firepower. He got one successful use, only to get a ‘6’ colored die to break his own squad and set a flame in his own location. Elsewhere he did much better, breaking my pinned squad in the street in Final Fire, and breaking my MMG crew in Q9 while killing the broken HS there.
For once in this big city fight, we actually had CC in 20V4. We both had a squad and a -1 leader, but despite being concealed, Patch blew his Ambush roll (6-4), and he only had a 3-factor Partisan squad, which failed to connect, while I got a low roll to take out the entire group.
Patch had no luck for his own rally, while my MMG crew in 23Q9 managed to rally on a +4 roll. He prepped a couple units to Encircle 8H0, pinning my HS and eliminating a prisoner HS in the process. All the long-range movement was gone at this point, as Patch pushed his defenders around, trying to keep me from getting to the end goal. The only result of fire was my Encircled HS broke a squad on a 1 -1 roll. And Patch’s Sniper went off again, DMing the squad stuck in 20GG4. And after missing it once, and no one making the TC the next time, the prisoners in that hex had a go at their broken captors, reducing them to a HS.
At this point we had three turns to go, and I already had 14 FP on board 8, and they were unlikely to get broken or otherwise negated. There was another 2 in H0 (we weren’t sure if half-hexes counted, but I figured I could do something about that as well). I had been expecting the last four to come in from the squad that had become Patch’s Sniper’s chew-toy. I still had a fair amount of FP near board 8, but there was dangerous open ground to cross under Russian guns if I couldn’t finish pushing aside the forces in building 20U2 in a hurry. For such a strong opening, it had turned into an annoyingly close thing….
Bad news continued in my RPh as Patch got three squads back; the one in 20S6, and the pair of brokies in 20T2. This put a lot more units in my way than I was comfortable with. I did recover the HMG in 20P8, and then prepped with that and the adjacent MMG at 20P9. I didn’t really have the time to not move them if they wanted to have any effect on the rest of the game, but they weren’t going to get anywhere while P9 was there. I got lucky and broke both squads on a 1MC, though I didn’t harm the leader.
Movement was a problem, since the extra squads in 20T2 meant that the ‘so stupid it might work’ plan of Dashing into U3 wasn’t going to work (the resulting Encirclement would have been a problem, but I would have re-DMed the squads that had just rallied, and if I survived, I’d advance into U2; nicely close to the goal). Instead, I had to try and overload his defenses by moving units into positions adjacent to his units and taking the point-blank shots. I tried getting some smoke grenades down, but couldn’t get that lucky. Thankfully, Patch’s dice were cold, and he could not generate anything better than 1MC, and my dice were hot. I lost a couple HSs of prisoners, pinned two HSs, and my main leader broke, but everything else was intact other than losing the broken HS in GG4 to Patch’s Sniper. On the other hand, 20V2h0 broke on FPF.
Part of the point of my later moves was I threw the kitchen sink at V2h2 for a 8FP +4 shot that Encircled him. Despite all the success, I still wasn’t willing to tie up a LMG squad in CC T3, and have the two squads of T2 adjacent to him, so I moved him back to safety while occupying V2.
Patch self-rallied 8K3, giving him some much-needed help in that area. I managed to rally the squad in 20AA4 (the 7-0 still refused to rally), and the 8-1 that had fallen back from last turn’s rush into the street rallied. Patch reshuffled his board 8 defenses, and managed to evacuate his main stack (the leader and two squads I’d been so worried about) onto board 8. This was helped by my rolls being even worse than Patch’s DF rolls had been last turn. (Admittedly, I didn’t make nearly as many of them….)
He did an all-too-good job putting together a defense that would get him lots of opportunities for shots in Open Ground as I hurried to make the goal in the last two turns. There wasn’t necessarily much directly in my path, but the fact that he was in all the stone buildings that I needed to head for was certain to be a problem.
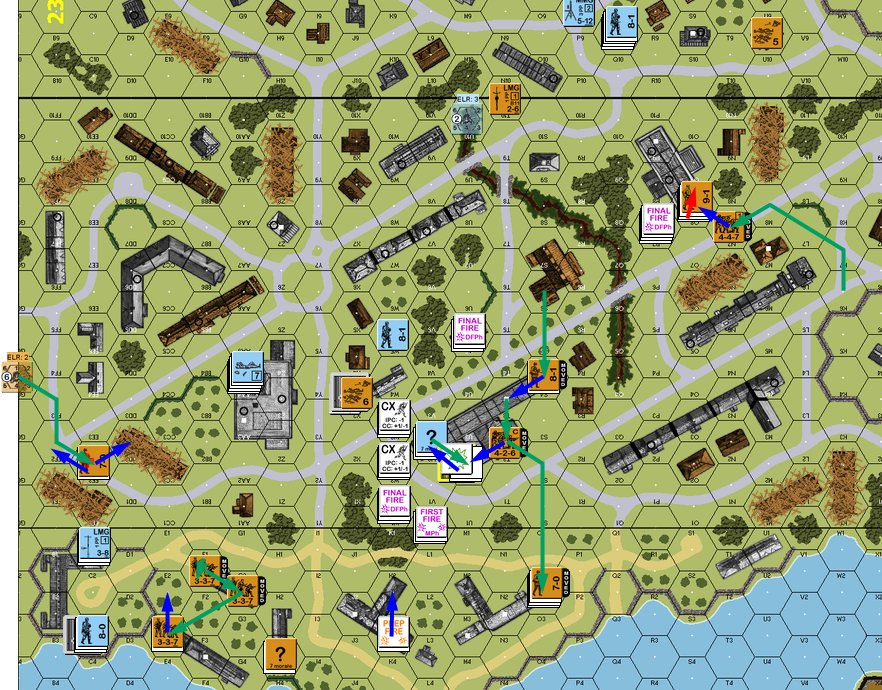
My 7-0 finally rallied for my turn, and Patch managed to rally one of the two squads that had taken refuge in 20O8h2. I rushed forward, and put everything I could into the weakest point of his defense, 8K1. Patch again had horrible luck with his DF. He managed to pin two HSs there, but another squad and a half were fine. Beyond that, all he managed was to break a squad+LMG at the end of its movement in 20W2.
In addition, I moved my 8-1 up to help the broken squad, DMing his broken squad in 20X3h1 in the process. Patch finally managed a good roll in Final Fire, reducing the broken squad in W2. For the first time in a crowded city fight, we had CC. I went into 20U2 with the two squads I’d prepped to pin him, and got an Ambush. Even with a 2:1 -1 attack, I couldn’t touch him, and Patch rolled even worse than I did. In 8K2 I sent in the available squad and a half, and narrowly avoided being ambushed (I hadn’t thought about the stealthy bonus on the Partisans). I missed on a 2:1 attack, and Patch missed on a 3:2 attempt against my HS.
Patch rallied his remaining broken squad in 20O8h2, while I couldn’t manage a rally on the HS in X1. Patch re-oriented his main defense in the south against the board 8 edge to make it tough for the next group of units to make it on my last turn.
He then proceeded to show me just what a disaster my two close combats were. Nearly everything in that area was tied up in Melee, which allowed Patch to maneuver at will to reinforce both locations. The big group in 8O2 swung around to K3, while his remaining units in the 20U2 building got ready to join in there. (Oddly, I had a 2 +0 shot at the first stack from K1 that I didn’t take, and I’m not sure why. Either I didn’t see what was up yet, or I was afraid of 20V2h2 going for him once he fired. However, I really should have taken that shot.)
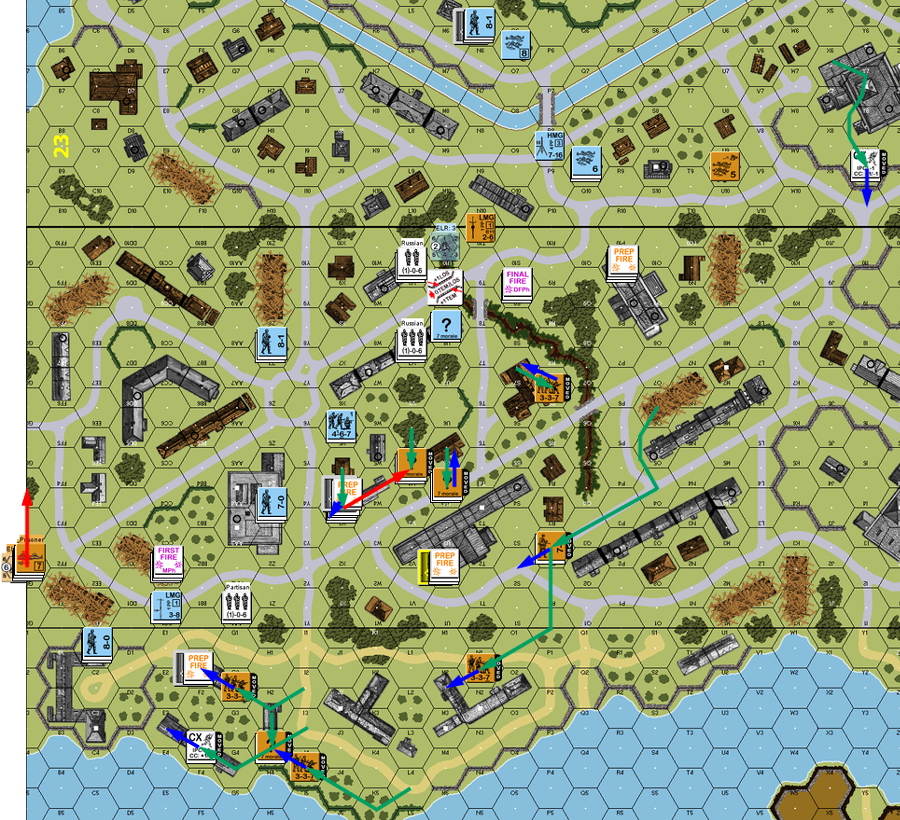
Patch poured another two squads into 20U2, making the final total 10:8. He managed to reduce one of my squads in two separate attacks, while I went all against all (since if it didn’t end now, they couldn’t move to board 8 on my final turn) and missed. Patch got two squads and a leader into 8K2 for a total strength of 11:6. Patch killed both of my units in two attacks, while all I could get was a CR against a partisan squad.
This left me with surprisingly few options for my final turn. Since 20X1 didn’t rally, and 8K1 wasn’t enough to win with (4FP; I was 6 short), the only thing to do was to try and get the squad+LMG in 20AA1 across the border for a win (assuming that everything then lived through his last turn, which was likely). But the best I had there was moving towards the 8B1 building through open ground in LOS of four different stacks (though two were much more dangerous than the others). I moved in BB1, 8G2 took it’s 6FP -2 shot and got a 2KIA to win the game for Patch.
Postscript:
After a very strong beginning where good luck combined with a defense that was too concentrated on one side, I slowly let my advantages get chewed away during the game. I was afraid of Patch getting in behind, as well as in front, of my main advance, and then chewing me up as units broke and didn’t have anywhere safe to rout to. So I kept a perimeter up that kept him out of my backfield, but took a lot of concentration out of my drive. Somewhat telling is the fact that my third LMG squad didn’t even attempt board 8 until the last turn. Those three squads were intended to be my main thrust since they had 21 FP by themselves. (There’s a reason that the other two were the first to arrive.)
The perimeter still worked out better than it should have, with the advance down the 20U-X area going a lot smoother than I would have thought. However, I made some late-game mistakes with the squad on the edge of that area, and the MMG/HMG group, which guaranteed that they could not get to board 8 in time, which simplified Patch’s job at an important moment.
Speaking of the heavier MGs, those were my worst mistake. The plan was to use them to help get me across the bridge, and then try to keep him careful with his lateral movements. They did the first job well (breaking units on turn 1, so I could cross in safety), and the position just wasn’t that good for the second job. I then let myself get suckered into a sniping match with 23X8 and 20P9, when they needed to be moving. There was a brief moment when that worked on turn 3, and I started getting men across the second bridge. I got more across on turn 4, and the HMG and second MMG should have been among the units trying at that point. That much firepower moving around threatening to get between X8 and P9 could have become a big worry for Patch. Better yet, I think I should have sent one of the MGs around by the main bridge at that point. He would have caught up a few turns later, and been a real help clearing Russians out of the way.
Finally, the turn 9 rush into CC looked attractive at the time, since the odds significantly favored me, but I didn’t think through the consequences of failure, and really paid for it.

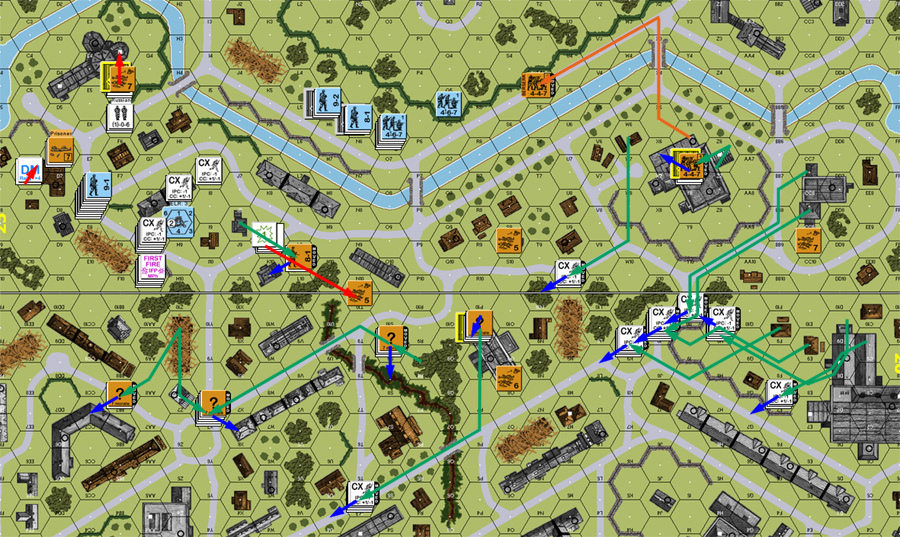
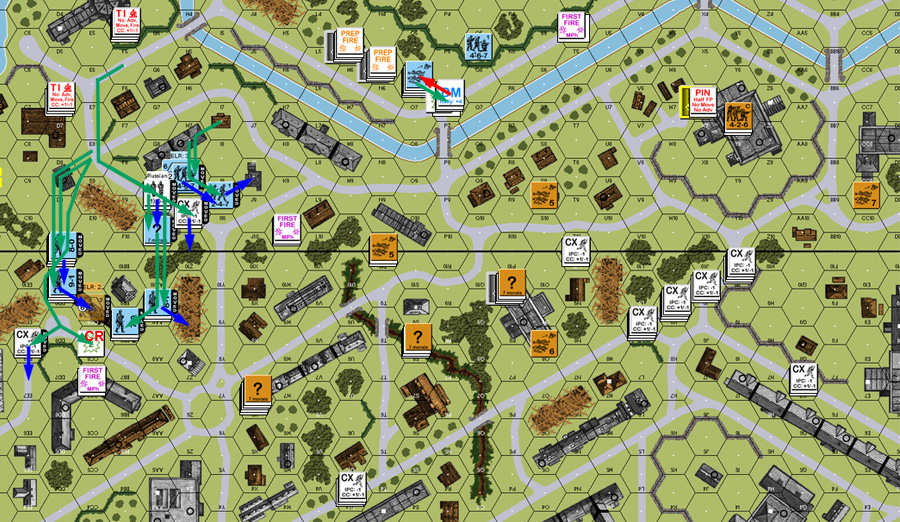
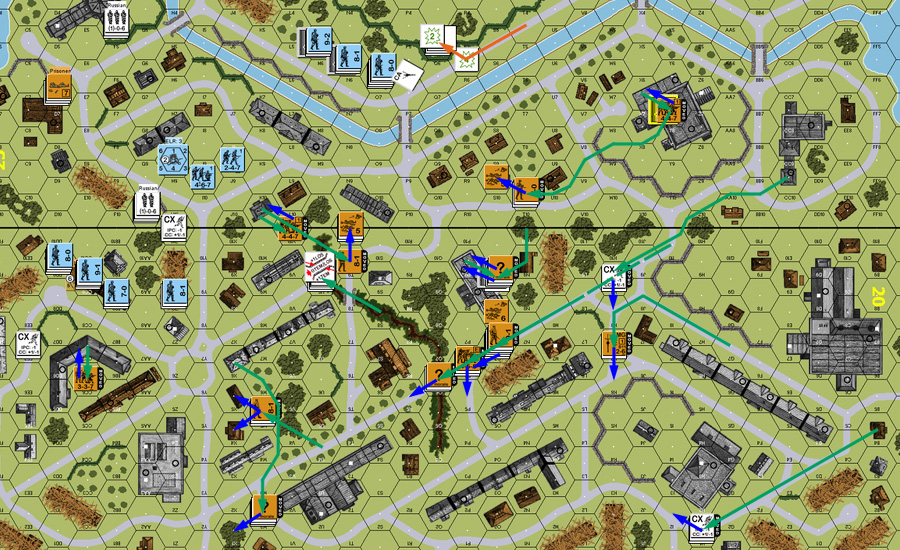
Discussion ¬