
PB5 Taylor Made Defense
Continuing my reposting of old AARs to fix the image issues, here’s the next one from the Pegasus Bridge series in December 2006:
And we’re back again with the next Pegasus Bridge scenario. This one happens back in Benouville, the location of PB3 (but a bit more restricted than last time). Patch is attacking with the Germans, who have to take six out of the seven stone buildings in my set up area.
Generally, that’s a fairly tall order, given the difference in quality and the fact that he only has 6 squads (versus my 5 1/2). But, there’s little, if any, open ground to cross, and he has three PzIVHs and a Marder I as support. I have two PIATs as tank killers. Also, one of my three leaders is wounded and three of my squads are Walking Wounded
The only thing I can see to do is a really tight defense in the village, and pray to hold out 7 turns. Outside, there’s just not enough cover for my comfort.
So far, so good. Patch once again agreeably broke a MA during his first turn. At the beginning of my Turn 2, he permanently disabled it, so that’s one less big gun to deal with. Meanwhile, the infantry is slowly working its way up to me, and the tanks have pretty much surrounded the village, keeping to range 3 or greater from any possible PIATs. I’ve broken two HS, one of which is just coming back, he’s broken both of my PIAT-toting squads, which have just rallied.
So, it’s my MPh on Turn 2, and I’m trying to figure out how to reshuffle the defenders, and wondering how the heck I can go Panzer hunting….
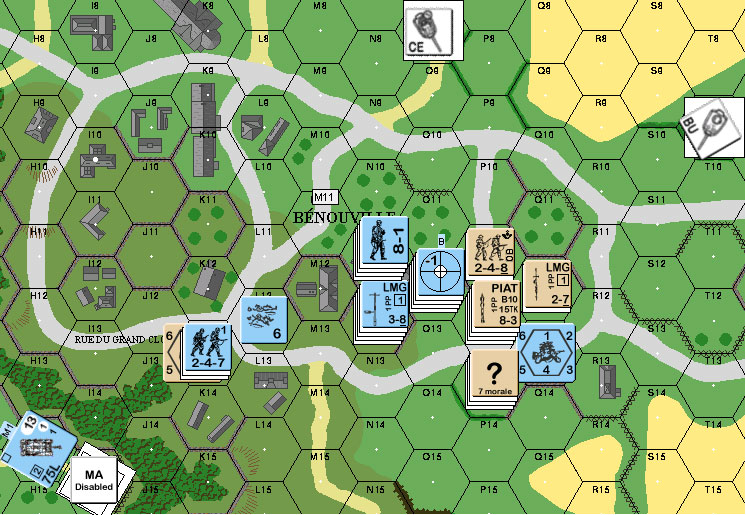
Situation at beginning of MPh, British Turn 2.
Patch commented:
“Holidays have delayed a response from my end.”
“This is a nasty little scenario for the British, as there’s just about no place to hide from my fire at set-up, and absolutely no place to hide after movement turn 1. When something breaks, it’s staying under DM. I can easily keep tanks out of PIAT range, and have circled the wagons and begun hammering away with HE and mg’s.”
“Turn 3 has led to some (possibly) overaggressive tactics on my part, given the time I have left. O12 had to rout away in the UK Turn 2, and the Marder nailed the P12 strong point, eliminating the 9-2 and two HSs. There are now just two unbroken UK 648s on board, and I decided to push into O12 and the tanks are moving up. Defensive Fire should be interesting.”
“Things certainly aren’t going well for the UK. In Turn 3 I was able to break all but two squads (pinned one, so close!) and he broke one of mine. Rindis was unsuccessful in preventing me from moving forward, and he’s now in serious trouble. I expect the game to end next turn barring some horrible DRs on my part in Defensive Fire. There is nothing I can’t hit, and he’s run out of meaningful rout paths.”
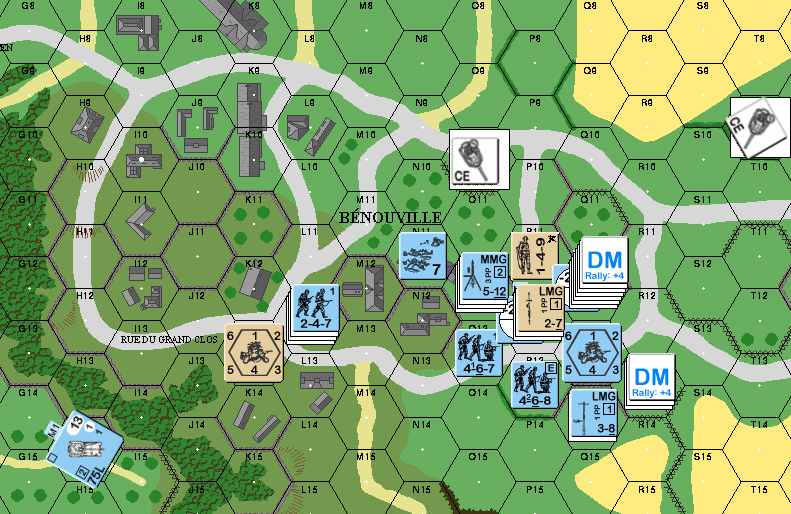
Rally Phase, UK Turn 3
“Our normal gaming time last night went bust, so we’re continuing this in email. I hope to have Rindis’ turn tonight.”
Tork commented:
“My analysis of this scenario called for the Brits to stay down on the lower elevation, where it was harder for the tanks/Marder to get LOS from out of PIAT range. Agreed, a broken brit becomes a dead brit very easily. Point-blank fire, and whoever is standing afterwards, will decide it.”
I responded:
The only problem with that idea is that the British setup area starts on hexrow M, so there’s only two buildings in the valley that they can start in. And outside the buildings there’s no cover.
My look at it before the game said that the valley would be a deathtrap for the Brits.
Problem is, the upper level is a deathtrap too.
I really don’t see how the Brits are supposed to win this other than the ability of ML 8 squads to sit and take it. I suppose I could have put my PIATs in HSs outside the village so the tanks couldn’t just surround it first thing, but I can’t see them lasting long.
It isn’t helping that I just can’t get a Final attack DR of less than ’10’….
“And it’s over! Rindis hit the canvas in Turn 4, surrendering after the UK Rally phase. I had all buildings under control, and he had a HS and 8-0 left. I lost two tanks, one due to MA recall, and one to a sniper, so it could have ended earlier.”
“We still don’t know a good UK strategy for this one, but the ROAR is fairly even so someone’s figured this out.”
“On to PB 6: It’s About Time!”
“And it’s about time, too.”
Postscript:
Another scenario I don’t remember too well. However, it seems that Patch is with me in my assessment that there’s no obvious good moves for the British. The opening setup makes it very easy for the Germans to surround the town from the beginning and keep the Brits from putting up any good defense as any break is likely to be permanent. Patch’s turn 3 pic above says it all. There’s a Hero in P11, a Walking Wounded squad in P12, another one in Q12, and a 8-0 leader in R13, plus a broken leader and a squad and a half of brokies in the last two locations. That map is also the entire playing area, so there is literally nowhere to run. ROAR still shows it as fairly even, but I don’t see how the Brits can survive this one.
Discussion ¬