
Two Rounds of Mt Vesuvius
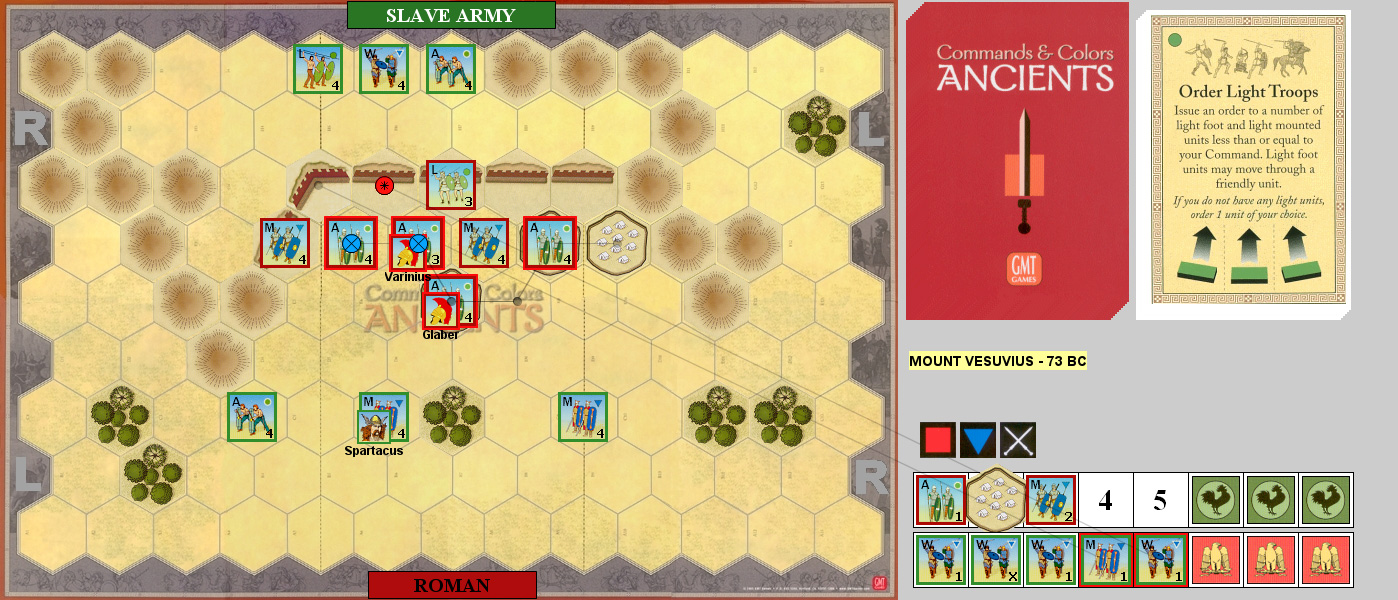
After the Incident at Morkedia, Patch and I did our usual round of Commands & Colors: Ancients. Up this time was the start of Spartacus’ slave revolt, with a battle at the foot of Mt Vesuvius from Expansion #2. Spartacus is hitting the Roman camp, so there’s slave units on both sides, with Romans in the middle, with a wall on one side. There’s four Roman camps as well, which can be looted for banners. Two of them are merely occupied by leaders at the start.
I had Spartacus for the first battle, and I started with Order Two Right Left (thanks to the upside-down setup, I just realized I mixed up my right and left flanks in Vassal) to send in two Warriors, who lost four blocks between them doing three hits to a single Aux. Patch Ordered Lights, which he used to occupy his camps and finished off a Warrior. I Ordered Mediums to hit both sides of the Roman camp, finishing off the Aux, and then lost the second Warrior to blocked retreat. I also did a block to an Aux, and two to a Medium, but lost six blocks across three units to do it.
Patch Ordered Three Center to knock out a weak Warrior, and do a block to a Medium, and a block to another Warrior, who “retreated” to a camp Patch had just vacated to man the walls. Clash of Shields got me that Warrior and a weak Medium, who finished off a Medium, forced an Aux off the wall, and did a hit to a Light at a cost of one block. Patch Ordered Lights, got himself into a really compact mass, and finished off my two units at the walls. 3-5

Patch started the second game with Double Time, with a Medium killing a leader (Varinius) and taking a camp, while a Warrior forced an Aux to retreat, advanced, did a hit to a Medium, and was forced to retreat over the wall with two losses. I used Line Command to get a good chunk of the Roman army in motion, supporting my remaining leader, finishing off the Warrior, and trading blocks with Spartacus’ Medium.
Patch Ordered Three Center, sending two units across the abandoned wall, and a Warrior from behind. He knocked out a Medium with a blocked retreat, and did two blocks to a Light. My Order Three Center got a Medium back in the fight, and let me work with two Auxes stationed to one side. First Strike caused the Medium to retreat again before they could try to get Spartacus, while an Aux and Warrior traded three blocks, and my other Aux did a block and forced a retreat.
Clash of Shields ordered four units for Patch, and lost his just retreated Aux as they attacked across the wall. My Light took a hit, Patch finished off an Aux and attacked the Light on momentum, getting three banners—all ignored (leader, support, and camp), and Patch lost the Warrior on a blocked retreat. An Aux was also reduced to one block by taking a hit and three banners, which took him to the baseline. I Ordered One (Mounted Charge) to finish off Spartacus’ Medium, and he evaded to a Warrior. Patch Ordered Two Center, but got no result, while I Ordered Two Left, and advanced over the wall to force a Light to retreat off the board. 5-4
Afterword
The first game saw a really weak hand for me (my starting cards were almost all ‘order two’), and then the dice favored Patch. However, he used the fortified camps and walls well, and ignored a lot of sword hits thanks to them.
One of the annoyances of the slave army is the mix of Warriors and Mediums. Notably, the ‘surrounding’ force has two of them, and they are out of range of the Romans, forcing the units to break up, while already broken into three groups (the units on the ‘regular’ or ‘wall’ side at least are bunched up).
And the usual complaint about “surrounded” or “ambush” scenarios applies here. Forcing the second group of slave units to retreat away from their start, and through the Roman camp messes up what is actually a fairly fun small scenario. The Romans technically have the advantage of defenses, but just don’t have the units to cover everything, and so have to make some hard decisions, while Spartacus is too broken up to use several cards easily.
Discussion ¬