
Battle in the Mačva
Last October, I finally got to try out GMT’s 1914 series. It had looked interesting from the start, with a detailed operational look at the start of WWI, where keeping armies and corps straight was important. It turned out to be a bit more than I wanted and more than I bargained for.
Mark and Jason played it some together a while ago, but for this game, Mark and I were using the version 3 rules for Serbien muẞ Sterbien‘s introductory scenario. The Vassal module is not in good shape, using custom code that no longer works with Vassal, and frankly there are many places where it seems to do something half one way and half another without either being a complete solution. But it does function, if you go back to a version of Vassal that doesn’t just refuse to load it.
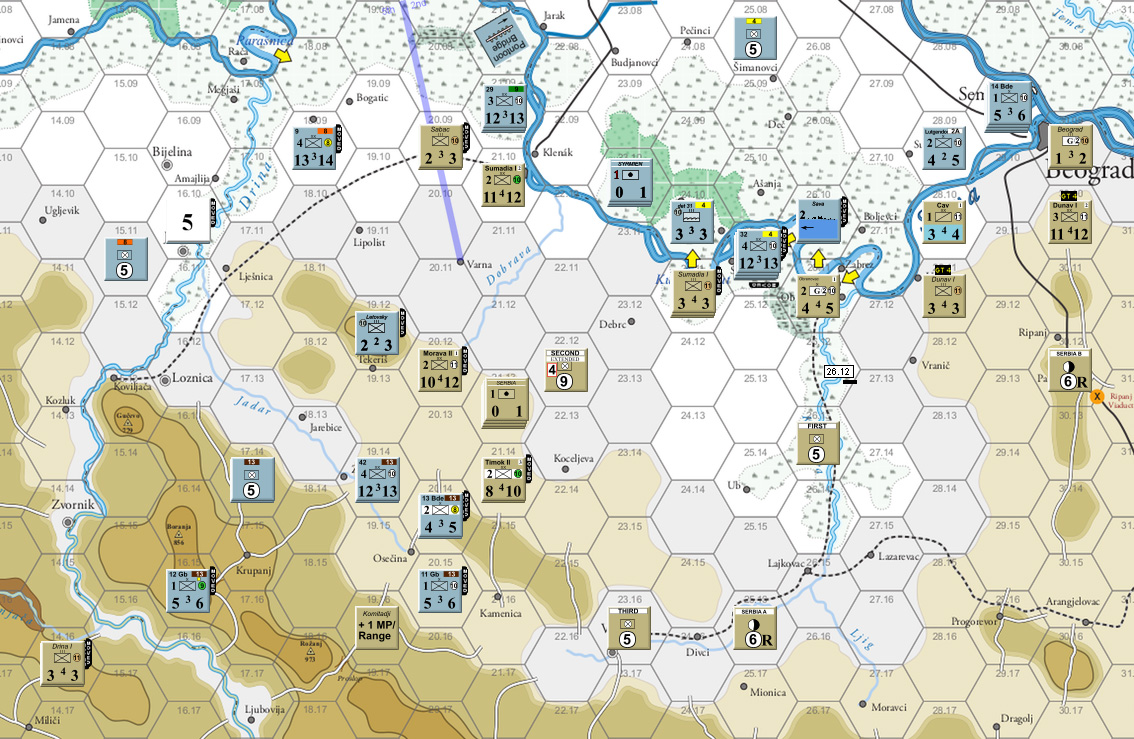
The scenario covers most of August and the defense of north-west Serbia, and I had the Austro-Hungarians, moving in with two armies, one of which largely pulls out for Galicia mid-way through. The main goal for AH is Valjevo, some eight hexes away from the border. The Serbians get the initial turn, and suffered some cohesion loss in two divisions as they force-marched towards the border. My initial attack across the Drina did nothing more than wear out two divisions, but a second attempt on turn 1 (the scenario starts with turn 0) knocked out both elements of the Loznica brigade, and took Loznica itself, which is one of the Serbian victory objectives. (Both sides have objectives they are unlikely to take/hold, meaning the scenario is geared to be a draw in most cases.)
Meanwhile, I crossed the Sava in two places, and the Serbians quickly repulsed the landing near Sabac, wrecking the Dani brigade, which was forced to retreat back across the river. However, a follow up attack on a regiment two hexes back ran into the 29th division as it crossed, which easily defeated the attack, and allowed me to get a pontoon bridge established.

Having taken out the border defenses during the Serbian half of turn 1, the 13th Corps raced ahead, bouncing the Serbian Third Army supply train out of 21.14, and cutting off the Drina-I division. The 8th Corps moved to take on an element of the Drina-II covering the north at Tekeris and caused a step-loss to it, then wiped it out with a failed post-combat effetiveness roll, but the attack wore out both divisions of the 8th Corps. An attack against the Serbian forces north of Sabac didn’t do anything, but the prepared attack did tie them down from causing trouble elsewhere (before we caught that, one regiment was going to go bounce the 8th Corps supply train out of position—which of course he did on the next turn anyway). Drina-I had moved onto my south flank, but the collapse of the border ended with it trapped behind the lines where it tried to move back into supply, bleeding cohesion for the next couple turns.
The Serbians counterattacked, but my counter moves left him with a hit to cohesion and losing a small unit while forcing me back in good order. I tried clearing the Sabac regiment out of the northern flank, but only ended up sending my own division combat ineffective. The Landovsky regiment was sent to Tekeri to hold the line while the 21st division recovered, and the 9th division (which had just recovered some cohesion of its own) chased off Sabac. An attack from the bulk of 13th Corps forced Timok-II back with losses.
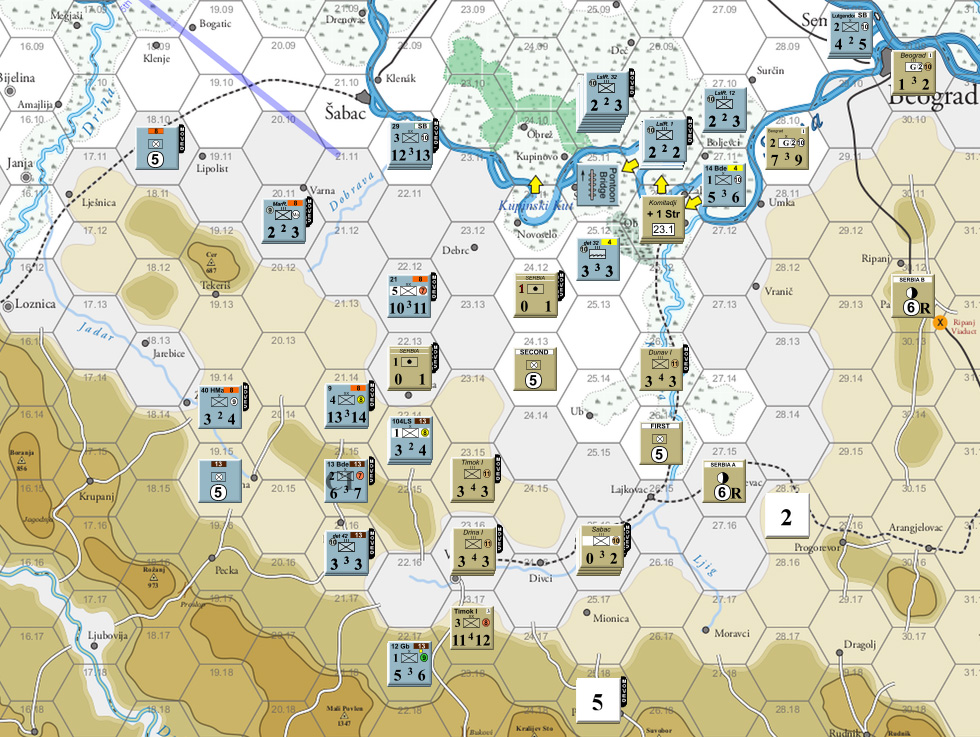
The way to Valjevo was momentarily open; Morava-I moved to the ridgeline outside town, while Timok-II went into the valley south of there. The rest of the line facing the A-H Fifth Army was fairly thin, but still nearly equal to what was facing them. I sent the 31st Division across the Sava to the east of the previous action, forcing the Serbians to react after the 32nd had previously crossed one of the loops that actually work for the Austrians. This didn’t work out with Mark getting a great roll to do two step losses, push the 31st back across the Sava, and nearly wreck it. However, the combat also sent the Combined Division combat ineffective.
I attempted an attack on Timok-I’s position, only to see Morava-I move to join the defense, sending it down to a 3:4, but a great roll still won the combat, sending the Serbians back to Valjevo with a step loss. Straggler recovery ended up replacing that, and Combined recovered enough to provide some protection to the flank. Importantly, this is also the point at which the final Serbian division, Dunav-I, becomes available (it’s on map the entire time, but is inactive south of Beograd until turn 4).
I contemplated an attack directly on Valjevo; one big attack to try and get in, which would invite the Serbians to concentrate there against my attack. Instead, I hit the two flanks, hoping to drive one or both off, and gain a better position for an attack next time. This did not serve its purpose. I did demoralize the Combined Division, helping secure my north flank, but it didn’t take me where I wanted to go, and a poor roll on the south flank merely hurt me instead of the Serbians. Much worse, I hadn’t anticipated how fast the Dunav-I would move, and it arrived before I could do another attack.
We went a bit further, but I didn’t have what it took to get anywhere, and remained stuck outside of Valjevo.
Afterword
I have a feeling this is one of the more successful A-H games. I’d think the front would stabilize much further west most of the time. I felt Mark should have given up Sabac fairly early and not had that extended line sapping his strength. It is one of the Serbian victory locations (they need the full set), and he, naturally, was wanting to hold it while looking for a way to threaten Loznica. While the 8th Corps performed poorly, he wasn’t really able to get past that to turn the 13th’s flank. My drive was dogged by average to above average rolls, with mass giving me progress, until the combat that got me next to Valjevo itself, which was a 3 (on 2d6). Getting too aggressive on a flanking maneuver also cost him a division since it was completely out of supply until it became combat ineffective.
There’s a lot of good ideas in the 1914 series to like. But I think the design would have been better served to pick one or two of things and focus on them. The regular scenarios can be a lot bigger than this one, and I found there to be too much to keep track of. I don’t really relish the idea of a bigger scenario.
One of the initial selling points I remember was the attachment of divisions to corps and those to armies. Basically, enforcing some command control into the regular mess allowed by wargames. I think that alone would be enough for a game to focus on, as there’s no real way for it not to lead to a decent amount of tracking paperwork, especially in a physical game. (One of the faults of the Vassal module is that the rules state some units aren’t allowed to trade corps attachments, but in the module it’s impossible to tell which ones, as they all have the commands to do so.)
The game also tracks unit strength (steps), cohesion (‘combat effectiveness level’), and quality (‘proficiency rating’). Step losses are quite common, and this doesn’t try to go down to individual strength points (like Der Weltkrieg), but does have up to four steps on units, which is extra markers. Cohesion is very important, and is nice to see, but tracking that takes place off-map on the corps display, so I imagine remembering who needs cycling out before becoming completely combat ineffective could be challenging (one of the real wins of the Vassal module is tracking that on the main unit counter). This feeds into a complicated CRT that takes a while to understand (and the version 3 rules streamlined it!).
One die roll gives you numbers that you then look up elsewhere to determine losses, is a modifier for cohesion checks, and determines retreats. Both sides pick if they are ‘determined’ about this combat, which can boost those results and change the retreats. Really nice idea, but it does mean that the decisions don’t end with a simple yea/nay on knowing the odds (which you generally don’t, since you aren’t supposed to peek at enemy stacks, though we did since the Vassal module doesn’t support that well, and we needed each other for staff work), and you’re looking up three things at the end of it. For each combat.
Cohesion also gets used for movement, where you can go faster than normal at the cost of perhaps losing some cohesion. The enemy gets a smaller move right after yours, and then combat happens, so the defender can pour units into an attacked area. Or pull out if they’re not nailed in place with a prepared attack. Move-countermove and attack-counterattack is another good idea, and certainly one I’d like to see elsewhere. It’s kind of the opposite of typical ‘exploitation’ phases, so it may not work well outside of WWI, but I’d like to see it tried. On the other hand, it can lead to a bit of ASL-style skulking: As long as a prepared attack is not declared, you can move out of a space during counter-move, and move back into it during your move. This prevents an attack during the enemy turn, and they can’t advance into the hex, but it was blocked by your unit during movement.
Any one of the preceding four paragraphs would likely be enough complication to deal with in a large, expansive scenario. Here you have all of them. I felt quite outmatched by the rules, and play slogged for quite a while getting used to it. I did eventually get a handle on it all, and felt much better about the system, but it is an awful lot to handle, and probably requiring more dedication than I care to give.
Discussion ¬