
Serbia The Defiant
After trying out Serbien muẞ Sterbien, I introduced Mark to the Der Weltkrieg series, with the equivalent opening of the war in Serbia scenario from the Eastern Front set. We reprized our earlier roles, so I had the attacking Austro-Hungarians again. The scenario rules force an A-H attack at the start, and naturally, the withdrawal of the 2nd Army after the first couple of turns. The main A-H goal is to take Belgrade, while the Serbians want to maintain a front from the Montenegrin border to the Romanian border, or better yet, take one of the A-H cities on the map (Novi Sad, Pecs, and Sarajevo). Overall, the scenario is 29 turns (from mid-August to mid-December, seven turns per month), though the action will naturally concentrate in the first month or two.
In the north, the terrain is clear, and is the same area as depicted in “Battle in the Mačva”, to the south the terrain rapidly gets very rough, and there’s a horde of A-H mountain brigades facing off against Serbian regiments and the Montenegrin army. An interesting twist is that there’s three A-H river flotillas with a fourth due in mid-September, but they’re confined to the Danube, while in Serbien muẞ Sterbien they could operate on the Sava. Since they’re designated as “flotillas”, it’s possible they’re centered around bigger ships, and just the smaller ones were capable of going on the Sava, but I don’t know enough to say.
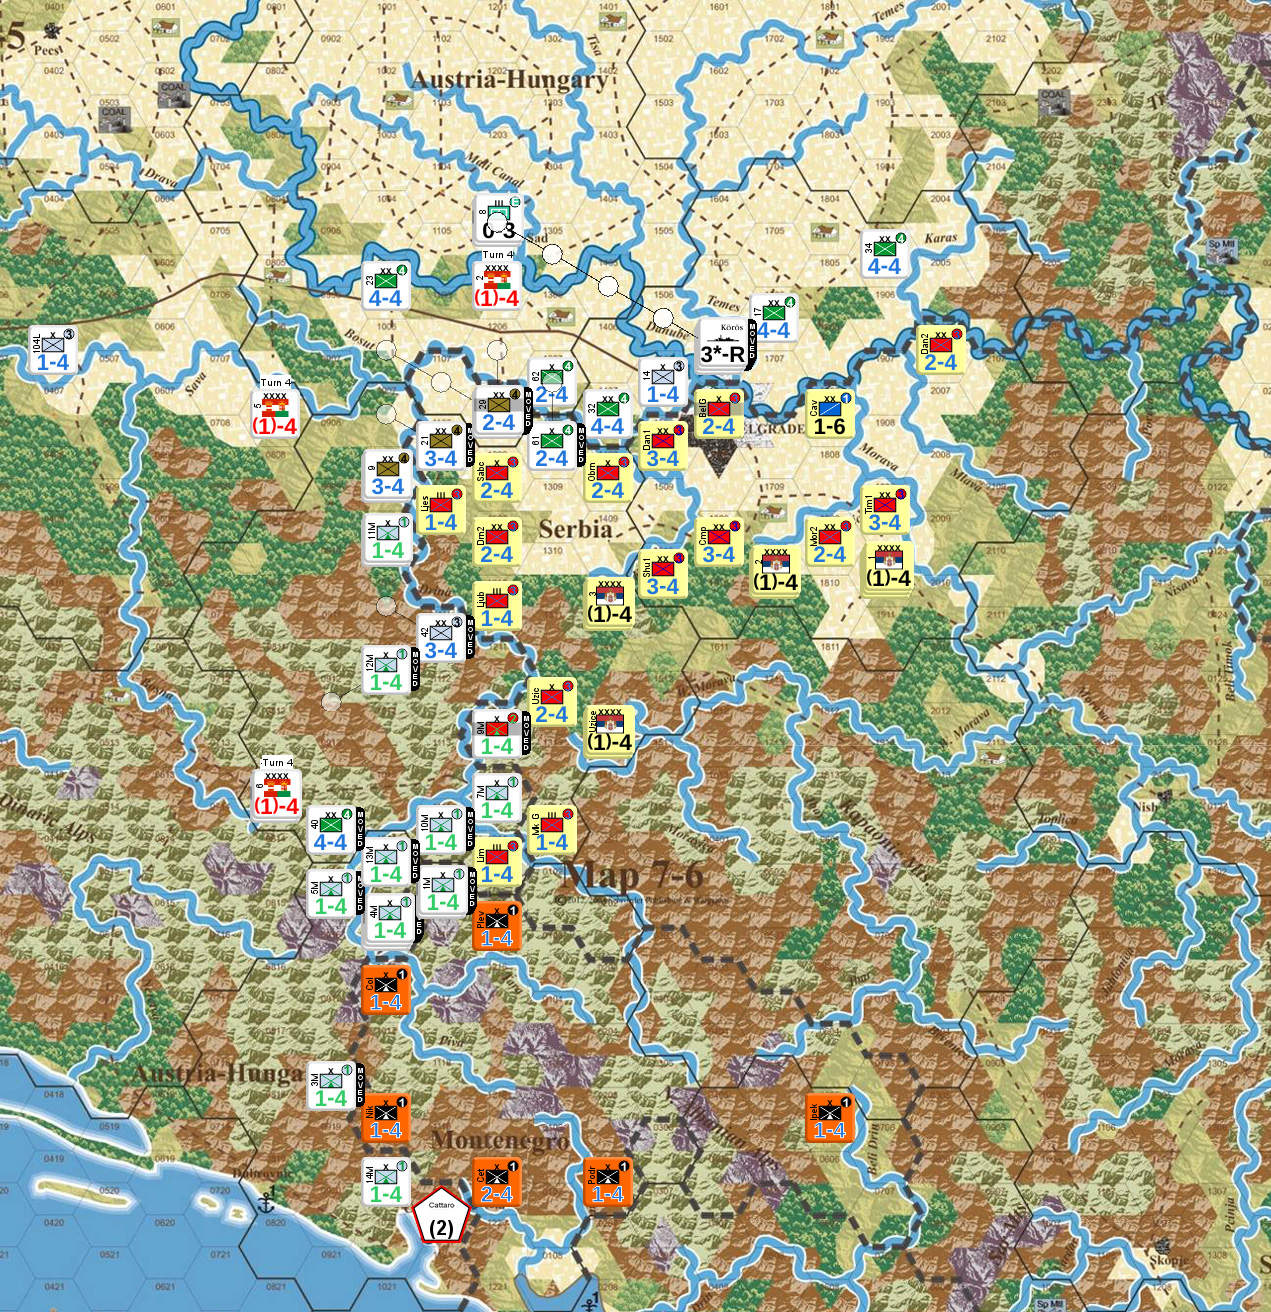
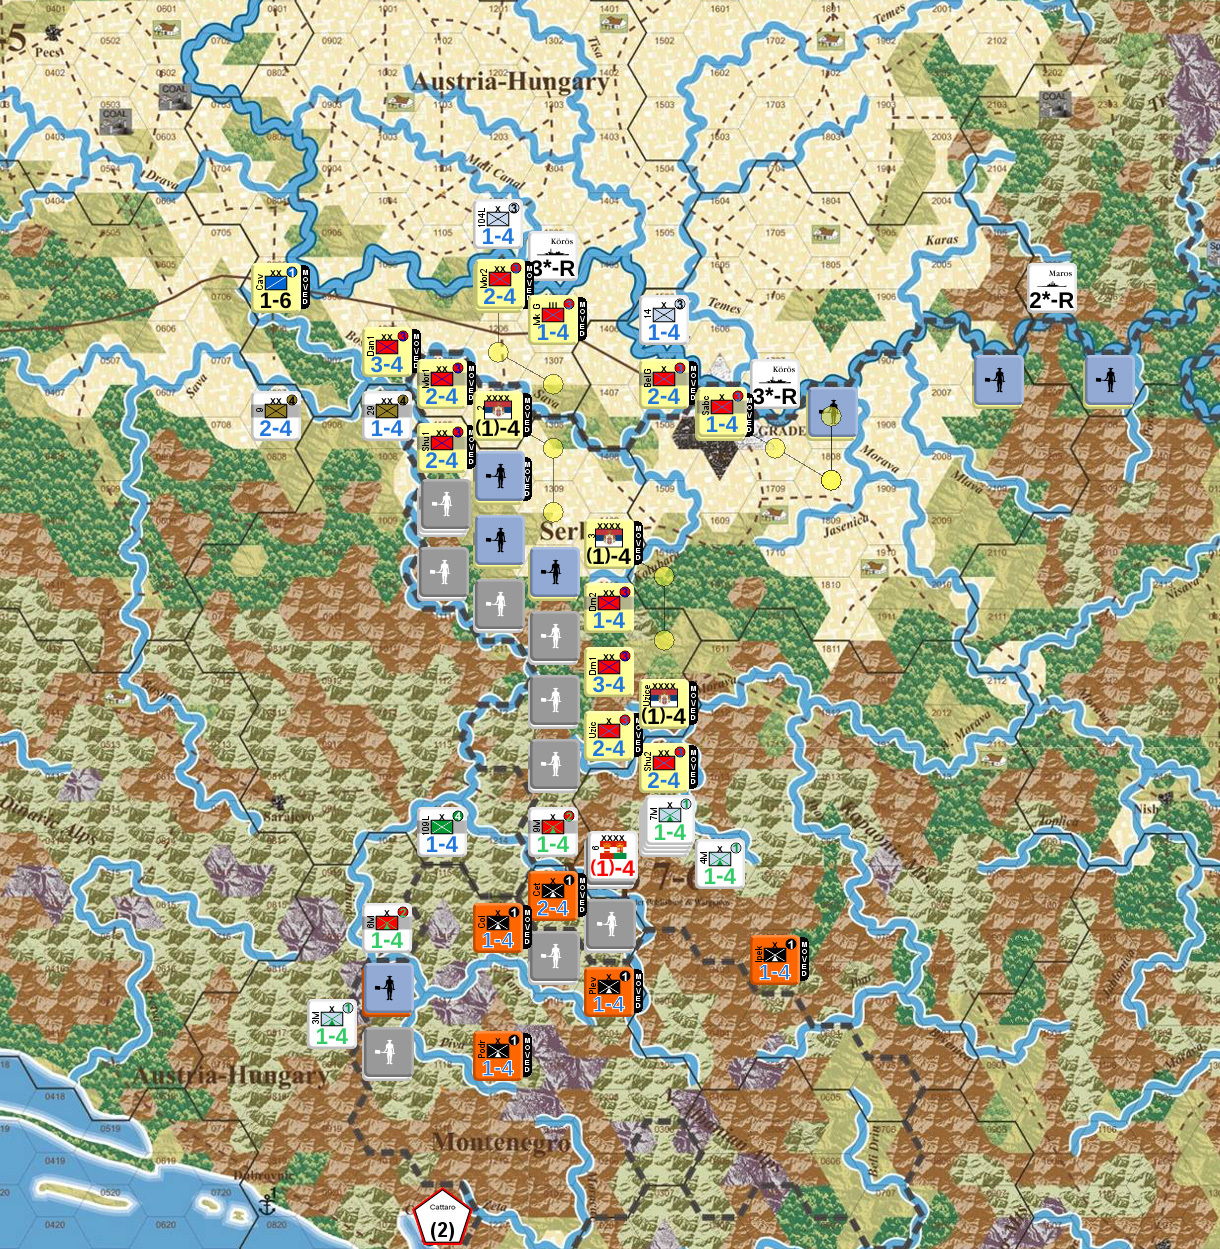
August 3 turn, first of the scenario, which goes to mid-December.
The scenario all the units who can to move into Serbian ZOCs, and then everyone who can in the 5th Army, attack on the first turn. This turned into three attacks, one of which would generally be ill-advised (and cost me a strength point for no gain). Overall I traded two strength points, losing one each from the 29th and 42nd divisions, but reducing Sabac and knocking out the Ljesnica regiment and advancing over the Drina.
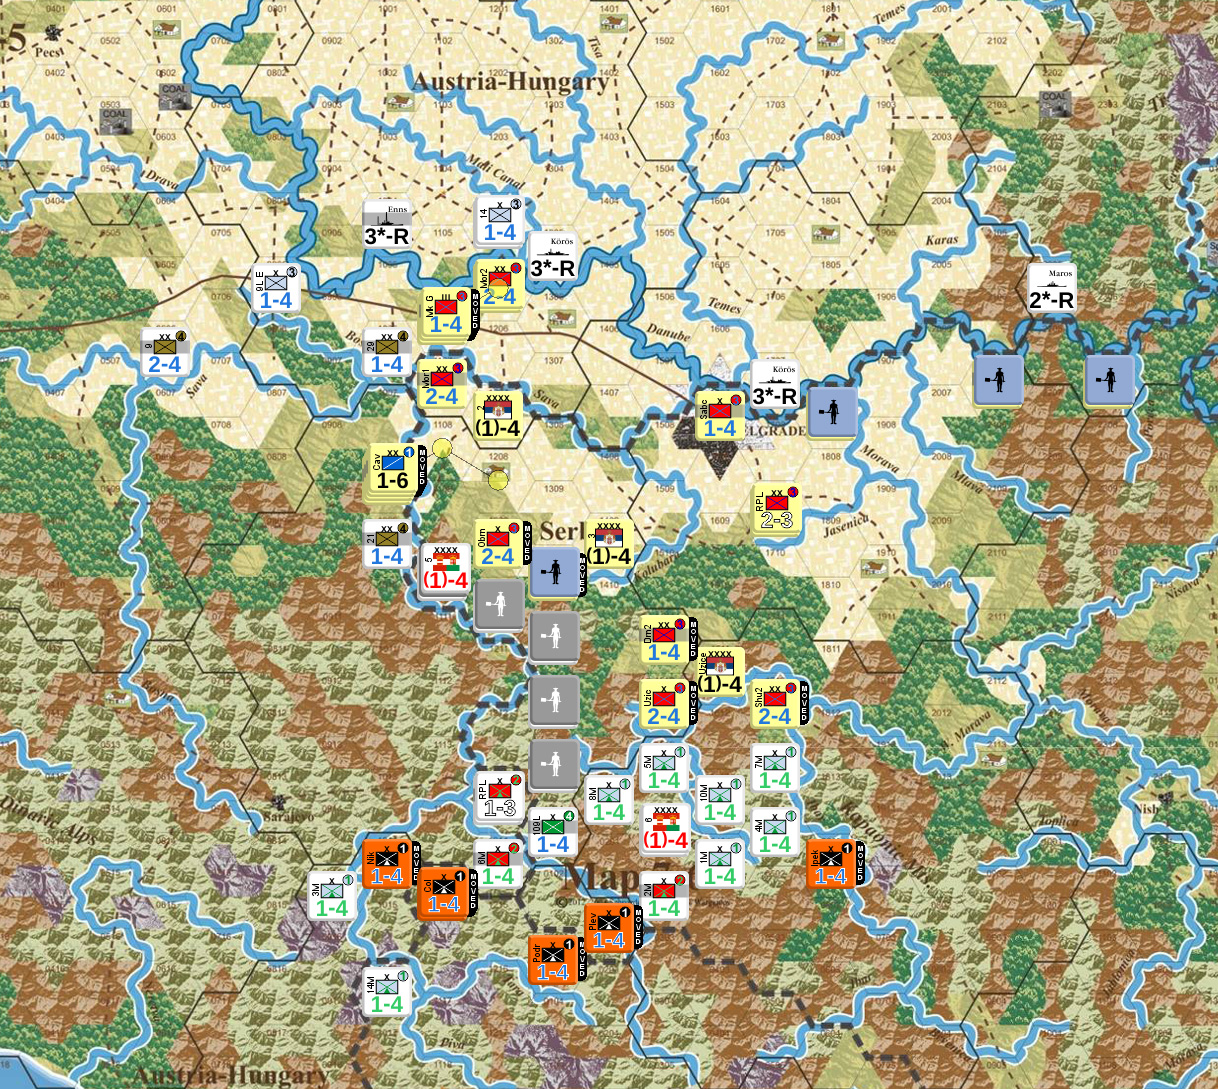
Mark pulled back Sabac, and started assembling a solid line, and I continued moving forward (still mandated by the scenario rules, though attacks are no longer mandated). Two more attacks finished off Sabac and weakened Drina 2, costing me one strength point, and taking two hexes. Mark counterattacked on his turn at the northwest corner of the line to do 2 SP (I retreated to reduce it to one), and took one in return.
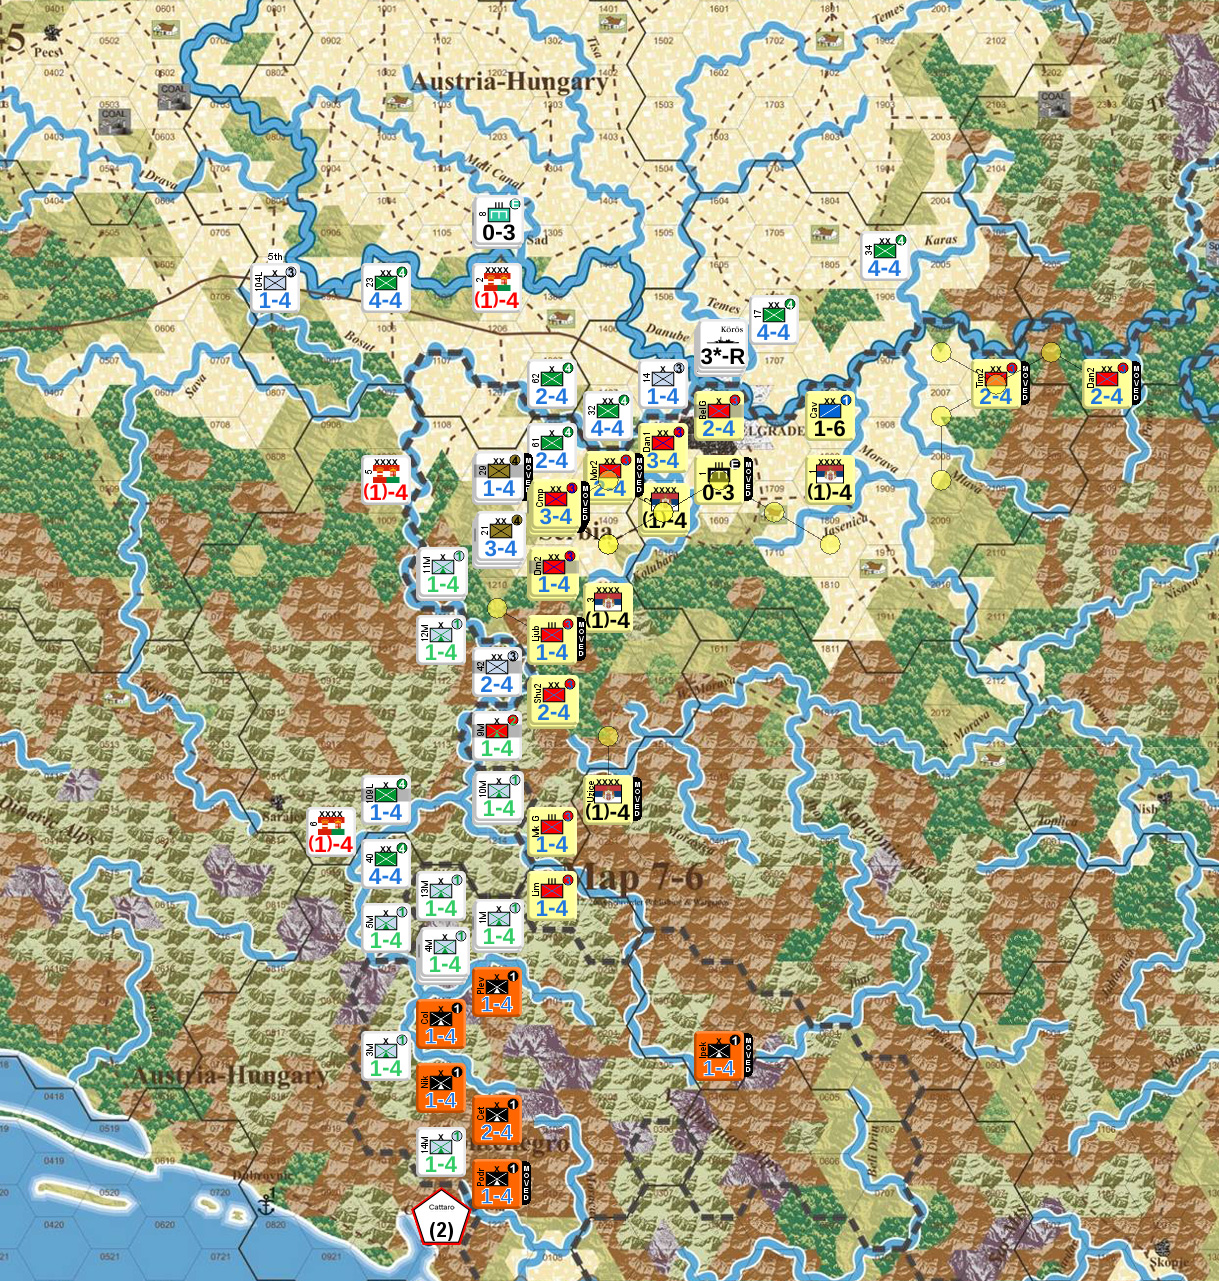
End of August 4.
After that is when the A-H 2nd Army starts moving out to Galicia, and the main active front becomes dangerously thin. With hindsight, some of the southern area should shift north a bit to help cover things. I had other plans. I managed an attack to take out Ljubovija regiment and get next to the 3rd Serbian Army HQ. This forced the HQ back, and the southern line had to pull out of threatened positions, but counterattacked the 21st division in decent terrain, and we each lost a point.
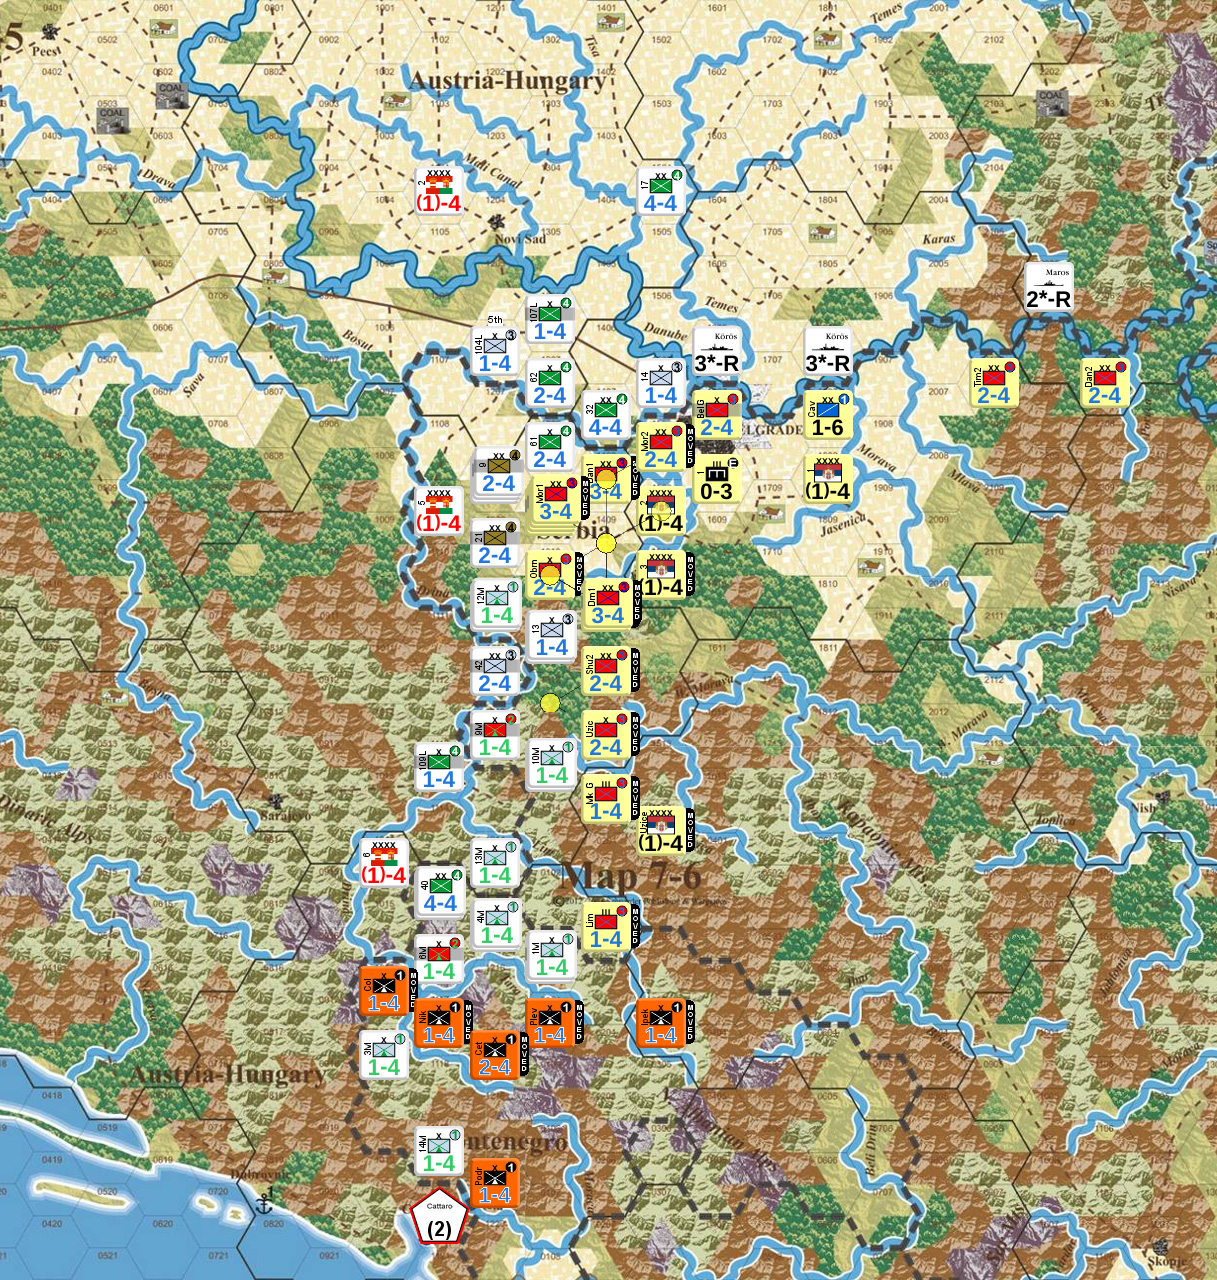
End of August 5.
My operational plan was to insert the mountain troops between the Serbian and Montenegrin army, and try to take out the extreme Serbian flank in what I hoped would turn into a real threat to supply and break everything lose.
The good news is that while the terrain is slow going, the mountain troops have the ability to squeeze through the gaps. The one regular infantry division, and the 5th Army HQ, not so much. Also, the terrain means anything less than a 10 SP attack (the first column to have at least 1 loss on any result) will likely fail as most of the results get shifted down to the -1 result, which makes attacks really painful to do.
On the other hand, we ran into a rules question that caused a warping of the action. Supply (in the general ‘not surrounded/pocketed’ sense, not combat supply points), needs a path to a friendly board edge (none for the Allies here) or “friendly country interior” (consisting of a personnel center—not defined, though it’s mentioned that cities may or may not be one—and a food resource center). Thinking later, that’s probably ‘any friendly country’, but we got hung up on the fact that Montenegro itself certainly has neither of these. So, how are their units supplied? We went with an idea borrowed from PoG/PuG where minor units are always in supply in their home territory. (Which should be reasonable enough for them anyway.) But, that led to ‘conga lines’ of units anchored within their territory to threaten nearby Sarajevo… and my supply. And my advance was much the same.
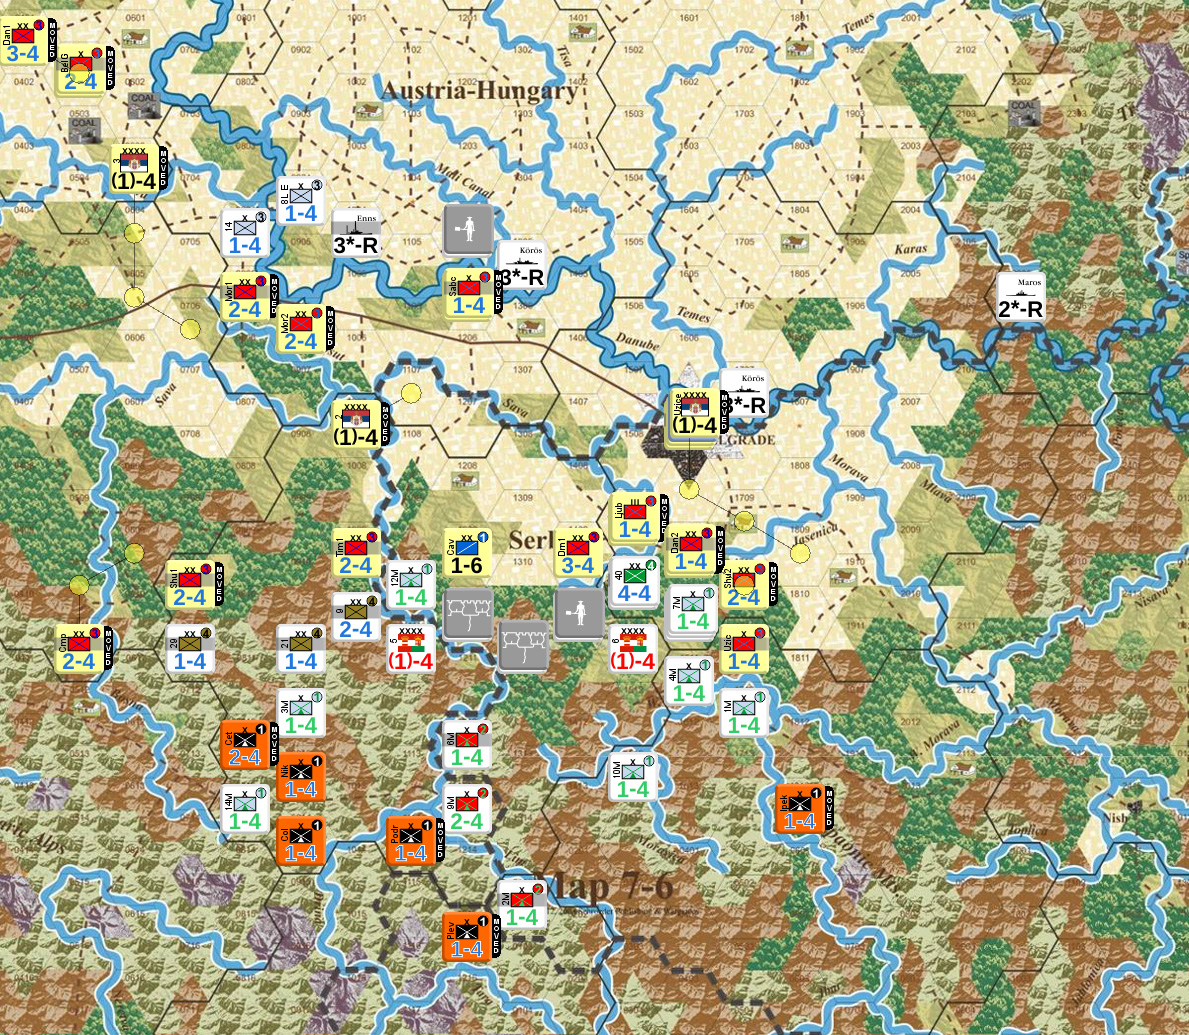
Mark hit the 21st division again, reducing it to 1 strength (and taking a loss himself), and I pulled out of the clear terrain in the northwest corner. I was losing men too fast and easily, and needed something defensible with the last of the 2nd Army departing. The 40th division finally reached the front that had been advancing in front of it, and I knocked out the Mokra Gora regiment in return for the 13th Mountain Brigade.
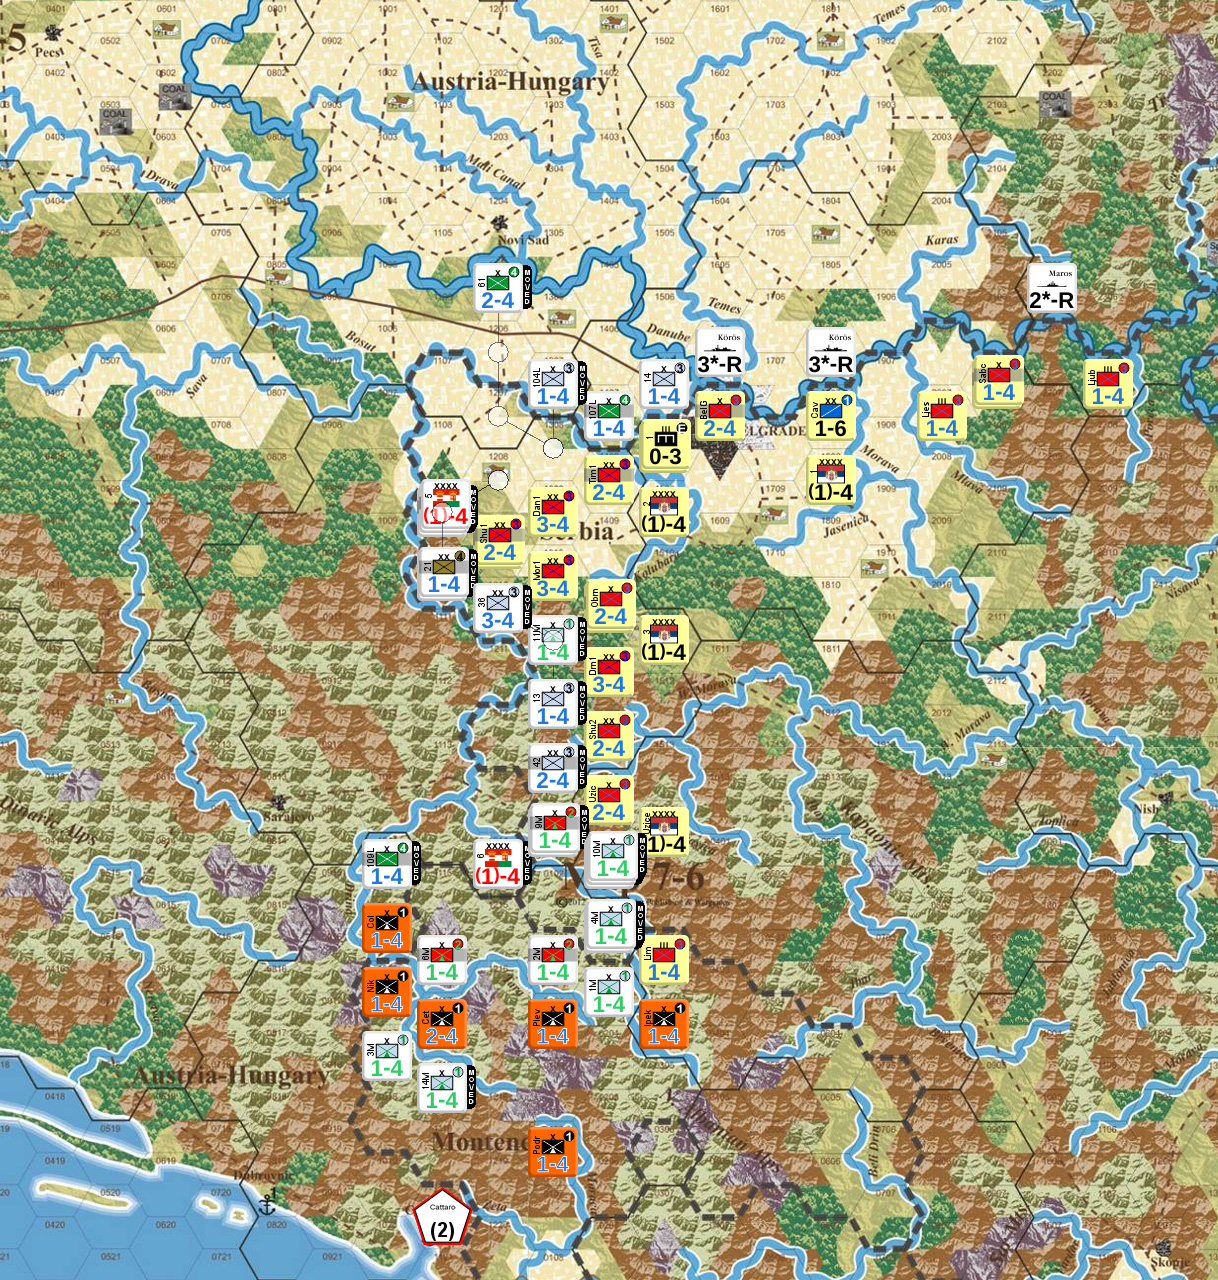
End of August 7.
Mark had already been finding men wherever he could by breaking down units to shuffle around, and now started moving into the gap I felt I had to open up. Hitting the start of October, we both started trenches all down the line; we knew most of them wouldn’t last, but not starting them and then having the line not move for a month would have been a bigger folly.
I knocked out the Lim Regiment on the south flank as the month opened. This forced some reworking of the line down there as Mark crossed the Sava, knocking out the 107th Landwehr. I had to pull back behind the Danube to protect Novi Sad directly, further opening the hole in my line, and the cavalry division headed northwest to threaten Pecs.
End of September 2.
The good news was at this point the first reinforcement of the game appeared: the 9th Landwehr Ersatz in Novi Sad. That allowed me to keep someone there, while trying to slow/stop a lunge towards Pecs. Mark was able to concentrate south of Novi Sad for an 8SP assault on the city. Oddly, river flotillas can cause losses to units trying to move across the Danube, and they can participate in attacks adjacent to the Danube, they don’t do anything for defense, nor interdict attacks that have engineer support (the only way to attack across the Danube to begin with).
Amazingly, Mark rolled a 1, the only result causing no losses, and failed to cross the river. Right after that, I got the 14th Brigade into the city, and 2 SP was more than he was going to get out of there. Mark started working on my cordon and the flanks of my main line. Further low rolls (1 and 2) saved two units, while my counterattacks had no effect either.
End of September 4.
I was forced to pull back anyway, but Mark had finally pulled away from my advancing flank on the other end of the line, and I surged forward, hitting the Uzice brigade to push north of the Morava after trading strength points. The cavalry division worked it’s way through the line, and another “1” die roll saved the 9th LE, which then pulled back to safer ground.
At this point, the gap between his forces west of my line was two hexes—blocking supply thanks to his ZOCs, and the only unit in the gap was the 5th Army HQ, a non-combat unit. On the other hand, non-combat supply rules are generous, and I was free to trace south through Montenegro to the coast. I destroyed the remnants of the Drina 2 division and started coming out of the rough terrain.
With defense stiffening, and problems truly cutting off supply, Mark spread out again, as he extended his line towards Pecs. The 9th LE arrived before him and the arrival of the 8th LE in Novi Sad helped me start threatening to re-cross the Danube behind him, while I continued approaching Belgrade after knocking Dani 2 out of position. Mark made an unsupplied attack on Pecs that went nowhere (worth a try, my unsupplied counterattack was incapable of causing a loss), and as October opened, I made a failed attack (another 1) on Ljes, and then Mark finally got a good result on one of his attacks, and took Pecs.
End of October 2.
Conclusion
We called it at that point. With the Serbians having taken a city, even if they abandon it immediately afterwards, Austria-Hungary cannot win. Now, he needed to pull his troops back, and reestablish a line that goes out to the Romanian border, but that was quite possible. Getting a line that goes down to Montenegro would be a lot tougher. And without that an actual Serbian victory can’t happen either. I was down to 15 supply between my two HQ, which would power about five attacks, but getting through to Belgrade was getting increasingly unlikely, since Mark was able to get a few units in there, and there was the Drina 1 (3-4) in the area to deal with.
Also, Mark had some hideously bad important die rolls. He should have taken Novi Sad earlier, and that would have given him time and attention to put together his line before it came to this.
Even with more sensible supply for the Montenegrins, truly cutting them off from the east would be a problem, so the general threat they pose to Sarajevo is certainly real. That entire southern flank doesn’t really play right from what very little I know (I should have just had a brigade sit on Sarajevo as a garrison though). Now, if I had stiffened the north with units from there, perhaps. This is also us looking for maneuver solutions to WWI problems.
The north suffered from the fact that once the 2nd Army is gone, there’s not enough to really hold ground in the open terrain without being weak enough somewhere for some good Serbian attacks to drain manpower even more. Possibly, I could have done the same, but that would require a concentration that would make the rest of the line even more fragile, and I had called off attacks after seeing my supply drain away, and I knew I was going to want it for counterattacks (as opposed to the Serbians who counterattack for free).
The good news is that Mark liked the system. This is my first time outside the low counter density of Crimea, and it held up well. I’d like to see the combined Galicia-Serbia scenario someday, as I think the Austro-Hungarians should have some very tough decisions to make (I think leaving behind one more infantry division would have done a lot here), and the Transylvanian Gambit scenario looks interesting.
There’s also an optional CRT designed to deal with lower-strength combat better. I wasn’t going to use that in a learning game with Mark, but it features column shifts instead of DRMs, and has the idea of a ‘1’ loss that can be negated with a retreat. Both of those look like good ideas, and I want to see it in use at some point.
Discussion ¬