
SH54 …And Settle Their Hash
Back in August Patch and I played the next Y161 scenario, “…And Settle Their Hash”. A Kzinti squadron is performing drone bombardment when a Klingon squadron arrives to spoil the fun. The Klingon ships are much heavier, but with 18 drone launchers on three ships, there’s a lot of free firepower for the Kzinti. The cost is they’re loaded with all Type-IIIXX drones, which are two spaces, and so will run dry fast if just thrown out as fast as possible. I took the challenge of the undersized Kzintis, and played a little too conventionally.
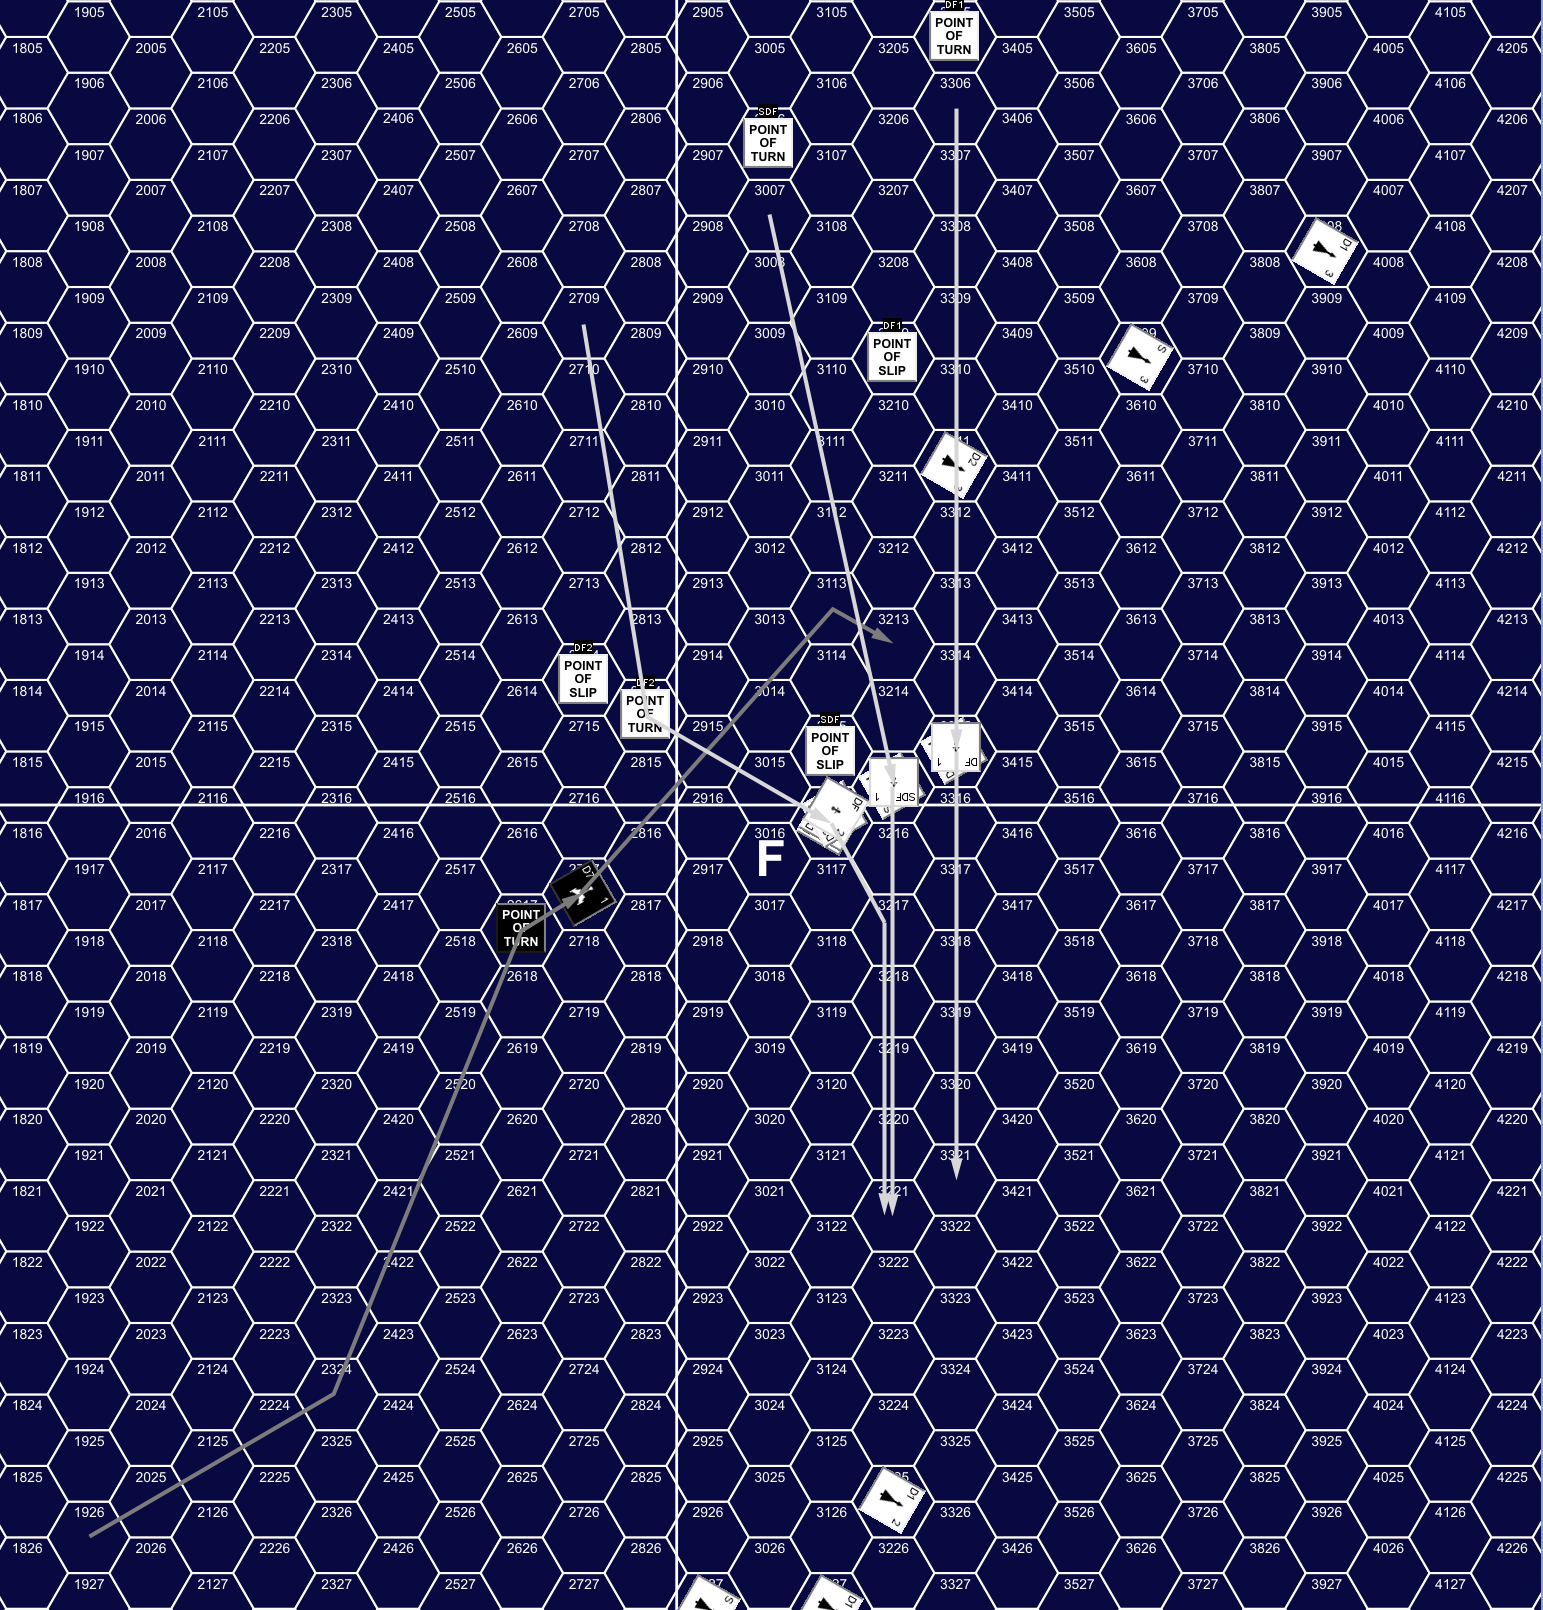
The Kzintis set up in a line on the right side of the board, and can gain points by continuing the drone bombardment, i.e., launch drones ballistically in directions B or C, and they they get away. (They get 2 VP per such drone under Modified Victory Conditions.) The Klingons are on the left, just entering the (floating) map, but more paralleling the bombardment course than aimed right at the Kzintis.
Patch determined to close range with opening speeds from 21 (E4) to 28 (D7), while I went speed 24. I launched one set of bombardment drones on impulse 1, and a second set on 3. Even at these speeds he had not caught up to the drones by the end of the turn, and increased speeds to 27 (E4) to 30 (D7) while I stayed at 24 for turn 2. I turned across his path near the top of the turn, and launched a new set of bombardment drones on 10 while Patch started engaging the first two sets. On 16, the D7 turned towards me, with only one drone destroyed, while the F5 and E4 continued after them. On 22 I started turning off, but he turned in to pursue on 25, at which point I launched four drones at it. The D7 fired two disruptors for four damage to DF-77‘s #3 shield, and followed up with a drone launch on 26. The SDF had sensor channels powered, and turned off the tracking on the Klingon drone, while Patch destroyed a drone and damaged another with phasers.
Meanwhile, the other two ships cleaned up most of the rest of the first turn’s drones, and the E4 hit with a range 12 disruptor to do 2 damage to the SDF’s #1.
While I went up to 27, Patch downshifted for turn 3, with speeds from 27 (E4) to 24 (D7). Once I looked at speeds, the SDF loaned the F5 two offensive ECM. I turned towards where the F5 was hunting drones, and it knocked one out with one its drones and boosted ECM to 1, and on impulse 6 the D7 fired on the SDF to do 7 damage to the #5 shield with a pair of disruptor hits and mixed phaser rolls. The F5 and E4 turned away from me, and on impulse 10 the DFs fired disruptors, but both missed. I tried phasers on impulse 14 at range 5, and got 3 internals through the rear shield – phaser #3, disruptor, and drone (power hits would have been nice, but I can’t complain about three weapons in three hits). On 18, I blinded the one active scout channel to fire the SDF’s phaser-1 into the down shield for two more damage, including a warp hit.
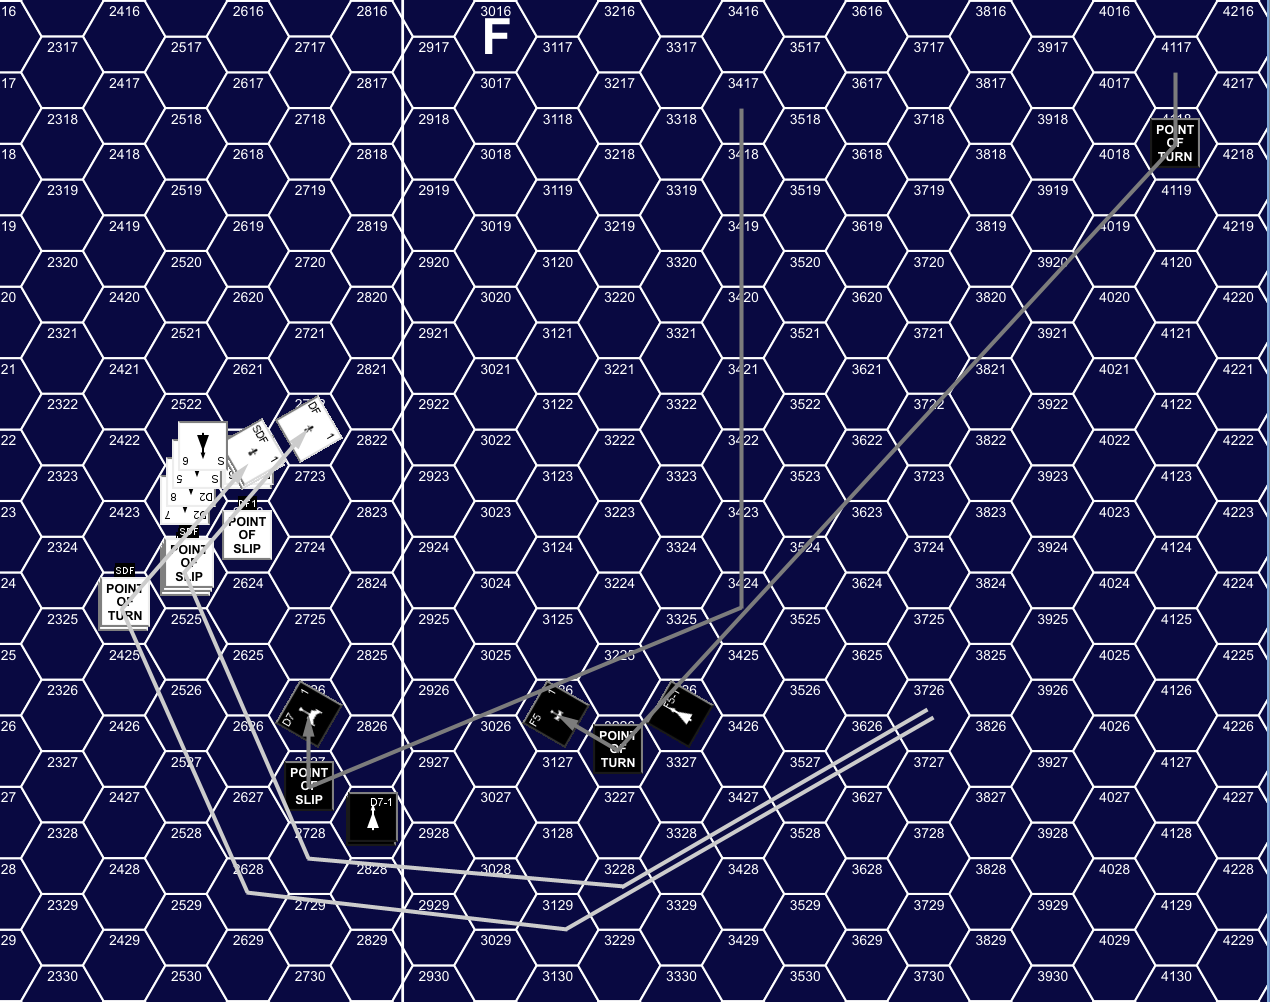
The D7 sped up to 26 for turn 4, while the E4 and F5 were stuck at 22, and I stayed at 27. Much of the turn was us running on steady courses as we tried to recover power, but on 25 the D7 collapsed the SDF’s #5 with a disruptor hit, and followed it with a third disruptor and 3xph-2s to punch 4 internals through the down shield, getting the bridge and a drone rack. Then on 27 the F5 hit with both disruptors to do 6 damage to the SDF’s #6.
I stayed at 27 again for turn 5, while the D7 matched me (since it was in moderate close pursuit, this was not welcome news), the F5 went 25, and the E4 28 with minimal shields and fire control off. I loaned the D7 a point of O-ECM. Not getting any better opportunities, I started turning on impulse 2 to try and get a point-blank pass on the D7 (I should have gone for this much earlier). Sadly, even with the speed and maneuvering advantage, I couldn’t make it happen.
In fact, by the second half of the turn, the D7 was getting behind me at increasingly close range, when it and the F5 both launched a drone on impulse 19, and each of my ships launched a pair on 20. And then on 21 the D7 expended power to counter the O-EW and put up 1 ECM, and fired all four disruptors at the SDF, with two hitting the #3 shield for 7 damage. The F5 followed up on 24, hitting with both disruptors to collapse the SDF’s shield, and do three internals for a drone hit. It responded by emptying out the rest of the drone racks to add some distraction.
For turn 6, the E4 went up to speed 30 and turned on shields and fire control (good for him, as I was now headed for it at about range 10), the D7 went up to 29, and the F5 was 30. I slowed down to 21 to try and recover power for a heavier engagement, which I could now longer avoid. The DFs split from the SDF (which was having major shield problems…), and the D7 and F5 chased after the SDF. On impulse 29, the D7 opened up at range 1 for 23 internals through the #5 shield. This crippled it, but there was 8 warp left, which meant that disengaging by acceleration was still possible, if there was at least 6 warp left at the end of the next turn.
The SDF didn’t really have any good options though. So instead of trying to put everything into an immediate getaway (@ speed 21), it did a HET on impulse to in the hopes it might get away before the D7 could get the weapons up again and turned after me. Unfortunately, this meant going by the F5, which rolled 1s on the three rear phasers for 15 internals. This gutted it to six internals plus excess damage. Worse, he beamed over boarding parties from both the F5 and D7. At the end of the turn, boarding combat was 7 boarding parties to 4, and we did two damage to each other. With more enemy boarding parties on board, the SDF plotted for self-destruction, and successfully accomplished it for turn 8 EA.
Afterword
The two DFs had tried to come back around to help during turn 6, but couldn’t get close enough in time. Once the SDF was effectively dead, they plotted to disengage on turn 8. This was an Astounding Victory for Patch (actually, nearly double what he needed for that), as my only points were for doing internals to the E4, and all the speed-12 drones he took.
We both agree that this one is an interesting scenario. The Kzintis have the tools for a much better showing, but I didn’t use them that well. When the D7 got separated from the other two, I should have resolved to take my lumps and try to overrun it. Failing would have been possibly even worse than this was, but a range-0 pass with maximum drone launches is something the Klingon has to be afraid of, because that will overload the defenses. (And of course, surrounding the D7 with 18 drones is likely to cause more than a few problems.)
This would presumably be a slightly different scenario in a group that is not quite so “speed is life”. I was giving up a lot of options in the mid- to high-20s, but I didn’t want to encounter a D7 on its terms, and the high speeds meant that overloads were never a worry. With frigate shields, I can’t take hits from those. But, the lower the speeds, the more important those drones get. The biggest weight in my calculations is that two volleys of drones empty the racks, so I was doing my best to get drone swarms out in a measured fashion so I could refill the racks from all the cargo stowage. That was somewhat successful, but my efforts to get drones through for actual bombardment did not.
Discussion ¬