
SM3 The Moray Eel of Space
Since I was still in an SFB mood after finishing “Border Incident” with Patch, I soloed my way through the third monster scenario during January as part of my Y160 games. Having just played the Romulans in KRs, and realizing I hadn’t played as the Klingons in a while, I took the D7 for this scenario.
The Moray Eel is the first monster not directly inspired by a TOS episode, though it is definitely a graduate course for the Planet Crusher. While there is an optional variant to use information gathering, the scenario is geared around combat to defeat a monster that is headed for an inhabited planet. It doesn’t do nearly as much damage as the previous monsters (5-10 points per ‘bite’), but is much nastier as it ignores shields, meaning that every attack is doing internals, and suffering too many attacks will destroy the ship in short order. The real twist is that the Eel only attacks after being damaged. After any impulse where it receives damage, it moves to the offender’s hex (instantly, even if that’s several hexes away) and bites that unit. If there’s several ships, and they all do damage at the same time, it moves to each of these hexes, and bites them all, in a random order, in a ‘biting frenzy’.
The eel is 100 hexes from it’s goal, and moves straight towards it at speed 12 (making it the fastest monster so far), which not distracted by a ship. It apparently used to follow close-by ships, akin to the Planet Crusher, but that was removed in Captain’s Edition to keep the time pressure up. Defeating it is also a problem, as the ship has to do 200 points of damage (reduced to 193 here for BPV balance), after which there is a die roll for each separate volley (which will involve a bite) that does 10 points of damage (9 after balancing), and the Eel is killed on a ‘1’. And as usual with these scenarios, the monster can’t be fired on from outside a six-hex range, and it has MCIDS to deal with shuttles and drones.
The D7 started 15 hexes away from the Eel in the direction of the planet, and I overloaded all four disruptors as part of a turn 1 alpha strike overrun to do as much damage as possible. I lined up an oblique shot for maximum firepower, and launched a drone as it entered my hex, which was instantly shot down by MCIDS.
One of the tricks with the Eel is to fire at range, and force it to move away from the planet, which is hard to do with the initial approach, especially as I went for a range-0 shot. But I fired just as we were both scheduled to move, so that it moved a hex further away following me, and it gave up its normal move to do it. The phasers rolled a little under average for a total of 77 damage (with 4 disruptors auto-hitting to do 40 of that), and the eel did a minimal 5 points to destroy one phaser and two warp.
For turn 2, I reduced speed from 12 to 9, so that the Eel could get a little in front of me, and be drawn back by my next volley of fire. I fired on Impulse 21 at range 4, hitting with two disruptors and doing three points with the boom phasers (everything else being out of arc) for a running total of 96 damage. The next Impulse, the Eel moved to the D7 and bit for 9 damage, knocking out one drone rack, a phaser, two warp power, and one battery after finishing off the forward hull. The D7 launched a drone from the remaining rack, and MCIDS missed allowing it to hit for 12 more damage the next impulse to bring the total up to 108.
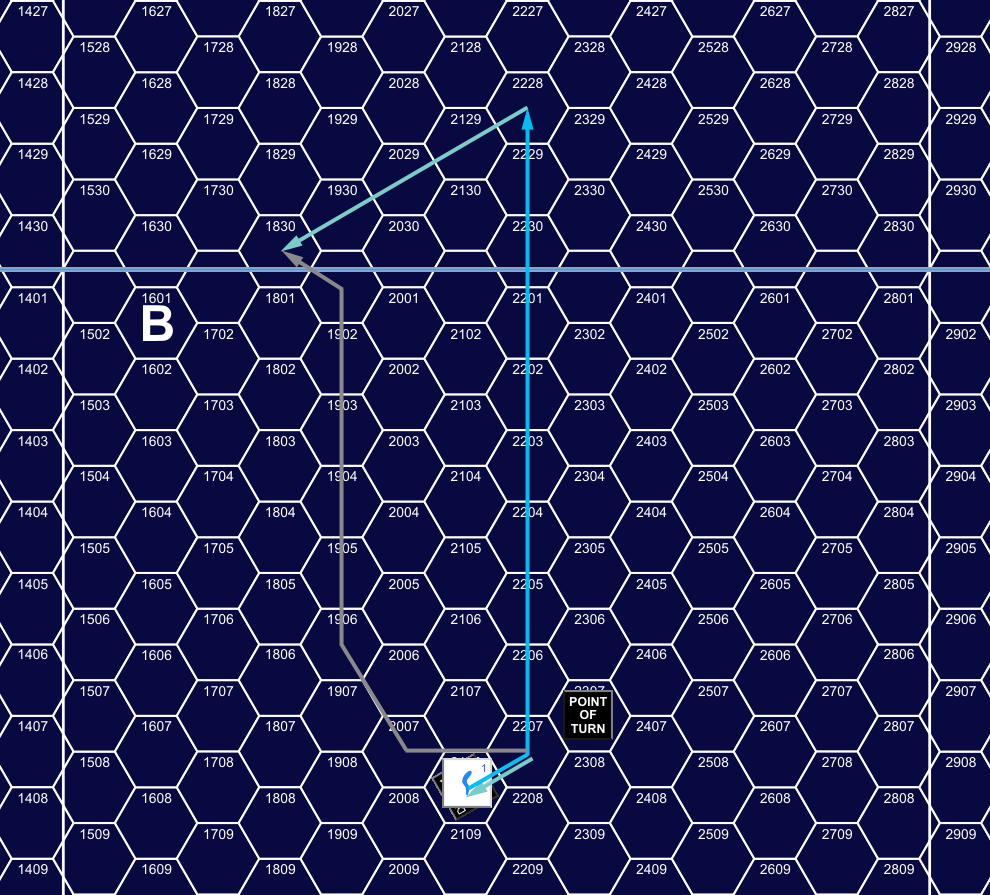
Turn 1, Impulse 24, showing movement from Impulse 23 through Turn 2, Impulse 22. The paler arrows are the Eel’s movement to bite.
The D7 repaired the first destroyed phaser as of the end of Turn 2, and increased speed to 13 to get another close-range oblique shot. The Eel was sideslipping back to its original course (part of the robot rules), which meant the D7 was drawing slightly ‘ahead’ of it to make this maneuver, but the low speed differential meant it took most of the turn to pull off. The D7 launched another drone as they met at range 0 again, but MCIDS shot it down. On Impulse 31, the D7 fired all bearing weapons to do 40 with overloaded disruptor auto-hits, and the maximum 30 points from 5 phaser-2s for a grand total of 178 damage. On 32, the D7 sideslipped away, and the Eel followed to do 8 damage to take out another phaser, the remaining drone rack, two more warp, the remaining two batteries, and a shuttle. At the end of the turn, the second damaged phaser was repaired.

Turn 3, Impulse 31, showing movement from 25 to 32.
With power continuously dropping, the D7 only went speed 8 for Turn 4, while it prepared to do the last 15 points needed before it started rolling for destroying the Eel. On Impulse 7, the phasers cleared, and the D7 fired four of them at range 1 to do 17 points on poor rolls (grand total 195). On Impulse 8 the bite did 10 points to destroy two phasers, two more warp power, the remaining shuttle, an impulse, and an APR. The D7 turned and moved back into the Eel’s hex after it sideslipped out, and fired an overloaded disruptor on 13 to do 10 points and force a roll to kill the Eel, which failed with a 5. The next impulse, the Eel bit instead of moving, doing 10 damage, which destroyed three phasers, 2 warp power, 1 impulse and 1 APR.
The D7 tried another disruptor on Impulse 15, rolling a ‘3’ for destruction. On 16 it slipped away from the planet, drawing the Eel after it, which did 7 points to take out a disruptor, one warp power, and two impulse. On 18 the D7 fired a boom and waist phaser at the Eel to do 10 points, and rolled a ‘1’ to destroy the Eel!
The 1/6 chance of killing the Eel each time probably makes the end of many plays of this a bit exciting. Certainly the D7 was well through a lot of padding, and was down to 23 power at the time the Eel expired, and that was only on the third attempt. I was very lucky that I didn’t take any ‘torpedo’ hits until the very end, and had two more of those left to try once the D7 was facing it again. In addition to the more important systems listed above, the D7 had lost its bridge (but not any other control spaces), most of the lab, one tractor, and one transporter. Damage was getting up to about column F of the DAC, and another couple of strong damage rolls from the Eel would have been big trouble, with 7’s headed for the ‘phaser’ and ‘any warp’ entries.
The purely deterministic movement makes it less of a maneuvering challenge, though the higher speed adds some interest back there. The tactics section in the rules mentions dragging it away from the planet by firing, but doesn’t mention the fact that you can scrub little bits of movement off just by timing shots around when you are about to move (so you can move even further away), or especially when the Moray Eel is about to move (so it doesn’t move closer to the planet). This is a more interesting and challenging scenario than the previous two simply because the ship will take internals every time it fires, and you have to figure out how to survive the consequences long enough to play the odds.
Discussion ¬