
195 Rocket’s Red Glare
For our next game, Tom and I ended up with a small scenario from the new Yanks (and originally from The General), 195 “Rocket’s Red Glare”. The SS are defending the board three village against a large number of American paratroopers backed up by a M36 GMC… and a number of captured panzerfausts. Setup is a little odd, as the Americans get to start in a fairly restricted area (five hexes) on board, or enter on turn 1, and must first decide which troops are doing which. Then the SS sets up, and then the Americans set up the on board troops and prepare for entry.
The Germans have 7 regular SS squads, reasonably good leadership, a MMG, HMG and LMGs, a PSK, a StuG IIIG (L), a Wirbelwind, and a 105 ART to defend two buildings on board 3 for six turns (and I should point out at this point that we missed the MMG, so I played this with just the HMG and LMGs). The Americans have 12 paratrooper squads, great leadership (four leaders ranging from 10-2 to 8-0, and all but that last have a negative modifier), with four MMGs, four BAZ (two each 44 and 45) and four PFs (normally marked with DC counters, but Vassal has American PF counters, which we used), and they win immediately upon getting Control of Q7 or O10.
I would have liked to set up on top of some of the hills to get good LOS, but the restriction to setting up in woods and buildings precluded that. The StuG and ART were part of the final line of defense, with each one pointed down the road loop near the close victory building. Most of the rest of the setup was scattered through the village, with some outliers on each flank in case he tried to go around everything towards O10. Tom put most of his forces onboard, with the M36 entering at Y1, and a platoon entering at I1.
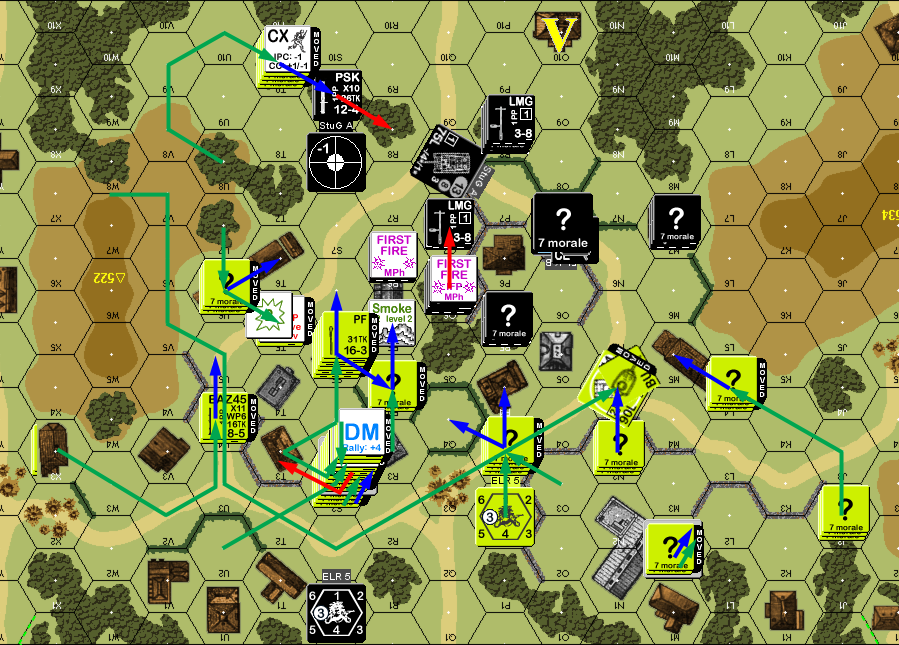
He started by deploying two of the on-board squads, and one off of I1. He tied a fair number of men up in Prep Fire, but rolled well, and killed a HS in W4 outright, as well as breaking two squads and a 8-0 in the village, though my sniper broke a squad of his in return. This allowed him to occupy the south-west end of the village without trouble, and entering platoon took up positions around N2, while the M36 strayed out of contact with anything else in the west.
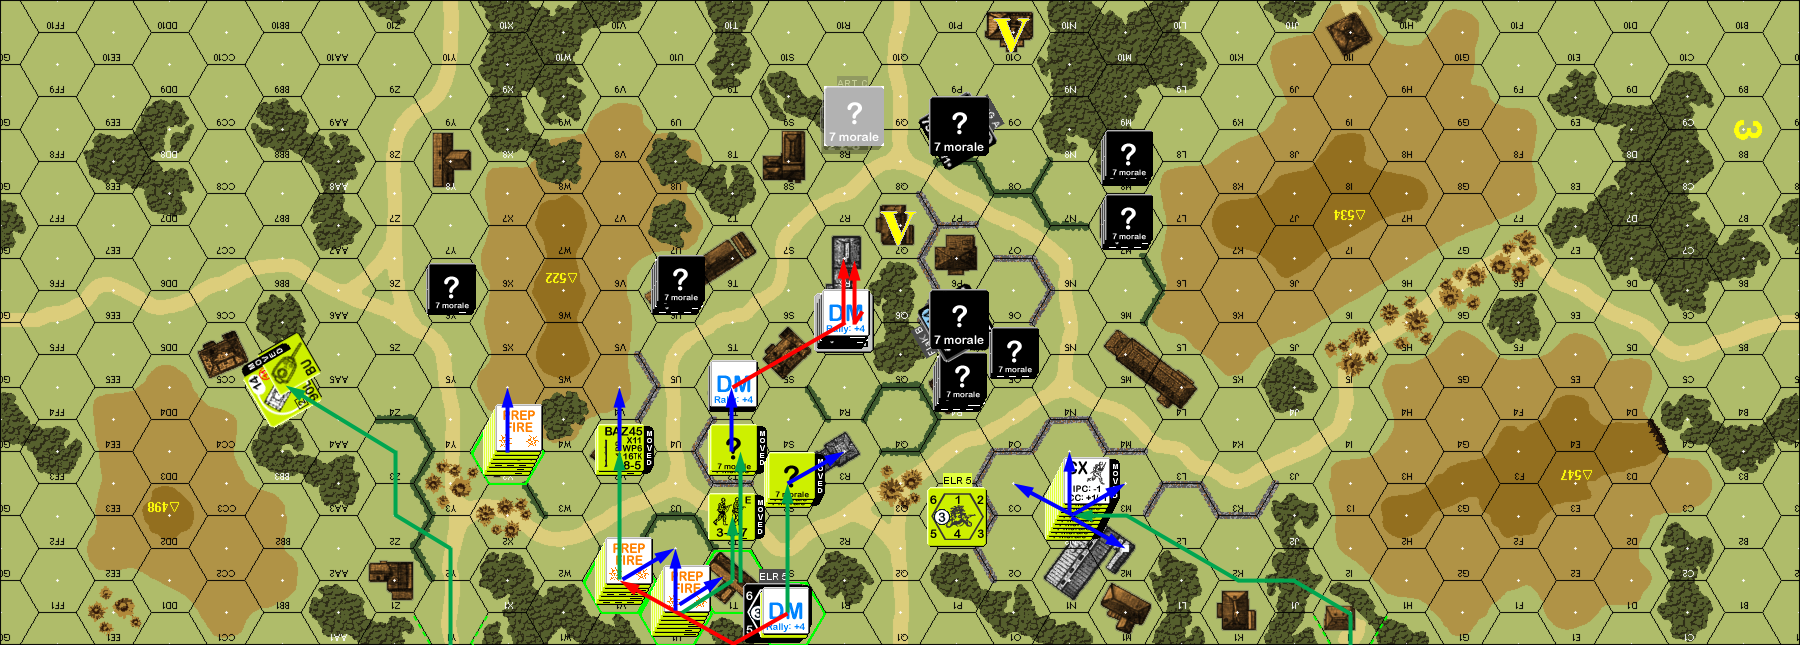
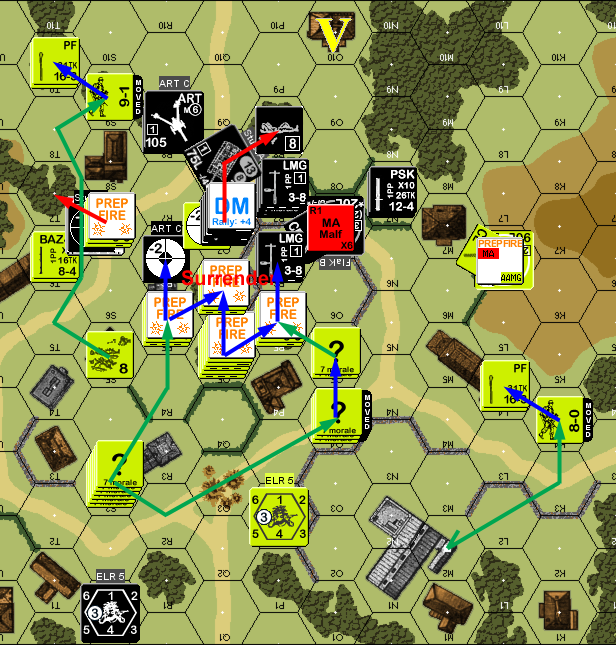
Situation, American Turn 1, showing the full board, and my HIP 105mm ART.
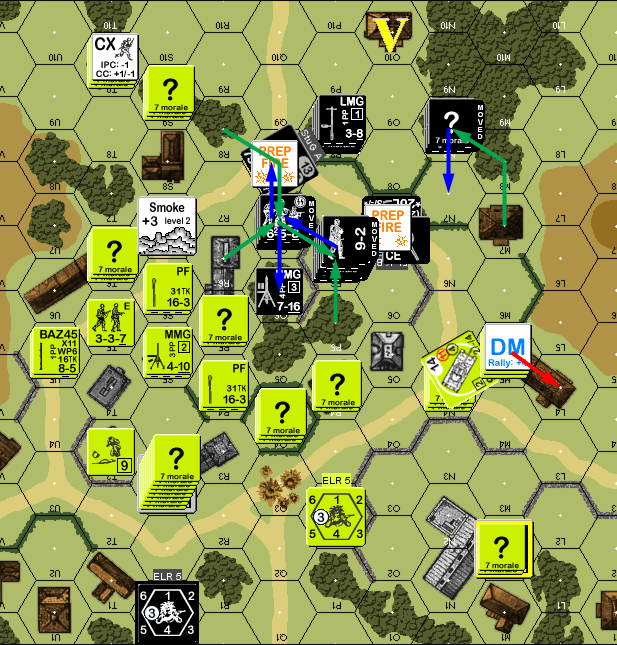
I didn’t rally anything for my turn, and Tom didn’t manage to rally his broken squad either. I tried to pull my flank HS out of Y6, but but a hit from the M36’s MA killed it. With a sea of American FP across the way, I pulled back from the first line of defense in the east, and pulled out the Wirblewind before it could get trapped in close terrain, and the StuG moved forward. Tom’s BAZ HS in V4 successfully hit R6 with WP in DFPh, and in the resulting -3MCs one squad rolled a ‘2’ to go Fanatic, and then rolled another ‘2’ in AFPh to break the V6 HS on a NMC. (“I think we’ve learned a valuable lesson here.” “No, I know this one. It has however, been repeated several times for emphasis.”)
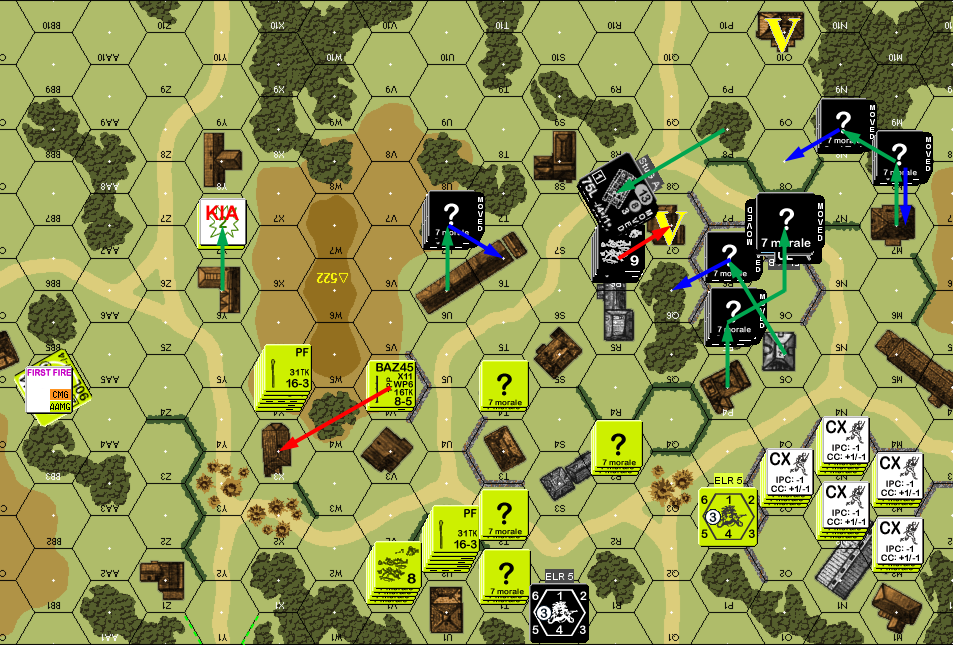
Situation, German Turn 1.
Tom rallied his squad, but couldn’t self-rally the HS, while my broken leader was still unable to rally. He set a squad+MMG+9-2 to Op Fire in V1 (obviously hoping to nail T6), and then started probing the west side of the defense, and then brought the M36 up onto hill 522. To my surprise, he largely backed off on the east side. Admittedly, he was faced with a HMG backed up by some other covering positions, but I expected him to at least start getting into L4 instead of just backing off. I tried pre-empting the Op Fire with T6, but couldn’t affect them with a NMC. The return fire broke them, but I figured routing them out was for the best anyway, as T6 was looking to get cut off.
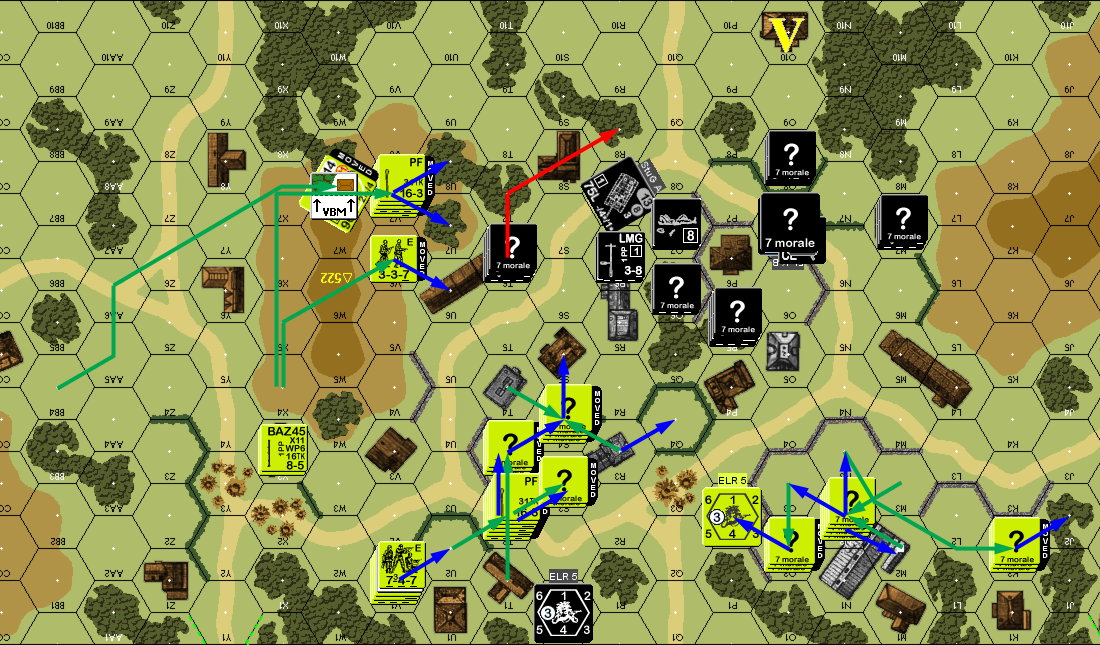
Situation, American Turn 2.
Both of my leaders rallied for my second turn, but only the non-DM squad in Q7 rallied. I generally skulked and backed up a little again, trading space for not enough time, and sent my PSK crew around the back towards where the M36 was lurking. Tom shot at R8 to re-DM the squad there, but thankfully got no other result (possibly revealing the ART there).
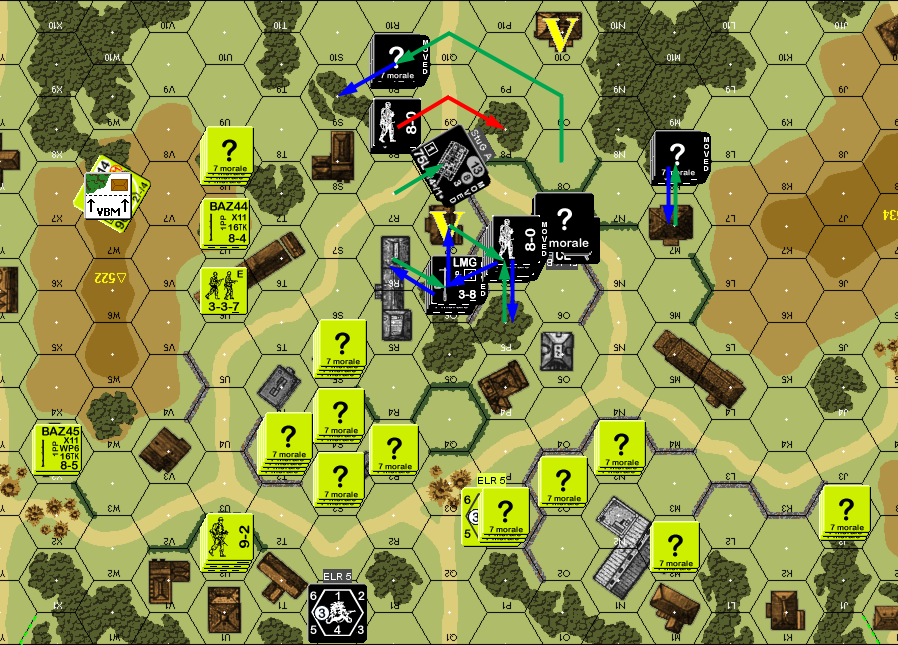
Situation, German Turn 2.
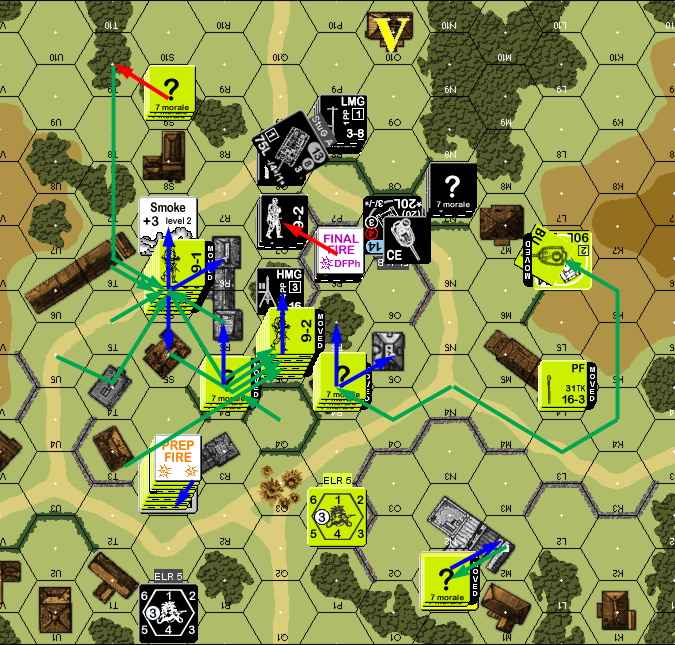
Tom self-rallied his HS for his turn, and I rallied my remaining broken squad. He got a lot more serious about moving in at this point, probing at the line, and attempting smoke to cover the advance. He pushed a unit into my new position in S9 to discover it was the PSK, and sent the M36 around to the other side of the village. He sent two groups up to S2h1, and the HMG connected with the second one to break his 9-2, and the MMG squad with him pinned to the LLTC, but only after going Fanatic from the 2MC. He just sent in the 10-2 to take over, who, combined with a ‘3’ DR got a 1KIA on O6 to kill the HMG squad and break my 9-2. Not liking the approaching Ambush, I self-broke the PSK crew and routed them to R8. It risked more fire going that way, but he was also less likely to just accidentally bump into the ART. (It turns out I should have stayed, Tom did the CC assuming I’d still be there, and lost his HS to my crew. But I had assumed he had a squad, and wasn’t sticking around.)
Situation, American Turn 3.
The 9-2 and PSK crew self-rallied for my third turn, while Tom recombined a squad in S2h1. The StuG placed Smoke in S7 to reduce fire from that side of town, and the Wirbelwind opened up, breaking the HS in M5. I skulked back for another reshuffle of the defense around Q7, hoping to keep the Americans off for another three turns, so there was almost no fire. The PSK ended under the StuG so the M36 wouldn’t try to come kill it, and sent a squad forward as a likely sacrifice to grab the HMG and keep it away from the Americans.
Situation, German Turn 3. The walls are closing in….
Naturally, I failed to recover the HMG on Tom’s turn, while his 9-2 rallied. The stack in S3h1 opened up, and eliminated my squad with a 3KIA. I had hoped that if something like that happened, it’d eliminate the HMG, but failing to recover it prevented that. The Americans started crowding close to the goal of Q7, cramming as much as they could into a couple of hexes largely out of my LOS, and the M36, instead of engaging anything directly, circled around onto hill 534 to take up position in L6 (risking ESB to stop in the final hex). I had almost no fire because of the cover, but I found that Q7 had a clear shot at S9, who had not moved (presumably ready to advance into R8) and I broke the HS in DFPh. Meanwhile, it turned out that O7-L6 was blocked, which relieved my worry about that duel. His advancing fire broke my squad+leader in P6.
Situation, American Turn 4.
My leader didn’t rally for my turn, but my broken squad became fanatic (giving me two 6-5-9/10s!), and Tom recovered my HMG. With my back against the wall, the defenders of Q7 did spraying fire against the adjacent Americans, but couldn’t get any result with a 2MC/PTC. However, that latter revealed the concealed stack in R6, and the ART finally opened up, getting a 1KIA on the IF shot to eliminate a HS and break a squad. The Wirbelwind tried doing the same to P5, but merely malfunctioned the MA. The StuG got a hit on S7 and broke a HS with a BAZ 44, but one with a BAZ 45 was fine. I rearranged the remaining pair of squads as as to advance where needed, while the PSK crew headed to threaten the M36. I could have pushed into LOS but kept to cover for the moment. I regretted that when I found out that the M36 had LOS to Q7. The MA missed, but I hadn’t suspected that shot at all, and suddenly had a big problem coming up in his Prep. He did get a 1MC on Q7 with his other units, but thankfully everyone passed, and he malfunctioned my HMG.
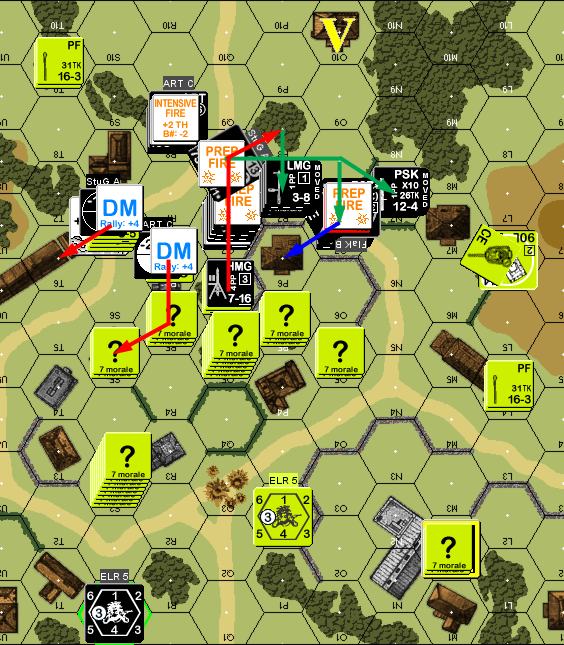
Situation, German Turn 4.
Neither of us managed any rallies for Tom’s turn 5, nor could I repair the MA on the Wirbelwind. The M36 fired on Q7 again, breaking everyone with a 3MC. Everything that was close in opened up as well, but they couldn’t do any more damage. Desperate to stop him before he took Q7, the ART fired on Q6, but it turned out to be blocked. But P7 got a 2MC, and the squad in Q6 rolled a ’12’ to turn into a Disrupted HS. The StuG managed to break the HS still in S7, temporarily stopping any threats to him. P6 accepted the Surrender of the HS, which was a mistake as it put me at a disadvantage in CC when he advanced in with a HS, though nothing happened anyway.
Situation, American Turn 5.
I rallied one leader and one squad in P8 for my turn, but still couldn’t repair the Wirbelwind, and Tom recovered the PF in Q6 and rallied his HS in L4. The StuG fired Smoke into Q7, with the hope that the extra +3 would keep anyone in there intact, and force Tom to go for somewhat chancy CC. The ART fired on the big “?” stack in R6, but only malfunctioned on the IF shot. I started the Wirbelwind with the idea of driving around all the broken American units to the west, and parking in S8/T7 so it could have a final defensive shot (with the BMG if nothing else), but it took a superstructure hit from a PF as it started and burned in place. This did set off my sniper, who re-DMed S5. The PSK crew at least distracted the M36 by coming into view, but it got a hit on them for a NMC that they failed. The Melee continued without result.
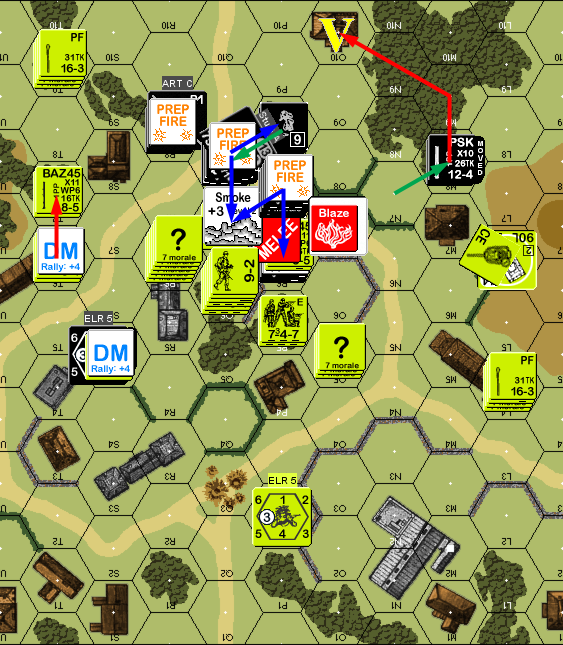
Situation, German Turn 5.
For his last turn, Tom rallied two HS, while I rallied the 9-2 and fanatic squad in P8. He opened up with a 36FP +3 shot from his adjacent guys at Q7 for a 1KIA that effectively ended the game. It did set off my sniper again to break his Melee HS, but the Melee itself continued. So I had no way to fire on the three units in Q6, so all he needed to do was wait for my surviving squad to rout out and then advance in with Q6 to take Control of Q7 and win.
Afterword
At this point, my final hope was to have something intact in Q7, and the just recovered squad in P8 would cover any rushes at O10, and then reinforce the Melee that was now the best outcome I could get.
I was really wondering about the balance of this scenario, as I was getting pushed around without a lot of choices. Finding out I was missing a MMG at least starts explaining it. I suspect I would have put it in U6, with the LMG there going to O5. The on board setup means there’s pretty much no way to keep the Americans from getting to the interior of the village loop in short order, and I don’t know if it could have done enough to slow him down at all.
It’s worth noting that a lot of his high-FP attacks had low rolls, which also did me no favors. I don’t think I’ve ever seen so many KIA results in one scenario before. On the other hand the Wirbelwind malfunctioning just as the kind of targets it was there for showed up was also a big problem. I think that and the slightly later casualty MC in Q6 were the only ’12s’ of the game.
And Tom once again made great use of what he had. He concentrated firepower with good leaders where I couldn’t do the same, and picked apart my defenders; I had no idea that the L6-Q7 LOS was clear.
Discussion ¬