
Troy
After our tour in World War I, Mark and I decided to return to Chariots of Fire, and he wanted to go to the final scenario, on the plains in front of Troy.
This is one of two scenarios that uses the hero rules, and has a few other oddities. Most notably, there are no “wing commands” in this scenario; instead the commanders activate anyone who is within range. Momentum can be used to just move all the heroes instead of rolling to command a wing, but they can also move with units they’re already stacked with, and we extended it to they got commanded and could move regularly with a leader activation, to keep things from grinding to a halt if we needed to rework them.
The first task for both sides is to set up, and therefore organize the troops. This is especially true for the Danaans (Greeks), since they enter from the west edge of the map, and you go by their grouping for the initial entry. The Trojans set up in Troy, but there are more allied troops than actual Trojans, and they set up on a convenient rise south of the city. I had the Danaans, and set up Idomenes in the north with lots of SI and a handful of BI, Menelaus took the center with the best SI and a good number of BI (also the best ones), and some chariots, and Nestor got the south flank with low-quality SI, a good amount of BI and the single LI.
The long distance between the armies gave us time to sort out some form of line, but we didn’t start coming to grips until turn three, when a pair of my BI got across a bend of the Scamander River. I was worried that Mark would hit them before I had anything else there, but I successfully trumped Acamas’ activation (who had his center), and used that for Menelaus to go again and engage his line of chariots that were just in range while I got a third BI over the river. My BI each took a ranged hit on the way in, but the chariots each took to from the pre-shock check, and then the combat itself scattered the chariots with one routing and the other fleeing.
The start of turn 4 saw Aeneus go first, and his chariots got out of the way as a line of BI formed with some SI behind them, and forcing one of my BI to rout in a two-on-one combat; the other one fled two activations later when the engagement concluded. But, I now had a four-unit line of half BI and half SI across the river, with another three units behind them. Idomeneus was just in range of these last, so they could extend the line while his wing got up to the Scamander. Mark got momentum with Aeneus, and set up a line opposing mine and anchored on a marsh.
Then I got momentum on Idomeneus, and I pushed forward into Mark’s line with everyone across the river while reinforcements crossed behind them. While part of my line was BI, all of Mark’s was, and my SI cut right through them, causing four units to rout, while the rest were engaged.
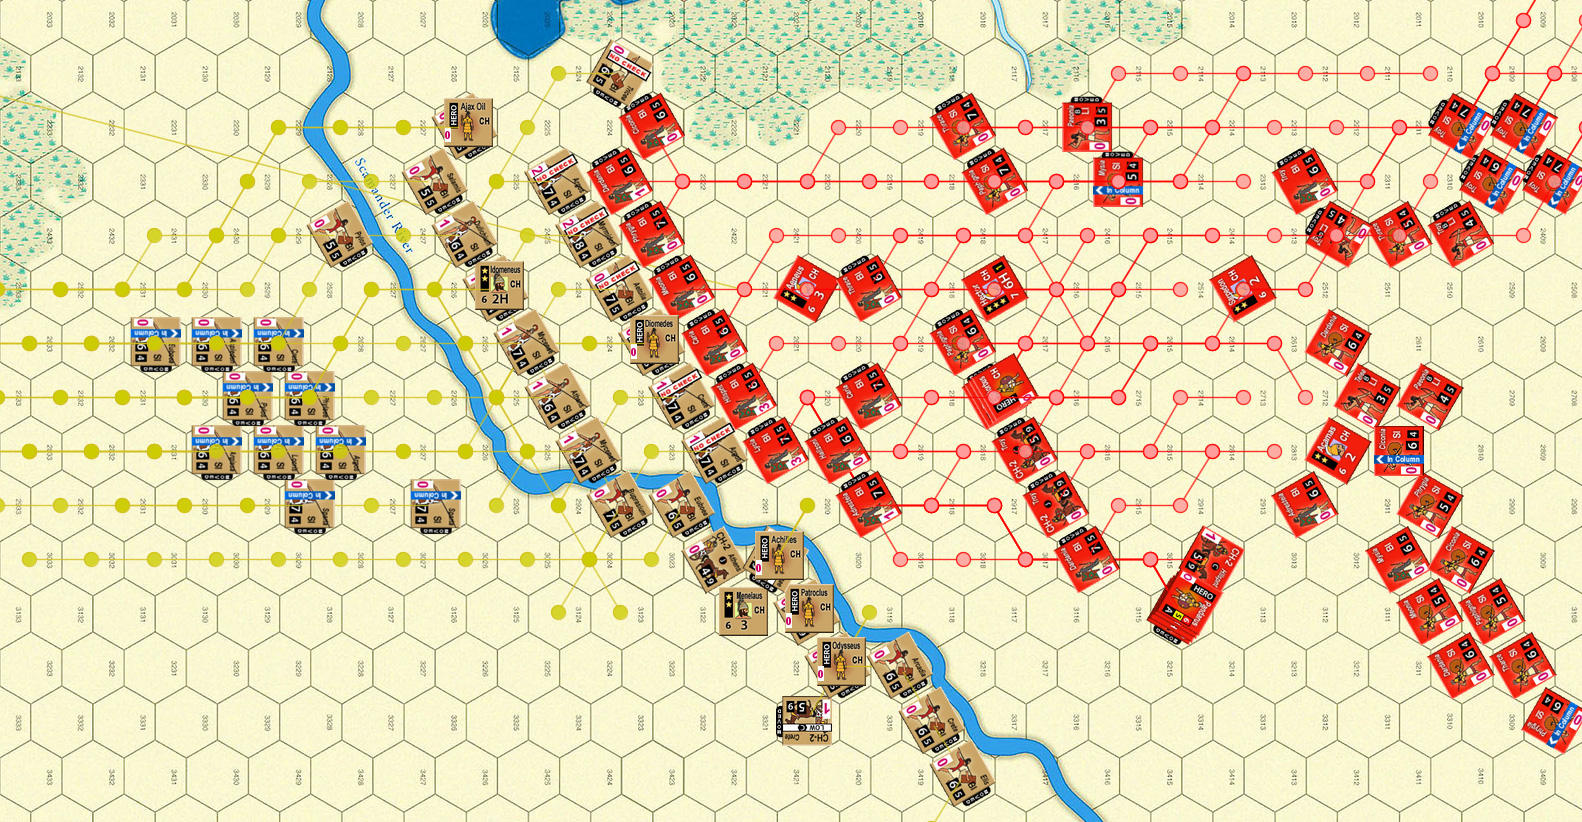
Second Contact.
At the end of the turn, Idomeneus got momentum again, and I reinforced a couple of the existing engagements, routing one BI, while another fled. Some of my BI moved up, but the reserve SI mostly stayed still to recover hits taken while they hurried forward. Aeneus went first for turn 5, and Mark started rebuilding his line, but much of what was available was still BI, and several of the combats had 9/2 results (thanks to the SI giving Defender Superiority), and three of his units routed while one fled, and my line was approaching its limits. Then Acamas went and Mark started sending chariots across the Scamander well south of my existing flank. Infantry started gathering there too, but only a single BI made it across at that point.
I managed to trump his momentum chit, and Idomeneus opened a small hole in his line to put a couple fresh units in while the north flank rested. This also saw our first heroic combat as Diomedes challenged Aeneus, and forced a withdraw (after getting him to 6 of 7 hits); the resulting +2 to all combats generally put them into more ‘normal’ results as I rolled low. We each had one unit rout, and one of mine only made it because Mark’s BI was one above the rout limit while mine was merely at the rout limit. Then Idomenus went again (chit draw) to shore up the south part of his line and recover some more spent units. Diomedes challenged Aeneus again, forcing another withdrawal. This time a LI and two SI fled, while one routed (very bad rolls from Mark).
Mark then trumped my momentum to activate Sarpedon. Another partial line was formed, with one combat with the normal 2/2 result. Menelaus overlapped a good part of the line so combat kept going. I lost four BI engaged with SIs (two fled, two routed), but at least they took the normal two hits in the process. I got initiative for turn 6, and Idomeneus went first, and I got further SI out of column and into a line (a little out of engagement range) while pulling a couple units for rest. Ajax Oileus challenged Euphorbus (not as good, but can take more hits…) and won with a lot of very strong rolls from me. I routed two more SI, and Acamas put a line across the Scarmander in the south. Sarpedon directed an advance into contact in the north, but at this point there was very little left, and Danaan reserves will still coming up. Still, he forced a rout and a flee.
Instead of more maneuver, Aeneus went for a rally action on momentum, bringing six units back from rout (we got the wrong stat, thinking it was based off of Initiative rather than Charisma). This was followed by a regular activation for him, and a BI of mine routed from receiving a charge, and then an SI routed. However, two of Mark’s SIs fled.
The real problem is now the Danaan camp was full. By the scenario rules, the Trojans rout to the city (with infinite stacking), their allies rout to the banner as normal, and the Danaans rout to their own camp, with normal stacking. After the first six routed units everyone else automatically flee until units can be rallied and moved out. I had moved Agamemnon back so he could rally them, but I still needed a wing commander in range to activate the rallied units and move them out.
Then Menelaus went, and a couple more units moved in, routing two more of Mark’s SI. Aeneus was the first activation of the new turn, and he largely pulled out the scattered chariots and LI left over, but most of the SI were engaged, we each had one flee, and Aeneus himself took off for the banner to start gathering the rallied troops. Then Idomeneus pressed forward, with more the middle crossing the Scarmander while the north took on the remnants of the Trojan line while desperately resting units near collapse. Achilles took on Sarpedon, who died in a round 12 double hit, leaving Mark with one front-line commander for most of the turn (after which, Paris stepped up to take his place); three Trojan SI routed while one Danaan BI fled.
Menelaus commanded a further press in the center, and then left for the Greek camp. A Trojan LI routed just trying to turn and fire while shock caused a chariot and SI to flee. Acamas brought the south closer, and forced a Danaan BI to flee. Nestor hesitated, and didn’t bring on a more general engagement there (a mistake; on the other hand it was also still a bit far to go), and lost a BI to an engaged check, though a Trojan SI was forced to rout.
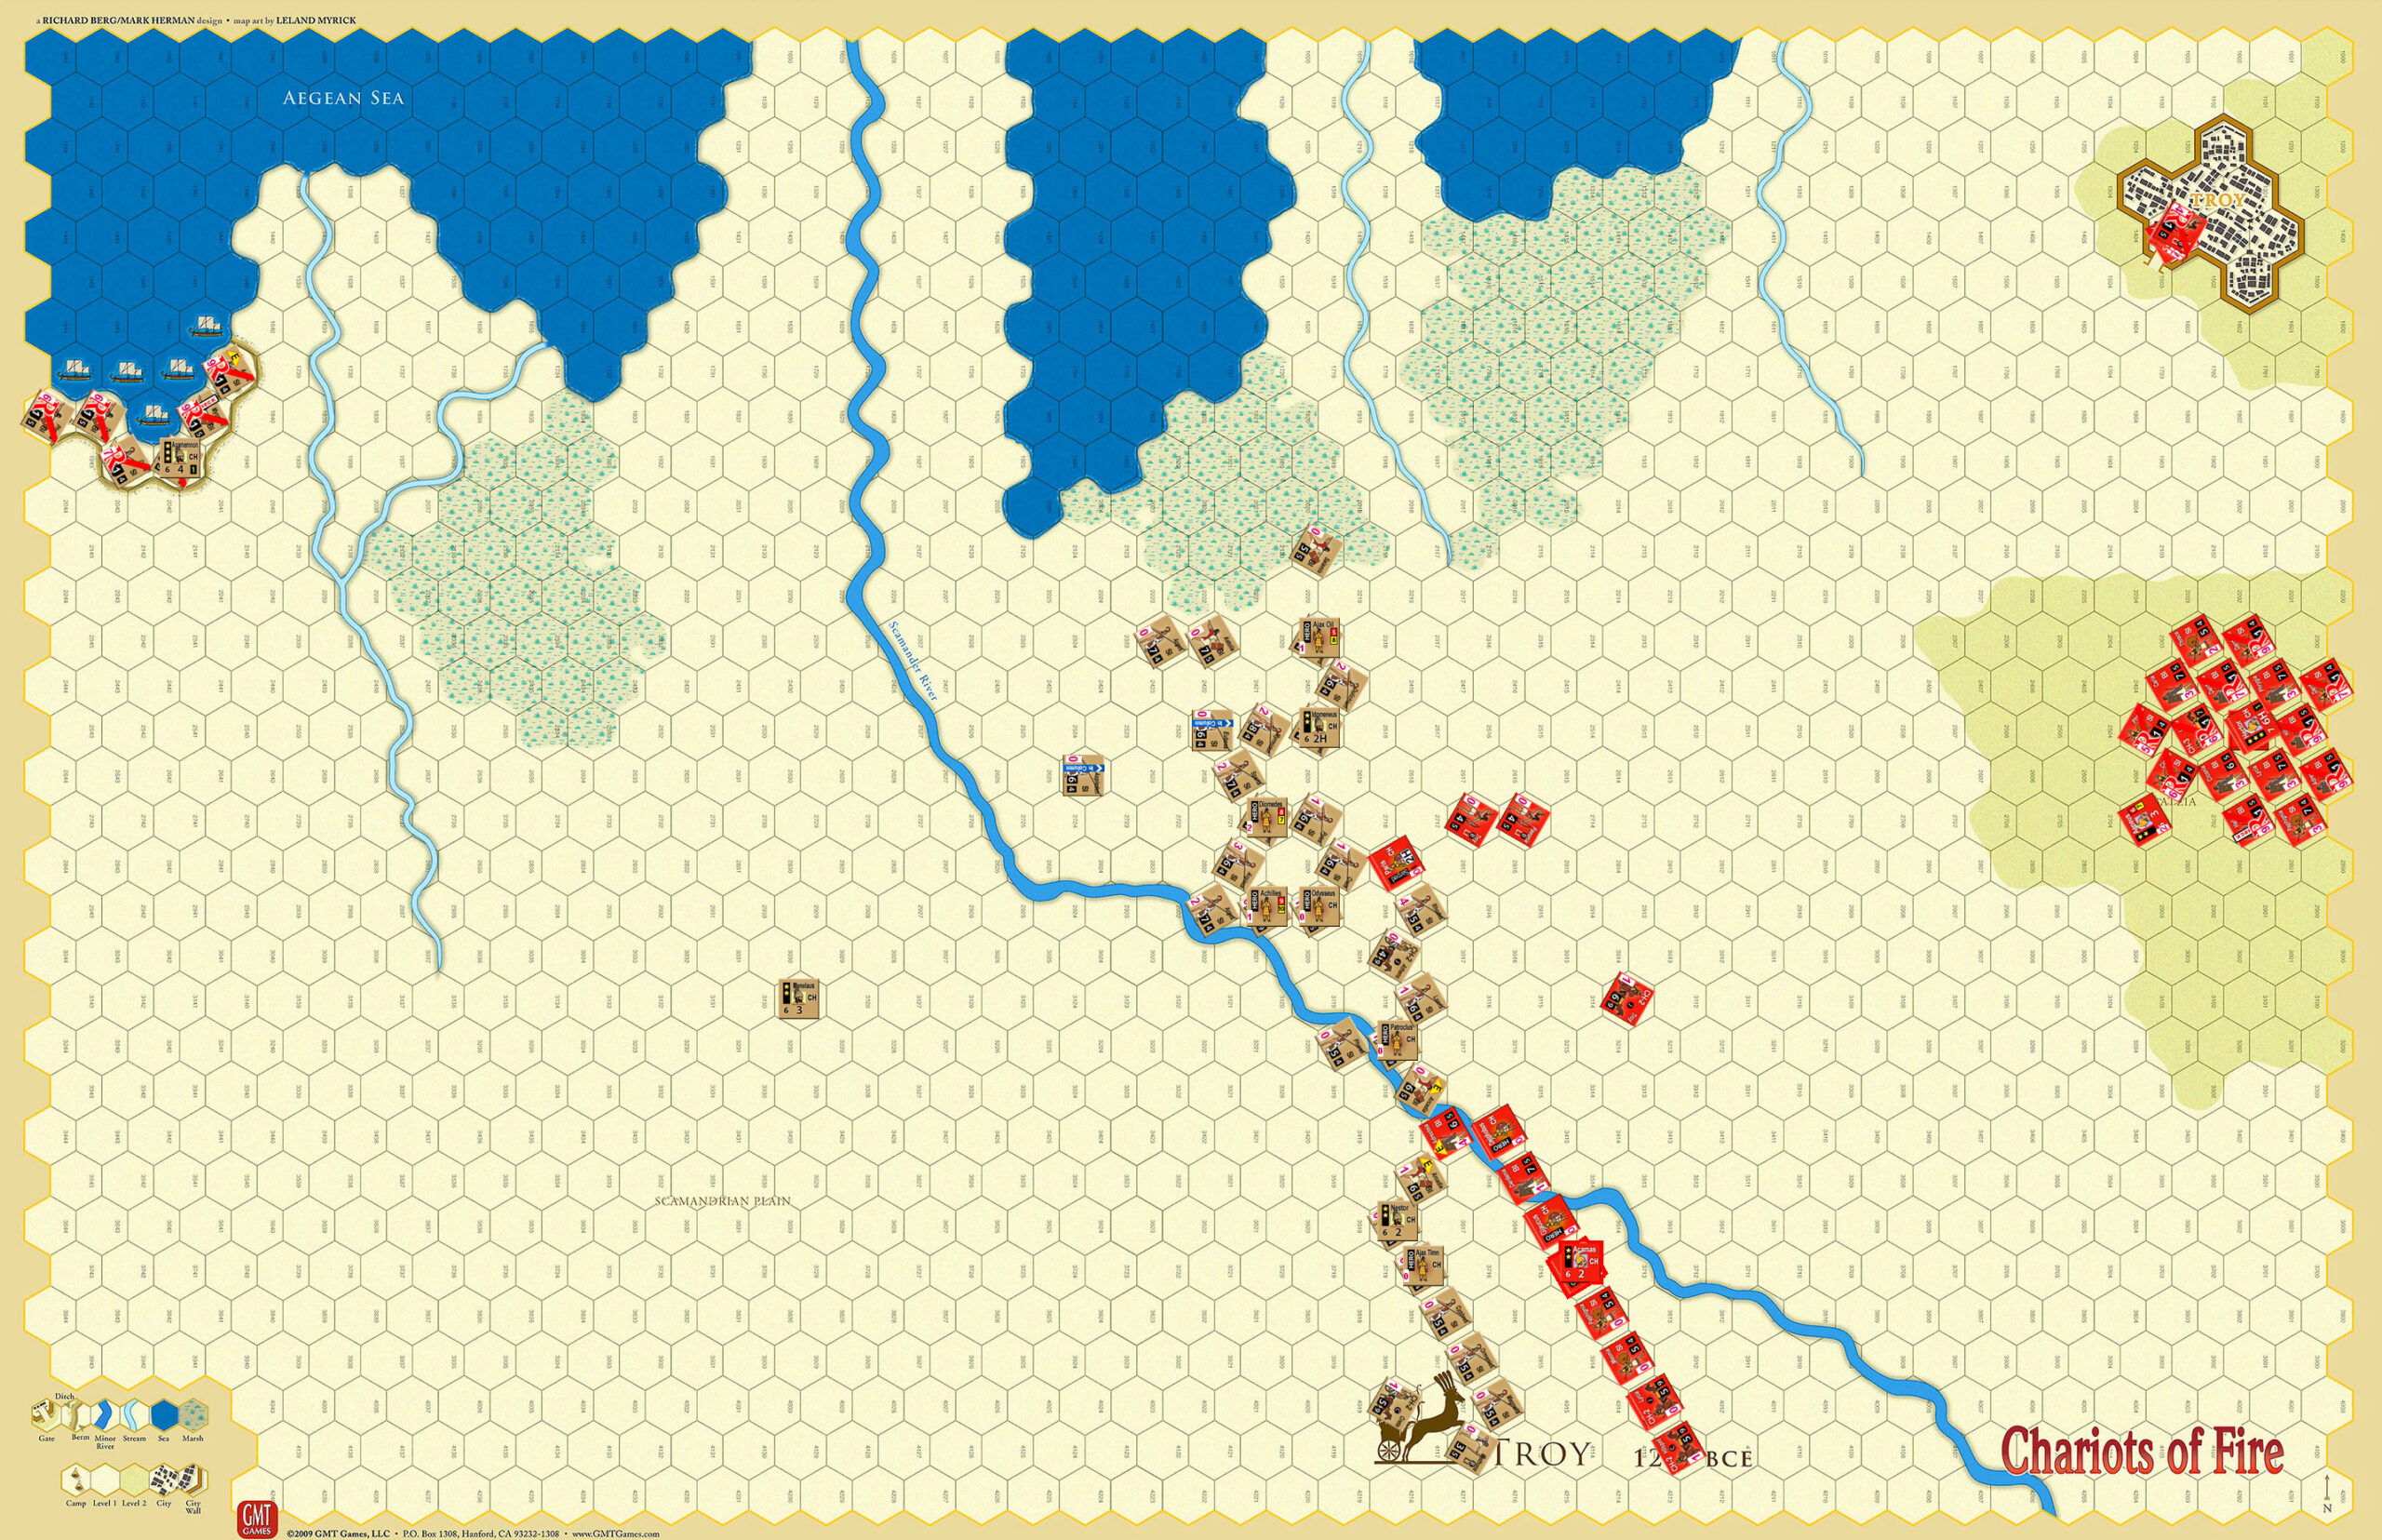
Between turns 6 and 7.
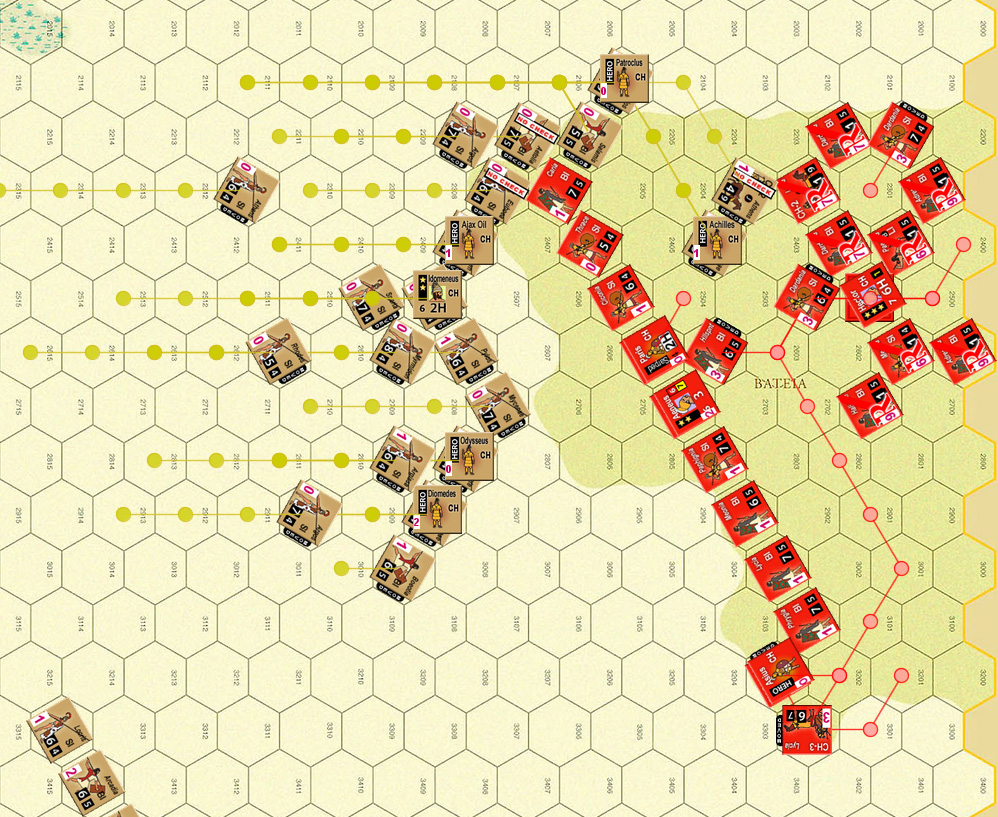
“Sarpedon” (Paris) led off the next turn by pulling out what remained of the Trojans, and then Acamas hit the south flank, doing much mischief. The low quality troops didn’t take the charge well, with the LI fleeing outright and one SI taking 4 out of 5 hits. Glaucus took on Ajax, who slew him; that was a help, and the two lines stayed to push at each other. Idomenus took off in pursuit of the Trojans, while only the chariots had the range, two left behind SI were routed. Nestor’s activation came down to a series of rolls to check engaged units on the brink of routing, with me passing three out of three (but still losing a SI), while one of two of Mark’s passed with the other fleeing, along with two BI and a LI routing.
Menelaus started turn 9; I had done a rally action already, and the two rallied units marched out to make room in the camp. Meanwhile, one more unit rallied. Mark trumped my momentum to activate Aeneas for more rallying (with no luck), and to start moving out those who had rallied. Idomeneus finally started putting together an actual line while routing the last LI in front of him. Acamas tried to shore up his command, but didn’t have any good options; he routed an engaged SI when his chariots hit it in the rear, but the high-damage line ended with one unit on each side routing. Aeneus managed to rally three units, but Nestor chased off a chariot (orderly withdrawal), Ajax forced Acamas to withdraw from a challenge, and the remaining chariot routed while the BI fled.
Turn 10 saw Mark get some more rallies and set up a new line near the edge of the hill. I got lucky and rallied all the remaining units in the camp, but I couldn’t move far enough to engage the new line, which recovered at the start of turn 11.
I got two chariots around the end of his line and forced two still-routed units to flee by hitting them with javelins, and then forced a routed chariot to flee in shock. The end of his line routed after a two on one combat. I didn’t get a chance to do anything more until the next turn when I won initiative and Idomeneus wrapped around the north end to hit half of the new line. A third chariot forced another routed unit to flee (one of the first two was out of command range, and the last helped hit the rear), Aeneus was wounded, and both lines stayed engaged with the exception of a Trojan BI that routed. Later, Idomeneus got momentum.
Afterword.
A chariot forced another flee, and we called it there, since that forced Mark over his rout limit of 115. It wouldn’t end the game ’til the end of the turn, but he was at 117 at that moment, with it likely to go higher during shock. I was at 75 of 120, so forcing me even higher over my rout limit was extremely unlikely.
The bit where all the Danaans start fleeing after six routs seems very harsh, but I assume part of the idea is they have the better army, but it’s more brittle. Overall, it’s a very exciting, if large, scenario and we had a lot of fun with it.
Getting my north flank over the Scarmander when I did proved to be important, and was something I actively worked on. Though the river is less of a problem than it seems, since it’s a mere -1 in combat. Being able to get the BI in there and quickly follow up with SI really worked out, and because I kept the engagement on a fairly narrow front, I kept having wave after wave of reinforcements to feed in that just scattered the Trojan line.
I was getting extremely nervous in the middle game as I was suffering from the automatic flee and my rout level started catching up to Mark’s. It got close, but I broke the last resistance in the north flank, got lucky in the south, and cleared the camp. Mark was finally starting to rally the actual Trojans in Troy, in the last turn, which played into my final fear. Troops in Troy are always in command, so it was going to be possible for them to sally out and hit my rear if I spent too long getting at the hill. As it was, the new line wasn’t long enough to protect from the chariots, and the next few positions south of where the fighting was were going to be BI defending against my SI.
The SI is really the queen of the battlefield here. The only thing better than them is the Heavy Infantry that only appears in one battle. They are slow… mostly. Column gets them up to 5 movement, and being in column gives free turning as they move (they just can’t turn more than once per hex). So they can adjust and get around obstacles in very good order. Just make sure to get them out of column before someone can jump them.
Discussion ¬