
Two Rounds of Tigranocerta
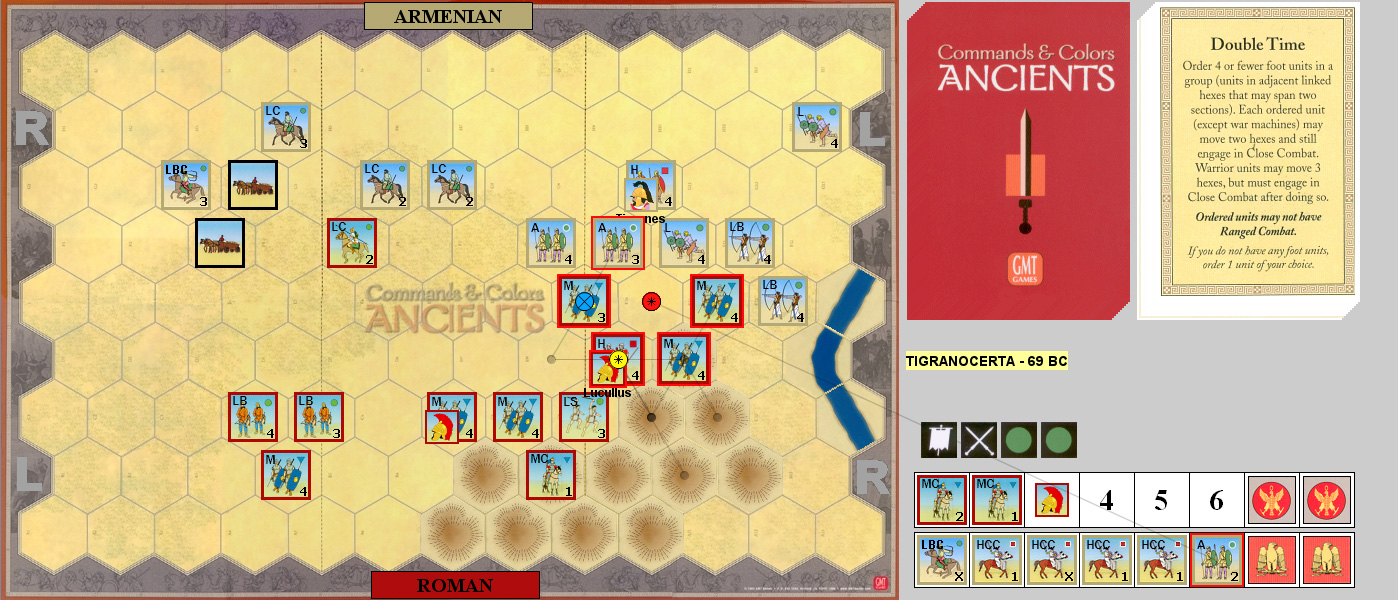
For our regular round of Commands & Colors: Ancients between bigger games, Patch and I ended following “Mortal Wounding” with the first scenario of Expansion #4, the Battle of Tigranocerta. We’re still on red-block Romans, but Tigranes gets four Heavy Cataphract Cavalry units… facing an army that is half on hills. His main force is bunched up in one corner with the only leader, and there’s a couple of baggage wagons that can be taken for banners. And he only gets four cards. The Romans go first and have six cards, about their only problem is that they only have one Heavy.
Patch started the first game with Order Two Right, deploying his LS forward, and forcing one of the HCC to retreat with a banner. I countered by making the LS retreat and lose a block on a banner with Order Two Left. Patch then Ordered Four Left and did a block to a LC. I Ordered Two Right to do a block to a LB, while Patch did two blocks to a HCC and forced my damaged LC to evade with Order Three Left. I Ordered Two Center to do a hit to a LC, and Patch Out Flanked to force a couple retreats and do a block to a LBC. I started deploying the big mass with Order Three Left, and Patch got his center cavalry in motion with Order Four Center to drive off a HCC.
I Counter Attacked with my HCC and Patch evaded with one loss. Patch Ordered Lights, driving my LBC off the board, and doing a block to a HCC, while occupying the hex of one of the baggage trains. I used Coordinated Attack to bring another LBC adjacent to the baggage trains and drove off the LC, and destroyed a MC and did a block to another at a cost of two blocks. Patch used Leadership Any Section to engage my strung-out HCC, finishing off all three in exchange for two blocks to a MC. I used Move-Fire-Move to bring up more of the left-flank army, and Patch Ordered Four Right to do two hits to an Auxilia. Leadership Any Section advanced me some more, and Patch did a Coordinated Attack to trade blocks between a LC and MC. I Ordered Lights to do a block to a Medium, finish off a MC and get a leader when it had to evade through me. Patch Double-Timed his right into my force and killed an Auxilia. 3-6
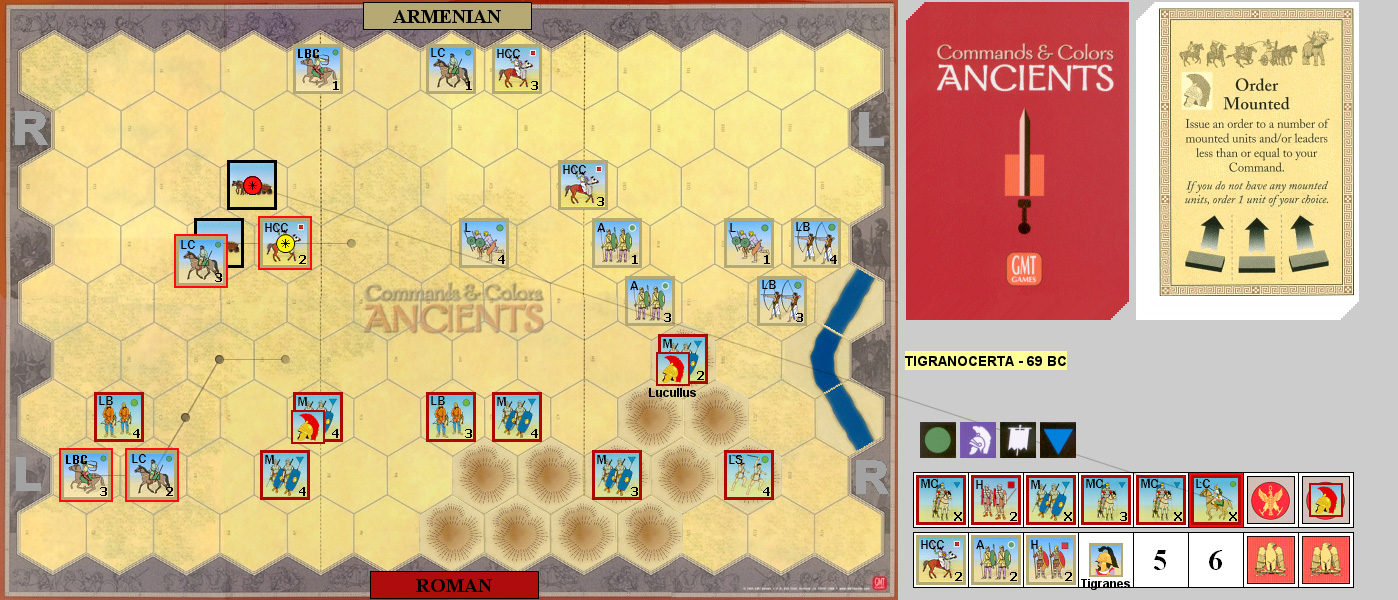
I started the second game with Order Two Left, which promptly did two hits to a LC with ranged fire. Patch started Tigranes forward with Order Four Left, and I forced the weak LC to the baseline with another Order Two Left. Patch Ordered Four Left again, getting his lead Light onto the hills. I Ordered Lights to drive him off, did a hit to a HCC, and nearly routed a LBC (one hit, and then another from a retreat). Patch Counter Attacked to bring up elements of both flanks and forced my LC to lose a block retreating. I Ordered Two Center to knock out a HCC; Patch Ordered One (Medium), and knocked out a MC when it declined to evade and took two banners.
Line Command put my left in motion, and forced a HCC to evade. Patch used Line Command to put the big group forward, and I Ordered Three Right to confront the mass from hilltop, doing one block to a LB. Patch used a second Line Command to keep advancing (and pull back the LBs) doing one block to my Heavy in return for two to an Auxilia. I Ordered Two Right, finished off the Auxilia and did three to a Light for a loss of one block. Inspired Left Leadership let Patch wrap his line around my Heavy at the point of the hill who lost two blocks and retreated while doing two blocks to an Auxilia. I attempted to Rally, but only got one Heavy result to bring that unit back to two blocks (the rest was banners and lights, I’d been hoping for Medium and wild to get both units at the front of the hill in better shape). I did another block to the Auxilia, but lost my Heavies in return. Patch Ordered Three Left to do two blocks to my Medium, and rout it (forced to go through other units), while I did a hit to the weak Auxilia and forced a retreat.
I Out Flanked to bring up the next set of Mediums and position close to the baggage train. Patch used Mounted Charge to get his HCC into the hills, routing a MC w/leader (three banners), killing a second one, and doing two hits to a Medium, which forced the HCC to retreat. Out Flanked let me finish off the Armenian Heavy and kill Tigranes, while putting a LC on a baggage train. Patch used Order Two Center to get his LC next to the baggage trains again, and do a block to a LB. Order Three Center drove off a Light and HCC, doing a block to the latter. Patch Ordered Mounted to cut off retreats and routed my LC. 4-6
Afterword
The Romans had very good ranged die luck in both plays. Mine was especially good at the start, but faded later. Patch did pretty good with his four-card hand the second game, while I struggled with a lot of “Order Two” cards, and not a lot else until the end game. Between that and really well-timed Line Commands and Mounted Charge, Patch nearly did better as the far weaker side than he had with the Romans, but my kill of Tigranes put me in reach of a victory, though it was too late.
The baggage train rules stipulate that there can’t be any enemy units adjacent to it at the start of your turn to loot it and get a banner, which kept both of us from exploiting it. That flank is technically weak, but has highly mobile LC, so you can’t really keep the Armenians away, unless they have no card options. That should be possible with a four card hand, but both of us were able to react.
The Roman center is largely MC, and the Armenian one is largely HCC, so it should be a good way to show off the latter, but the fact that most of the Roman center, and all of their right, is on hills keeps them from being particularly useful, outside of the Mounted Charge card.
Discussion ¬