
SH127 My Brother, My Enemy
With other opportunities having passed it by, I decided to try soloing “My Brother, My Enemy” for SFB from Module S2 during the holidays.
It’s an interesting situation that had caught my eye when I first went through S2. Mind-controlling “plants” are discovered on a planet by the Gorns (or should I say they discover the Gorns), and are brought back to a base, which they promptly take over. The Gorn navy sends a couple ships to investigate, which arrive just before all the ships at the base are ready to depart to spread the plants further. If plant-controlled boarding parties get loose on a Gorn ship, they start taking over the crew, but the Gorns can use scientific research to find a cure. Even better, disengagement is limited to via separation (which means 50 hexes), so the plant-controlled ships have to scatter and get away from the navy.
However, the first thing I found while setting up is that the given setup is illegal. C13.7 is quite clear that each tractor beam on a normal base is one docking position, that can take one ship, with the tractor used to hold it in place. The Gorn BS has three tractor beams, and there are six ships docked to it. Deciding that each position was a ‘dual’ dock, with the single tractor beam able to do the close range manipulation of two ships at once wasn’t hard, but it was something to be aware of first. (I imagine this is a place changed/clarified from Commander’s Edition, and they didn’t catch the wrinkle when putting together the “new” book.)
After sorting out that wrinkle, next up is determining the schedule of departures. The one military ship there (a FF) can leave whenever, but the other five ships roll a d6, and that is the turn on which they can undock. The plants got lucky with two small freighters and the free trader ready to go on turn 1. The final two small freighters had to wait for turns 4 and 5. Since they’re docked, they’re under normal acceleration restrictions, while the Gorns are coming in at whatever speed they want, and at WS-III. The Gorn ships decided to split up, with the CA (speed 24) circling around clockwise to catch anything going that way, and the DD (speed 27) going counterclockwise, and hopefully meeting up on the far side. Natrally, the four plant ships all undocked and made best speed; the FF at 15, FT at 13 and the freighters at 9.
Also, there’s no specific headings related to being docked, but I set up the docked ships with “fixed” orientations, and as they had been at 0, they have an unsatisfied turn mode upon undocking at the start of the turn. At lower speeds, it took a bit to get turned around, but the plants all turned to direction E, away from the Gorn’s entry, and sheltering behind the base and its phaser-4s.
By impulse 9, the DD had hit range 17 from the base, which fired a pair of ph-4s, with bad rolls keeping damage down to 3 damage on the #1 shield. The FF decided to distract the CA, and continued running in front of it, and the CA launched a plasma torpedo on impulse 19. The FF turned off, and the DD tried to work around the base with disastrous results. The DD had slowly been getting closer to the BS, and on impulse 24 hit range 14. The base waited until 27 and fired 2xph-4s with good rolls doing eight damage to the #6 shield, following up with the final pair on 29 for five more damage, causing three internals, two of which were warp hits.
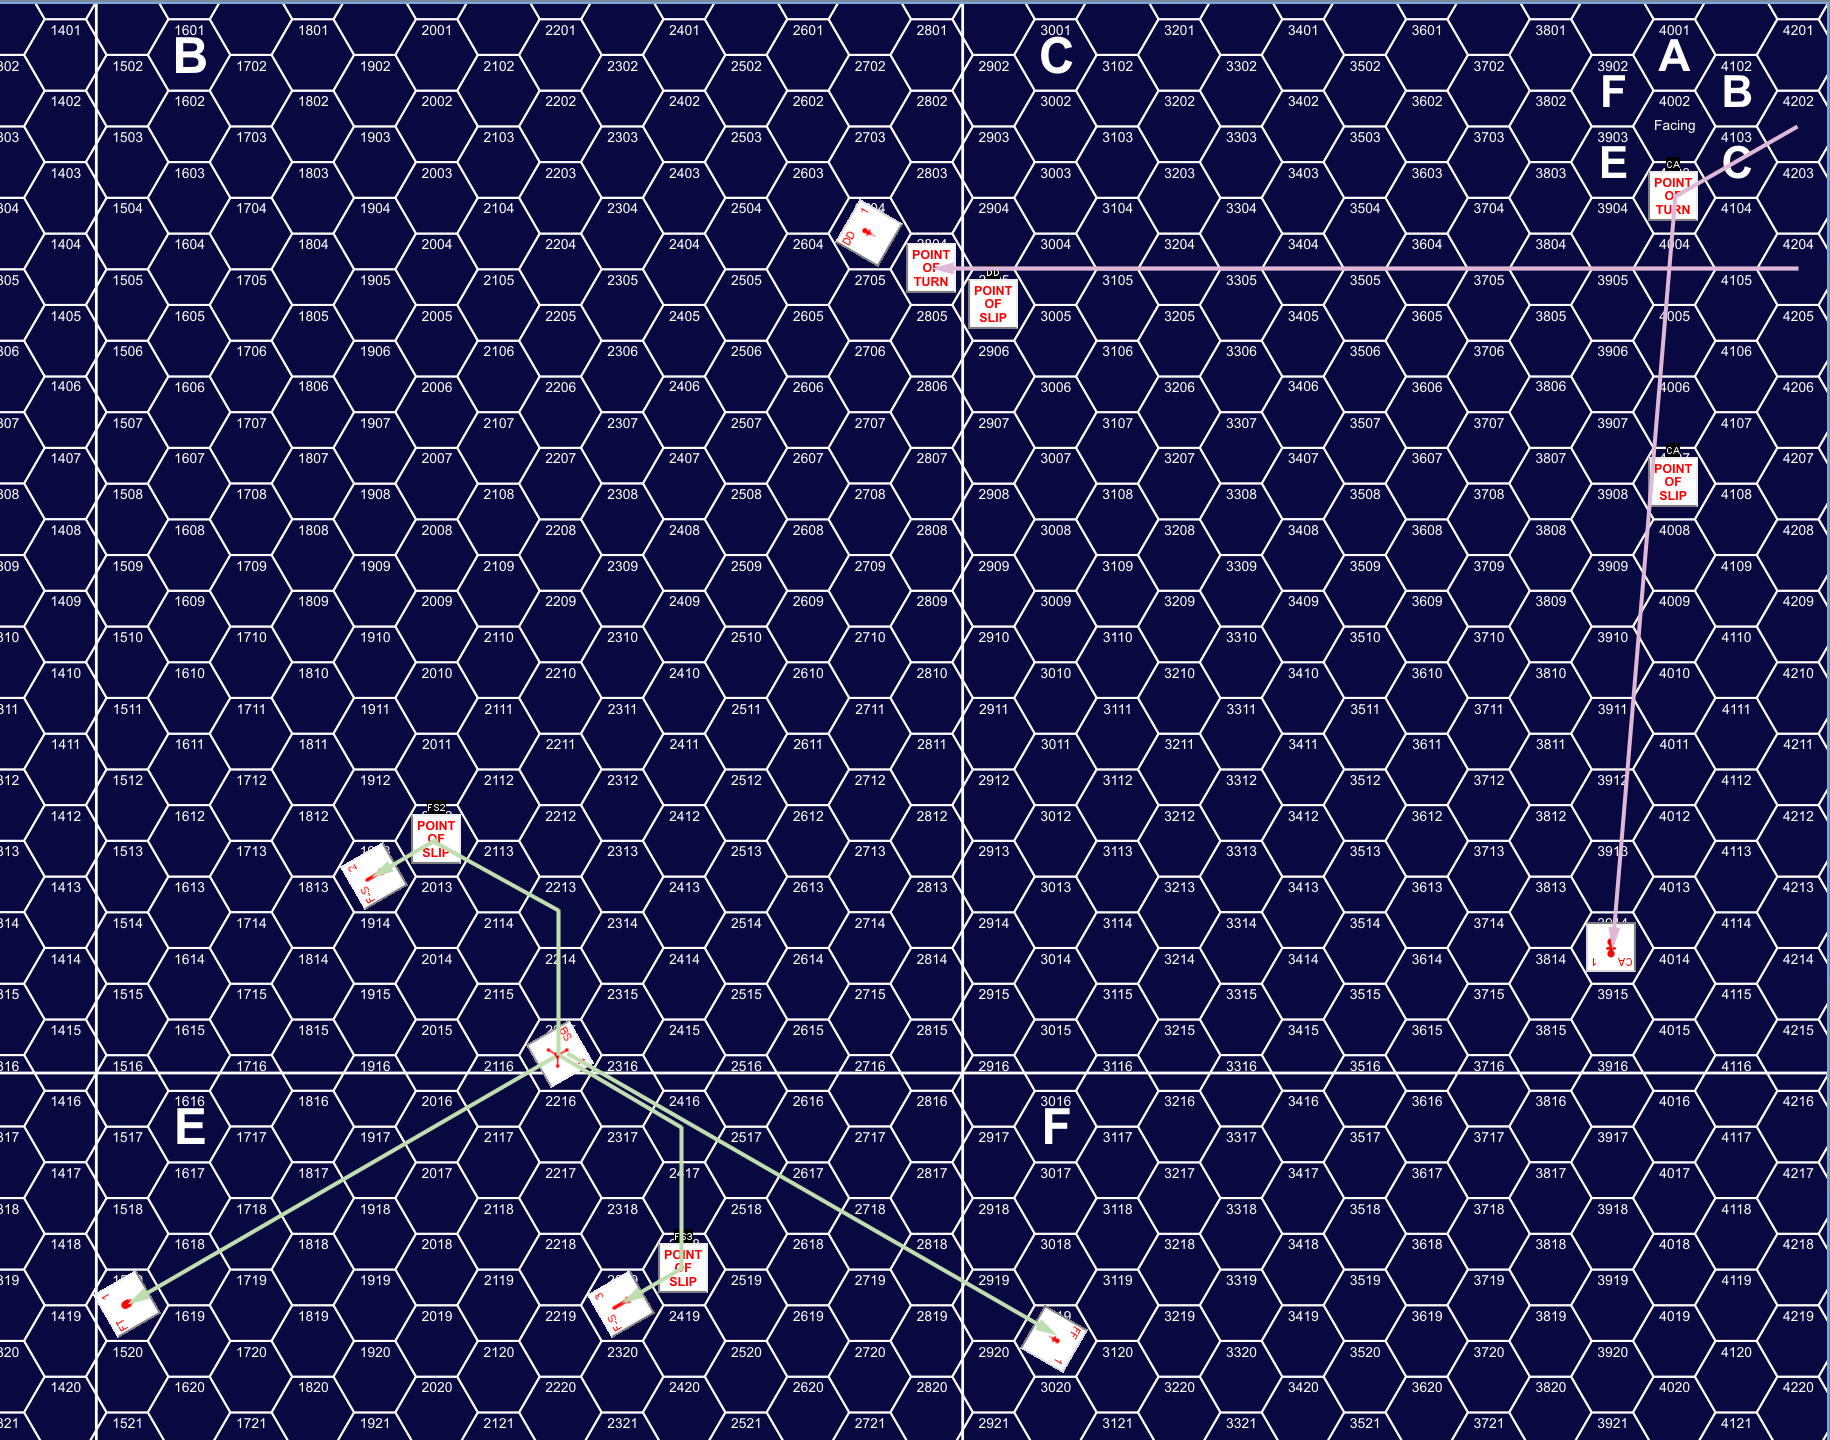
Turn 1, Impulses 1-18. One big happy fleet.
The DD hadn’t gotten close enough for any research, but the CA was five hexes from the FF and generated 8 points of information. Down two power, the DD only went 23 while repairing a shield box. The CA sped up to 29, while the FF went 24, the FT 23 and the freighters got up to 10. The BS had been loaning EW to the FF and a freighter, but had to shut down the special sensors to recharge phasers.
The plasma torpedo hit on impulse 1, tearing through the FF’s #5 shield for four internals, taking out a warp and two phasers. The DD turned a fresh shield to the base, which fired another pair of phaser-4s to exactly knock down the #4. A second shot with another pair did seven internals, mostly getting hull, but also a warp, a phaser and the bridge.
On impulse 9, the CA got to range 3 of the FF and tractored it (the FF’s batteries were spent against the plasma). The 1/2 MC FF only slowed the CA down to 21, while the FF had a pseudo speed of 6. The CA then turned to parallel the two freighters (and FT) and start overtaking them (and nearly keep up with the FT). The CA then fired the other torpedo at the FF. This hit eight impulses later to do 10 internals to the FF through its #4 shield, taking out the remaining phaser, torpedo, and three power. The CA then spent the next few impulses pounding the FF with phasers, reducing it to three power, and not much else. A probe bought an easy 20 points of information, while the CA’s range 3 from the FF got another 20, giving a total of 48 out of the 100 needed for a cure.
Afterword
I generally ran out of steam at the start of turn 3 after a look at the victory conditions, and the relative speeds for that turn. Importantly, the CA had to slow down to 25 while rearming the plasma torpedoes, start rearming the phasers, and recharging the batteries (two being expended on that distant tractor). The FT worked up to speed 23, implying a very long chase after it (current range = 31) that would also see the two freighters left behind.
The DD was down to speed 19, and needed to stay a very healthy distance away from the BS, as its shields just couldn’t take the kinds of abuse ph-4 fire could deliver. The FF turned off everything to go speed 9, but a beginning of the turn phaser shot reduced it to 0 power (until a warp box could be repaired in a few turns).
With the other two freighters still at the base, the best call seemed to be for the DD to turn around and try to keep them in range if they bolted in the opposite direction (this would also turn the untouched right flank shields to the base). The CA could catch one of the loose freighters and still catch the other, carefully knocking down shields and beaming over once the cure was found in about another three turns.
This would give the plants 9 VPs for the FT getting away, 4 VPs for the FF being crippled, and then 1 point for each freighter that takes internals in the process of getting shields down. (This is a scenario where the Gorns could consider non-violent targeting, though I don’t know that it’d work out.) So 13 VPs, possibly going up to 17 if things go well. If one of the last freighters actually gets away, that’s another 3 VP. The plants win with 17 or greater. Very careful surgery with the freighters should just avoid that. (Possibly a succession of ph-3 shots at range 3 or 4.)
The Gorns had two problems here. The first is their own fault, with the DD getting close enough for a ph-4 barrage to take down multiple shields that are 7-10 boxes each (only the #1 is better at 14). I think the DD is going to have to keep distant and try to just keep whatever is furthest from the CA in sensor range. The first plan was for it go go after the free trader, but it was a long ways away, and too fast once the DD lost power.
The second was the early release of three ships. Having to coral four ships at once was a bit much for them, though they took out the only one not in something of a group (the FF). Most particularly, having the two competent ships, the FF and FT, going at once made things a lot worse. The FT can only go speed 24 (12 warp and MC 1/2), but small freighters have a theoretical max of 12, and with only one impulse, life support, minimal shields, and low-power fire control (which is quite optional here) reduces them to speed 10. Just by putting the base between the navy ships and it, the FT ensured a large lead that could only be overcome with a lot of effort.
Discussion ¬