
8 Retreat to the James
Mark’s suggestion for our next Sunday game was more GCACW, and after looking over various suggestions, I picked a scenario from the recent reprint of On To Richmond, dealing with part of the Seven Days’ Battles. This one deals with the last three days of the battle, with the final retreat to the James. Initial Union positions are pretty good, especially with the Chickahominy River unfordable and most of the bridges out. However, victory requires they pull back to within supply range (nine hexes) of landings on the James, and the Confederates have the ability to repair a bridge behind the Union line, and have a large force north of the Chickahominy.
I had the Union forces, who get the first two initiatives of the game. Since bridge building/repair can be halted by having enough troops on the opposite shore, I moved Meagher’s brigade to block one location, and then Franklin had Smith block the second while Slocum moved back to rest his disorganized division for the day. After that, the IV and V Corps moved to extend the Union line to the south, in case anything like Holmes’ division should get active, which happened when Mark finally won an activation, reaching the New Market Road on two activations.
After that, Longstreet’s Corps moved south of the Chichahominy and massed on the north flank of the Union line. AP Hill’s Corps followed behind and then passed to the rear of the Confederate line, headed to the south end of the line. Jackson’s Corps also headed for the same crossing with only DH Hill’s Corps staying behind, and Ewell’s division marching to find a more eastern crossing to repair, and then marching back after Naglee’s Brigade moved to block that route.
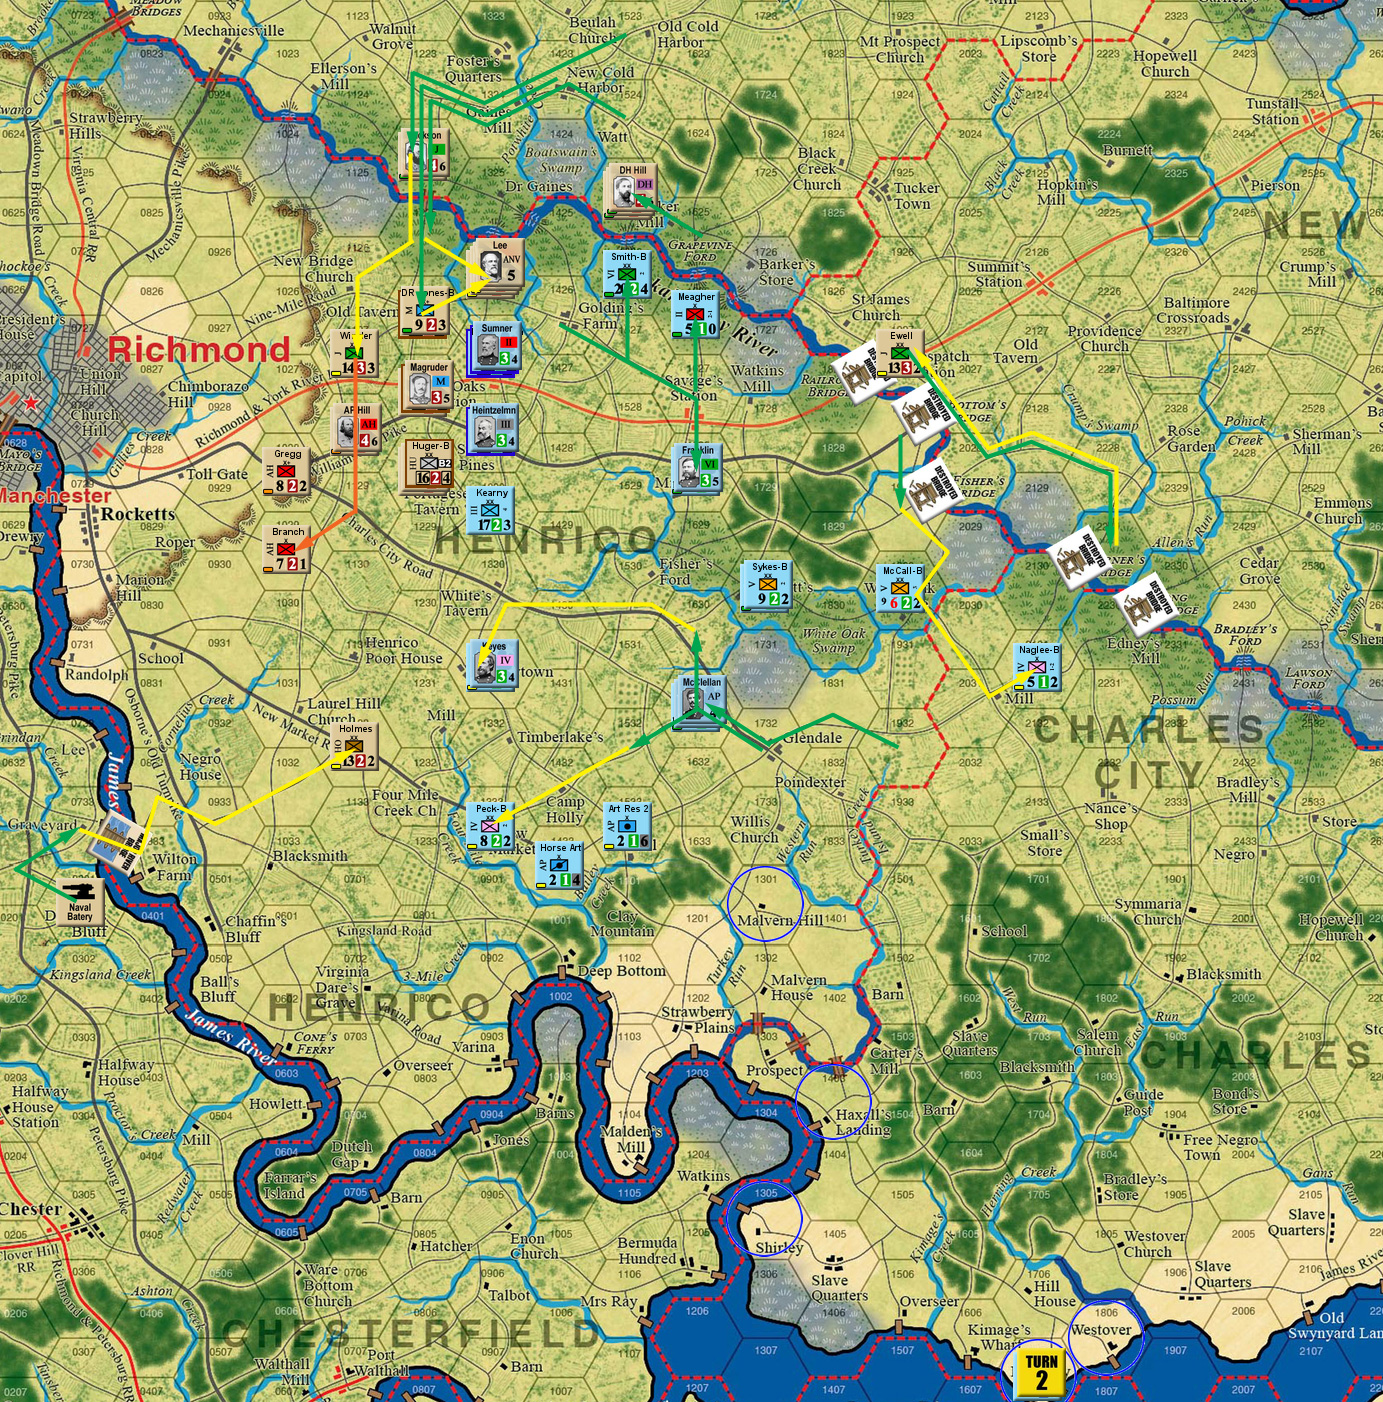
End of June 29th, 1862.
There was no more action after that, and I got the first initiative of the second day (June 30), at which point I started pulling back the north end of the line in earnest. In fact, I got lucky on getting a lot of early activation. I got unlucky on the movement for several of them however. This allowed Longstreet to actually get past the Union flank, but III Corps was able to (slowly) pull out of the area before any attacks happened. Holmes got across Four Mile Creek, into a gap in the Union line, but was pushed back out by the VI Corps before AP Hill could attack.
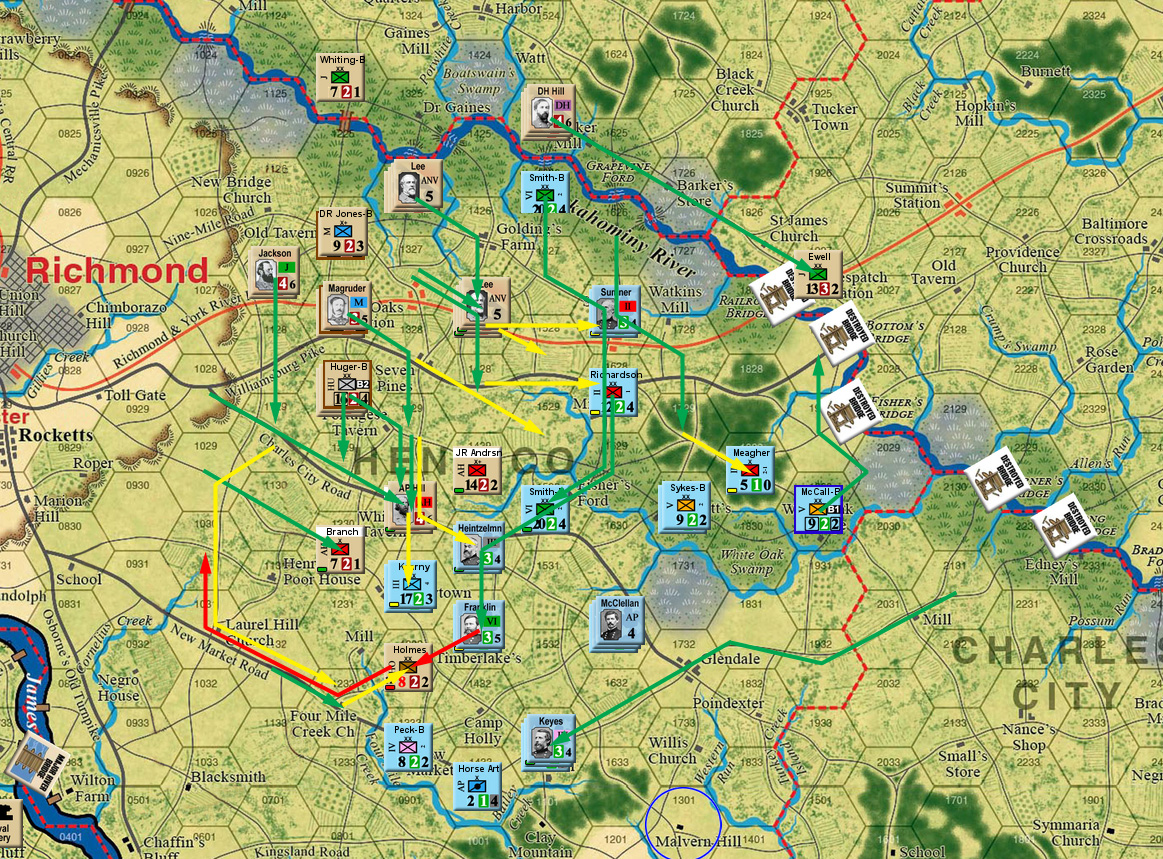
June 30, mid-day.
Ewell managed to repair the bridge across the Chickahominy at the despatch station, with DH Hill’s Corps ready to cross in the morning. But the first action of July 1 was an assault on the Union line by Jackson, which just wore out Winder’s Division. This was followed by an assault by Longstreet (with a failed grand assault) that forced Richardson to retreat, and cut off Sedgwick’s division. I activated Sedgwick to try and fight out of the trap, but with only 1 MP, the attack was canceled. DH Hill then crossed the repaired bridge, and performed a pair of attacks on McCall’s division, but merely wore it out without forcing a retreat.
Magruder declared an assault on the III Corps as I started pulling the line back (with another failed grand assault), to blow McLaws’ demi-division, and Huger’s division attacked, but didn’t do more than cause themselves losses. After that, I finally got some activations to pull back towards my proposed final line. Whiting got around the end of the line, and AP Hill assaulted the end of my line (with another failed grand assault) to force Kearny to beat a hasty retreat for the rear. Thankfully, a new flank had just been established by Peck of the IV Corps, and the day ground to a halt with both sides exhausted, and most Union troops in position.
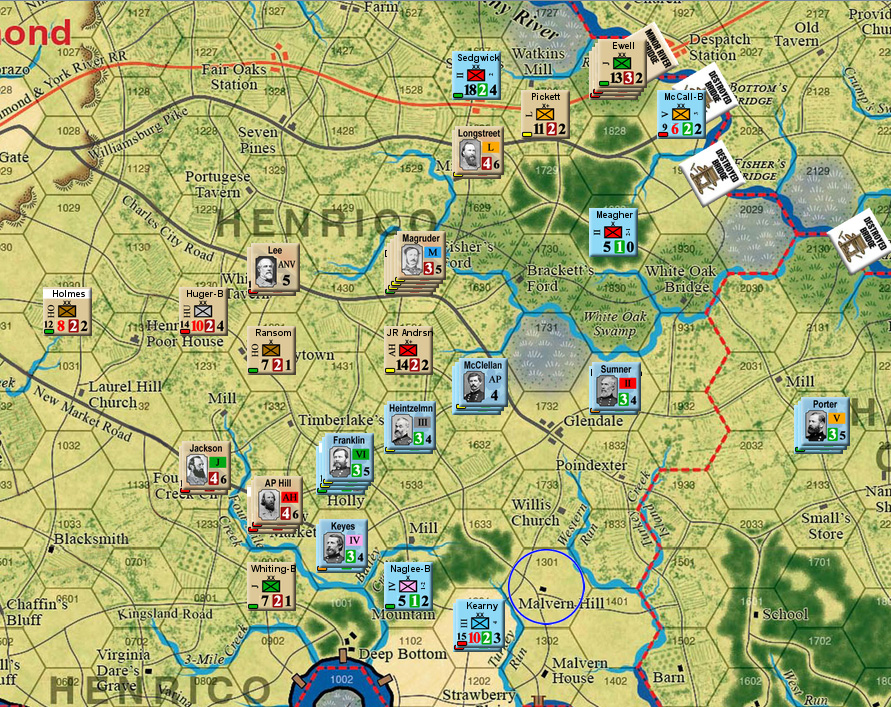
End of July 1.
Afterword
Final score was +6 VP for Union divisions out of supply range, +7 for Union losses, and +9 for Confederate losses for a marginal Union victory. There was no real threat to the geographical objectives; the Union forces are pretty large, and my long sequences of activations on day 2 helped make sure there weren’t any good opportunities to get at them. Lee rolled three 6s for grand assaults on the third day. I suppose he was still too busy getting used to the job, but it made sure all the combats were bloody standoffs. Things could easily have gone much worse for me.
Seeing the bridge repair rules in action was certainly interesting. So was having some meaningful artillery units (usually, we’ve been in times and places where there just isn’t a lot). However, it seems entirely too easy to block the repairs near Grapevine Ford, which is the subject of a fairly extensive special rule.
On the other hand, it seems wise for the Union to fall back faster than I did. One thing I had not appreciated was the fact that the Confederates can attempt some battles on the third day just to exhaust their Union opponents so much they can’t move back into supply range for the end of the scenario. Knowing that, a replay would certainly have an extra dimension to it.
Also, not mentioned before, is an On To Richmond rule that limits the number of Union units that can move on a single activation. Most of the time, this was not a big deal, partially because if the Union won initiative, they probably rolled pretty high, and that allows more units to activate. But, it’s a neat effect, and did slow me down a bit at a couple of points. There’s also a couple of brigades available as Union reinforcements, but the odds of them showing up is fairly low.
Discussion ¬