
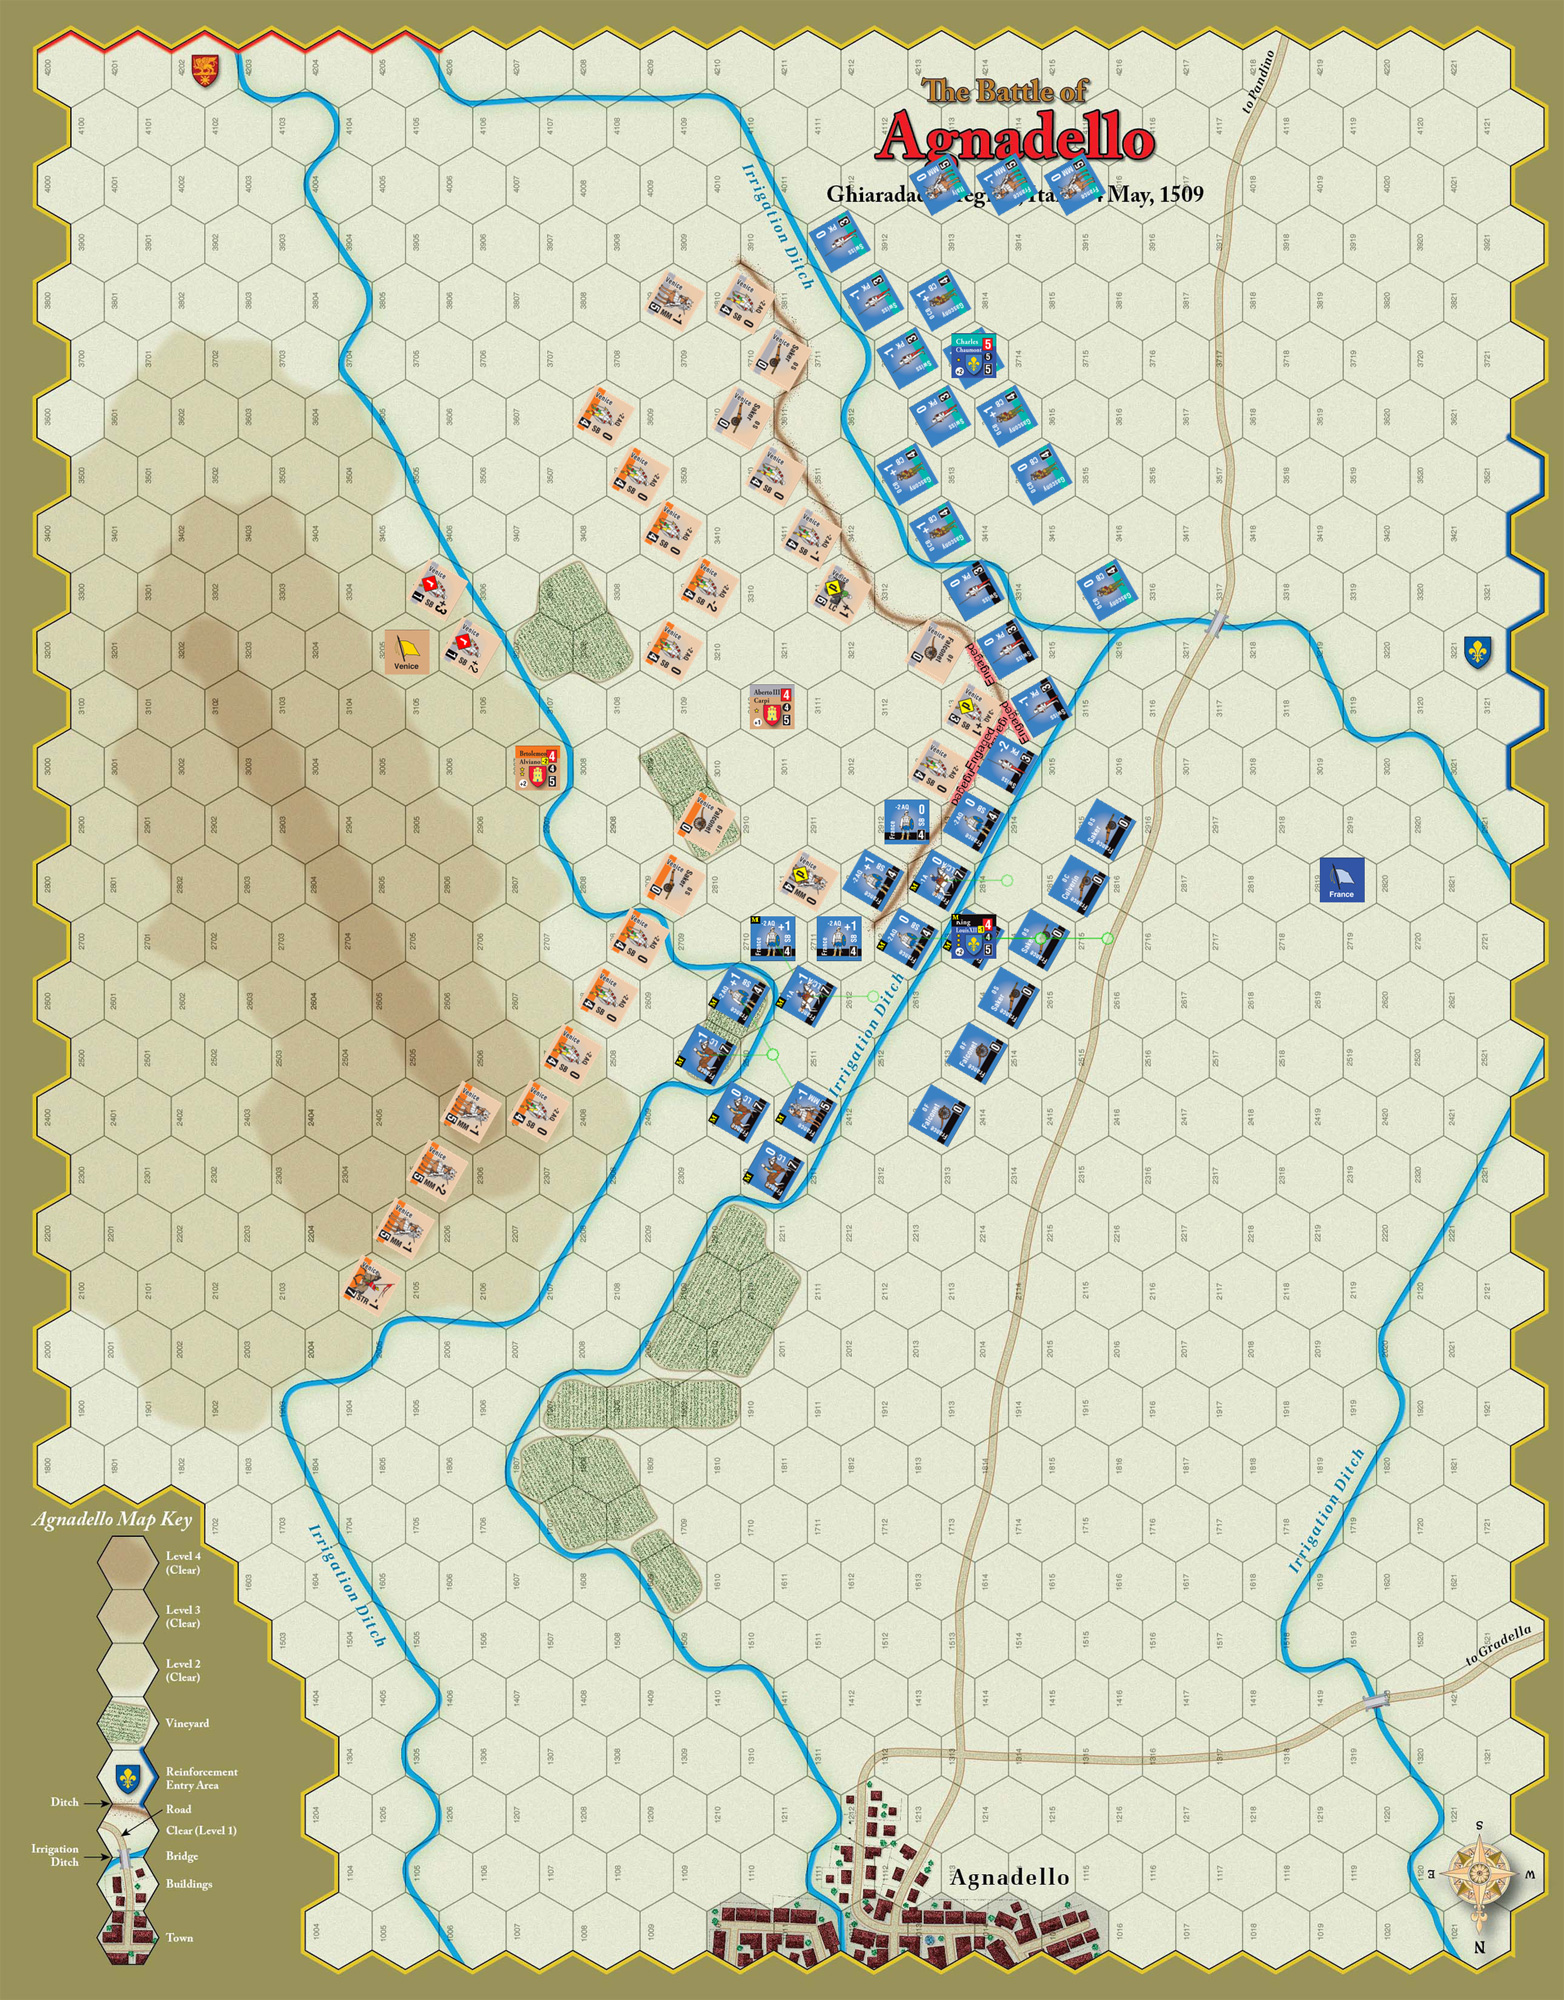
Agnadello
After dealing with some space dragons, Mark introduced me to Arquebus. I actually had a session of Men of Iron with Jason earlier, but just enough time passed for me to need to re-learn much of it. Mark was also wanting to try out the new set, and we eventually settled on the Battle of Agnadello as a relatively quick battle. The French are heavily favored here, and Mark volunteered to take the Venetians. Both sides have two battles (the French have a third as a reinforcement, and the Venetians can have a reinforcing battle in a non-historical variant), with the French artillery already set up on one flank, and the other with a lot of crossbows and pikemen. The Venetians have the advantage of being behind a series of ditches, and their right flank goes well beyond the French left.
The game opens with French activation, which I took on Louis XII, with an initial artillery volley that rolled either low or high and disordered two of the Venetians behind the primary ditch. The pikemen came in on the angle of the ditch, while the sword-and-bucker formations came through the artillery and engaged the rest of the line. One pike unit (on the far right) refused to engage, which helped lead to that entire flank ending engaged, but the two units at the end of the Venetian line retired, getting me across the ditch.
I successfully continued with Charles in the other wing, which mostly involved maneuvering the slower pikes up to the initial irrigation ditch, though the crossbows managed to disorder some light cav, and eliminate the sakers stationed with them.
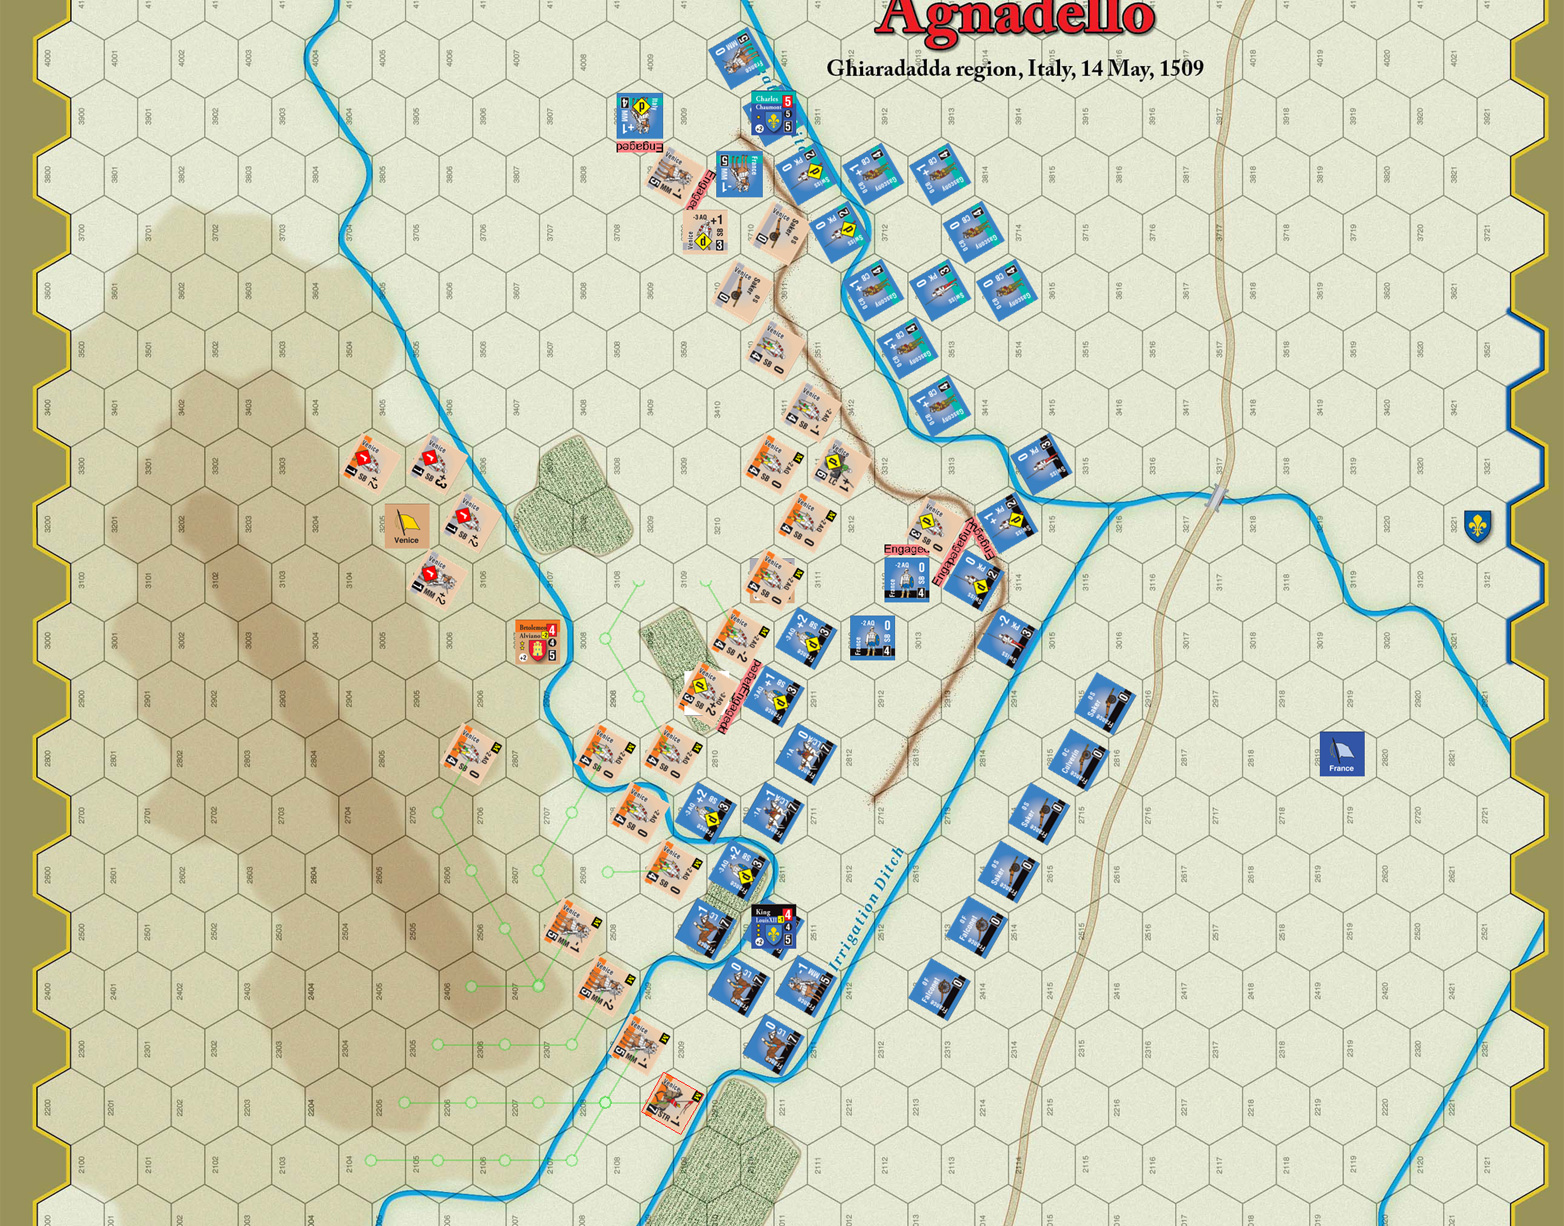
Louis XII managed a second continue, and the flank extended to cover some of where Alviano’s second line was waiting, while I maneuvered to flank the mounted men-at-arms waiting on the flank of the Venetian line, and disordered them with fire from the French light cavalry/archers. This time pikes that refused to engage last time ended up retreating in disorder, while the rest of the Venetian line retired or retreated along with the men-at-arms. One unit crossed the ditch and continued with momentum taking them into the one Venetian unit that had done well so far and the one that retreated, becoming disordered and engaged with both of them.
Full map, right before shock combat on Louis XII’s second activation.
I got a third continue with Charles (by now it was getting quite likely that I’d miss a roll), and engaged on the left flank of the Venetian line with my mounted men-at-arms and pikemen (I would have charged, but didn’t understand the mechanic yet, and so moved to contact). Two of the pikes got disordered coming up to the ditch (I didn’t have the attack), and the remaining pike refused to go into combat, just leaving the men-at-arms, one of whom was disordered and engaged, while the other forced a sword-and-bucker to retreat.
Louis XII made the next continuation roll, and moved to clear the last of the initial line and onto the the flank of Alviano’s battle. Reaction fire generally disordered everyone who got that far, though I also disordered a Venetian unit. The end of the line ended up engaged, while the second unit in line retired. The initial line still held out with a attacker disorder result on the one that had been all the trouble, while the other was eliminated.
I finally failed a continuation roll (my second needing a 1 or 0) and Mark activated Alviano, building a new line on his flank and eliminating one of my units with arquebus fire. He charged into the light cavalry guarding my flank (with nowhere to really go, because I packed everyone too tightly), but didn’t do more than cause a general engagement there. He did force two units of sword-and-buckler to retire near the center.
When Mark tried to continue on the other flank I used my seizure opportunity marker and managed to get the activation back to Charles. I enveloped the Venetian flank, but only forced one unit to retire, with the rest ending up engaged.
Mark tried to seize my continuation, but I negated it, and then failed the continuation roll anyway. Alviano activated again and inserted himself into the fight for his bonus. On the flank I had two LC and a sword-and-buckler eliminated and another LC retired. This ended up with continued attacks against my mounted men-at-arms, which beat them off with attacker retreats.
Mark failed his continuation roll and Louis XII activated. My horse archers managed to disorder a separated unit in the center, and I finally finished off the initial line at the ditch, and eliminated two units in the center. This got the Venetian flight level to 36, and the roll went over the flight limit of 40.
Conclusion
There’s a few oddities with the Vassal module. Dedicated modules for each scenario isn’t the choice I’d make, but it does make for a nicely small package. However, the map (as seen above) is oriented vertically on horizontal screens, and I’d definitely recommend rotating it. The main map text is upright this way, which I suppose is what determined this, but that’s not horribly important, and it does leave the hex numbers pointing off to the side (even less important, but still provides an “excuse” for rotation if any is needed). The biggest problem is there’s some “bare” (no alt or control) commands on the counters which interferes with text chat; oddly, it’s only a couple of commands here.
On the nitpicky side, the graphics are sized much bigger than is needed, and the default zoom level doesn’t help. On-counter status markers for fired units would have been nice (along with a way to clear those and the counters automatically). A method of showing just who is engaged with whom would be a big help, but is tricky to do in Vassal (offsetting a counter so it appears away from the hex it’s technically stacked in can work, but has it’s own trouble). The Game Tracks window suffers from too-large graphics (so the too-large counters are still tiny on it), and hasn’t been zoned at all, and it really should be echoing status updates to the log (which would require zoning). And at some point after the set up was done, the hex grid was shifted, so things don’t initially stack right on those occasions where it’s allowed (I suggest just moving everything a hex, and then back to where it started before starting a game to clear that).
As for the system and scenario itself, we had a lot of fun. We nearly went straight to another scenario when it was looking like Mark might not get an activation. And when he did, losses started piling on fast enough that I was getting worried that I might be rolling for flight first. The great start meant that the nominal time limit was useless as Mark needed every activation he could get to save the situation instead of trying to run down the clock. It took some time getting used to the artillery (which can’t move after setting up… and it’s all set up at the start) and the integrated ranged/melee units, but they work in the basic system quite nicely.
Discussion ¬