
3 McDowell’s Opportunity
Back during May, Mark and I returned to the GCACW series with the third All Green Alike scenario. Interestingly, it’s simultaneously historical (in that the opening setup is just where everyone was two days before First Bull Run), but ahistorical in that it assumes that McDowell assumes the offensive with the Army of Northeastern Virginia two days early, with the Confederates less prepared.
Somewhat oddly, part of Tyler’s 5th Division, and Early’s Brigade start exhausted because of a small fight the day before (seeing the overall set up for that would be interesting). The Confederate Army of the Potomac is behind the Bull Run, with abatises under work, and Johnston’s units are still far away, while the Union troops are already concentrated at Centreville. The Union forces are going to need to deploy and shake themselves out, but there’s plenty that can be done. And they need to do plenty, as the victory conditions are suitably more ambitious than the pure historical battle.
I reprised my role as the Union player, who gets the first initiative by scenario rule, and I sent Hunter’s 2nd Division towards the Confederate west flank, and on my second activation (thanks to Confederate command paralysis) came around behind Stone Bridge, while Burnside attacked across the bridge, blowing the roll to do little more than exhaust and disorganize both sides. Porter’s Brigade managed to go again and forced a retreat, which wiped out the Confederates blocking Stone Bridge.
Then I sent Heintzelman’s 3rd Division towards the east flank of the line. The trip took a bit, and ended with Franklin’s Brigade crossing the Bull Run at Butler’s Ford and taking up a position to block the fords while the rest of the division was still on the other side. Mark finally got a real chance to move, and shifted Longstreet’s Brigade to confront Franklin, sent Early to Camp Pickens, and Bonham to reinforce the west flank and occupy Groveton (in two moves).
Hunton’s Brigade moved on the Union flank but had slow going to end up near Sudley Springs. Tyler’s 1st Division took positions along the middle of the line, now that the Confederates were getting spread out, and Miles’ 5th Division headed west to try and get around the flank. Good rolls got him to Sudley Springs for hasty attacks against Hunton, but it took both brigades to force him to retreat near Gainesville despite good odds. Mark moved Early down the Manassas Gap road to join Hunton, along with the 13th Mississippi and Radford’s cavalry. Munford’s cavalry went to get behind Franklin and keep me from using the fords a bit further downstream.
Jackson’s Brigade and the 6th North Carolina entrained and got into the area of the fighting, but the rest of Johnston’s army had a struggle to get to the closest station (Rectortown) for entraining the next day.
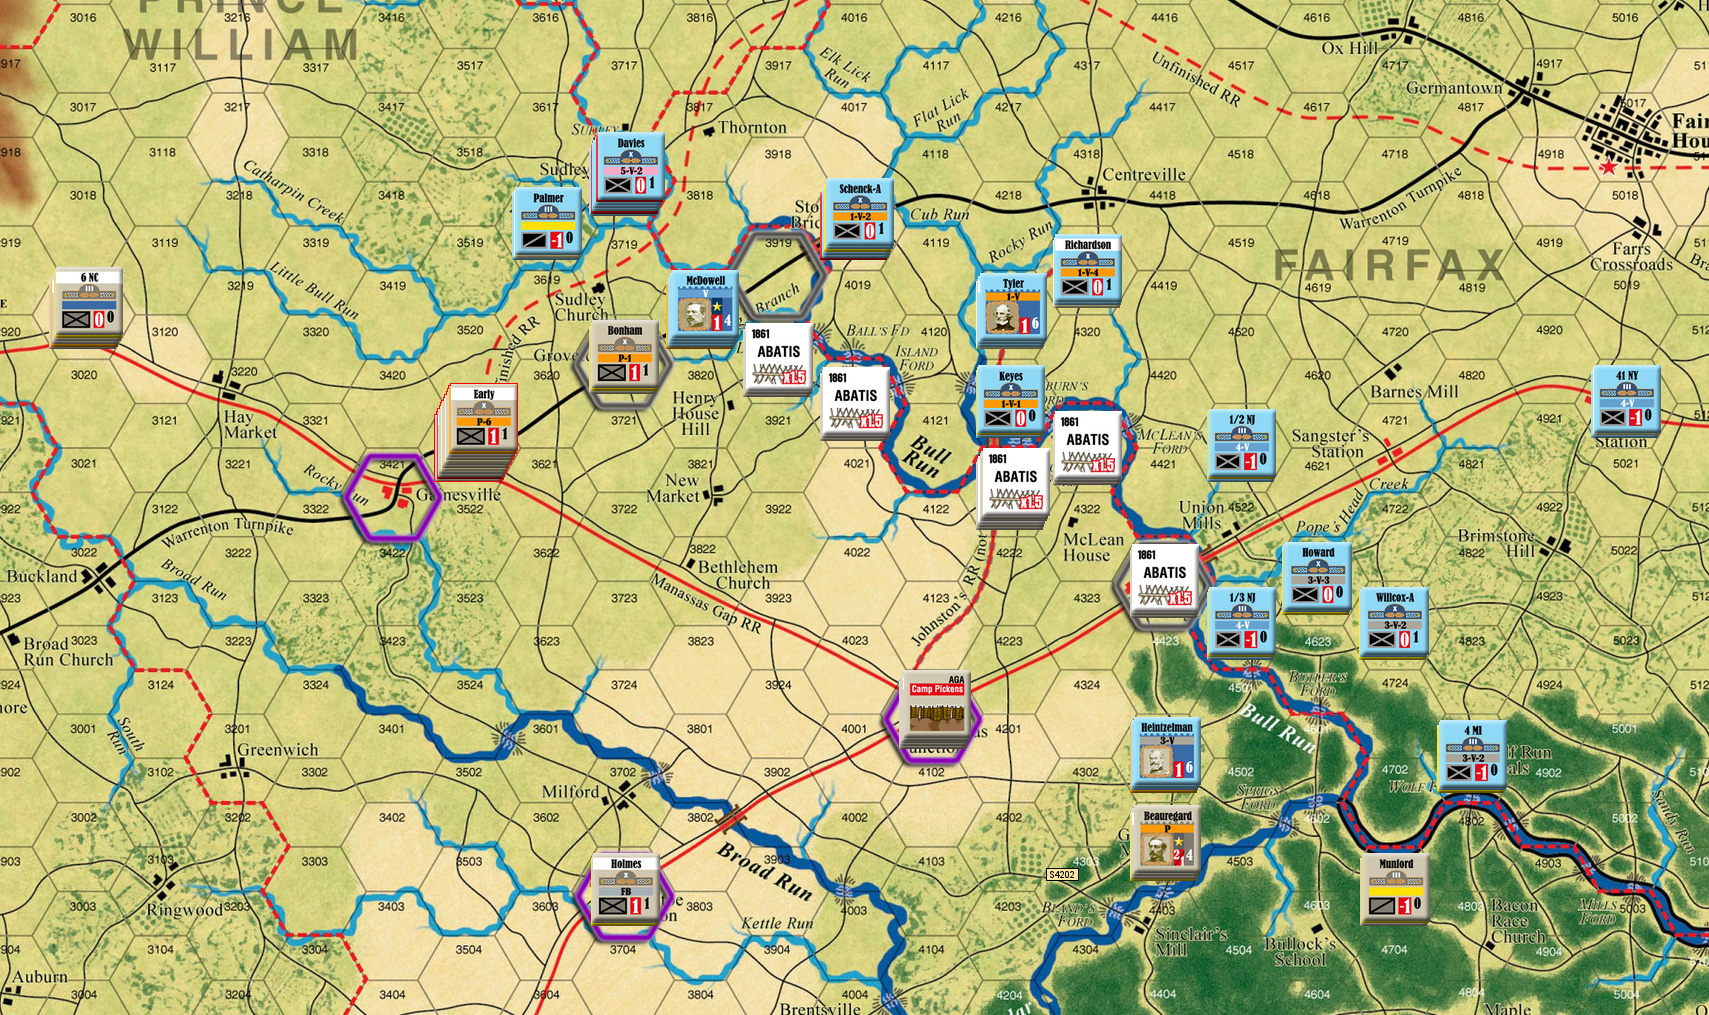
End of July 19/turn 1, after fortifications are built, but before recovery.
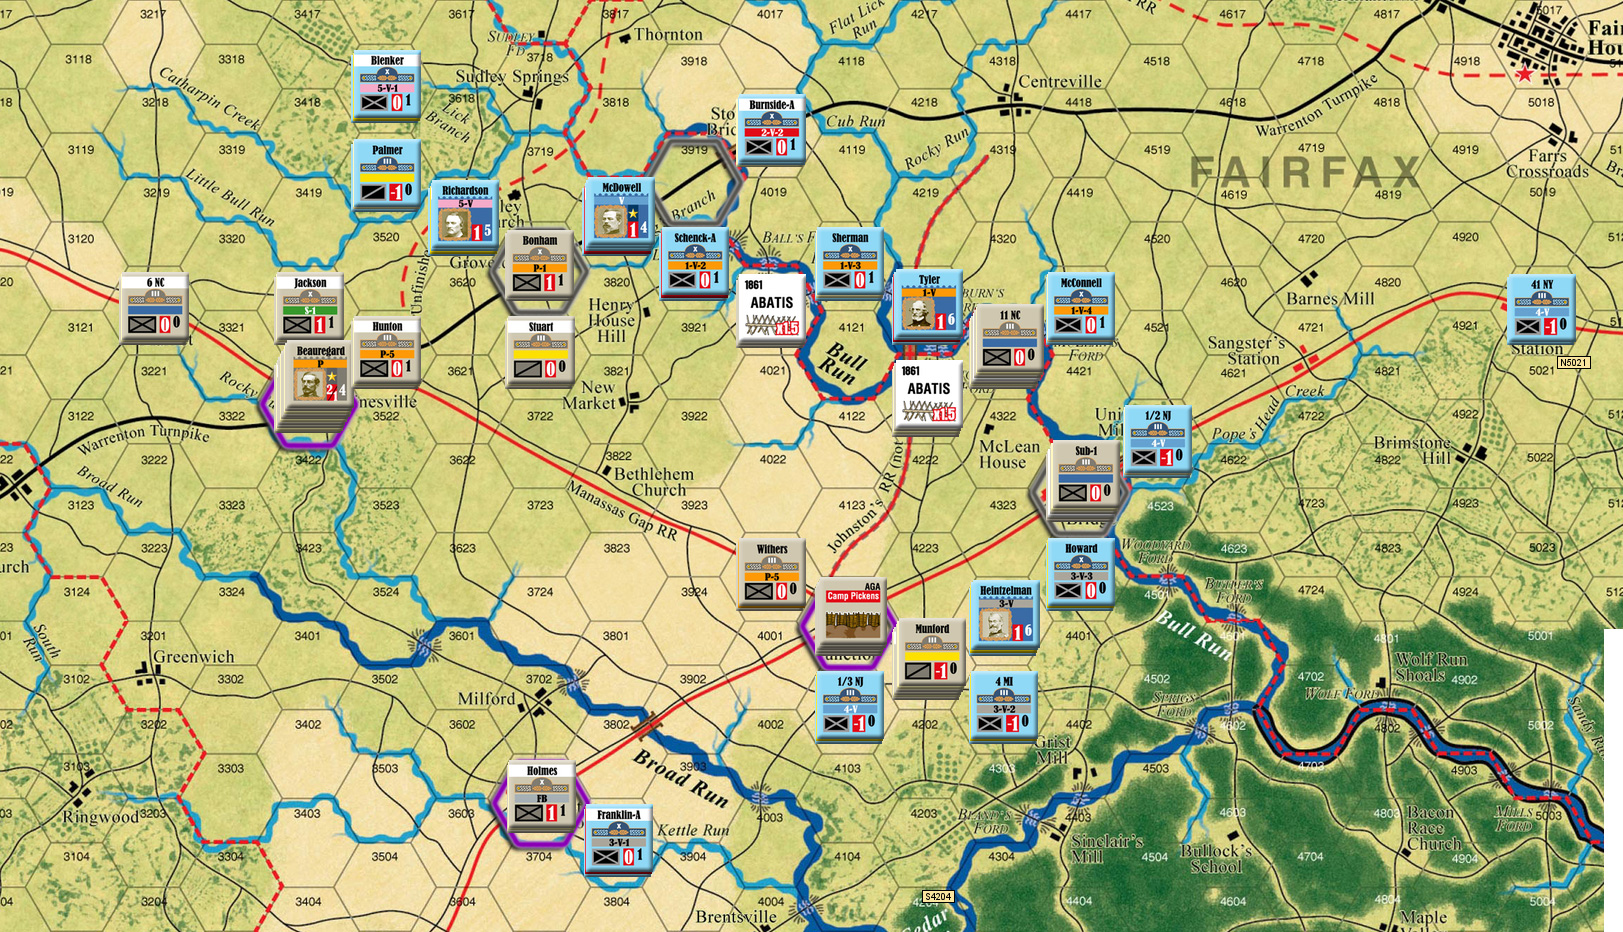
For the second day, with everyone somewhat rested, the Confederates pulled back a hex to garrison Gainesville directly. Longstreet pulled back, and Tyler finished getting his division into position (somewhat poor positions; I needed a long session with the flanking rules to get what goes on with impassible hexsides, as it’d been too long). McDowell had Porter assault Wither’s Brigade at the end of the current Confederate line, with Schenck joining a grand assault, driving the Confederates out of the hex with a Dr/1Da. Richardson moved up a bit on the flank, but I got overly-worried about my flank and didn’t take the positions I wanted (there weren’t really any roads to get at where I was vulnerable).
Heintzelman finished crossing the Bull Run, and Mark started re-working the defenses over there. He left the 1 SP 8th Louisiana alone covering Mitchell’s ford, but a prepared attack from Keyes failed with a -2 result (the first of a string of combats where Mark out-rolled me when the odds were in my favor). Mark then pulled part of D. R. Jones’ Brigade out to help defend Bull Run Bridge (this wouldn’t have been possible if I’d gotten a retreat result and crossed the river). Franklin’s Brigade got all the way down to Bristoe Station and did a normal attack against Holmes, suffering a f/1D.
However, Mark was stymied in the west, as all his embarkation rolls for the day failed, leaving the bulk of Johnston’s army out of the fight.
July 20/turn 2.
Keyes made an assault across the Bull Run, but only got a D/D to blow both side’s units. D. R. Jones detached more men, this time to help in Camp Pickens (it actually had to stop short, but he got another activation before I could attack a small unit in the open), and then Jones himself joined the 8th Louisiana, giving up on holding McLean’s Ford directly. McConnell’s Brigade crossed and then failed an assault on the new position, with a second assault merely managing D/1D. However, the 3rd Division managed to concentrate against Bull Run Bridge, and got a 1Dr/Da on a one-unit assault (everything else failed to go in). Ewell ended up between Pickens and Mitchell’s Ford, losing half the unit in the process. Howard’s Brigade then turned around and struck towards Mitchell’s Ford for a Dr/Fa on a hasty attack, and the stack of tiny units there dissolved with no go retreat options. Sherman’s Brigade then crossed at the ford and drove Ewell back with a DR/fa.
Jackson moved into Groveton, and then Early detached his artillery to move up to Groveton. The Confederates assaulted out of Groveton for a 1DR/1fa to drive off Porter, and then he marched into Stone Bridge to deny me that objective. Shenck was largely cut off, and ended up pulling back behind the Bull Run before it was attacked with Confederate units on both sides.
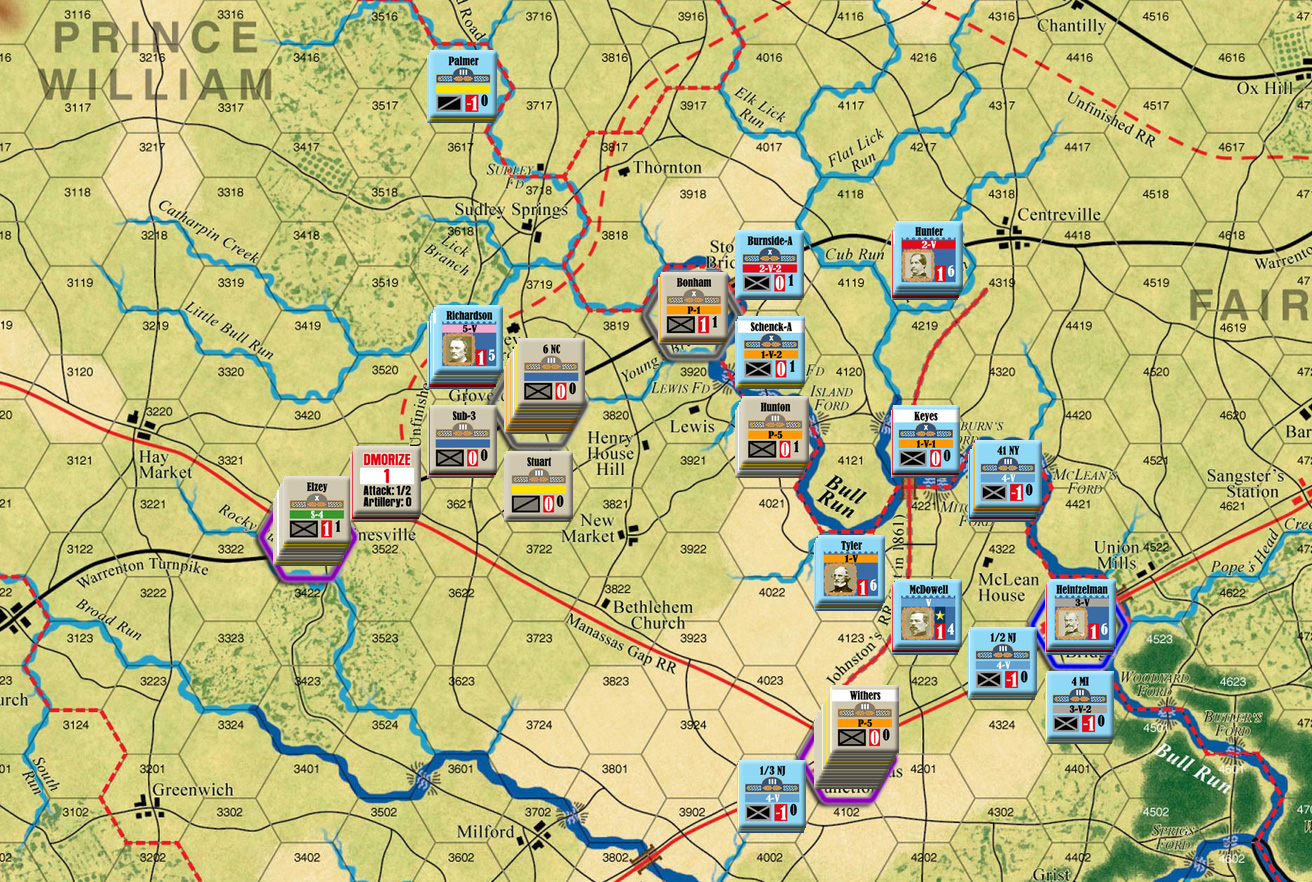
July 21/turn 3.
Afterword
We called it there; both of us had a few more things we’d like to do, but there were no more combats coming up, and the maneuvers wouldn’t mean anything without another day in the scenario so there was little point to them.
I had gotten a nice string of activations early on the 19th, which let me maneuver onto the Confederate flanks and really overextend their line. This was countered on the 20th with all the bad combat rolls that left me on the +0 or slightly worse result despite generally having a 2 or 3 DRM advantage.
I got 4 VP for being adjacent to Manassas Junction/Camp Pickens, and 7 VP for taking Bull Run Bridge. Both sides get 1 VP per enemy manpower loss (instead of later, when Confederate troops are worth more), with Mark getting 8 and me 10 VP. This came out for 13 VPs at the high end of a Union Marginal Victory.
It’s a good scenario, since there’s a lot of maneuver to be done; especially as the Union troops are all clustered in the center and need to deploy from there.
Discussion ¬