
3 Heavy Counterattack
Back at the end of February, Mark and I returned to Operation Dauntless, with the third scenario, depicting the fighting on June 18, 1944. The rules mention this is a tough scenario for the Germans, and they need to know what their doing, and indeed the scenario defeated the both of us.
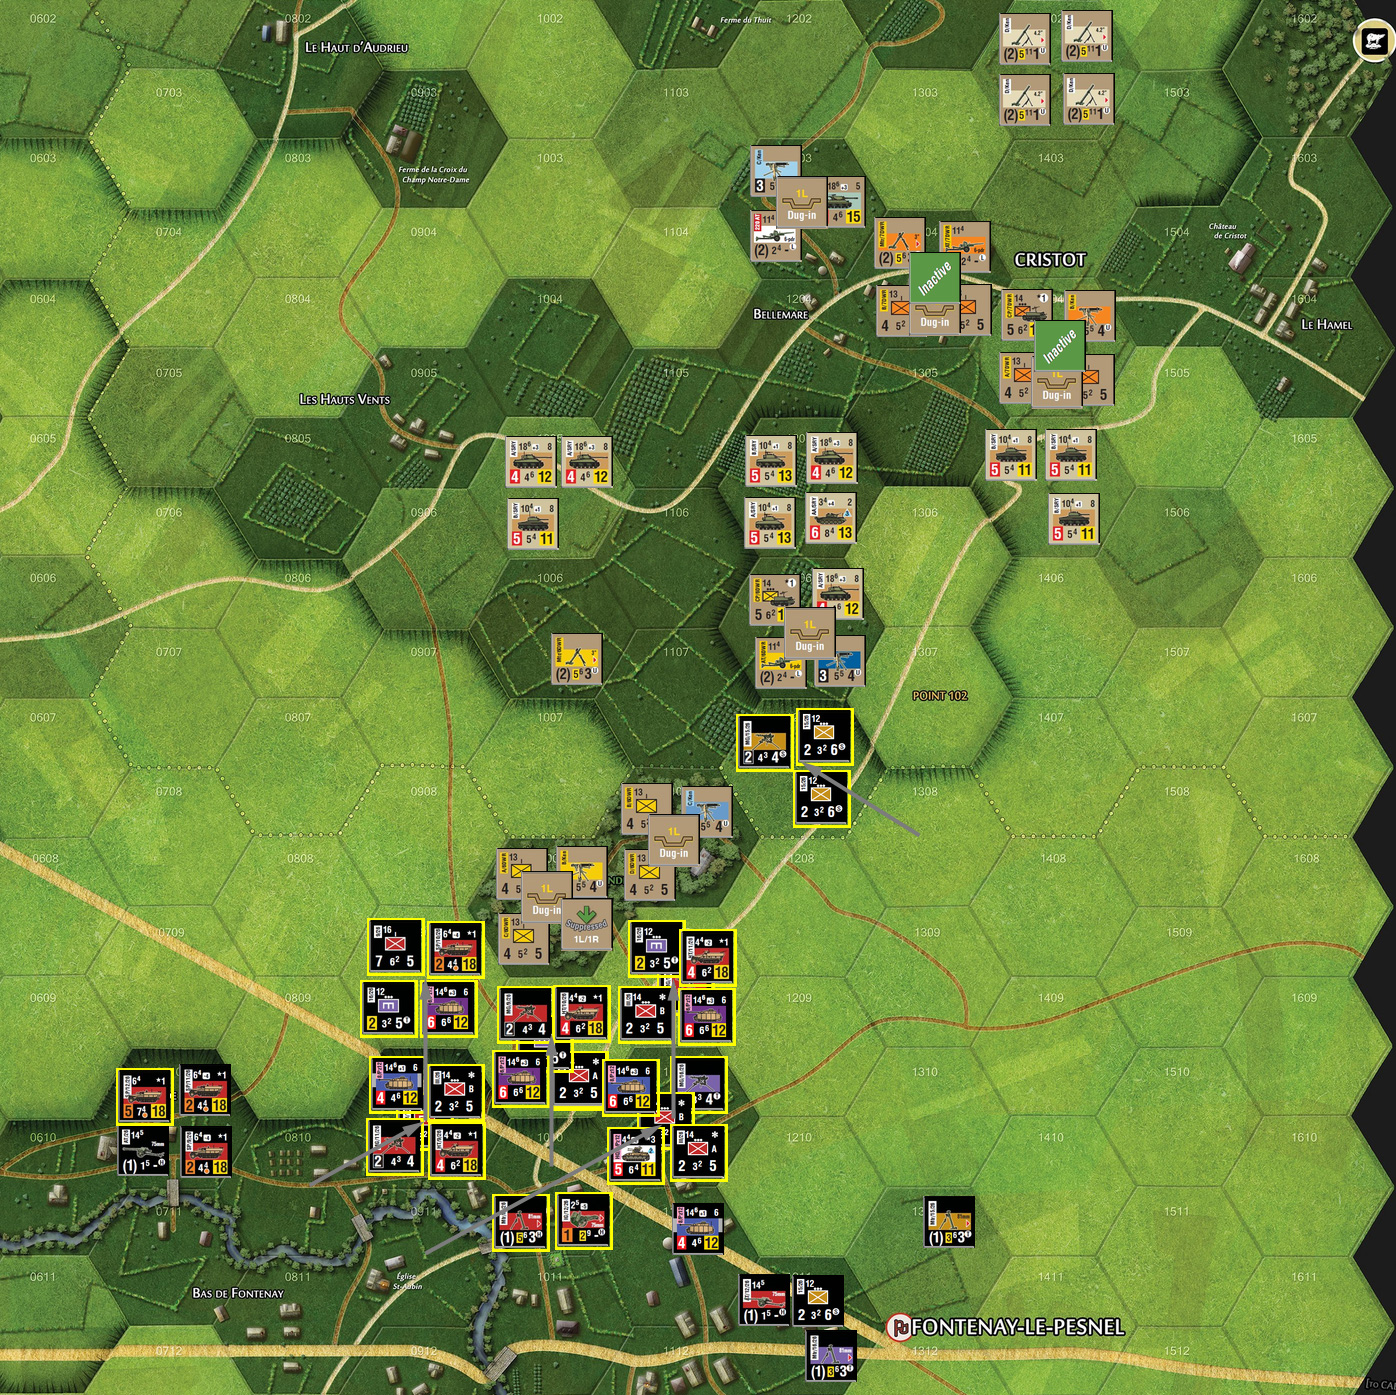
We reprised our normal roles with Mark as the Germans, who set up in Fontenay, while I did what I could with a British setup that allows them a dug-in battalion at the main goal, the Parc de Boislonde, but another is inactive some distance away, and all the armor is in positions that don’t have a lot of LOS. They can set up in 1205/1206 hill near Point 102, and four set up in 1205, where they can see the area north of the Parc, while one squadron was in 1206 along with the battalion AT, carriers, and a MG section to dominate the area south and east of the Parc. The two hexes of the Parc itself each held two companies and a MG section to make them tough to assault, but not disastrous to lose.
The scenario starts with the German half of the 13:00 turn, and Mark started with a few ranged attacks, and the bulk of the off-board artillery trying, and failing, to suppress the occupants of the Parc before moving to assault. His first attempt on 1008 ran into a DDDD tactical advantage draw (it was -4 for a max defensive draw) to kill a platoon of Pz IVs, and then lost an infantry platoon on a 1:3 attack.
That ended assault attempts, but he moved a stack around the north side for a later encircling attack, but lost Pz IVs and halftracks to ARC attacks from the hilltop. He then put more troops into 0909, and moved another stack into 1009, which stopped from friction fire. Mark sent more Pz IVs to 0908, losing some to a Firefly, but his 75mm AT position to the south managed to pick it off with Return Fire. Another group parked in 1109, while another stack got halted in 1209.
Everything hit 1008 in the combat phase for a four-hex encircling attack that drew lots of support. None of the German support came close to doing any good, while British support caused eight suppression, and knocked out four platoons (it would have been more, but one good attack hit a hex that had already lost all the infantry), while holding back the two medium battery (5.5″) assets for later. The final odds were 27:14 for a 3:2 attack (with 6 left and 6 right shifts), and a poor roll gave a 2/0 result to kill another platoon and reduce a company.
That was a disastrous beginning for the Germans, and Mark was obviously quite frustrated with the entire process. So, I volunteered to swap sides, as I had some ideas on how to handle the Germans. I put the three long-range (orange-dot) halftrack units in 0710 so they could try to suppress 1006 at the start, and put much of the 15/26 recon company in 1308, where it could get into cover and try to interfere with movement in and out of the Parc.
Sadly, the initial ranged attack on 1006 didn’t work (7 DR + 6 = 13 NE by one…), and friction fire did work on the first group to move out, halting them in 0909. I then got a suppress on 1008 with the 3/Art12’s 105s, but after a second stack got halted by friction fire, it was a waste as I didn’t bother with a single assault against the hex (or, I just calculated the odds again).
I attacked 1008 from three hexes in the combat phase, with all available support being thrown in on both sides, netting me all of two suppressions against thirteen suppressions from the British and four dead platoons and a dead company (only leaving me three engineer platoons and two MG sections for infantry). The final odds were 24:14 for a 1:2 attack after taking 3R and 6L shifts, and I rolled very well for 1/2 result, flipping two British companies while… we seem to have skipped my loss.
While more than bad enough, my position was slightly better than Mark’s had been, if only because of the good combat roll (and a lack of armor losses), and we continued. Mark activated the 7th DWR with his reinforcement points, and started shoring up the defense. Fireflies took up positions in 0906, giving good LOS out there, and he reshuffled the defenders in the Parc. The bulk of the 7th DWR moved to surround my group in 1207, though he lost an AA tank step as it moved onto Point 102. An Achilles moved into 1606 (out of my effective range), and three Sherman squadrons moved to 1507.
Mark did an encircling attack on 1207 for the combat phase. He only had limited support and caused one suppression; I had more and did four suppressions, but lost a Pz IV step in the process, and the combat was still 50:8 for a final 5:1 which did 0/4 on a good roll, which I took as a loss to my MG section and three retreats, though I lost another platoon to friction fire in the retreat. He also took several shots at halftracks, but the only result was to lose a Firefly from ARC.
I made a couple attempts to suppress 1008 in the action phase again, but now that British armor was in place, I merely lost a step of the better support halftracks. I used the engineers to dig in, and moved up some replacement infantry, and got a platoon into 0908 for an encircling attack. That, of course, drew all our support again (I did hold two off-map artillery in reserve) to do two suppression while losing another halftrack step, while Mark rolled relatively poorly for a “mere” six suppressions, and the only casualties being the platoon that moved to 0908 (and ending the encircling attack). Factors were 28:14 for a 2:3 attack 6L and 2R shifts for a 1/0 to destroy yet another infantry platoon.
Mark tightened up the defense for his turn, advancing the Shermans on the east flank a little, picking off a Pz IV with an Achilles squadron, sending some Shermans west to 0606 and sending a new company in to bolster 1108. In the combat phase, he picked off two units of halftracks and a Pz IV platoon with anti-tank fire, while taking losses in two Sherman squadrons, and ranged fire eliminated another platoon.
I moved up for another attempt on the 1600 turn, losing another Pz IV step to ARC in the process, and the combat drawing lots of support again. This time I generated three suppressions, but lost two support halftrack units to return fire, and then took ten suppression and lost two engineer and one infantry platoon for a 15:20 combat that went down to 1:4 and generated a 2/0, to take out a MG section and engineer to empty 0909.
Afterword
With two more turns in the scenario, I threw in the towel at this point. The main goal is to get into the Parc, where the Germans can get 2 VPs a turn for each hex, and a one-time award of 5 VP just for getting in. No matter how things go the Germans will take losses going in, and this would, presumably, counter that. There’s also an auto-victory for eliminating three companies from the same British battalion, but all I ever did was make two of them take step losses.
I figure the German’s best chance is on the first turn, before the British armor gets a chance to redeploy to more intelligent locations, and shoot up the German armor. And, everything was downhill from that attempt as I beat my head bloody trying to crack the wall. With all the British support available (largely off-board artillery), and the difference between open ground and being dug-in in woods, the best I ever managed was when Mark had a really cold turn, and merely rolled three more suppression than I did, which is still the maximum three column shift you can have from that anyway.
Final totals were 21 VPs for me (2×2 leg infantry steps)+(9×2 armor steps)+(1×1 transport loss) to 49 VPs for Mark (1×3 two-step leg unit)+(14×1 leg steps)+(16×2 armor steps), where the Germans need to score 15 VP more than the British to win.
Beyond that… this scenario has defeated us. I gave it my best shot as the Germans, and didn’t so much come up short, as failed to get anything done at all. I gave up on assaulting because the odds are too horrible. About the only way to make up for the field-to-close shifts is armor, and tactical advantage makes that a great way to lose your armor and firepower.
The move into 1207 was interesting, but a decided mistake as Mark showed it was easy to just pound the hex from all sides and throw them out with heavy casualties. If done with a good combat into 1108, that’s another thing, but given equal defenses in both halves of the Parc, 1108 is much harder to get at, meaning that 1008 really needs to go first.
Mark’s attempt to get around to the north bears another look, as encircling combat would do much to make things much harder on the British. But, I was trying to keep the number of units that could fire on me down, and I showed how even the opening set up allows for AT- and supporting fire from units that are otherwise blind, so going in 0908 a great way to lose armor (an infantry-only move might work better… until the supporting fire comes down).
Discussion ¬