
Normandy 7
After finally trying out U.S. Civil War, Mark and I went back to the “ZOC-bond” series to try out Normandy ’44. For the first time out, we did the seven-turn mini game, and I had the invading Allies. Unfortunately, after the very good module for Ardennes ’44, I do have some complaints here, most notably that it uses a bunch of shift-commands on the counters, which had us both inadvertently firing off commands as we typed. (Never, ever, use a bare shift-command in a Vassal module, it’s very bad practice.)
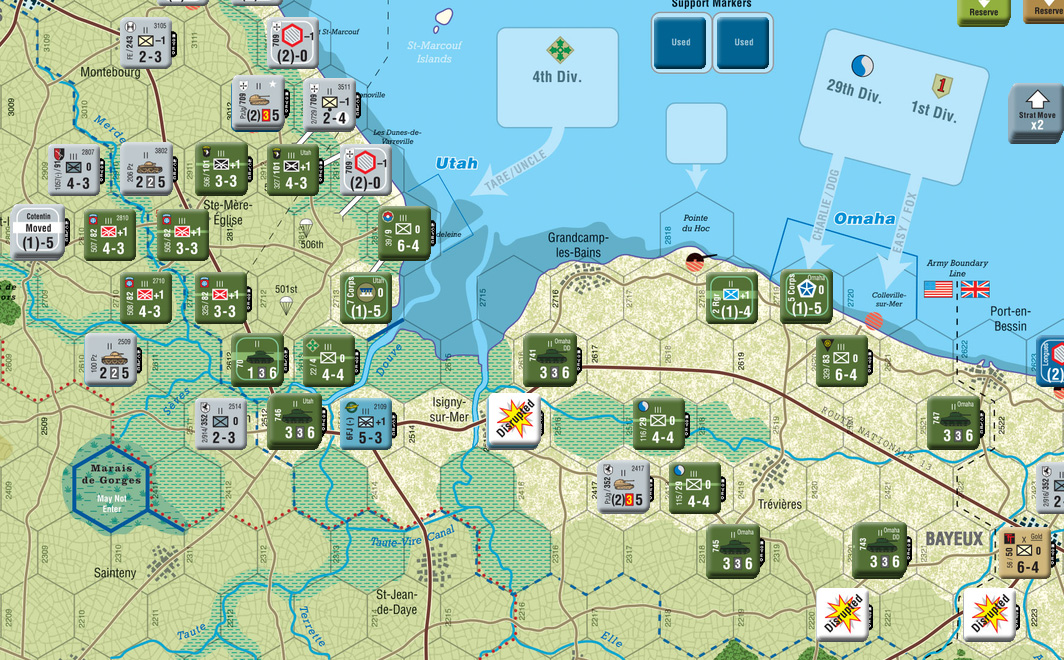
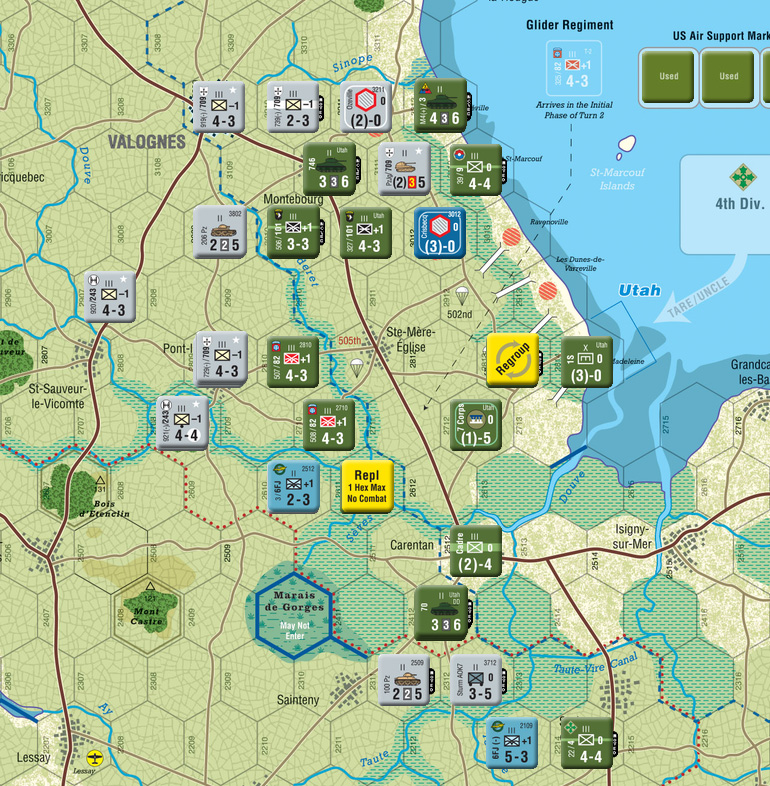
Somewhat oddly, the Germans go first in this game, followed by the Allies. But the first turn starts with a special invasion phase, where the Allied first wave comes ashore, and then the second wave comes on the normal Allied turn after the German turn. The first thing that happens is the three airborne divisions drop, and the Allies roll to see how the drops go. Each division has it’s own table, with the 82nd having the worst one, but good die rolls meant that two regiments landed fine, with the third scattering and losing two steps. The 101st did worse, losing three steps across two regiments, that at least the last one had not scattered. The British 6th Airborne, with the easiest results table, still lost two steps, though one unit also did not scatter.
Then comes the initial assaults to get on the beach, which also have unique CRTs (with Omaha having a special result of losing a step, and then rolling again). As these are just ‘results’, you don’t check odds or anything, and the DD tanks check to see if they lose steps separately. Point du Hoc is treated as a separate mini-beach with a chance that the 5th Ranger Battalion will get word to come ashore there (despite the area being cleared, they historically went to Omaha because they didn’t get word in time). Overall, I came ashore in pretty good order, with only one ‘repeat’ result on Omaha, but lost steps on the majority of DD units.
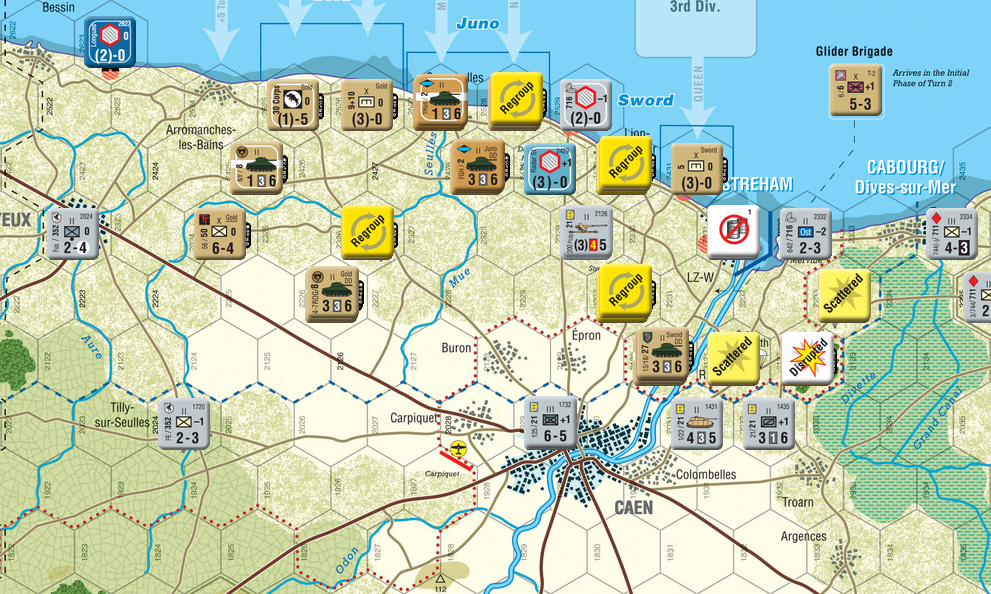
Mark had a somewhat abbreviated first turn as he tried to figure out just where the problems were going to be. He made one attack to shift an element of the 6th Airborne off their landing hex. The British, in turn, were able to get to the outskirts of Caen, and launched attacks to clear strongpoints, and couple weaker units, clearing the front fairly nicely. The Americans were able to clear out a unit in front of Omaha, and advance to the Aure for a small, but secure, beachhead, while units moved up to secure the Airborne perimeter behind Utah. We never got into the habit of doing much with reserves, but I had a few here, which helped the British advance.
Turn 2 weather was overcast-3, allowing some air support. Oddly, a couple glider units arrive at this point (they came down with the airborne troops, so I don’t really get the one-day delay here), and both scattered and lost a step. Mark brought back a couple elements of the 352nd Division with replacements to fill out the line in front of the British, and of course, the 12th SS arrived and headed to Caen. He had enough to get ZOC-bonds all across the British front, but parts of it were anchored in clear terrain. In front of the Americans, things were much more solid, with a number of two-unit stacks and better terrain sealing things up. He didn’t have any attacks, and lost two units to supply attrition.
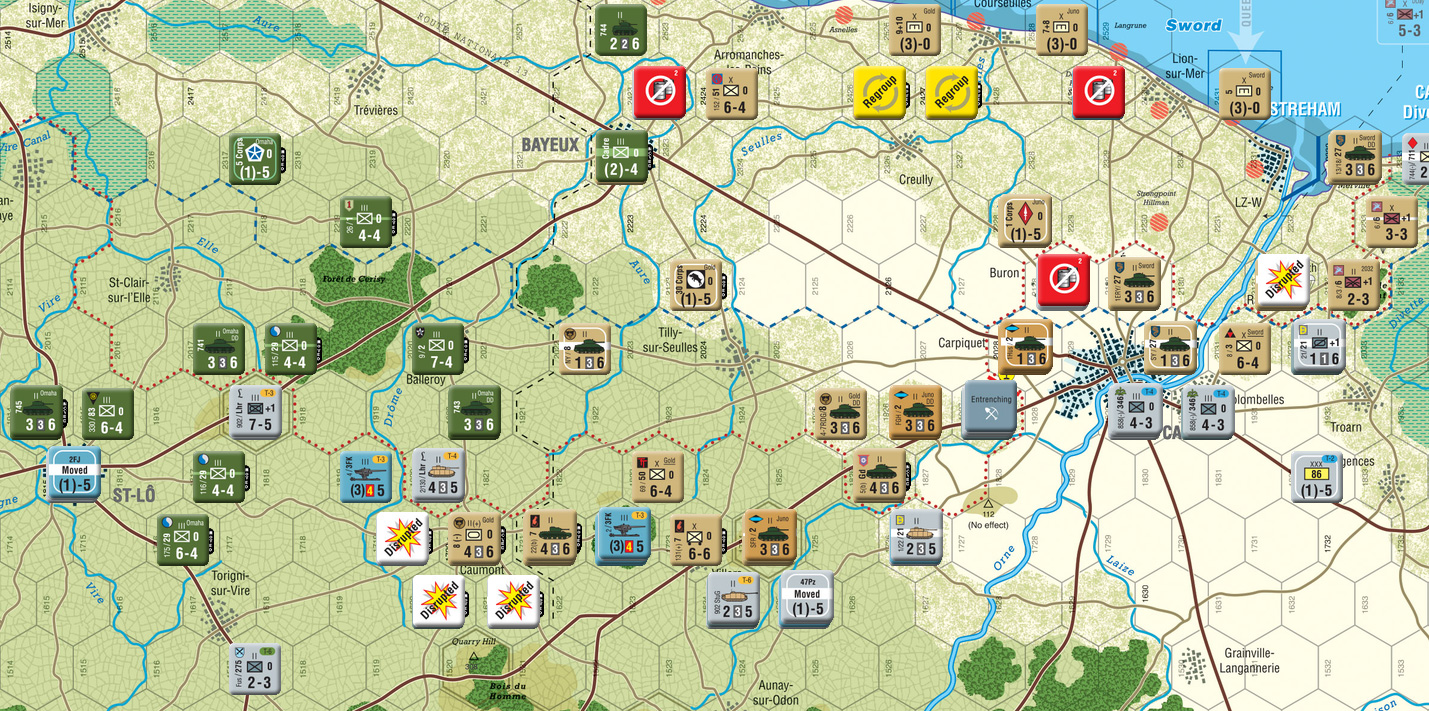
I did not feel very strong in Utah, with a lot of German units around, but the one combat there was to get across the Douve, as Mark had mad the mistake of three units in three hexes, rather than doubling one up and letting ZOC-bonds protect the line. An exchange let me get into Carentan, which certainly ratcheted up the tension on that part of the line. In front of Omaha, I forced a flak unit to retreat (was hoping for a lot better), but also knocked out a small unit, and forced retreats near the army boundary to start moving inland. The British took Bayeux, cutting off another battalion, blew apart the thin German line (including a DH result; free reserve status from combat is a really interesting wrinkle), forced another crossing of the Orne, and cut off a panzer grenadier regiment and AT battalion outside of Caen. Reserve attacks got the British into Carpiquet, and eliminated another unit from the too-thin German line.
The weather continued at overcast-3 for June 8th, and Mark brought in elements of the 352nd Division with replacements again (I bet that is a common refrain as long as the weather doesn’t clear up enough to force low-quality replacements. This time Panzer Lehr enters from the south, which was exactly what Mark needed for the developing crisis in the British sector, though there was still trouble getting them where they were needed. A couple battalions and a regiment crossed the Orne south of Caen, which gave him a good position on the Odon, while the bulk of the 12th SS went to hold Caen. Further west, he largely pulled back in front of the Americans, shortening his line by skipping the flooded areas. A couple counter-attacks drove the British back into the clear area, and let him take up positions south of the Carpiquet airfield. An attempt to relive his trapped units bled the British, but a determined defense held the position, leaving them trapped.
The Americans were largely busy trying to catch up to the Germans, but broke through at Baleroy and started clearing the coastal batteries north of Utah, and cleared the road between their two beaches. The British only had a couple attacks themselves, largely pushing back towards the bocage.
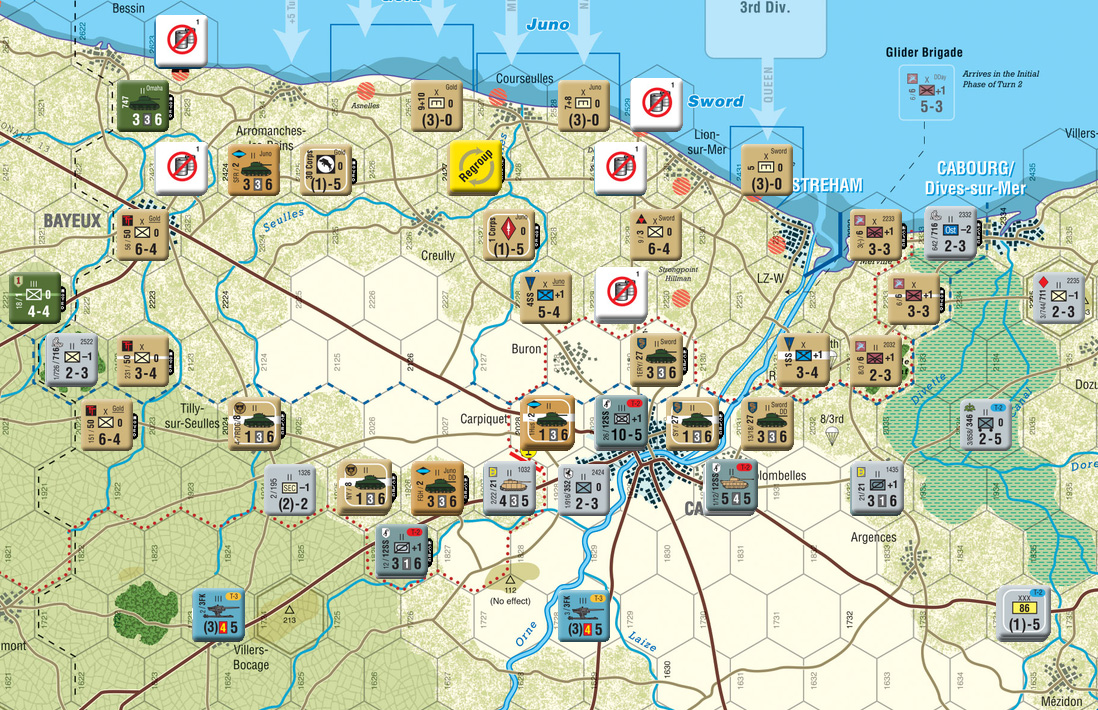
June 9th dawned clear-6, which gave me a much needed boost with all the air power that became available. Mark continued trying to shore up the middle of his line with a low-quality (all that’s allowed in this weather) battalion from the 352nd, and continued a process of shifting troops around the Utah beachhead to new defensive positions in the south. More of Panzer Lehr shows up this turn, which did a lot to stabilize parts of the line. To my surprise, he pulled out of parts of Caen in his efforts to shorten and extend the line. (I still think this was a mistake, with the nice defensive terrain of a city, but I was squeezing the city pretty hard, and the Orne makes an even better barrier. His trapped units forced the 4th Special Service brigade back, letting them maneuver, but they were still on the wrong side of the lines.
I decided to let the area around of Caen stay idle so I could replenish units on the front line there, and sent units west of there to start driving into the bocage. The Americans advanced towards St Lo, while also reorganizing to be able to finally push north, which happened despite some bad rolls. However, the good rolls were concentrated in the center, which helped blow things open again, with a bare handful of units in my way.
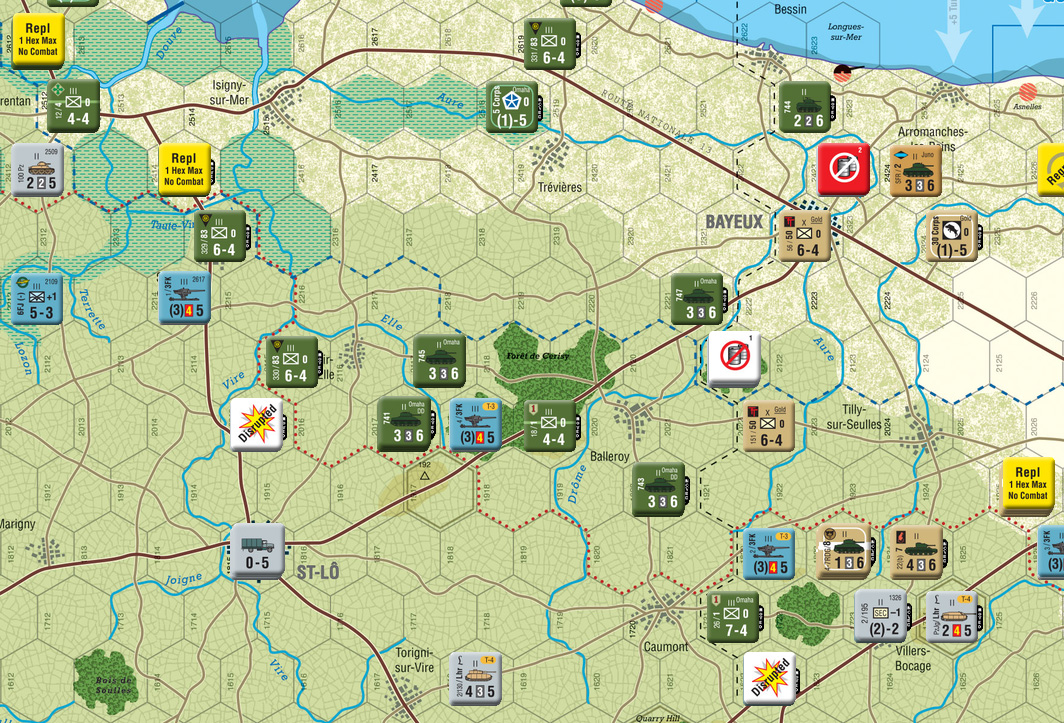
June 10th (turn 5) went back to overcast-3. Elements of the 3rd Falschrimjaeger and 77th Divisions enter this turn in the western half of the south edge, which is exactly what Mark was needing, along with more of Panzer Lehr just to the east. This allowed him to trap and eliminate one overextended regiment of the 1st Infantry Division, and reduce another, suddenly pushing up the American cadre count.
However, the line was still in good shape, if blunted. Progress in the north started accelerating as more strongpoints went down, and I got a D1 to put units into reserve, and get a second attack that reached the Sinope. The British also managed to take Hill 213, which put pressure on a part of the German line that had gotten quite solid. And despite the losses, the Americans reached the outskirts of St Lo.
The weather on the 11th was clear-4, and Mark had a busy time reworking his line again, with mounting pressure in at least three places. He backed off a little in the north, moving to protect Valognes and Pont-l’Abbe and pull out units in danger of being cut off. He reconstituted a unit in St Lo, and sent everything else that would fit there, while pulling back just a bit more elsewhere to protect it.
However, the north went poorly for Mark, with three attacks certainly costing me casualties, but I pushed him out of Pont-l’Abbe and got across the Sinope. My attempt on St Lo failed to an EX on a determined defense. Nearby, I eliminated a battalion and started cutting off Hill 192 (which looked a bit like how I got the 1st Division into trouble… but I was able to position another unit to cover the first), and a pair of British attacks forced back a weak bend in the line, and took Caumont.
June 12th (the seventh, and final, turn) was overcast-2, leaving me with no air support. Mark pulled out of Hill 192 (it’s a good position, but another turn would probably trap units there, and elements of three divisions entered to make their way towards St Lo and Caumont. He counterattacked on the east bank of the Orne, and drove back three brigades there with losses, throwing that entire area into jeopardy. Out on the Cotentin however, he had to pull back again, and both sides were looking very thin.
Thanks to Mark needing to fall back and concentrate elsewhere, the 82nd Airborne crossed the Douve, while some light armor came to help them hold the new positions. The British reorganized the east flank to meet the new German threat. I didn’t have a lot of combat, and it didn’t generally go anywhere, but I did re-take Ranville to stabilize things east of the Orne, and determined defense held on to St Lo again, but it was starting to bleed him of some good units.
Afterword
The final score was 21 VPs out of 14 needed for an Allied victory. There’s a VP for each airborne drop hex the Allies hold a the end (there’s nine), and three for linking all the beaches, so it’s hard to see the Allies scoring much under ~11 VPs, especially as Bayeux is also worth 2. The rest is made up of towns and cities held outside the naval bombardment zone, and I imagine can be quite variable, so it’s probably meant to be a contest for those last couple of points.
However, this was something of a blowout, as shown by the fact that I was largely past the line that shows where the front was on June 27th (another two weeks away). I think at least some of it is that the defense requires more careful play, and it took a bit for us to work out good practice.
This is our second ZOC-bond style game, and the system holds up very well. I think the motivation to keep divisions together is a good idea, but it only really works on offense, if you’re not needing to attack, it doesn’t make a difference. But, it’s a well-crafted game, and it would be nice to see MAF rule (and a couple other things) ported back into Ardennes ’44. The fact that bocage stops retreats really changed the nature of the advance as I went inland, and was a great bit of ‘feel’.
Discussion ¬