
19 Le Boys Haut
After finishing up The Lone Grey Wolf, Mark and I cycled to Great War Commander, picking up with the third Mons scenario from the British expansion. I had the attacking Germans again, as they try to take a hill, and the British are trying to extricate an artillery battery from it. The British have ten platoons of highlanders, four foxholes, and two 18-lbrs with crews, lined up on or behind a road running diagonally across the map (this takes a special rule, as the scenario format is too inflexible to do this normally). They can remove one 18-lbr each time time advances, getting VPs dependent on the current turn for doing so.
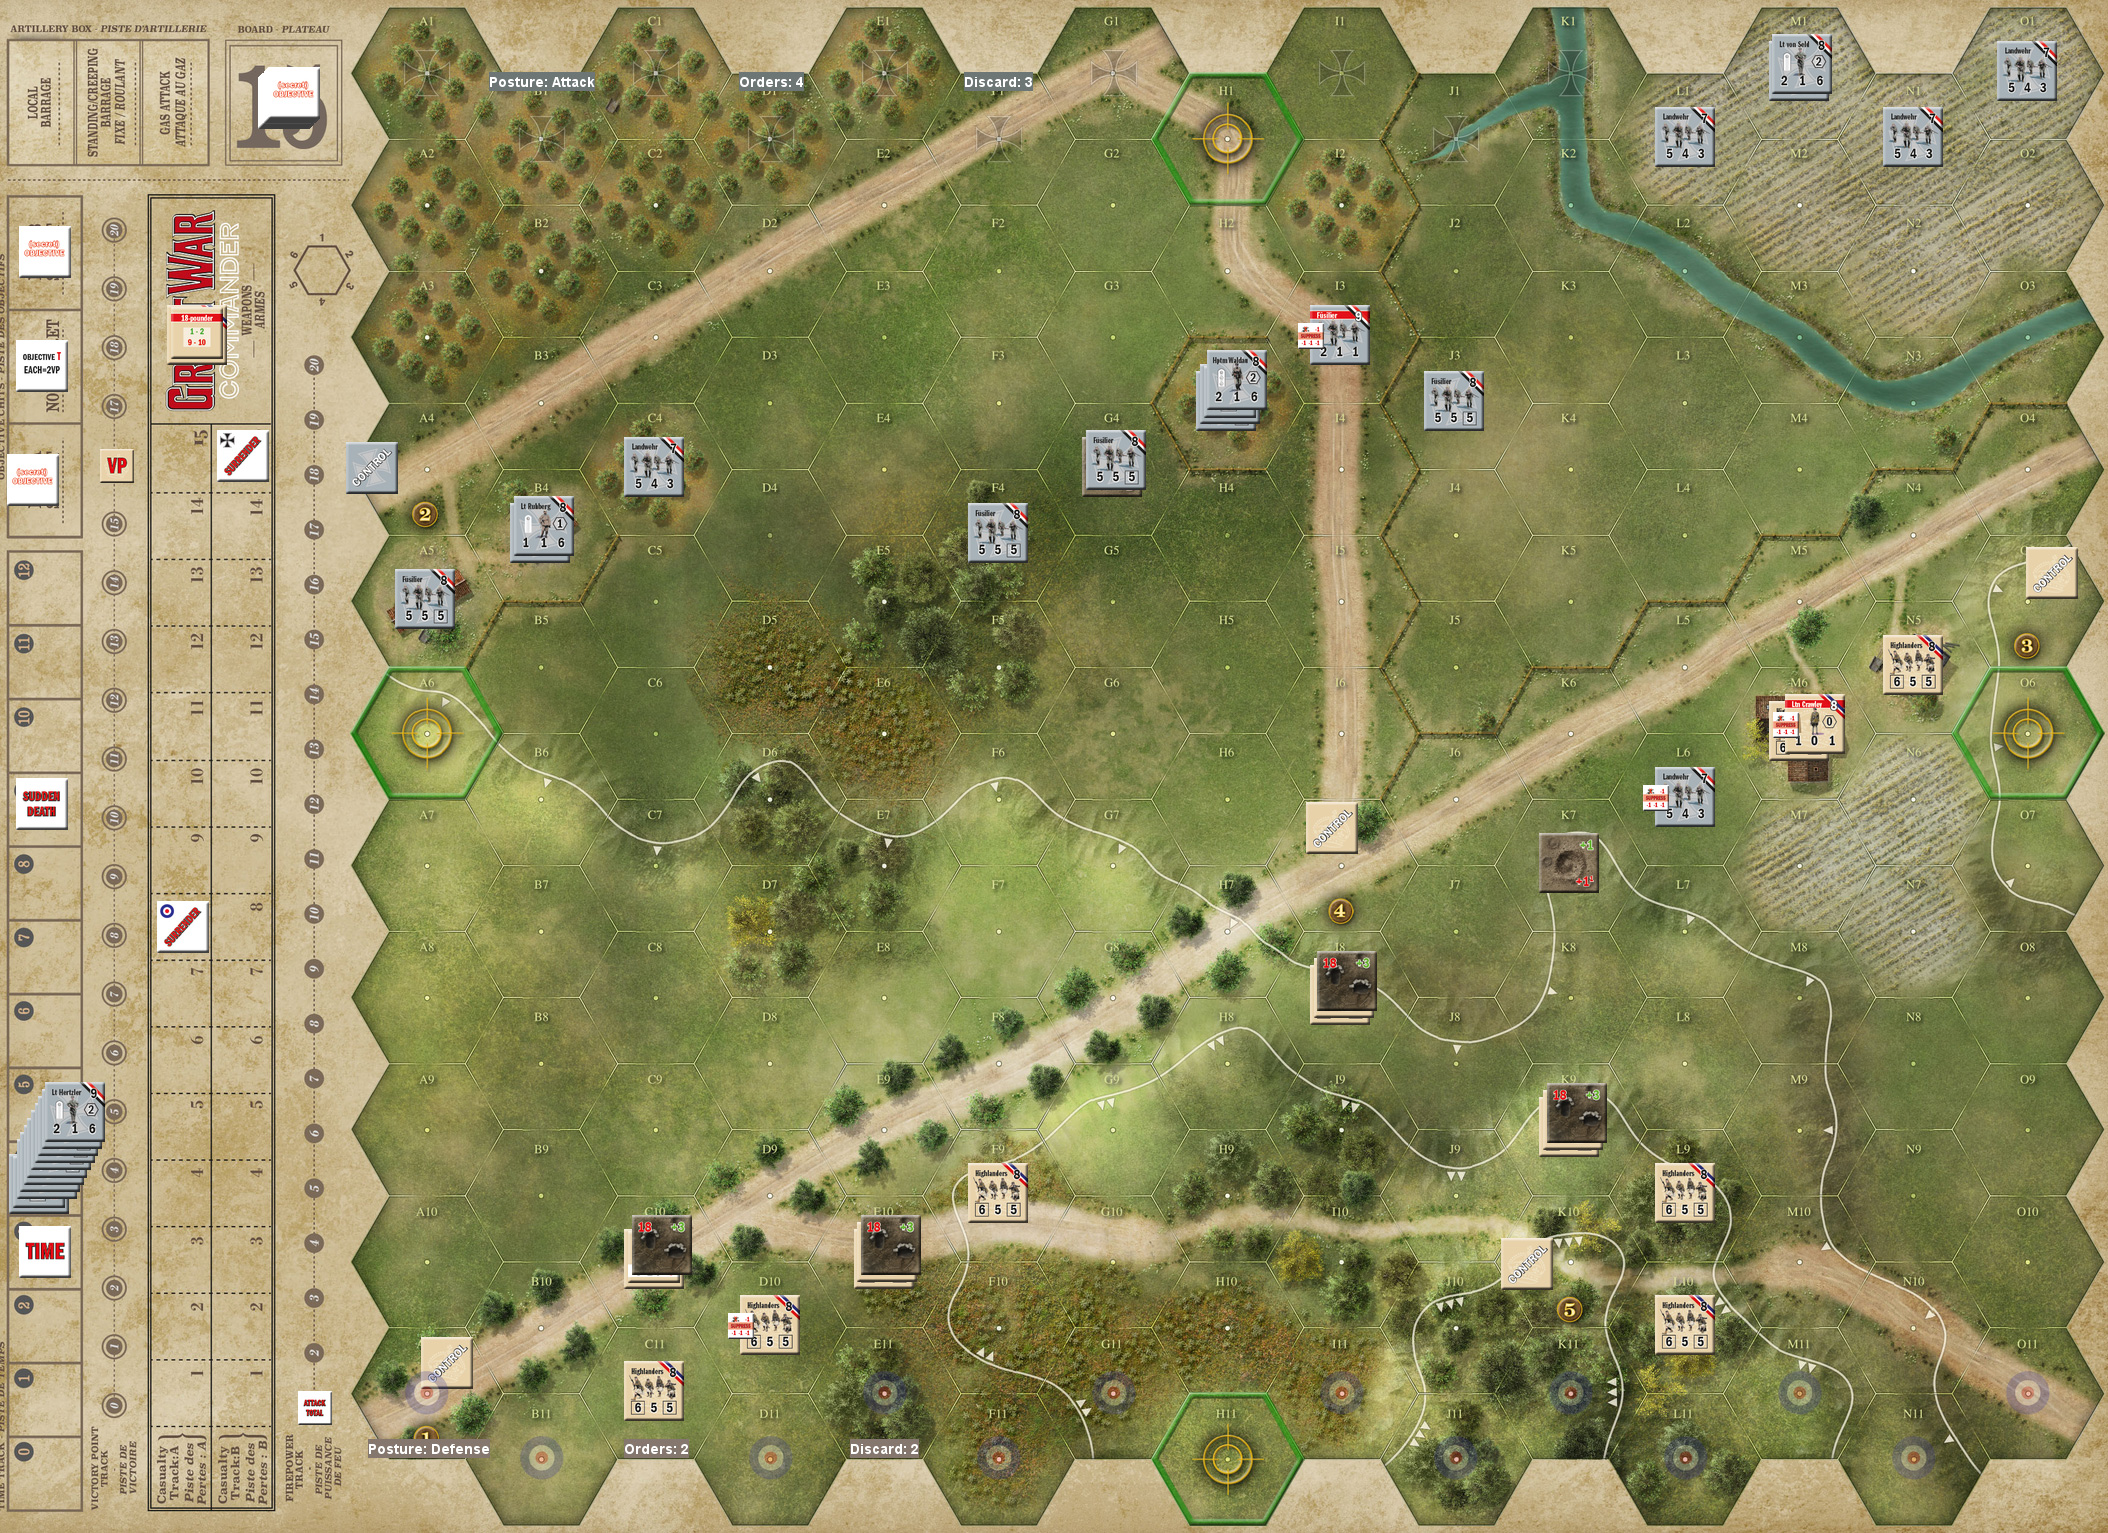
The Germans get fifteen platoons (in a mix of fusiliers and landwehr) and a machine gun, with another seven platoons plus a second MG coming in at time index 4. Both sides have pretty good leadership, and the British control four of the objectives at scenario start (with a little farm to one side uncontrolled). One 18-lbr was on top of the hill, while the other was on a lower plateau, with infantry backing both up, and a third group on the east edge, in a larger farm.
The open chit made every objective worth two points, and my secret one was 4 VPs for the main hill. I set up in three general groups with Waldau and the MG set to occupy a small orchard in the center of the map, while the other good leader had the challenge of crossing a stream to get at the larger farmhouse (at least there was a fence to provide some cover if I could get that far), and the smallest group was in front of the uncontrolled farmhouse, with the eventual job of getting on the plateau.
I lead off with a Move for that last group and took objective 2. Fire from the MG prompted the highlanders on a forward spit of the hill to Go To Ground, getting some shellholes as cover. Despite no result (barely), Mark then pulled the platoon back to the main hill. Some more Fire back and forth had no more result, and I ordered an Offensive to bring the center forward. This drew Opportunity Fire from the 18-lbr up top, and nearby platoons, with a final result of three time triggers, the 18-pdr malfunctioned and withdrawn on the first time trigger, three platoons broken, Waldau broken, one platoon dead (double break) and then brought back broken and next to the farmhouse by Walking Wounded, and a British hero created. Once I finally got to fire after my movement, I managed to suppress and break Lt Crawley in the farmhouse.
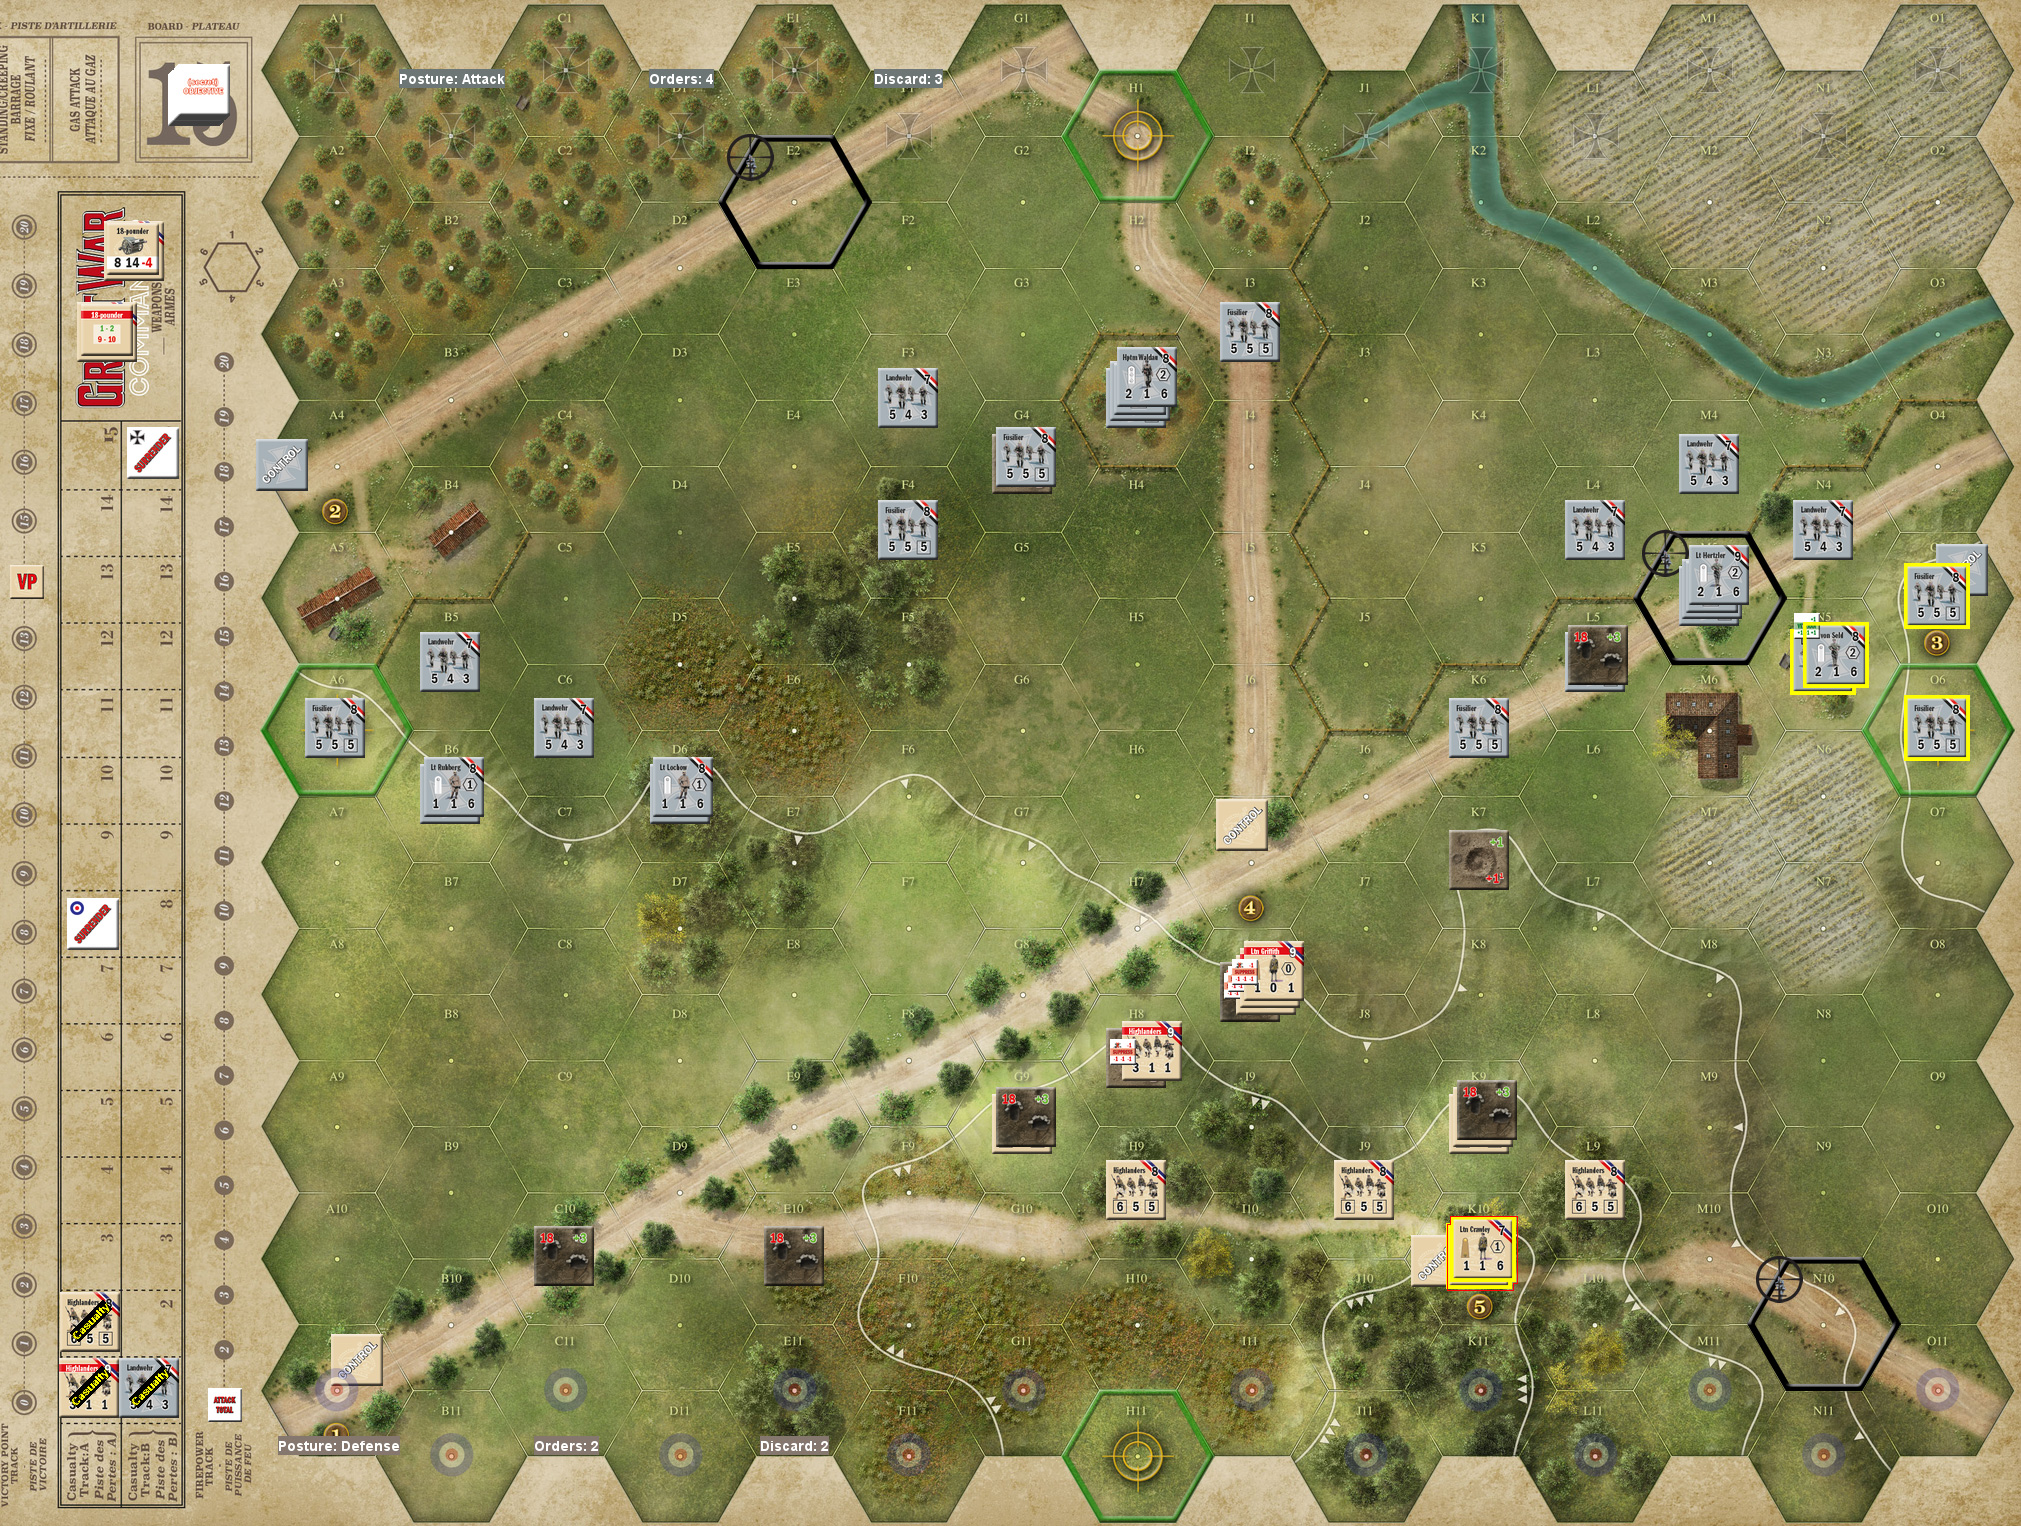
A Recover rallied everyone except one platoon that suppressed. Mark Rallied Crawley, and then broke my returned platoon with Fire from the hill, before a sniper broke Maj Stone (the senior British leader). Fire from Waldau and the MG, and surrounding units suppressed the British hero, and broke the platoon he was with, but also caused another time trigger, bringing in my reinforcements. I broke these up into two groups; a smaller one under Lt Lochow to back up the eventual push on the plateau, and the bigger one under Lt Hertzler to go between Waldau in the orchard, and von Seld’s command across the stream (who’d had no chance to go yet). Hertzler Moved right afterwards towards the east farmhouse, and thankfully took no fire.
Mark Recovered to rally his one platoon and Maj Stone, and I then conducted an Offensive with Hertzler. I invested the farmhouse, and took objective 3 (which is on a little edge-map hill above the farmhouse), and broke Crawley and his platoon with my fire; however, there was another time trigger, and Mark removed the second field piece. Then von Seld finally Moved to back up Hertzler. Fire from Waldau’s group didn’t do anything but jam his MG. Mark Recovered again to rally Crawley and his platoon. Von Seld Moved further to work around the the farm and bring the rest of his men to the stream.
I finally Recovered to clear a couple suppressions, and rally the two platoons that had been broken for some time. Then the British Moved their western force up the hill to be able to put more fire into the center of the board. Opportunity Fire from Hertzler broke all four moving platoons (and then killed one with a KIA event), with another time trigger taking us to turn 6. Also, my broken MG was repaired (this was the first time we had a broken weapon, the mechanism of checking every random hex draw for repair/elimination is an interesting one). Mark Recovered to rally all three surviving formations.
I Fired again at the farmhouses, for no effect, which was a shame, as the follow up was von Seld Advancing into N5 and managing to kill a platoon in melee after both sides played bonus cards. I then Moved Lochow to the small farm on the west, with some of his men splitting off to beef up other groups. The British committed almost everything to an Offensive to rearrange the troops on the main hill; this time I broke two platoons and Lt Griffith. Then Lt Crawley Advanced out of the farmhouse, and eliminated a platoon (again—it was the one that had died and come back near the beginning of the game). I used HMG Suppress to suppress two of the hill hexes, and then Moved the west flank up onto the hill (well, part of it, at least). Crawley then Moved up onto the hill, surviving OpFire, and causing another time trigger.
Further Fire from me eliminated Griffith, the platoon with him, and broke the hero there. Mark Moved men back west to overlook the plateau, and Recovered to rally the hero and another broken platoon. I Fired with Waldau to no effect, and then Moved the entire east flank, ending up with five platoons broken, one eliminated from double-break, and Hertzler broken from a sniper attack. But I got to the base of the hill (and one platoon on it in shellholes), and worked around to the flank where LOS was a lot more restricted. We also had two time triggers, which put us into overtime as the first Sudden Death check was passed. A Recover then rallied everyone but one platoon, who suppressed instead.
Further Fire from Mark was ineffective, but caused a Time Trigger, which I used the Initiative card to prevent. Later, another Fire broke the platoon with Maj Stone, but a Probe prevented it, and then a sniper broke von Seld. This happened again about a turn later, but this time a Blaze broke out in the central woods. Another shot from Hertzler then broke Stone and the platoon with him. I followed up with Fire from Waldau, but another time trigger caused a sudden death end.
Afterword
Mark’s secret objective was 1 VP for objective 4 (the central road fork), and once both of ours were added in, the final total was 13 British VP.
The particular combination of objective chits gave me a pretty tall order, as the biggest concentration was the place hardest for me to get at. Also, with each objective worth (at least) 2, I really needed to grab anything I could. Add the VPs for removing the guns, and I had very little hope of winning the VP game. This meant that the daring breakout of Lt Crawley was a problem as that was looking like two units on the surrender track, which would have put the Brits to 6 out of 8. The two MGs were doing very well against Maj Stone at the end, and I might have gotten some double-breaks, if things had gone longer.
And yet again, that was a crucial problem for the attack. There were three time triggers during one Move action, which put me terminally behind schedule. Outside of how fast they were going off all game, I was actually making good progress, aided by the early malfunction and withdrawal of the main gun. Once my two MGs were in action things started getting very hot for Mark.
This was our first game where hill levels were a big deal, and the +1/-1 fire effect of them also was a big deal. Overall, the terrain rules work well, and the map was an interesting one, if hard to assault.
Discussion ¬