
Operation Dauntless T1-T2
For the last few weeks, Mark and I have been getting together on Vassal and going through the tutorial scenarios for Operation Dauntless. The first two are (largely) on a supplement card which makes it easy to reference as you go through the basic attack forms. So, “T1” is ‘tutorial 1’, not ‘turn 1’….
And Dauntless is a fairly involved system, which these introduce in pieces. There’s four different ways to do an attack: combat, assault, ranged attack, and anti-tank fire. The first scenario is all combat, and then the second scenario goes to all assaults, which is about the same procedure as combat, but happens during movement, instead of in a separate phase.
In the first, the British attack Fontenay with a couple of battalions (including four companies, a carrier platoon, and a MG section as separate units each), and the Germans defend a few hexes north of there with a mix of infantry and engineer platoons, a MG section, and an IG battery. Victory is awarded for the village, or the Brits losing two units (not steps), or the Germans losing three.
Mark has been taking the Germans for all of these, and went with the recommended set up, though he put the IG in the north, away from the likely action. With the limited rules, turns (of which there are five) are pretty simple, move, then attack. Combats can be any combination of units adjacent to a single enemy location, with an odds-based results table. There’s a few limited things that adjust combat strength, which are marked with colored boxes around the combat strength. Possibly the most common one is MG sections being doubled on defense. The different part, is that all modifiers after that shift the odds column instead of the die roll. A combat represents a moderate to short range fight (perhaps equivalent to a large scenario in a squad-level game), and results in a a number of ‘losses’ on each side, with each ‘loss’ being taken as either a one-hex retreat or a step loss (the attacker must take their first loss as a step).
All the German units are one-step, so their force is brittle, but can generally retreat out of trouble. However, there’s a limit to how far a unit can retreat, and taking more losses than that will force losses to be taken, like in the first combat of our game, where an 8:1 combat was reduced to 5:1 (the max on the chart), and I rolled well to force 4 losses on a unit that could only retreat 3 hexes.
Generally, the Germans have the advantages of being dug-in (an odds shift), in close terrain (woods/village/heavy bocage odds shift), and often, the attack is coming out of a field (one side being in truly open terrain is a shift against it). However, concentrating against a single target is easy, especially when there’s no ranged attacks, and the Germans need to spread out to cover a lot of territory. My other two attacks weren’t nearly so dramatic, but did force retreats.
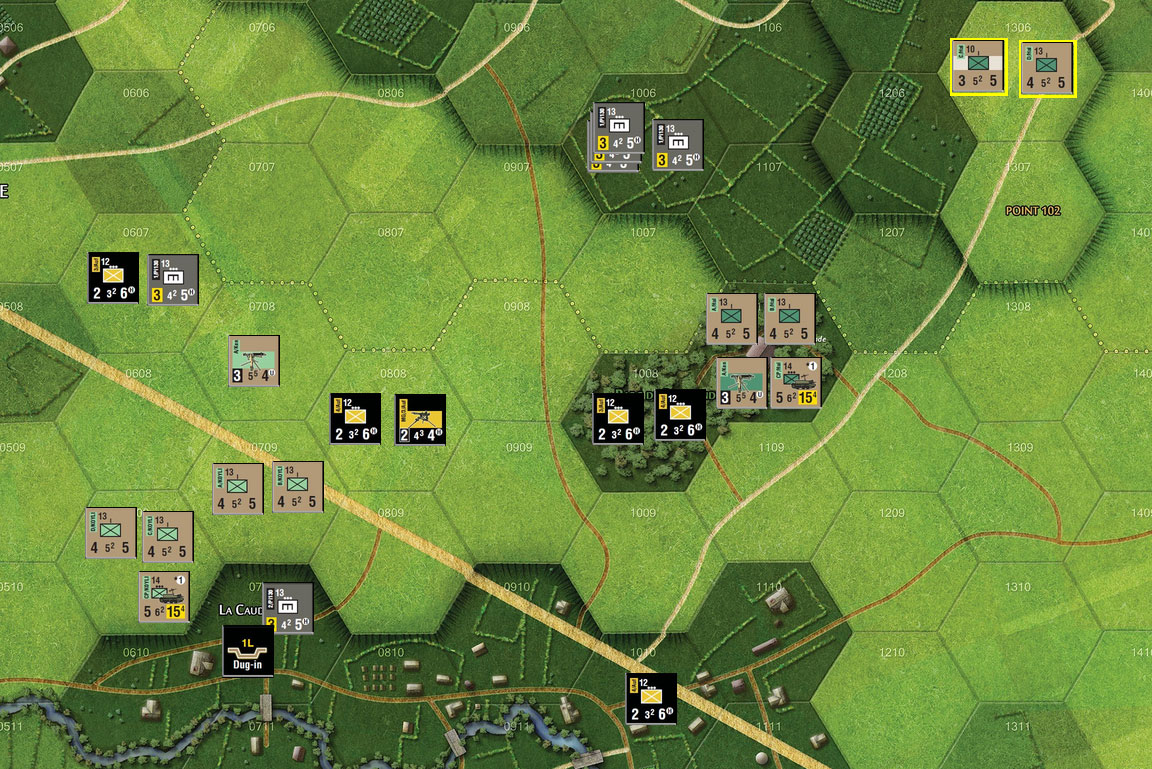
Mark repositioned to block the center which I was blowing open, and concentrated a stack in 0606. His main problem was 0805, which was in the middle of his ‘hole’, and couldn’t leave without being vulnerable, and couldn’t stay without being surrounded (‘concentric attacks’ are another odds shift). So he stayed, and on my second turn I surrounded him and eliminated the platoon by forcing it to retreat through my ZOC, while a second attack forced his last dug-in unit in the main line to retreat.
The Germans pulled back to the woods (Parc de Boislondel), and started taking positions in Fontenay, with a retreated engineer digging in right outside (they dig in in one turn instead of the usual two). I raced after them (leaving behind a MG section, as they’re slower), for two combats that pushed the engineers out and took one woods hex. Mark went for a counterattack, surrounding two British units, and the first attack was a 5:1 that forced me to take a step as I retreated through his ZOC, while the second was a 3:1 with a poor roll, forcing him to take a loss, and lose the scenario.
In many ways, it’s not much of a scenario, but it does involve a fair amount of maneuver, while giving the combat table a good workout. There’s certainly worse ways to show off the basics of a system. I think he should have pulled his middle unit back on turn one, in hopes of it managing to retreat out of danger, instead of letting it get completely cut off, but it would have been in danger of another excessive loss result in the open.
The second scenario imposes the heavy fog rules, which limits LOS to zero, making all forms of attack impossible, except for the assault, which is a move into the enemy’s hex. This uses the same combat chart as a regular attack, but the attacker must take the first two losses as steps instead of retreats, and you only get to use one stack of units moving together. The rules prohibit you from ‘picking up’ units as you do a move, so an assault stack must be ready to go at the start of the turn. The column shifts are a little different between the two, and a few units (…like German engineers, which I think we missed for most of the scenario), create a shift in assaults unless countered by a similar unit on the other side.
This time, there’s fewer units involved, but it’s a longer scenario, and the British are trying to take three of four objective hexes. The British have a battalion to start with, and get another one on turn 6, while the Germans get two reduced companies, a pair platoons (normally just ‘break down’ units), three engineer platoons, a pair of MG sections, and are defending two strongpoints. “Recovery” actions become important, which is an action that can be done instead of moving/assaulting, since the British can assume they’ll take a lot of step losses, and that allows recovery of a lost step (also, the Germans have two reduced units who can Recover). The playing area is only ~4 hexes wide, but heavy fog eliminates ZOC, which means there’s still plenty of chances to maneuver.
Mark pretty much followed the recommended setup again, and my first attack failed, with a 1/0 result. The second one was on the same hex with a larger force and the armor bonus from universal carriers (hey, if they’re the only armored thing around…) for a 1/1 to force him out of the hex. I had one (successful) assault for the second turn, driving the Germans south of the river, while a company headed for the rear to recover, and another tried to recover in place, and I used MG sections to cover my flanks.
I also put together a new full-size stack, and it assaulted over the river on 3, taking another loss, but forcing an engineer to retreat, while one company recovered to full strength. Mark started pulling back to the strongpoints, generating large force concentrations on two tough hexes, and I’d need to take one of them. I rearranged forces, and got a lucky recovery while in contact with the enemy, as well as the other reduced unit.
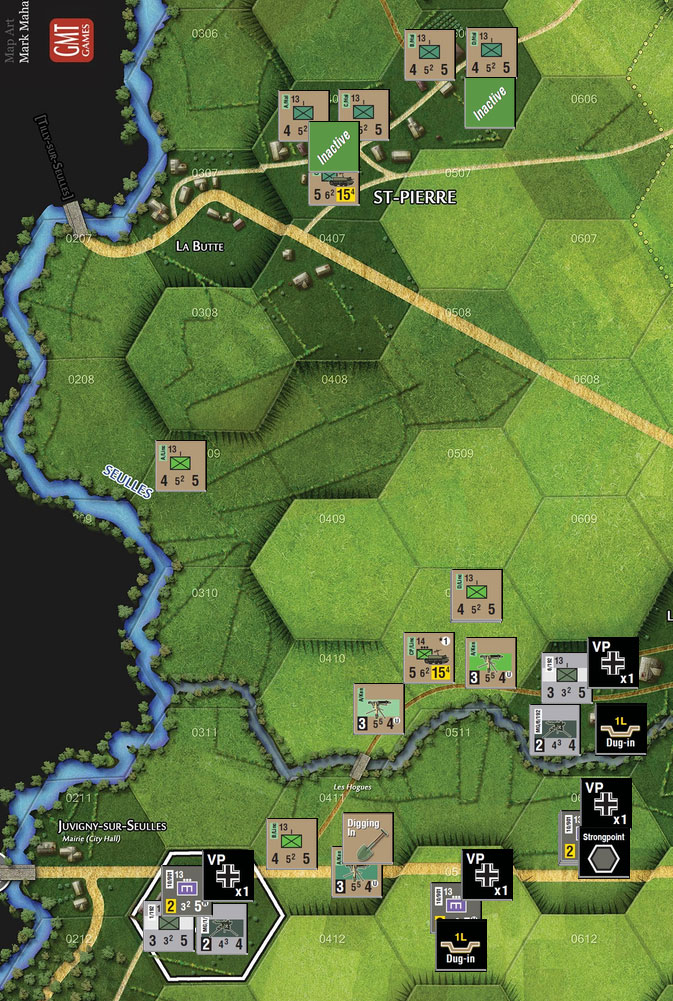
After British Turn 4.
Mark completed his pull back, and I occupied 0610 with an MG section, and then assaulted to drive him out of 0510. The Germans regrouped into the strongpoints, and finally managed to recover one of their companies to full strength (normally, German units can’t recover because of a +1 to the table, but being in a strongpoint puts them back at a 1-in-6 chance). Turn 6 saw my just-activated units come into range, while I tried physically cutting off 0312, and assaulted 0611, knocking out a platoon (now that he was down to the strongpoints, Mark was eliminating units rather than retreat, because I’d advance in to take it, and then he’d have to assault a strongpoint to avoid a loss—thankfully for him, the strongpoint negated the first loss of a 1/2 result).
Mark thought about a breakout from 0312, since my defending companies could be in a lot of trouble against a full German stack, but if he got me out of the hex (which would have happened), he was obliged to advance into the assault hex… uncovering the victory strongpoint. The next turn, I shifted to surrounding 0611, where I could put two companies into one hex, making that even less likely, and another assault eliminated a weak German MG unit, while I took another step loss.
That led to a purely administrative reshuffle turn, and one of my four reduced units recovered. Turn 9 saw another German unit eliminated, but the next assault went all wrong with a 3/0 result, flipping two units, and forcing a retreat. Units sent off to recover had to move to fill the new gap in the line instead. Mark did a counter attack against a pair of reduced companies, and rolled a ‘2’ (on 2d6) for a 2/1, losing two valuable units, and only forcing me to retreat a hex. I reshuffled and had one unsuccessful (0/1) assault on 0312 (now the weaker hex). My final turn saw the final reduction of 0312… just in the nick of time with two assaults that each managed to cause a loss.
Given how fast I started driving the Germans back, the end was surprisingly tense. Assaults are not an easy way to get the job done, but they can be a fast way, and thanks to the recovery mechanism, as long as you can absorb two losses, they don’t have to wreck your force when they go wrong, either.
Overall, these two scenarios do a good job of introducing some of the basic mechanisms, but are (understandably) a bit one note. Still, just fiddling with them gets one used to terrain types and the main combat table.
Discussion ¬