
WO25 The Replacements
When Mark was deciding his picks for our next FtF game day in December, I showed him my recent purchases from the MMP Fall Sale, and that induced him to put a DASL scenario on the list. I eagerly picked that, and we started “The Replacements” from Winter Offensive Pack #9 on the 27th. We got halfway through, and then finally finished off the second half on January 25th.
I took the defending Russians, and was mostly set up when Mark arrived for the day. It’s September ’42, and the Russians have twelve 447 squads, one 45mm ATG (and two crews, I gave the spare crew an ATR), two ATR, a MTR, a few LMGs, and one HMG. They set up in a bit more than two DASL boards, with the Italians entering the new hill DASL board l (note that level 3 doesn’t exist here) with sixteen elite squads, a FT, a HMG, two MTR, six LMG, and six L6/40 tanks. They need to take two building buried along the back/east edge of the board in 5.5 turns.
Oh, and they get three squads, a 9-1, and two LMGs from the north edge on turn 3. You shouldn’t forget that like I did.
Start up was a bit slow as Mark looked at that fairly barren hill and tried to figure out what to do. My instincts were for a fairly spread out advance in the center with the tanks as cover. The edges have too many woods, so the tanks are fairly well channeled that way. I naturally had a few things on upper levels to see over the orchard, including the HMG in iI4h2. The board l tower is within the setup area, so a squad started there, and the ATR crew was in the north-side woods with the ATG buried in the orchard.
Mark eventually sent half the tanks around the south edge, successfully creating a TB through one hex of woods and coming out near some of my defenders. I really need to learn to not be so afraid of Bogging; it’s not as likely as it seems. If my advice had been better, there’d have been proper infantry to support them, and the charge through the center wouldn’t have been as bad.
Unfortunately, that’s what it was. Mark is an old SL-series fan, and still getting used to the realities of ASL, including just how much defensive fire units can pour out. The low point was three squads disappearing from a 3KIA on turn 2. (I rarely get to see a KIA result, and I’m not sure I’ve had a multiple KIA result actually kill multiple squads before.) At least his leaders were mostly intact. The forward ATR managed to kill a tank during my turn one, and then had to run for its life, but eventually recovered. He got one of his MTRs unpacked, but it malfunctioned.
This was all well and good, but I remembered I needed to cover the direct approach to the victory buildings down board i a little late. Turn three saw me with just enough in there to hold the Italians up, and one of the tanks raced through the middle to support them. One tank had halted in kH5, where the ATG bounced a shot off(!) before shocking and eventually burning it. The second ATR was in kL4 and burned one of the separated platoon of tanks even as the infantry made their way down the hill.
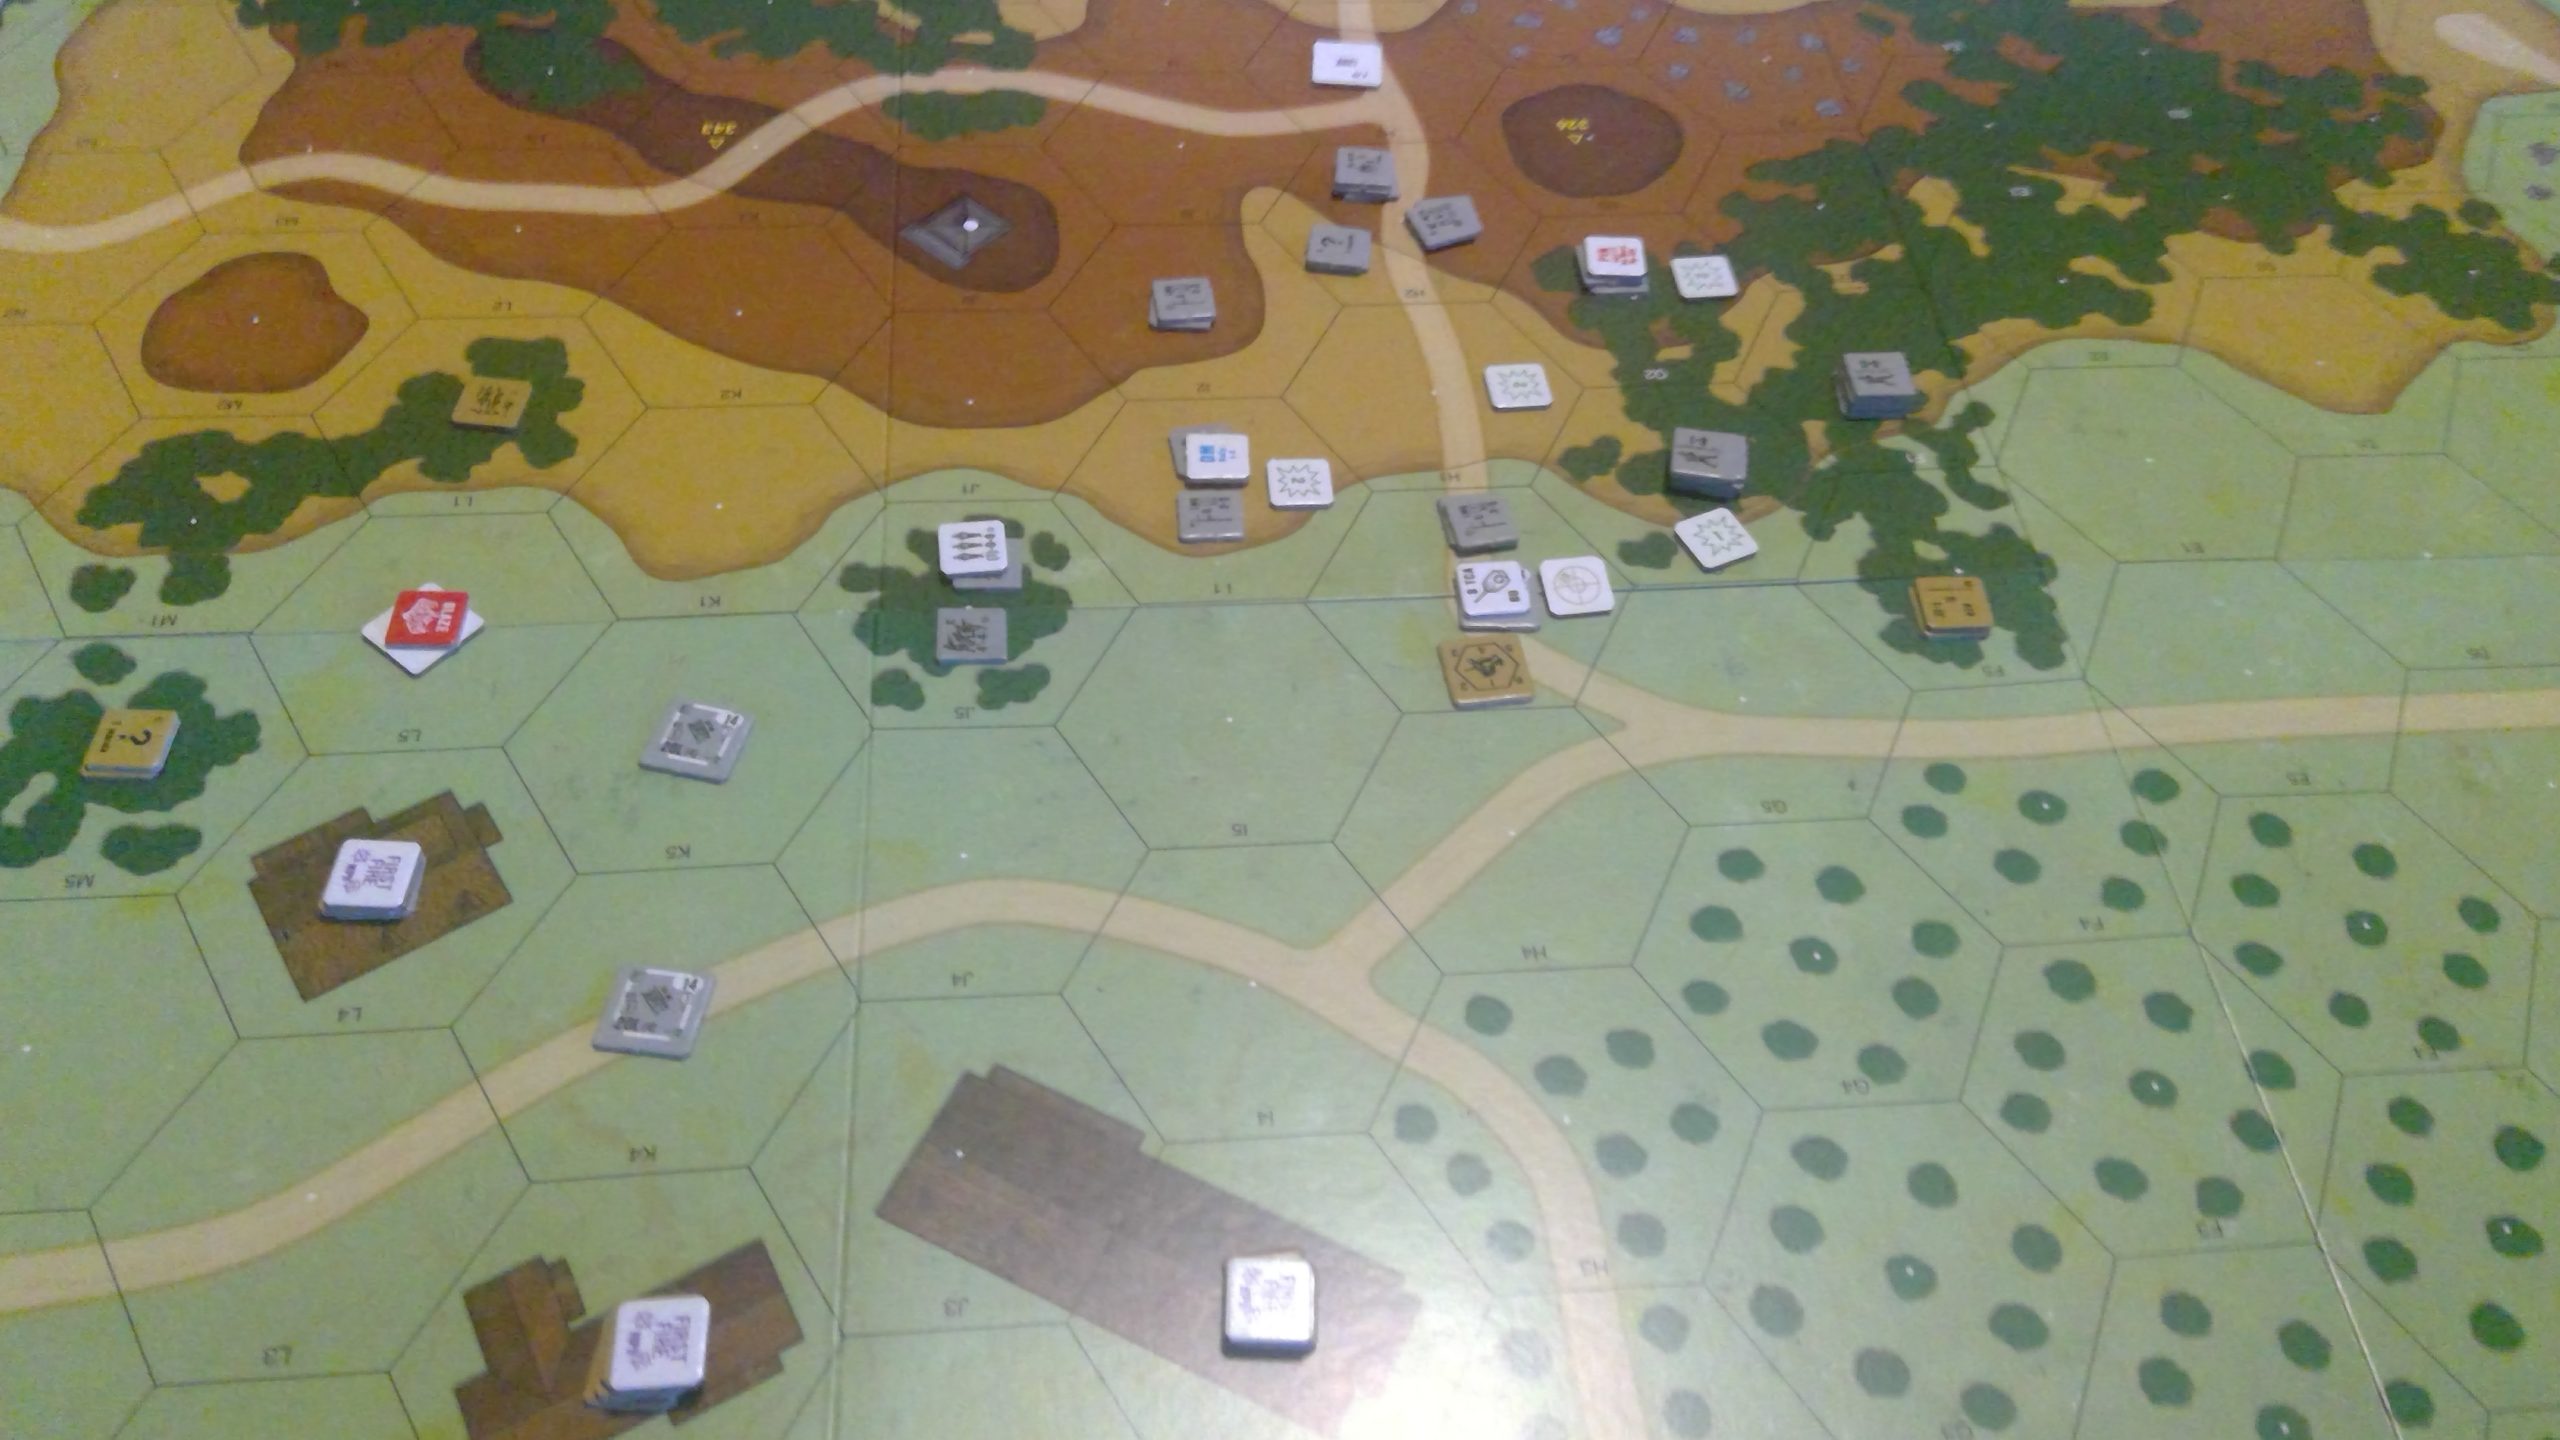
Towards the end of Italian Turn 3.
We kind of raced through my turn 3 before packing it up, and then continuing a month later with the Italian turn 4 wind change roll.
My ATR crew had caught up with the tank speeding down the middle, but missed as it continued to the intersection between the victory buildings, and it was joined by a second tank, while the other ATR shocked the third one before it got anywhere (eventually succumbing to failed rolls). The remnants of the main Italian force charged into the big orchard, forcing the bulk of my attention to remain there. I stopped most of them with a combination of various squads and the MTR (who was firing at minimum range from kE0). Final Fire thankfully finished off the threats that remained, the ATG breaking (at range 1!) the FT squad, and the HMG taking care of a couple more, including one that was ready to leap on my ATR crew in CC.
Most of his men streamed back to the board k/l border, but some had to surrender; between that, more surrenders the next turn (from much the same thing), and a squad of mine that had had to surrender back on three, this was by far the highest number of prisoners I’ve seen. The reinforcements suffered from indecision. Mark wisely didn’t care for his chances at getting anywhere with what I had gotten in the area, and didn’t even have anywhere great to advance to (with him in aC1 and me in E2, and the nearest other cover being all the way in F0).
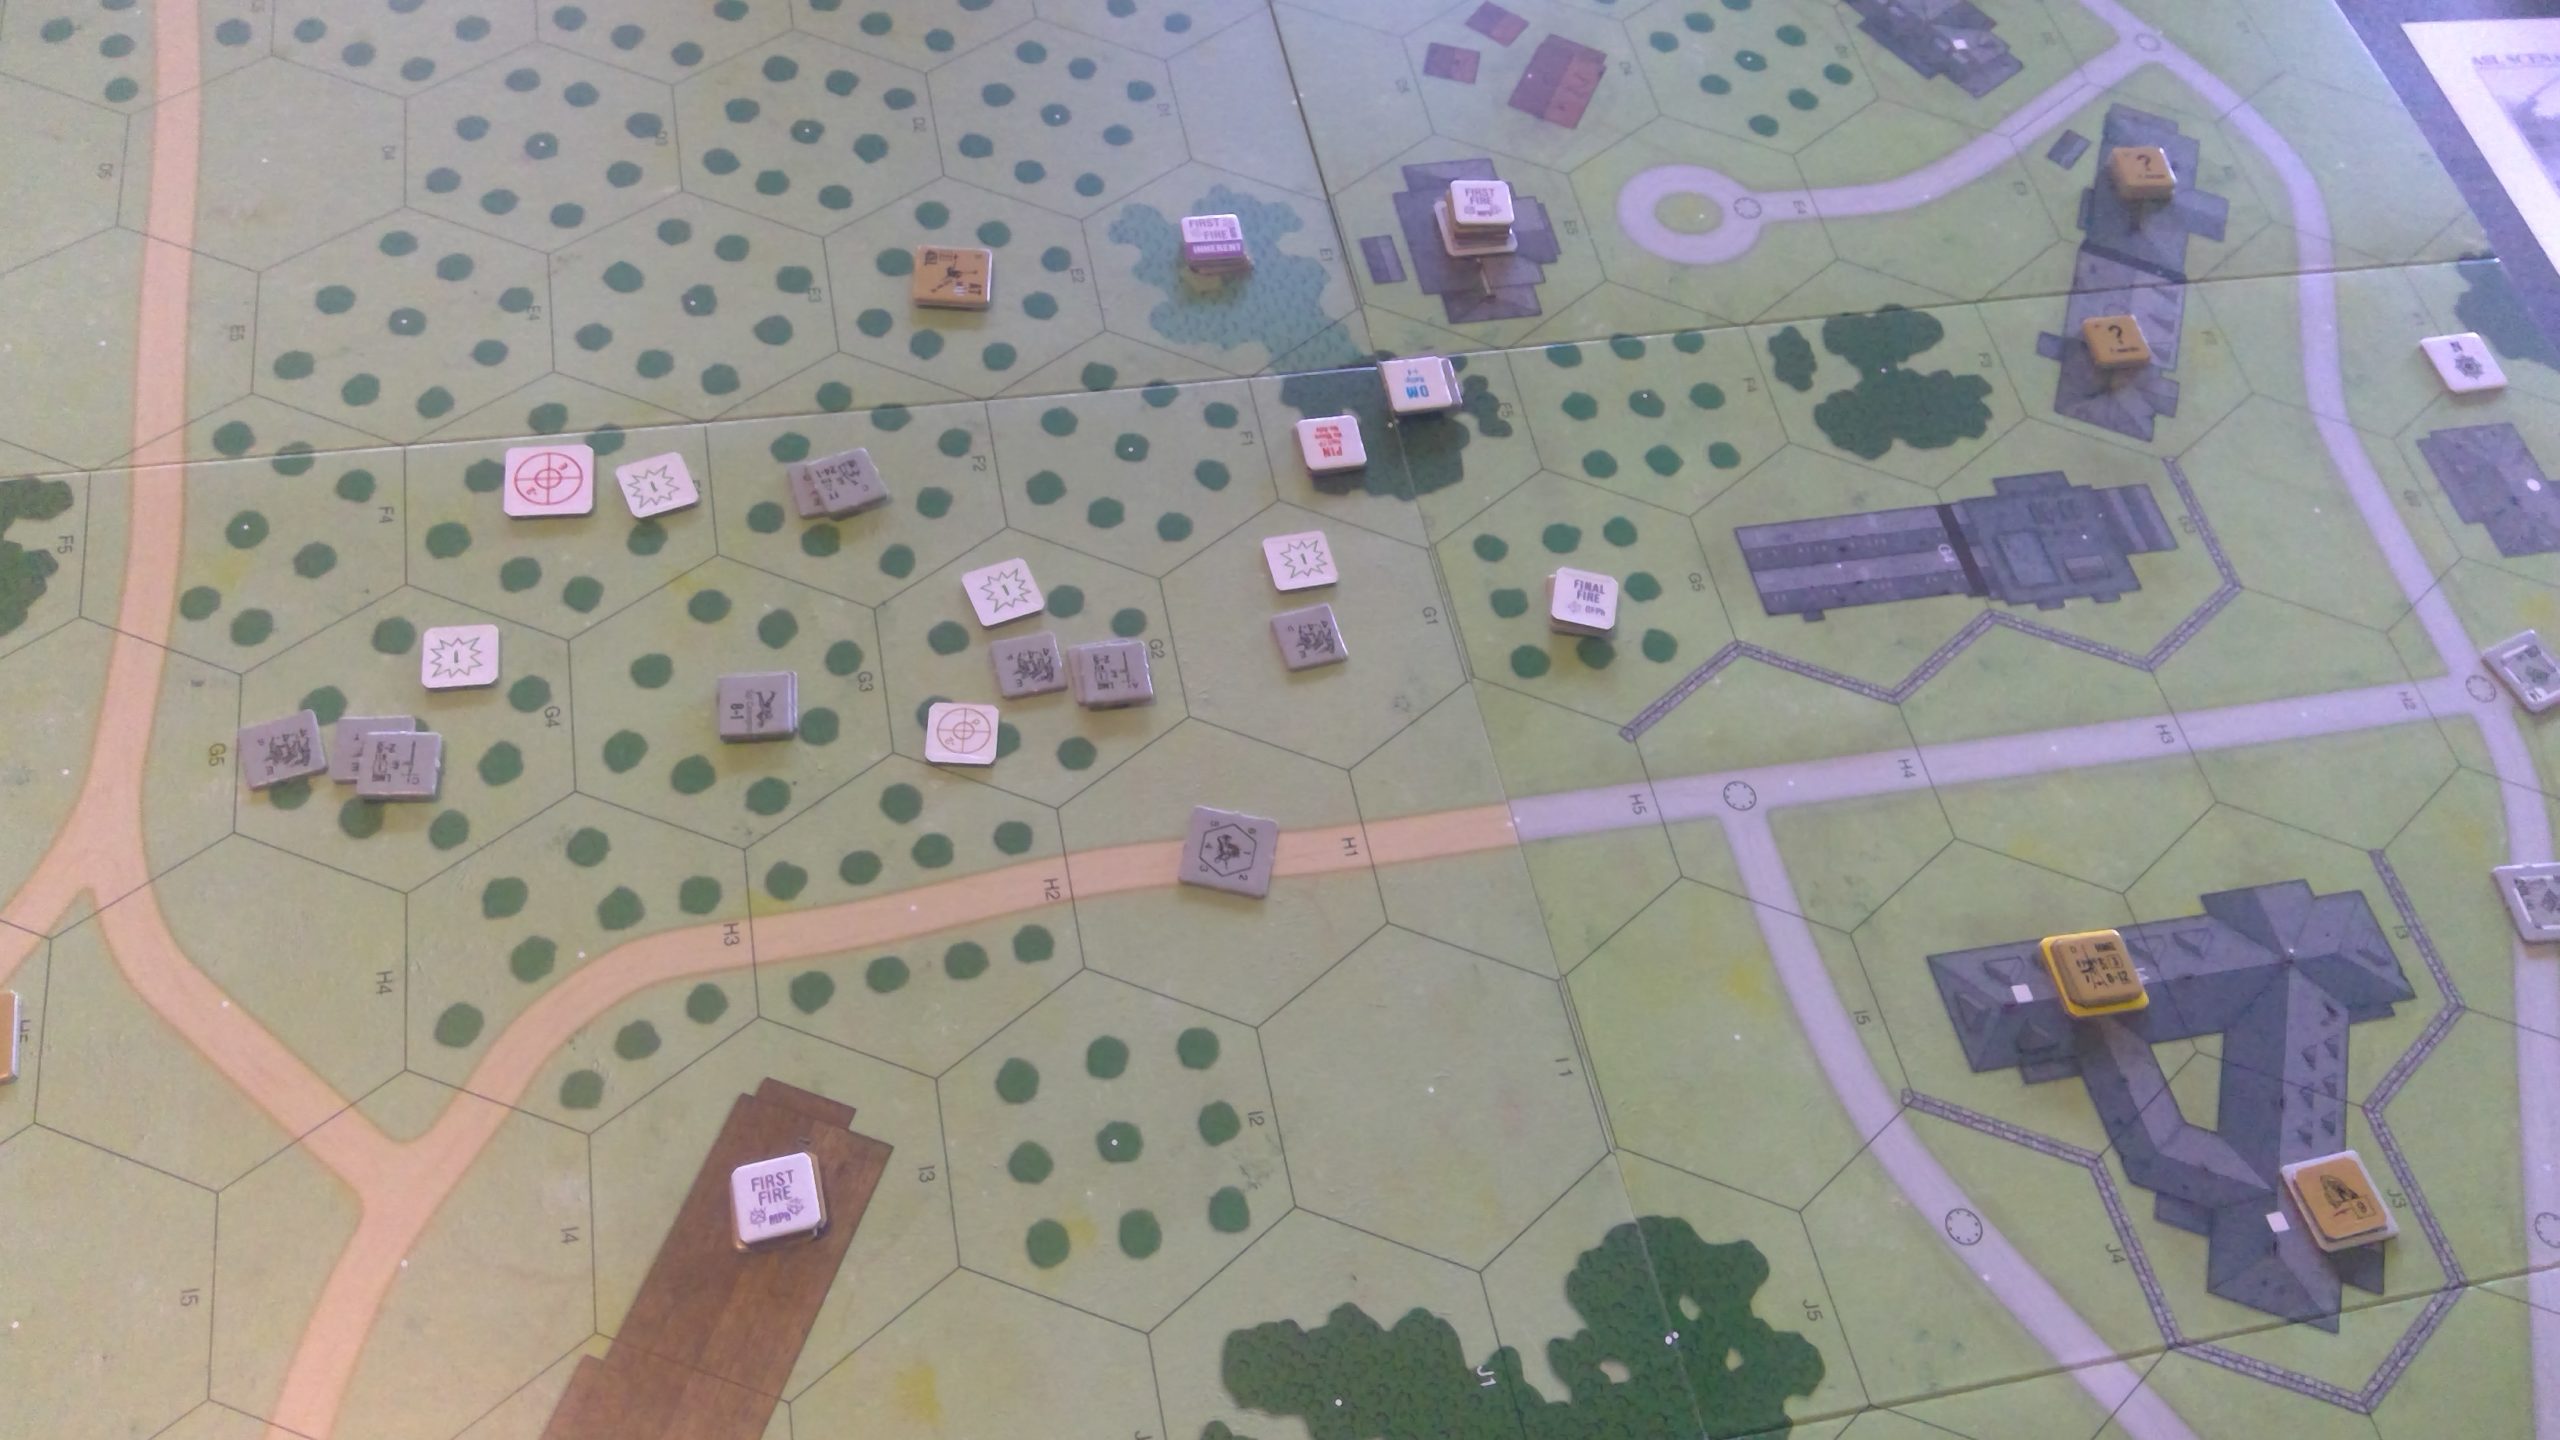
Before the HMG opens up.
He did still force me out of E5, breaking a leader and squad. And turn 5 was something or a repeat, with Italians going through the orchard, me shooting them up, and some of them surrendering. He still couldn’t dislodge me from the blocking position, but had his two surviving tanks on hand to help… until one malfunctioned the MA in his turn. I got a squad and 7-0 of my own into one building, and one tank broke them with IFE fire in prep, and then the other crew abandoned ship to try and take the building. I had enough on had to break them during exit, but it was closer than things had looked on occasion. He also charged the other building, but couldn’t get through my fire, despite having a fair number of distractions to throw at me.
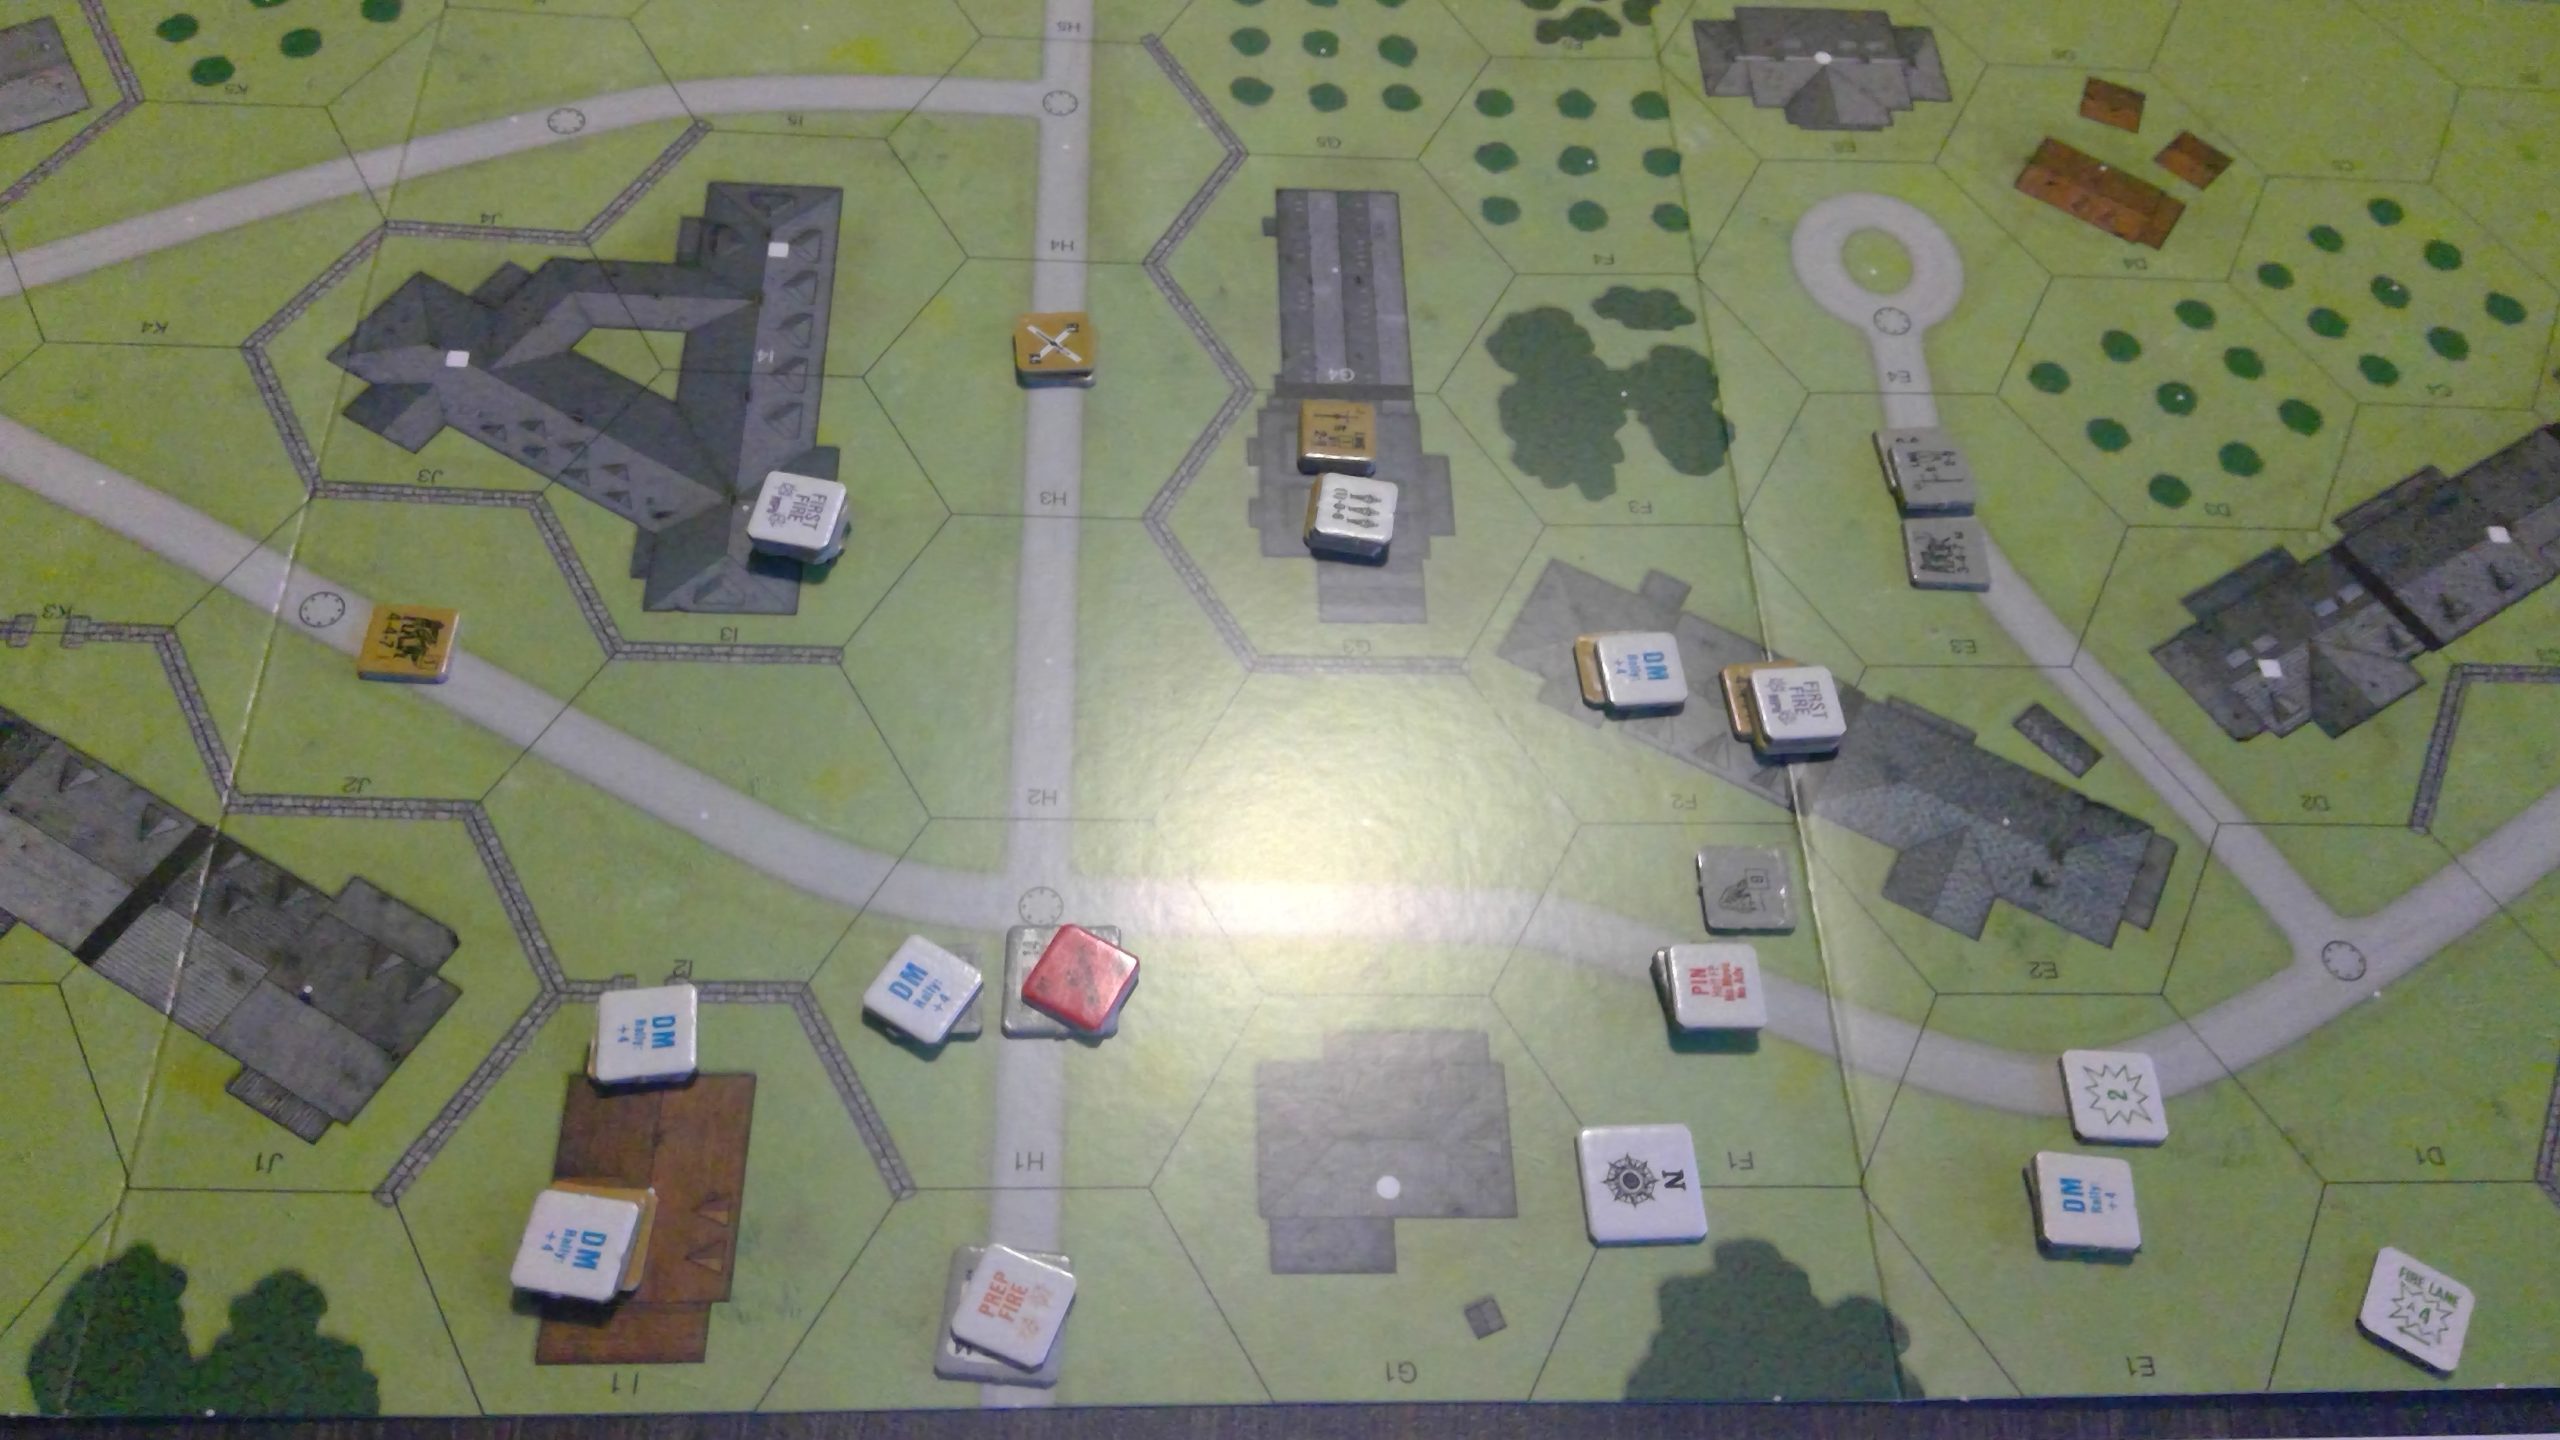
At the end; G1 and I1 are the victory buildings.
Afterword
So far, the ROAR record is leaning pro-Russian on this one. I think some of that is the Italians need some smart handling. I certainly wouldn’t mind giving them a try at some point, as I think there’s things to do, but even with going through the woods and such, getting over that hill is going to be rough.
The Russians also have MOL capability (vs tanks only), and combined with two ATRs and the ATG that may be too much anti-tank capability. Maybe take away an ATR, and SSR that crews can’t voluntarily abandon vehicles so they are more survivable, but only really support?
At any rate, the Italians have enough bodies to make sure the Russians need to put up a real up-front defense, so that flanking force reinforcement adds a lot of life to this scenario. It was certainly a great time for the both of us, and the new SK-DASL boards are great.
Discussion ¬