
A95 The Long Road
I got a sudden call from Patch on Saturday, saying that he was in the area, and didn’t have anything to do during the day. So, he came on over, and we started figuring out what to play. Quickly settling on ASL, we started looking through the most recent Journal, but most everything we looked at needed boards I didn’t have. So I pulled out Annual ’96, and we found “The Long Road” dealing with the British campaign in Vichy Madagascar in late ’42.
I randomly picked the Brits, and Patch figured out a setup for the Vichy forces. They defend board 5 with six squads, a pair of MMGs and four hexes of wire; everything in concealment terrain can be HIP, but they suffer from Ammo Shortage. The Brits are looking to exit 16 VP off a three hex area in 7.5 turns, and have 10 squads, some LMGs, and two armored cars with ATR main armament (I never bothered firing them, sticking with the CMG the entire time). Looking online now, I see that looks pretty tough on the defending Vichy, but the balance of trading a MMG for a HMG probably wouldn’t have helped here. It probably needs to be cut down a turn, and then some other adjustments made.
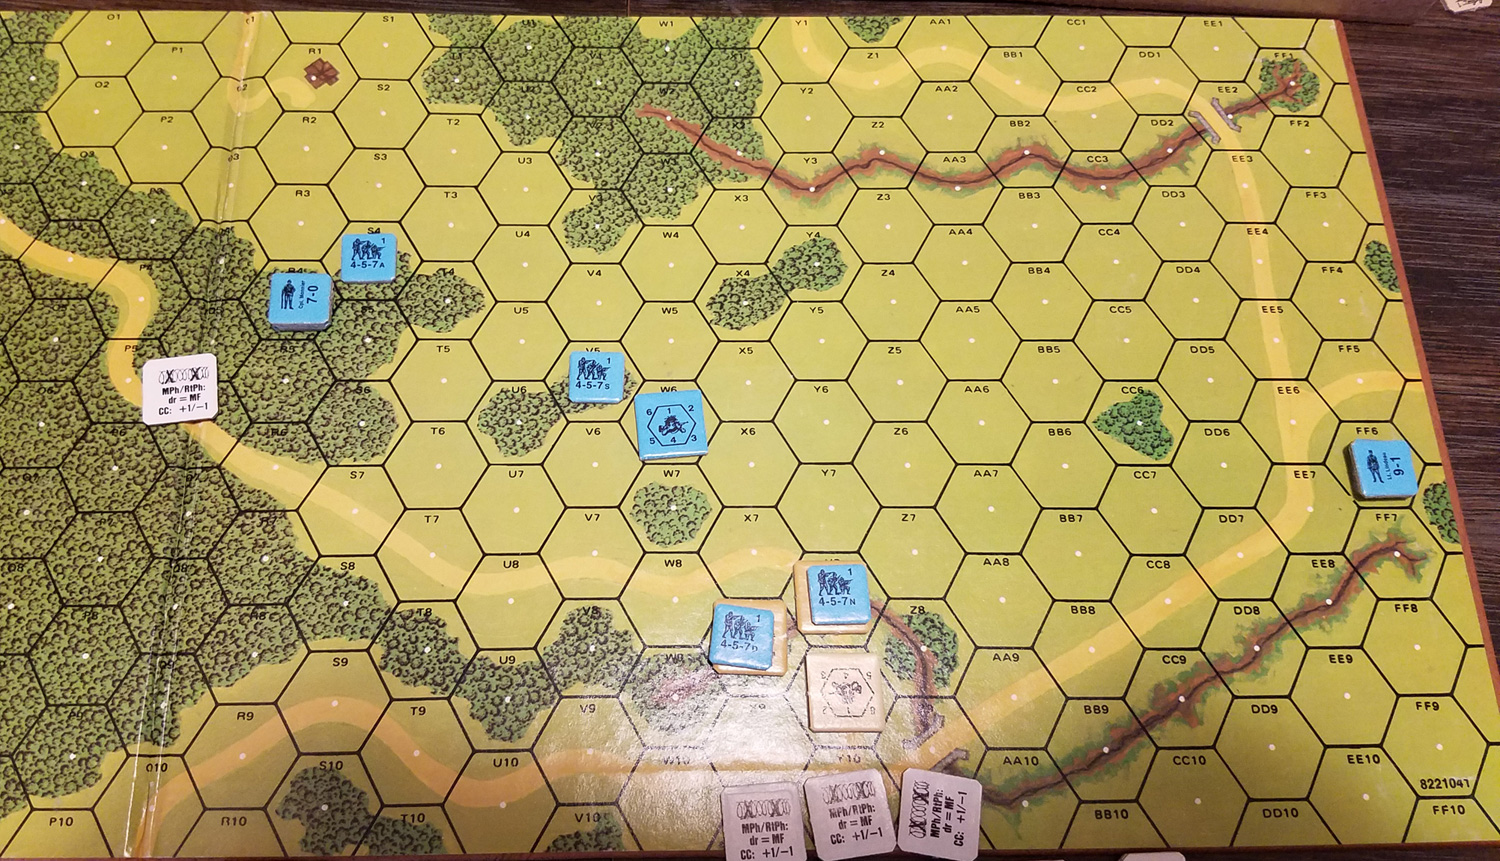
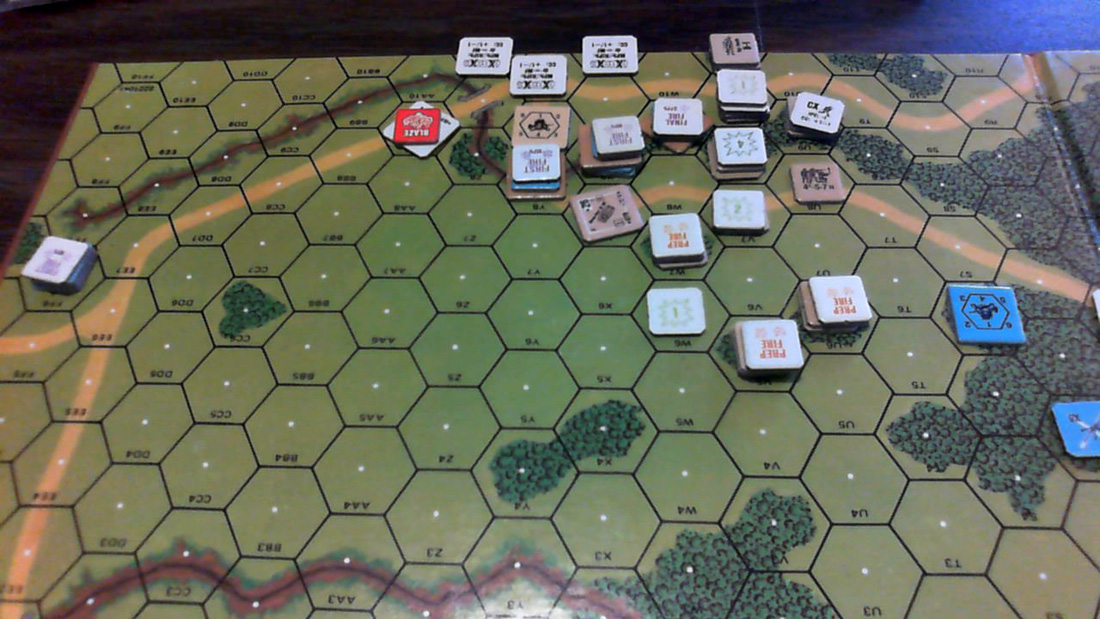
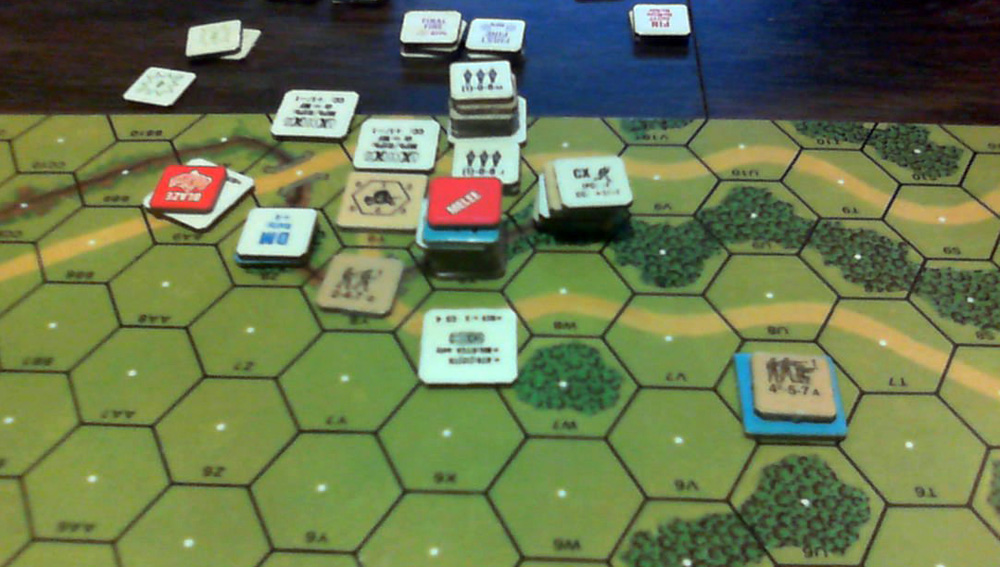
Patch’s reference photo of his setup. Note: there are no bridges in this scenario.
The Brits can come on within two hexes of any one x1 road hex, giving three entry choices. The furthest one (I1), requires going through most of the board 5 woods, and Patch blocked the road with the fourth wire hex (with the other three on the exit hexes; I imagine that just about every game features that setup). The closest one (Y1) features a lot of open ground, with just a gully for cover near the entry. So I went for the middle area (Q1), which is also open, but the woods close in enough to protect it from most of the rest of the board, and there’s good cover nearby. The ACs were to break out of that little area, while at least some of the infantry was to gain the woods on the other side of the clearing and head straight down, hopefully flanking the bulk of the defenses out in the open areas of the board.
It didn’t take long for me to find that Patch had placed two squads and the MMG opposite my entry area, but his dice were bad, and the MMG malfunctioned on the first shot. Thanks to his bad dice, I was able to cross the open section and get in his face almost intact, instead of having to dive for the surrounding woods. One leader-led stack got deep into the woods and discovered the wire in Q6, while a couple units pinned, and one of his broke on FPF. My fire broke the MMG squad, and he had to abandon the jammed gun.
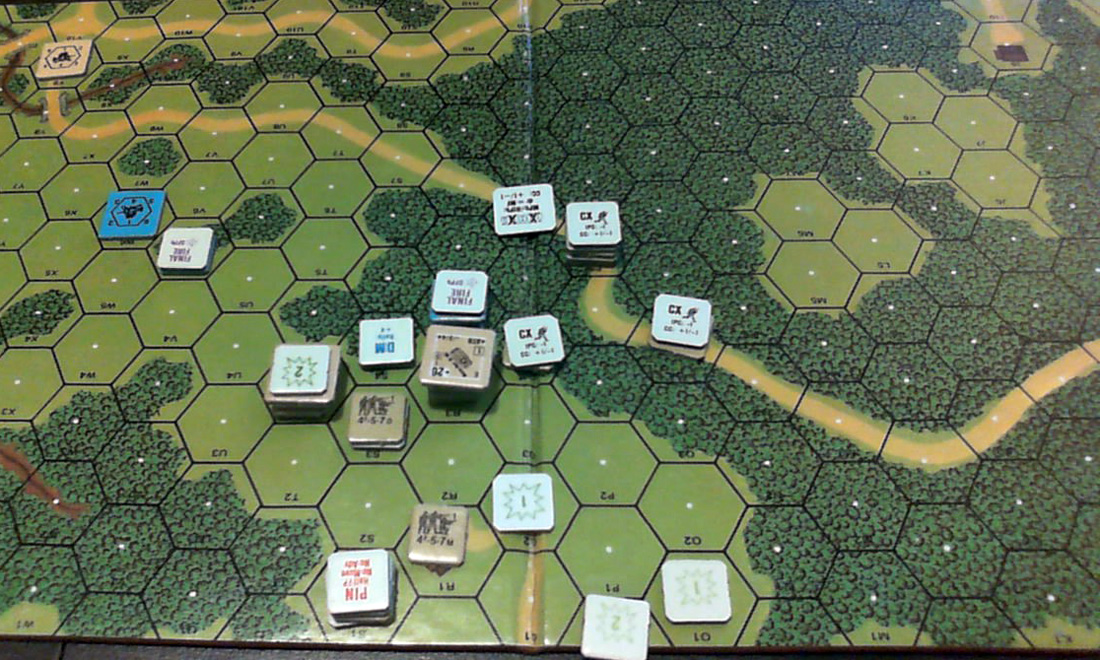
Patch had little to do on his turn, but he did reveal V5—to get him out of the way of my assault. He could have nicely held up part of my forces, but I was already headed for the woods-line near the goal, and if he didn’t leave now, he’d be completely cut off and without support. I had advanced a squad onto the Q6 wire on the first turn, and instead of moving him, now I Op Fired him (to get rid of CX) at that squad, who had ended up in V8—in LOS and normal range. The rest of the ‘forest force’ worked on capturing a French squad and working towards the goal, while I occupied the first woods line from U6 to Y4. Another squad showed up in Y8, and I was starting to wonder where the last two were, and fired on Y4 to make sure of it at one point.
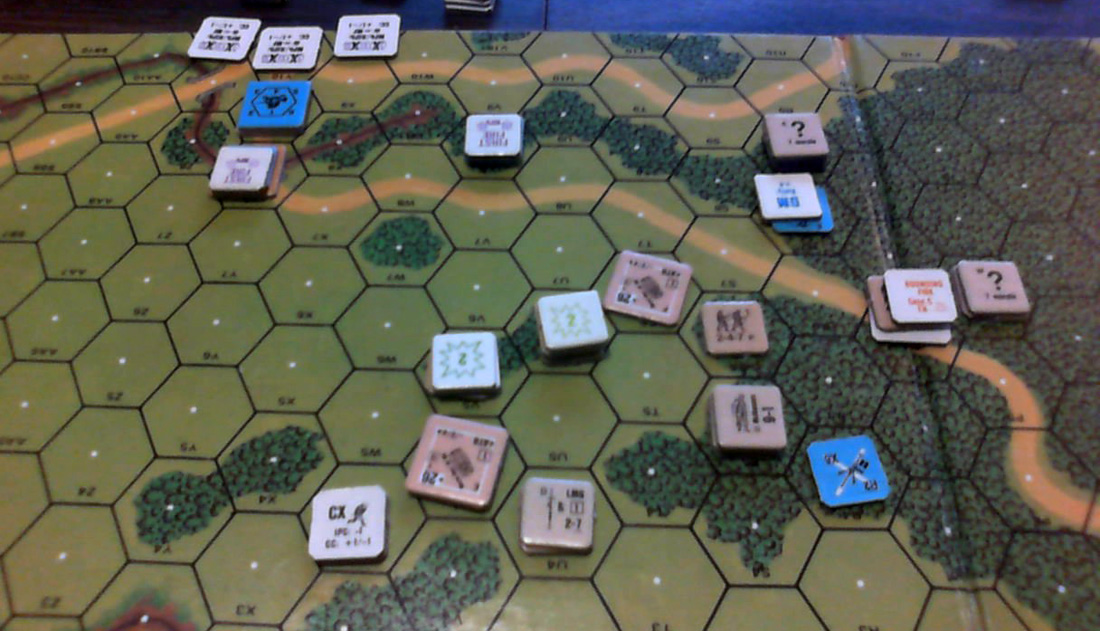
Since all of this was going so well, I had a good amount of time, and mostly Preped on the third turn, to see if I could do something about the French line emerging in the gully before the exit. The squad on the wire successfully moved under it, a squad and leader got into S10 without trouble, and I moved one squad+LMG into the forward position of W7, while moving my ACs to flank it on either side. During this, Patch revealed the other MMG in FF6, and it malfunctioned on its first shot!
My fourth turn was in part the typical ‘try to come to grips with the enemy defense and get shot up’. Patch had repaired his MMG on the first try, and revealed his last squad in X8, so he had a nice three-squad line set up, and I didn’t want to get stalled by it for too long, since I was going to have to move through wire to exit, and that could turn into a long delay with bad rolls. I got the idea of sending an AC around the back of the line and start causing encirclement to make it more likely for his line to break. This meant giving his MMG a nice rear shot at it, and the dice decided it was time to give him some good rolls to make up for the earlier problems, with a solid hit followed by a ‘2’ TK roll. Burning wreck!
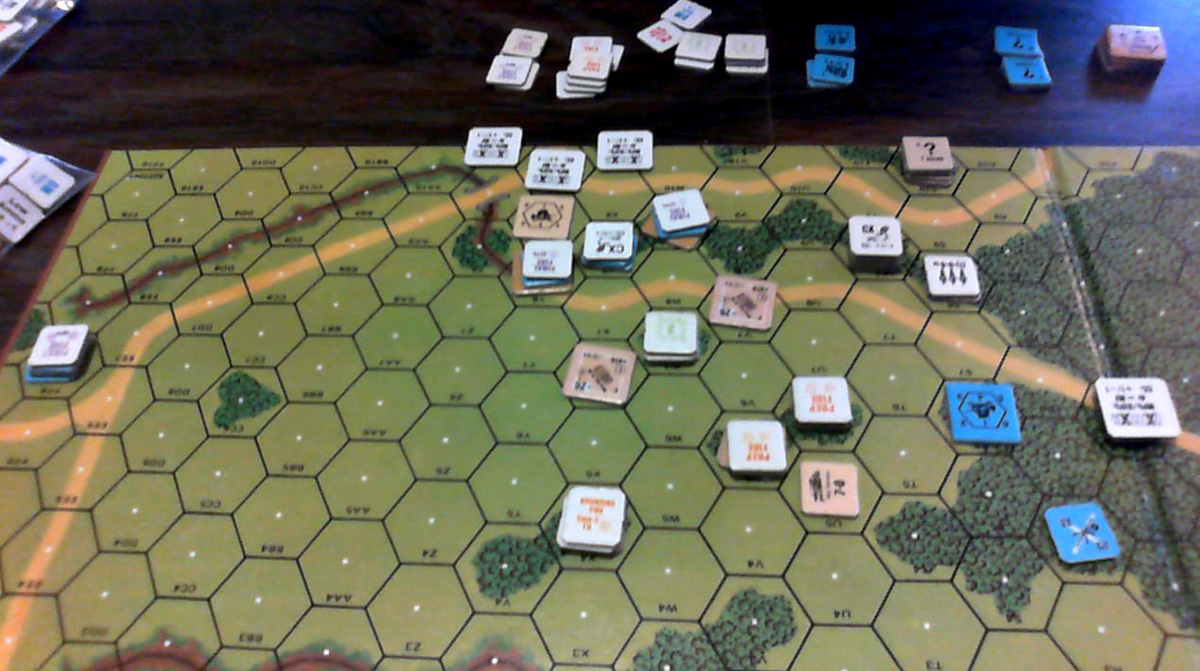
The problem was that it had just smoked up his MMG’s line of sight to the exit hexes. Patch was kicking himself for not getting it in the previous hex, but we really hadn’t been thinking about it until Patch decided he couldn’t let me disappear into the gully. So I wasn’t able to to get in and start Encircling everything, but, my advanced group was in V10, and I moved the other AC to X7, where they Encircled the end of his line. It took a turn to pay off, but it eventually did, and that squad ended up surrendering.
However, Patch’s MMG now had a rear shot at the other AC, and he eliminated it on his turn. It didn’t burn, but the crew didn’t survive either. Given the low odds of actually Bogging in wire, and the 5VP for exiting them, they had been a large part of how I would win, and suddenly I needed to exit the bulk of my forces. A few good rolls from Patch could turn this disaster around for him.
But my turn five saw the final collapse of his defenses. I managed to break both remaining squads, and engaged the leader in CC. He got Ambush, but since he was Pinned, couldn’t leave. Neither of us got any result, but I got him during Patch’s CCPh. Patch shifted his MMG squad south of the gully to get a clear LOS as I exited, but still couldn’t do enough, and I exited all my remaining guys (other than a 0-VP Hero I had gotten on a rally) for ~19 VP.
Well, it is certainly nice beginning the year with a win, especially since I didn’t win any ASL games last year. If we’d done the balance, I’m sure the HMG would have ended up in FF6, and the extra FP and ROF might have helped out a bit, but I don’t think it could have made much difference. His SAN of 5 went off twice (about right for the number of checks, though both times were a ‘2’), and the second time, went into the hex of my 9-1 leader, which could have been bad if Random Selection hadn’t picked the squad instead (2, 1… very close thing). The first turn really set the tone for the game, since I pretty much overran him instead of him shooting me up and then pulling back.
Discussion ¬