FB3 Furor Hungaricus
Patch and I continued our playthrough of Festung Budapest scenarios on Vassal with FB3 “Furor Hungaricus”, a combined Hungarian/German counterattack on Soviet positions on the outskirts of the city. We’re mostly doing these FtF, but Vassal has some nice tools for night scenarios, so we went over to Vassal for this one in June 2012.
It’s roughly the same area as the previous scenario, with another three hexes added to the east for the Hungarians to cross. For the first time, the Russians are defending, meaning that most of the lessons of how to attack this section have to be tossed out, as the advance is in the opposite direction.
I had the defending Russians, and felt entirely inadequate to the task, with visions of everyone being slaughtered in place. Patch’s comments indicated he wasn’t feeling much better….
The Russians are actually in pretty good shape, with 11 squads (mostly elite), four leaders, a 57mm AT Gun, an OT-34, as well as a few support weapons, mines and wire. However, not only do they have the normal No Move restrictions of a night defender, but they are not allowed to set up more than one MMC per hex. Per Location would have been fine, but no more than a squad per hex really kept me from establishing the concentration around the main victory area that I wanted. Meanwhile the Axis comes in in three groups: The Hungarians get 12 squads, up to half of which can set up HIP on board in building L29 and on the roof of E29 (that last option gave me lots of consternation), and the rest enter on the east (top) edge along with a Bergepanzer III (which has to be SSRed to heck for the stats—why didn’t they provide an actual counter for this?) and Flakpanzer IV. The Germans enter in the north with another six squads, while a couple Hungarian assault guns (Zrinyi IIs, one of which has its MA replaced with a MG) enter on the east or south.
Like FB2, the scenario has six victory conditions, and the Axis needs to satisfy four of them. Two them are for control of buildings C30 and E29, one for controlling hexes F32, F35, and I32 (which all have foxholes with burnt-out wrecks on top of them), one for controlling 10 of 16 building hexes inside a road loop that occupies most of the board (three hexes start under Axis control), one for killing the OT-34, and the last is for getting 25 CVP.
Our first session was slow as we struggled to remember what we’ve forgotten. Both of us had minor setup goofs (quickly fixed). The early tactical goofs went to Patch. He obviously had a nice plan for getting up close before I could do anything, and then partially spoiled it by forgetting and driving a tank into view (you can see [hear] tracked vehicles at twice the range of other units). My two units that could see it couldn’t get a starshell off, and I didn’t think to fire on it before it turned around and got back out of range, but a couple units were free of No Move.
Over on the north side, my setup area actually intersects the edge of the German entry area. I had a hidden unit in there, and he managed to walk right into him, getting revealed and bounced out to his entry hex. I fired (which removed my restrictions on using starshells) and broke the HS+PSK in that Cloak counter. Final Fire also got a 1MC on Cloak F, which turned out to be a Dummy. Then Patch revealed Cloak E as 2 squads+LMG+MMG+8-1 (a third of his north-side force), and the resulting 2MC broke my squad, but also activated my Sniper, who eliminated Cloak K.
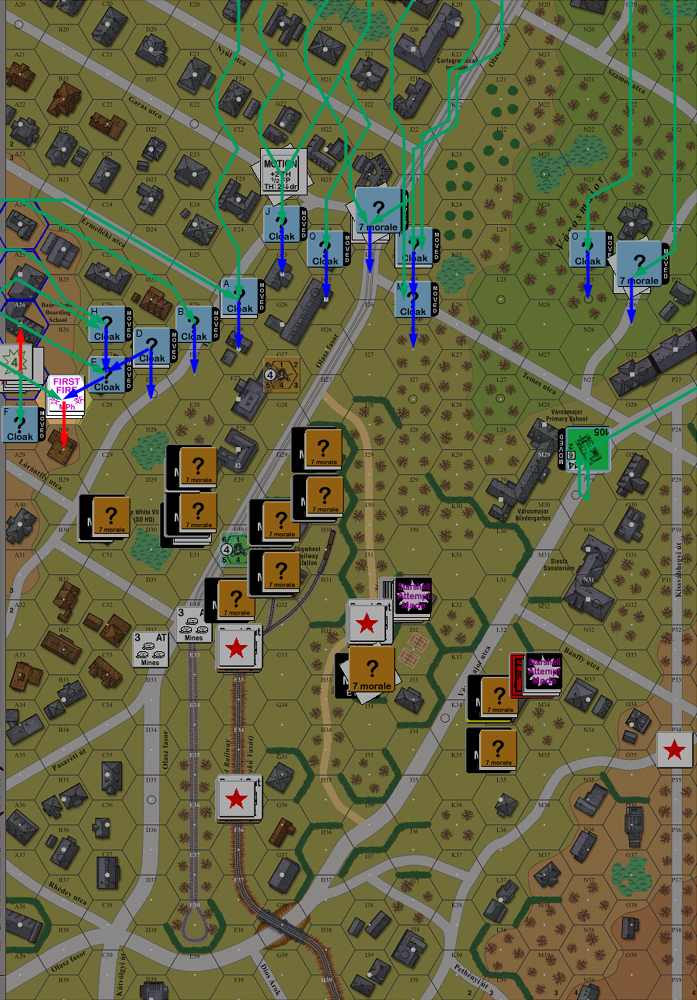
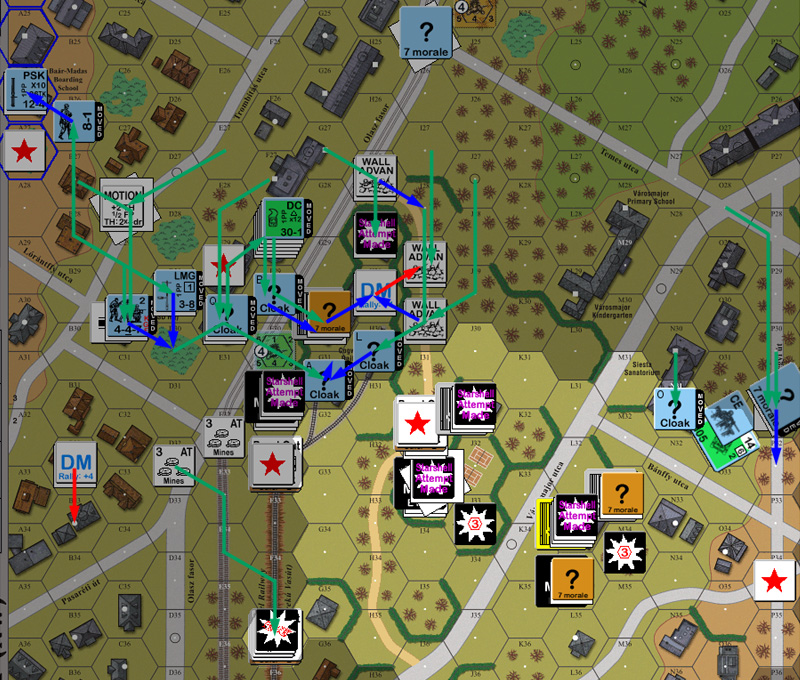
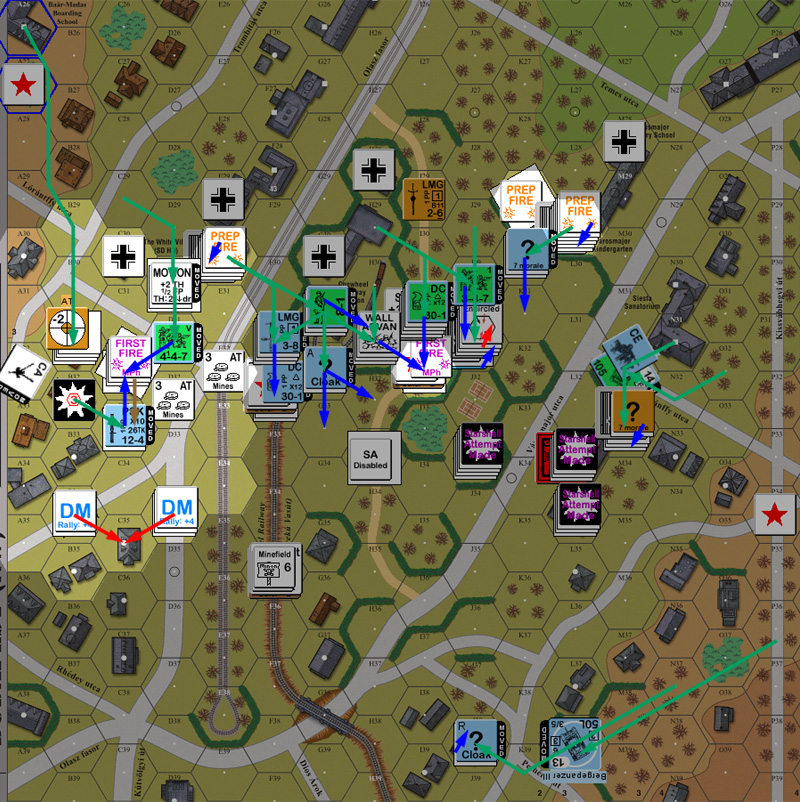
Situation, Axis Turn 1, showing full board in play. Also note that at least one unit in E30 is a Dummy.
I made a few starshell attempts on my turn, and lit up a couple of nice areas on friendly drift DRs. I couldn’t pass the TC for my best leader to go active, so my movement was pretty boring. Patch gave up on subtlety, and fired while under a starshell to remove No Move from most of the north end of my defenses. Of course, he reduced my tripwire squad to a HS in the process….
Patch rolled a ‘6,5’ for Wind Change, which increased the NVR to 3, and started a light rain. I’m entirely unused to scenarios that have weather, and hadn’t realized that the Overcast meant more than the mere fact that there’s no moon to affect NVR changes. So we had +1 extra Mist LV penalty after every six hexes of range (not likely to come up often at night), and if the rain got any heavier, there’d be another +1 on top of that at all ranges (and there’s already a +1 LV for night…). Patch’s PSK squad tried to self-rally, but couldn’t even manage to remove DM. Patch didn’t bother with any fire, and my starshell drift was not nearly as good, with one going off in a corner where it wouldn’t do much good, and the other parking itself right over my own lines, blinding me to his advance.
Patch’s opening move was to send forward Cloak C daringly between my blinded defenders in building E30, and the squad holding C30, and—what he didn’t know—right towards the AT Gun. I eventually gambled that he was sending forward a Dummy, and held my fire. Later, I did fire as Cloak A stopped adjacent, but couldn’t get a result. Towards the end of movement, Cloak D went charging into E29 to reveal my squad in return for revealing his squad and bouncing back out of the Illumination so I couldn’t even fire at him. >.< I didn’t even think of it ’til I went to fire, and actually, Patch didn’t think of it either. I’m sure we’ll both remember it as potential sleaze if the situation comes up again….
My MTR tried shelling his armor on the south side as they moved up, getting rate a couple times, but not able to connect. His FlakPanzer moved up to within sight of my AT Gun (range 6!), but the shot wasn’t quite good enough even with how close Patch was getting to stumbling on its location.
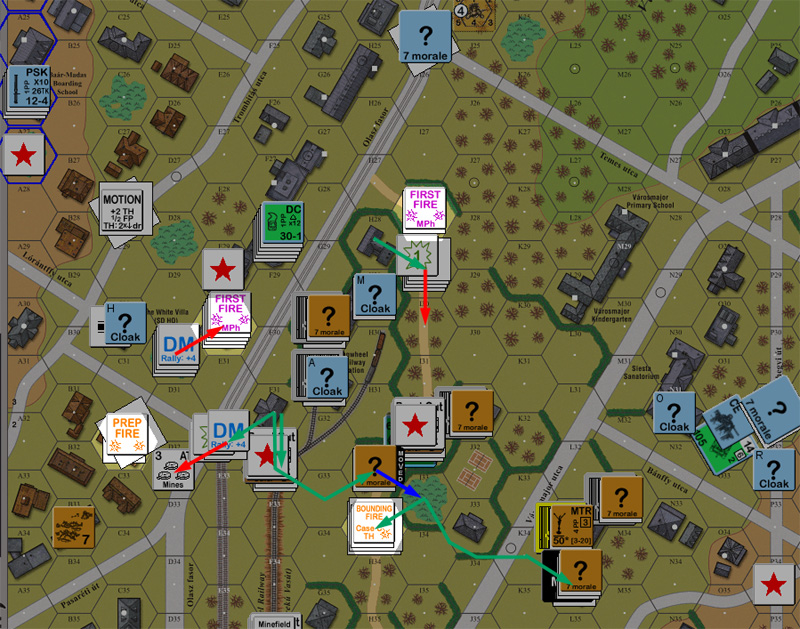
Patch’s only AF shot was a ‘2’, which killed the broken remnants of my tripwire, and had Patch wishing he’d gone for C30 instead (this close…). He piled in Cloak I as well as the revealed squad to E29, and revealed a -5 Ambush modifier (concealed, Stealthy… -2 leader). I could only manage -3 (concealed 8-1 leader). And I still nearly nailed him with 0:-1 Final Ambush drs (only need two difference at night… argh). And then in attack declaration, I found out he had 2×447, 2xLMG, 10-2+DC in that cloak. Grand total: 13:5. Patch killed everything in a single attack, while I missed a 1:1 against his leader and squad combo, leaving behind a LMG. The only good news is that another three stacks of units lost No Move from being able to see all this.
I tried putting up a couple of starshells to try and blind Patch while I shuffled around, but couldn’t get any up. I was able to pull out the contents of E30 (not fired on with FFMO by the adjacent Cloak A… Dummy?), and G31, and I revealed a HIP unit in H29h1 to pull him out of the area; Patch correctly figured that as my best leader heading off to wake up other units. I tried to pull out of C30, but a 2MC broke and ELRed them mid-Dash. DFPh was mixed as Patch lost a MMG from Ammo Shortage, but he revealed and broke my squad in H29h1.
One odd note is that somehow a couple of my units shifted between logs. One set I noticed at the time as I realized they were where I had intended to advance them, but the other I missed.
So, after two turns, Patch had gotten one VC (control building E30), was clear to get another (C30), and had made a good start on two more (CVP and 10 building hexes). My fears of dying in place were coming true. The worst part was the two super-stacks; the OT-34 was a bit too well-hidden away and was probably my best tool for getting him to split up.
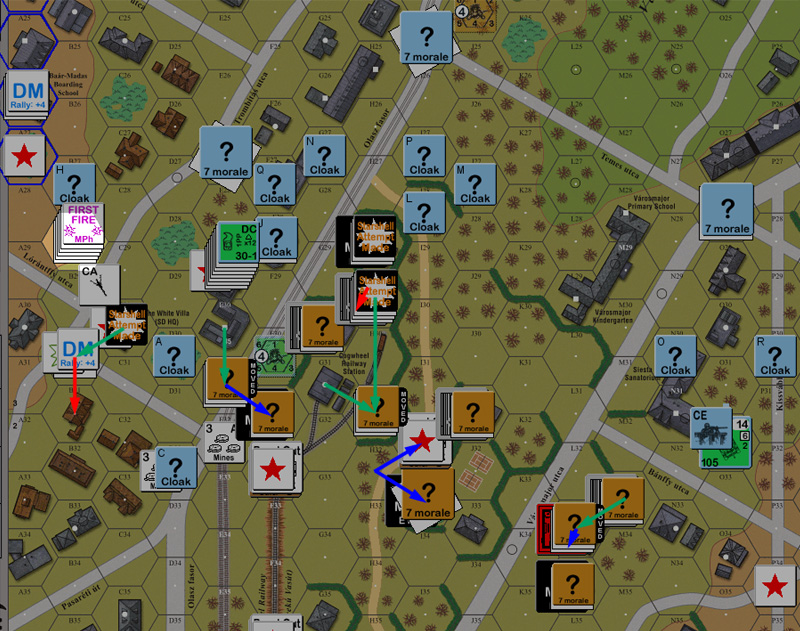
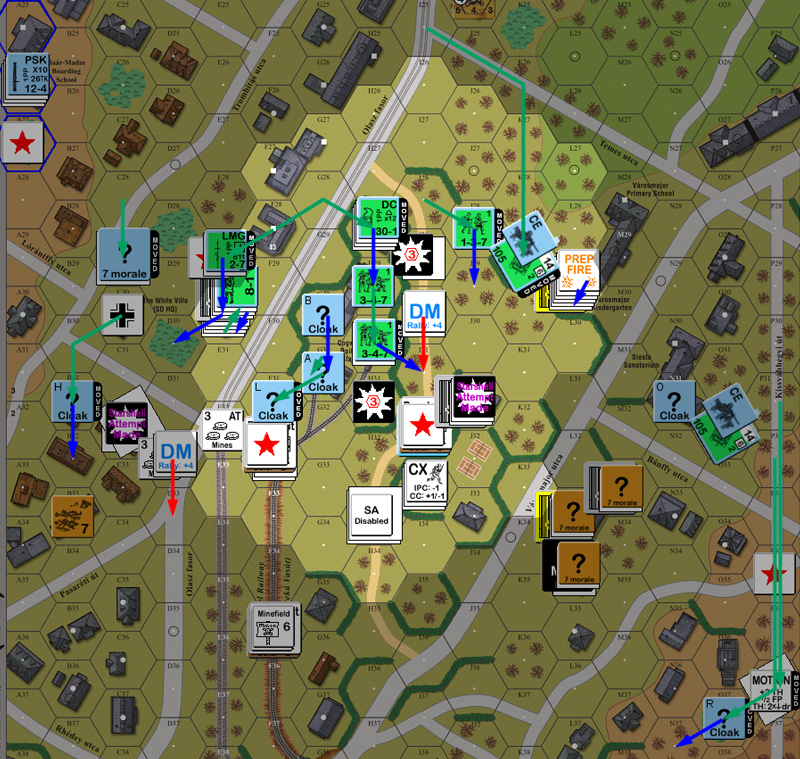
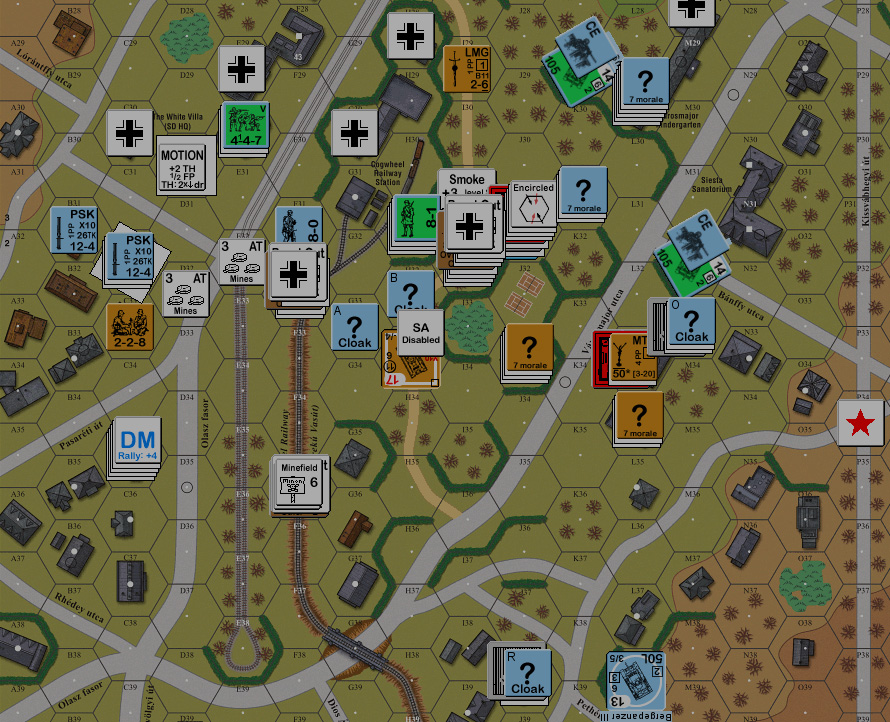
Situation, Russian Turn 2. Advance from the empty hex is caused by the shift of units from H31.
The only thing that happened in rally was Patch finally removed DM from the poor PSK squad still stuck back in A26. I put up a pair of starshells again, both on the south flank. While it wasn’t as bad as the previous turn, I still ended up blinding my firebase in J31 to what was happening to the east or building H29.
Patch flowed forward in movement, sending Cloak C down to the cogwheel railway, which, as he expected, was mined. The mines got a result, showing, as I expected, that it was a Dummy. A couple of Cloaks went down the south side of building H29, and surrounded what was left of the garrison there. He then sent a Cloak into H28, revealing my squad and his HS. He also went wandering through the E29 building, which appeared to be under his control, but it was possible there a HIP unit somewhere. Patch wasn’t excited about exploring another 6 upper-level Locations, nor trying Mopping Up.
The FlakPanzer IV drove through the gap in the D-hexrow, and practically right into my AT Gun. Thankfully, I had someone else to force the reveal… at which point I pointed out that he had used 12 out of 6 MP. Patch hadn’t noticed that it’s movement rate changed when he switched it to firing mode. This left both of us unsatisfied, as Patch couldn’t get it where he wanted it, and I couldn’t get a shot at it on its new route.
My only DFPh fire got a result on Cloak P, which turned out to be a Dummy, giving me a little breathing room, and somewhere to move my brokie in H29 to.
Despite having a leader and no DM, Patch still missed his only rally attempt on my turn. My self-rally removed DM in B33 and nearly rallied him, which would have been very handy, as I had wanted him to cover the still HIP AT Gun. As it was, I revealed it at this point to fire on his two squads in the brush a couple hexes away. I got three shots off, breaking both of his squads on the second, and malfunctioning it on the third.
I also used my best leader to grant Freedom of Movement to the OT-34 I had gotten him to last turn. Patch desperately wanted to shed some light on the situation, but eventually passed on starshells, rather than see them backfire like they had for me. I evacuated F31 in three different directions, and the last unit got nailed when Patch revealed more Vannay units in E30 and caused an ELR failure.
The OT-34 started up, moved one hex to get a LOS on G31… and immediately ran out of fuel with the FT. In one turn, I had lost both of the weapons that Patch really needed to be wary of.
During DFPh, Patch eliminated the last Dummy in G30, and revealed Cloak M to be another large stack (two squads+LMG), which promptly got a K/3 vs my stack in I29 trying to get away. This ended up reducing both squads to HSs, and then he revealed the HIP kill stack in L29 (two squads, MMG, HMG, 9-1) to kill the broken HS, and ELR the other to a broken 227. I considered the three 628 squads I had to be the most important units I had, given the nature of night fighting, and now two of them were gone with no more to show for it than an eliminated Dummy Cloak. To make things worse, the eliminated squad dropped a LMG. The only good news was that Patch lost his LMG to Ammo Shortage on a ROF shot.
I finally got good news in Patch’s RPh, as I immediately repaired the AT Gun, and Patch only got one of his three broken units back. I then managed two starshells, and with method 2 (aim them at Known enemy units) was able to keep them somewhat on target, lighting up the entire center area. Patch decided to keep fairly quiet there, slowly shuffling around the E30 and G30 buildings.
He Dashed a Cloak across the street against the ATG’s position, which left me with the dilemma of shelling E30, which had a bunch of Illuminated units (and therefore eligible for Acquisition during the turn), or turning it (at +6) against the adjacent Cloak in the hopes of getting a hit (relying on rate for a better second shot), or trying a 2FP +2 shot. I eventually turned the Gun, and didn’t get rate, the IF shot didn’t do any better (though it did have better odds). I figured I’d probably lose the crew in CC, but instead Patch advanced to B32 and revealed a HS+PSK to DM my squad in B33 before it could attempt self-rally. Patch mentioned that he had meant to send another squad over to take care of the crew, but moved everyone upstairs in E30 before he remembered.
He also moved Cloak R and the Bergespanzer III along the south edge of the board towards the eastern cluster of VC buildings (part of the 10 of 16 group). Other than transferring a stack from the E29 building to the H29 building, Patch stayed quiet elsewhere, and also advanced a 347 squad into CC with my broken HS in I31 to easily wipe out the remnant of my 628s, and put himself adjacent to the next strongpoint in J31.
Patch got both his remaining units back in my rally, while I tried for self-rally on B33 anyway and showed I wouldn’t have gotten back even without DM. I turned AT Gun again and and took another shot and IF shot at the HS in B32, and still couldn’t get a hit. J33 managed to Pin the adjacent squad, but that was all the effect I could get out of Prep.
My only movement was to get my 9-1 back towards the upcoming fight in J31, and link him up with… a Dummy. Patch DF at J31 broke my 8-0 and then his Sniper mortally wounded him.
There was nothing to do in rally as Patch led off his new assault with smoke fired at I31, and then made it pointless by breaking the squad in J31. I got one starshell on four tries, with it going up over the AT Gun, and drifting in the one direction I didn’t want. Patch sent a HS into the ground floor of the building, and I decided to finally reveal my HIP 628 in the foxhole in I32, but couldn’t get an effect on him. This revelation gave Patch pause, but that didn’t last long.
Cloak R moved into the east victory block, which left me to wonder if he’d just taken control of a building or not?
Finally, rallied, the HS and 8-1 moved down from B31 and into my AT Gun’s CA. While I had bigger fish to fry than a HS, I couldn’t pass up a good shot at a leader, and opened up. The first shot hit, but they both passed the resulting PTC, and the second shot missed completely (and nearly broke the Gun again). The FlakPanzer IV moved up and took a shot at my crew on the move, but couldn’t get an effect.
Patch split off two units from Cloak B in G31, one of which was a leader with DC, who placed it on the ‘?’ in the F32 foxhole. He split off another unit from Cloak O to run across the road into M33, which was turning into the only place where I had anyone in Good Order, before following it with the actual Cloak. And then revealed another two units (presumably a MMC+SW) in L29h0 and sent them forward. (By now I was really wondering if he’d ever run out of actual units to reveal.)
For DFPh, the AT Gun finally rolls well, with a IF CH on B31 for a 2KIA to kill the HS and 8-1. Looking for ways to save the poor crew, it finally occurred to me that the T-34 couldn’t see any of the activity, despite the Illumination, because of the RR Embankment in between. The DC in F32 just managed a PTC, which revealed the contents as a Dummy. Much of his other AF fire concentrated on the AT crew, but couldn’t get a result.
Routing units in a multi-story building can be a pain on occasion. I have never before routed someone onto the roof of a building. (Like a bad action movie! Where’s the helicopter for the getaway?)
Patch generated three CCs this turn. Patch piled a squad and a half on the AT crew, and then rolled a ’12’, which I used to slip out the back door. In I32, he piled in three squads (one concealed), and the 10-2 leader, for a -5 Ambush modifier, which gave him the Ambush (and killed the last 628) even when he rolled a ‘6’ for Ambush. Lastly, he Ambushed M33h1 which forced me to reveal the Dummy.
Naturally, I tried to self-rally C35 in hopes of a leader to get the other unit there, but I only managed to remove DM. Patch managed to recover the AT Gun with his HS in preparation of destroying it (for CVP). With two full turns to go, my last-ditch plan was for a last stand in J33. If I could hold that, and the six buildings on the west end of the victory area, I’d hold Patch down to 9 (out of 10 needed) building hexes. Maybe I could squeak out a win.
I put up a single starshell over L33, and it drifted east, almost perfectly positioned for my desires. The MTR took aim at I32, but only got a couple rounds off, and didn’t hit.
Then Patch’s entire line erupted with starshell attempts, and he got 6 out 8.
That has to be some kind of record.
Anything meaningful on the board was lit up. First, I attempted to get to J33 from L34. Patch fired on my first move for no effect, but then pinned the squad follow up with the residual. The crew in C31 AMed into the street and broke. Patch opined that skulking in B33 would have been better, but I needed him to be in potential movement range of the victory area next turn. Skulking would have effectively eliminated him from the game.
I started the OT-34 in reverse, and every German on the board reached for its PFs…. Cloak B turned out to be a 467 squad which Pinned and then broke on successive ‘6’s. F32 found a PF but missed at two-hex range. The Hungarian squad in H31 found one, missed (12!), and then hit to kill it on the second attempt.
Patch’s DF broke my MTR squad on the roof of L33.
All of this put him dangerously close to a fairly stringent CVP requirement (22 out of 25), and he was already at 10 out the 16 building hexes, he had killed the OT-34, and taken C30 and E29. I had to take a building hex back, while not losing a single CVP. (We’d already forgotten to give him my J31/R squad for FtR at this point.)
Wind Change generated the second NVR change of the game, putting it back down to 2. Patch couldn’t do anything with the squad he’d just broken, but I got my crew back, after they had routed to where I’d been going in the first place.
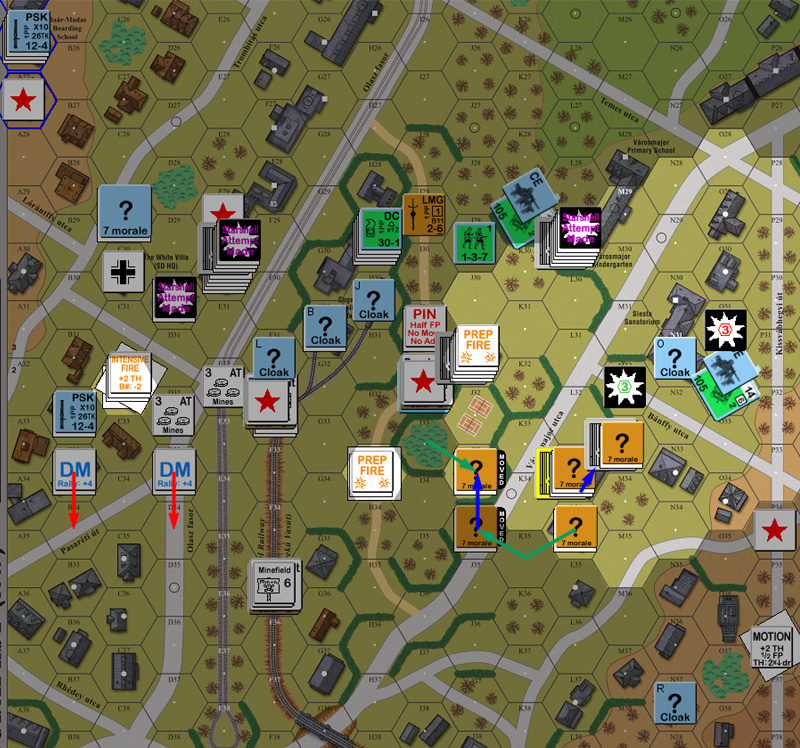
I got three out of three starshell attempts and lit up a fair area. Patch finally found my last HIP unit in I38, which revealed his Cloak down there to be a HS, which promptly broke to my fire. This would allow me to retake the two buildings down there he claimed… but it also opened the floodgates as Patch was no longer worried about stumbling into him. He treated J34 with some respect, but performed an OVR on the squad stuck in K34, pinning him, and preventing it from firing back. Patch also flooded into the edge of the G35-G37 region. I hadn’t properly appreciated how inactive he’d been because of the dangers of HIP, and that entire plan collapsed just looking at his movement.
Patch got a squad back up to my crew, using the illuminated area to keep me from firing at him, and got Ambush in CC followed by a ‘2’ to kill the crew and generate a 8-0 leader. He poured another two squads in against my squad pinned (again) in K34. Thanks to the AFV still being there, I got to go first in Sequential CC, but neither of us did anything to the other. (Nor did Patch do anything on the rooftop of J31, but that really should have been a FtR elimination, strange that neither of us realized that….)
At this point, with a full Game Turn to go, I surrendered. He had the needed four out of six VCs, I wasn’t going to get him back under six building hexes, and frankly, he was going to get the other two VCs as well. Considering how things were going around turn 2-3, I’m surprised that I lasted until his turn 6.
Sadly, I muffed my setup again. I tried putting Wire on buildings. >.< (G35-36-37)
Patch was surprised to find J33 had a 7-0, 9-1… and a Dummy. He was sure I had another 458 left (nope), and that the DC was with the 9-1 (nope, was with a 458 who ELRed on turn 2, and was now in C36).
Postscript
I’m not really sure what the Russians are supposed to do here. Patch used concentration of force very effectively, and, especially in the first half, I just died in place as I expected going in. The no more than one MMC in a hex restriction on the Russians is just nasty. I just couldn’t come up with an overall defensive plan that I thought was a good one. The general theory I went with was to concentrate on the initial line so that I had a better chance of getting rid of No Move when the action started. I’m thinking something more oriented along the J29-G25 axis might be better.
I couldn’t come up with anything I liked for the wire, as it pretty much has to go in an area I didn’t want to block as I wanted good lateral movement options. Patch pointed out that something like E34-F33-G33 could work well, especially backed up by the mines.
I think the MTR on the rooftop of L32 was a good idea, but I didn’t realize why until too late. I was thinking of it holding back that side, and it was too easy for him to get inside it’s range. But it’s a nice tall building and is going have targets anywhere there’s illumination. The AT in C32 worked well (and could have been a real game changer with one good rate-tear), partially because Patch got focused on the VC area, and blinded himself to things outside the center block. I figured it commanded two roads he was likely to use, even with the AT mines nearby. My initial trip-wire in B27 worked well, and took advantage of the fact that my setup area intersected the German entry area. I think that early surprise is part of what made Patch take it slow and cautious for much of the game.
I38 surprised him, since everything had been well forward, he figured my last HIP was part of the next line of defense. I figured with everything so far forward I needed a backstop. Especially if he tried going around the flank on the P hexrow road—which was exactly what he did.

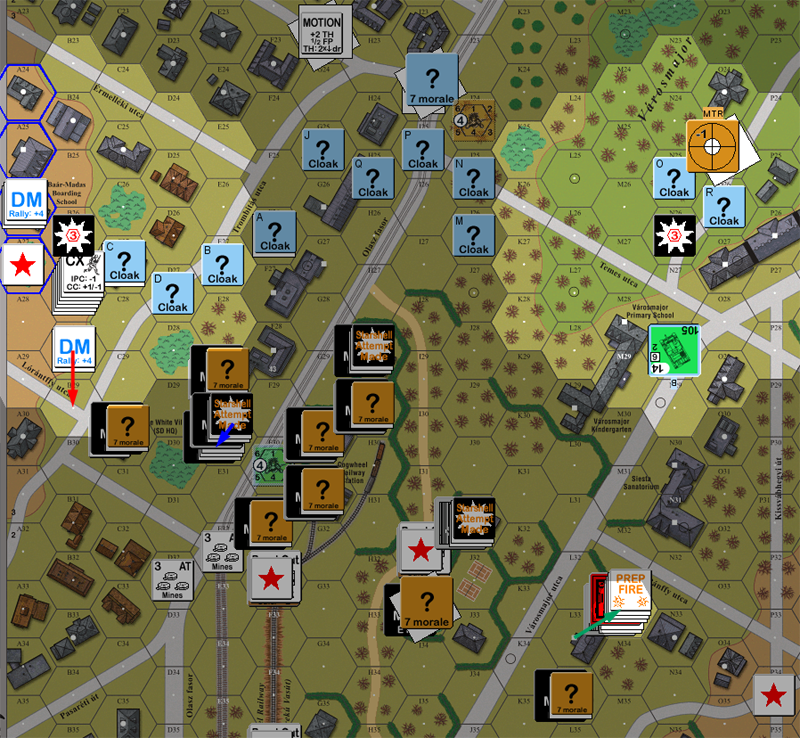
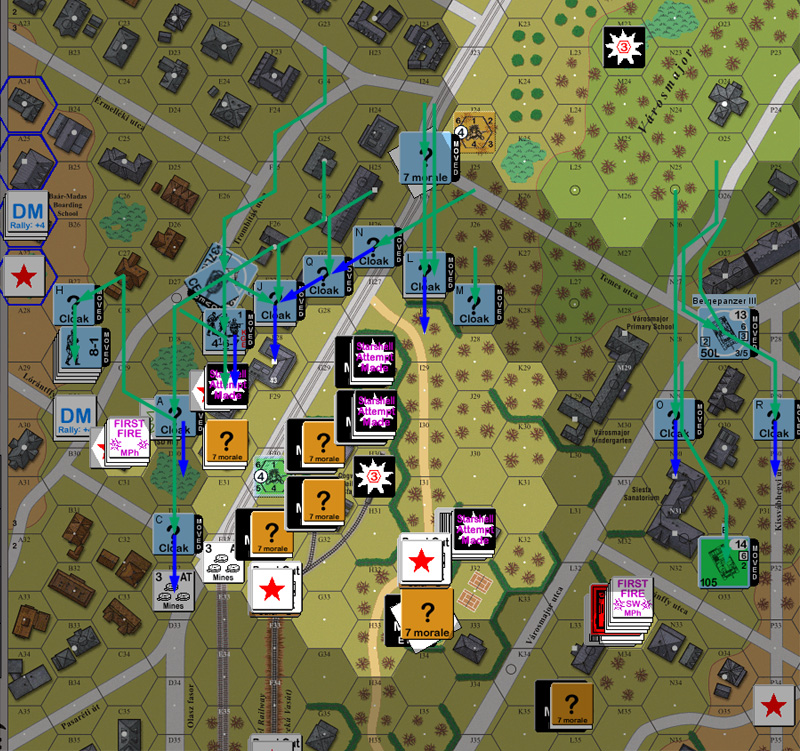
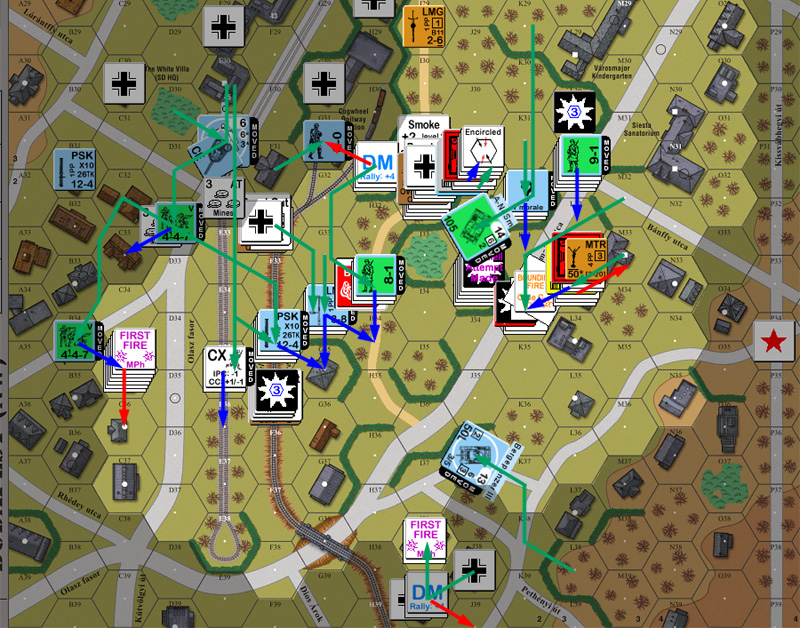
Discussion ¬