J19 Merzenhausen Zoo
After the last Deluxe fight, Patch and I decided to try out the ‘instant classic’ scenario from Journal 2, J19 “Merzenhausen Zoo”, which I had just gotten the reprint of, and we got going in November 2010. I only have a few brief notes that I posted to BGG at the time, so this will be going back through the logs and reconstructing.
It’s big scenario, with two full boards in play and eight turns. The Germans are defending the outskirts of a town with mixed force of infantry, four self-propelled guns (StuGs, PzJg III/IV, JgPz IV), and a 50mm AT Gun. The Americans (with plenty of British help) enter from the west and south with a bunch of infantry, too many Shermans to consider, a couple Churchills, and three Crocodiles (Churchills with FTs). Midway through, the Germans get more infantry and a pair of Tiger IIs. Ten types of AFVs (including three different models of Sherman)—it is a zoo. To win, the Americans need to take 38 stone building Locations in eight turns.
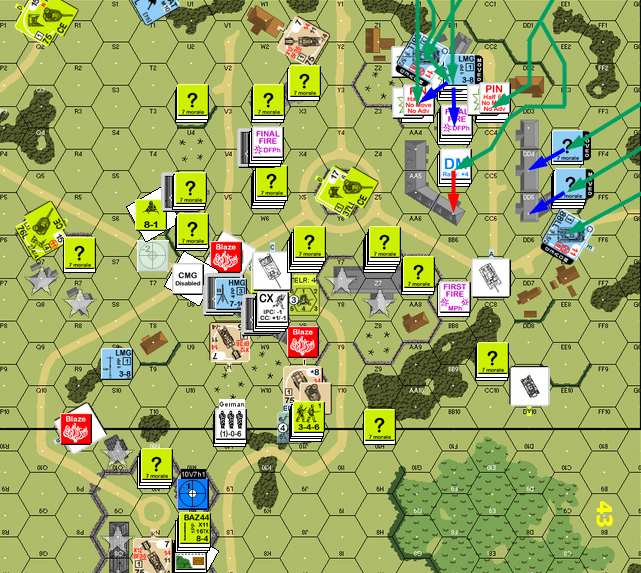
This was possibly the most complicated set-up I’ve done, since for once I had the opportunity to use Bore Sighting on a number of units (four AFV, one Gun, and four MGs). Pity it didn’t really do me any good. There’s a walled area in the middle of board 43. It was an obvious first place to attack towards, and I set up a force in there with the idea of holding Patch off for a couple turns and then pulling out under cover of some woods and orchards nearby while the town on one side and the hedge and brush on the other allowed me to cover the area.
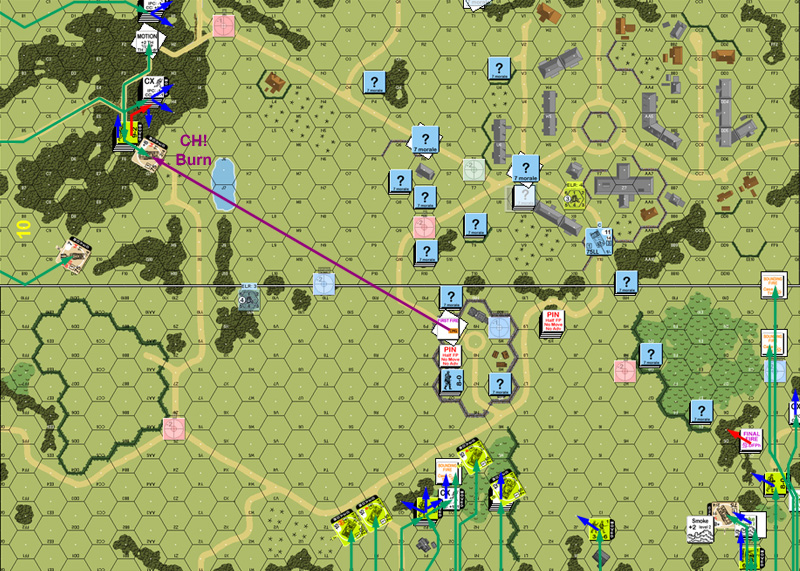
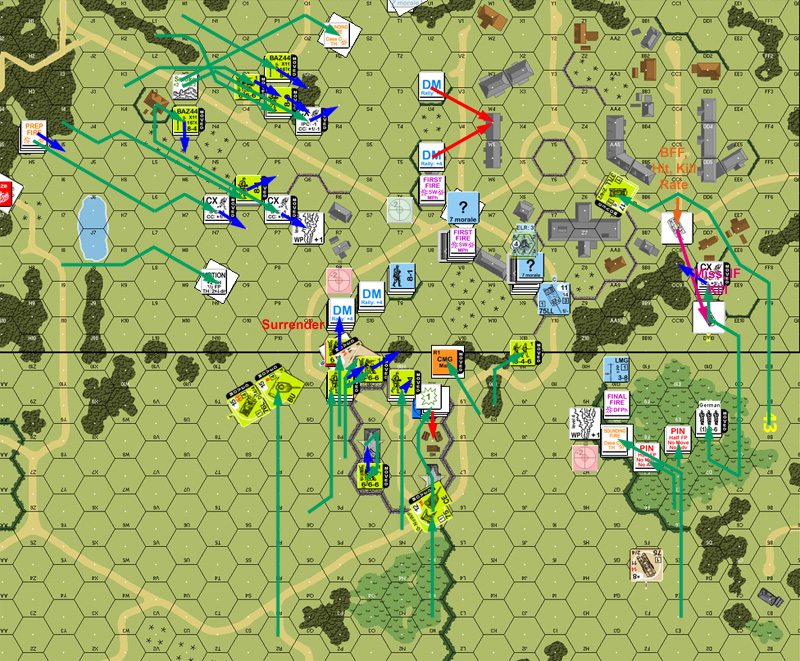
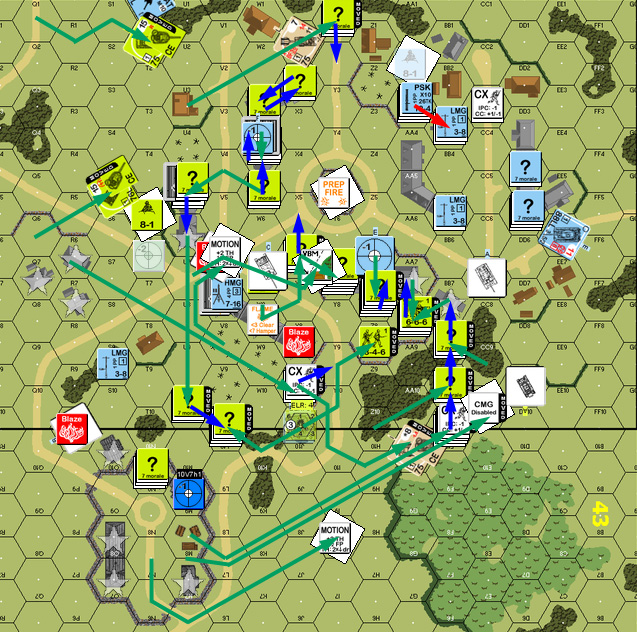
The game starts with every German infantry unit and Dummy stack taking a PTC, and while I generally rolled well, it seriously compromised the protection of that central area as I lost a Dummy in there, one in the nearby woods, pinned a unit in there, pinned the MMG that was supposed to cover the large open area nearby and pinned my extreme left flank. During movement Patch showed how much in the air that area was by running a Stuart through and into my back area. My pinned squad did manage to pull out a PF, but it missed. All his rolls other than the TH did pretty well, and if he hadn’t been pinned, could have really slowed down that side.
During defensive fire, I got what was probably my highlight of the game: my StuG in 43O9 got a critical hit on its first shot against a Churchill that was staring down the woods-road at it. This was followed by the MMG on that left flank malfunctioning, and Patch breaking my forward squad in 43C5, while putting down a fair number of acquisition counters.
Naturally, neither my broken squad or malfed MMG came back for my rally, but Patch did get his broken HS back. I skipped Prep, and started bugging out of the central compound. This started poorly when my first move entered open ground and a long-range shot from a squad got a ‘2’ for a 1KIA and killed the 8-0 leader in charge there, while breaking the accompanying squad. The second move needed the same hex and he broke that squad too.
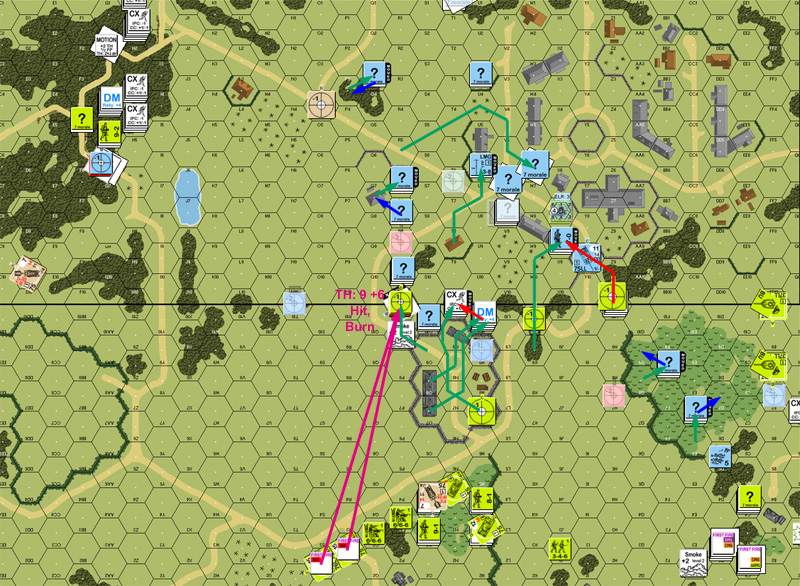
And then disaster struck. The StuG started, cruised through the gap in the wall, coming into sight of two Shermans on the south side, fired a sN, left the smoke between him and the Shermans, and turned to duck behind the north side of the wall. With range, size, and Smoke, Patch’s best shot needed a ‘3’ to hit. The second Sherman got the ‘3’ and then rolled a ‘2’ TK to burn it, to the surprise of both of us (Patch commented he’d been already mentally reviewing his rant for the AAR when it got away). The real problem is that I could have avoided the whole thing by just driving over the north wall, but I was suffering from confusion because I wanted to think that roadblocks and walls should be the same for that, and I’d just been dealing with a very problematic roadblock (that I had thought I could drive over at first) in the previous scenario.
That forced a re-work of the defenses. The StuG had been going to protect the back of my position against the Stuarts that Patch had sent up the end; now the other StuG had to pull out of its position covering the main road from the forest to the village to do the same thing.
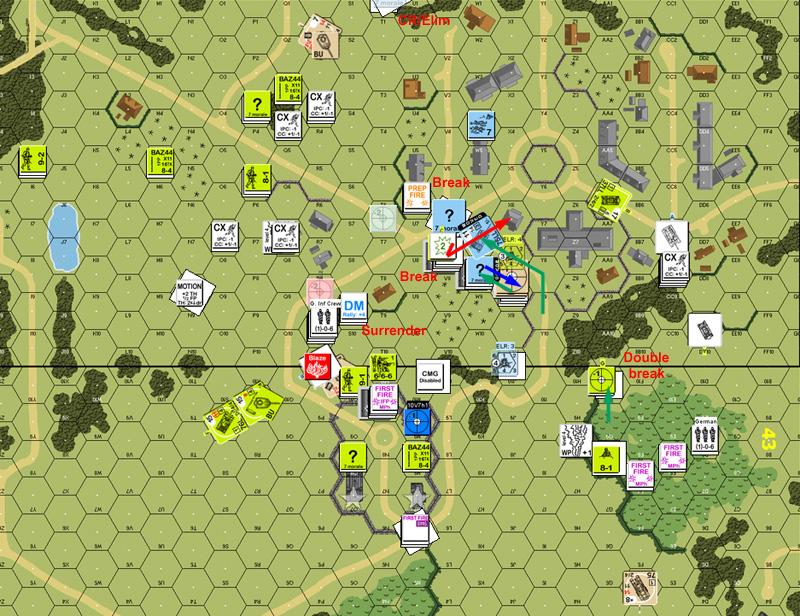
The DFPh made things worse as a couple of hits from the Shermans in the south-east corner reduced the two broken squads left in 43M10 to a single HS. His MMG managed to break my MMG squad in 43H10, further breaking apart that entire defensive line. The only good news was that Patch malfed the MA of the lead Stewart.
The second turn kicked off with injury to insult as I a rolled a ’12’ for my only rally attempt to CR the broken squad in 2X8. At least my busted MMG repaired. Patch didn’t attempt repairs on the bad MA, and couldn’t get a CMG that had malfed in 43C2 back.
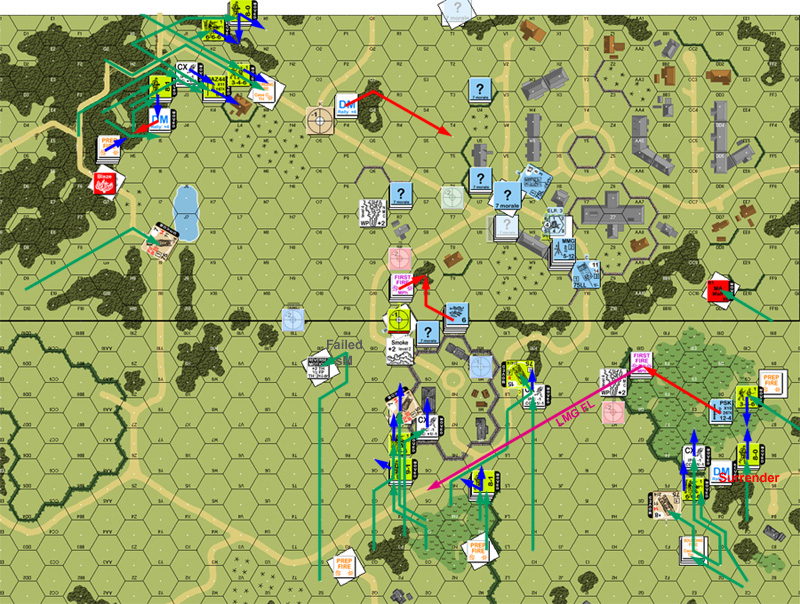
Patch began his turn firing off some Smoke, and revealed a dummy stack in 10Q7 by putting WP in the hex. A couple shots stripped concealment, but could not get any effect. Patch swarmed all over my south defensive line, positioning to capture the brokies in 43D5, and getting adjacent to my crew in D7 (which was holding its fire for a PSK shot at the Stuart), and then sent a Sherman forward to try to smoke the corner of my line in 10R9, and ended in Reverse Motion after that failed.
The west-side mostly skirted the north edge of the board, keeping to what cover was available. The forward Crocodile on that side rolled up and promptly broke the point squad trying to hold down that side. My HMG in 10R9 only really got one shot and broke a HS, but Patch walked around the residual and kept to the trees for the most part.
I led off DFPh with the PSK shot… which turned out to have no ammo.
I blow way too many BAZ, PSK and FT on the first shot….
I only had one other shot, which did nothing, while Patch’s AF broke the ex-PSK crew and malfed another CMG. Then he did a ranging shot through my smoke and the smoke of the burning StuG to get an Improbable Hit on 10R9 which broke my leader and HMG squad, which finished off the center of my line.
For my rally, I got my leader in 10S9 back, but couldn’t get anything else, including the HS (and MMG) in 10X8, which was the only non-DM unit I had to rally. Patch got his only broken HS back, and one of his two malfunctioned CMGs.
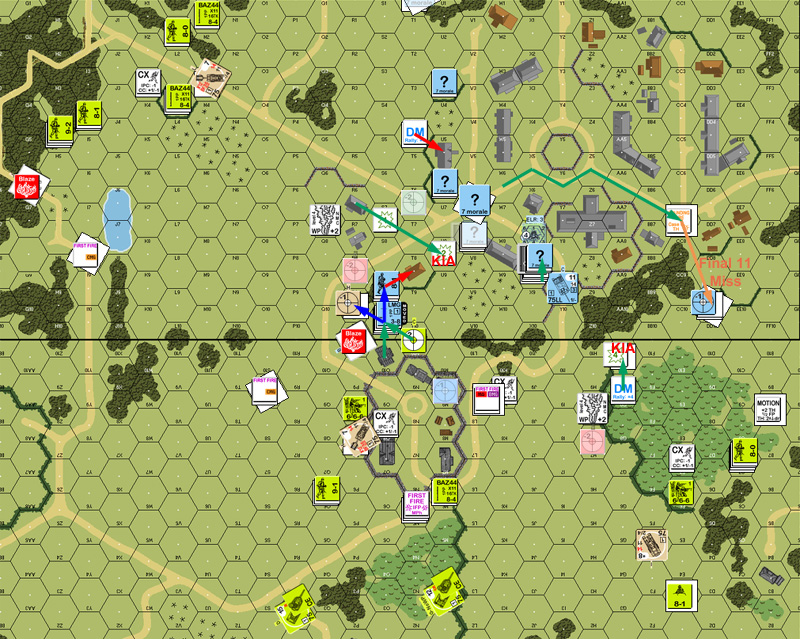
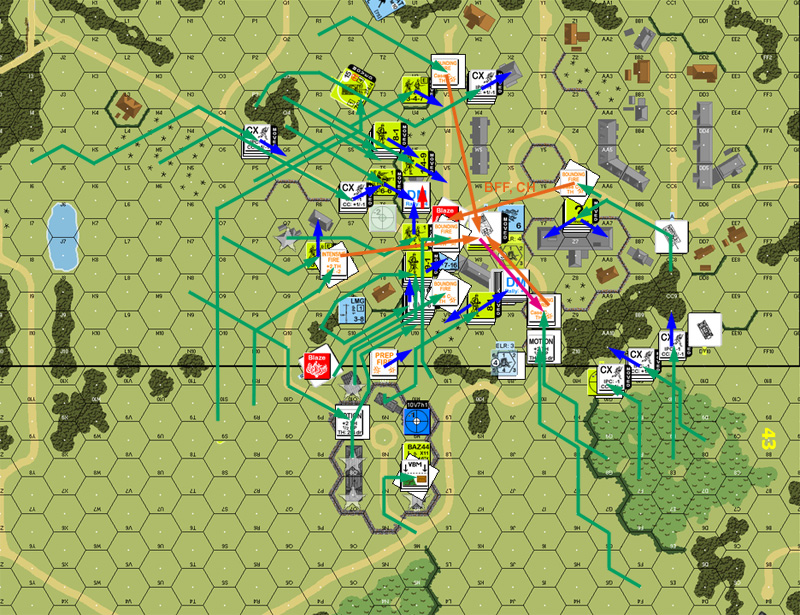
I skipped Prep and led off with my StuG fire brigade advancing to a gap in the trees that let him see both Stuarts. After a shot that almost hit the lead one (with the malfed MA), Patch tried for Motion on both of them, and got it on the rear one. After that, I tried pulling a couple squads back for the next line of defense, but it was impossible not to have a clear shot to someone, and they both died on KIA results. I did manage to get an intact squad and PSK crew into the 10R9-S9 woods area, and my intact MMG squad in 10X8 went upstairs. Assuming I rallied the other HS on Patch’s turn that area could be quite dangerous.
Sadly, that didn’t happen. In fact, the only thing I got back was my crew in 43G9. On a completely wasted ‘2’. Patch Prepped with the leader-led MMG in 10H4, and immediately broke the new line of guys in R9 and S9. Finding the PSK in R9 was a surprise for him, but not the surprise I wanted (which was firing it at range 3 when a Crocodile tried to engage the stack). He then started movement with a few HS hurrying up to the shredded tatters of my defenses, and was disappointed when they drew no fire. But they weren’t really close enough to immediately worry me, there was no place where I really wanted residual, and most of the available shots just weren’t that good.
He then started the Crocodile in 10M3 and put it at range 3 of U3, which it promptly broke from the FT (halved twice for range and concealment…). What Patch didn’t know is that it was now making a nice attractive target for the AT Gun HIP two hexes away in T0, but it was a still a frontal shot and the odds of killing it were nil (13 – 14 = -1 TK). All I needed was for it to creep another hex forward for a side shot with a slightly better kill number….
Mostly, movement was further tightening of the noose, with American units flooding into the walled compound, and getting way too close to my hapless broken units in the 10R9-T8 line. However, one squad of his fell afoul of the HIP HMG in V7, when it entered it’s boresighted location in 43M9 and broke (I think this is the only boresighting that came into play). The ex-PSK crew on the left flank managed to pin two squads on separate shots; that was about the end of the good news for me though.
The first Stuart (with the malfed MA) started and turned, giving me time to get a non-Motion IF shot at it after the first one from the StuG missed. The IF hit, killing it, but left me with no firing options left when the second Stuart started, parked itself right behind the StuG and killed it on the first try. It then proceeded on a couple more hexes, stopping just out of LOS of the PzJg III/IV. Patch had been contemplating a rush on it by the Stuart and the Shermans on the other side, but wasn’t expecting the LOS to be blocked by X6.
AFPh was lead off by the Crocodile that had moved up to Bypass of 43O10 scoring a long-range 2KIA on 10T8, and RS tied to kill all three units there. For good news, Patch managed to malf the BMG and AAMG of one of the Shermans (on the same shot), and my Sniper broke a HS in 10X10. However, my crew in R9 was forced to surrender, leaving a nice PSK and HMG for Patch to come pick up.
Given nothing with better possibilities, I picked 10S9 for my 1st MMC self-rally, which would have gotten quite exciting if it had worked. However, that just required a lot more luck than I was having. Worse, my HS in X8 still refused to rally. Patch lost one of his malfed CMGs, and didn’t have much else to do. My only Prep was the squad and LMG in U6 conducting spraying fire against the Americans across the field, and they easily passed the resulting 1MC, with one unit generating a Hero.
The left-flank crew tried running for the town, but got eliminated on a double-break. I tried skulking with the HMG squad in V7, tried to get cute with it, got pinned, and then they broke during DFPh while the 9-1 died of a mortal wound. DF fire at U6 broke that squad.
And then it got worse.
Patch took an off-chance shot with the FT on the Crocodile in R1, and revealed the AT Gun there on a 2MC that they passed. He then generated another 2MC with the MA, and and the crew died on a ’12’. Patch pointed out that they should have gone for a Deliberate Immobilization shot when they got the chance, which would have certainly mission-killed the FT, but I never think of those. If Patch ever starts getting hits with all the DI shots he’s tried against me over the years, I might remember it more….
Patch’s only news in his rally was losing the other malfunctioned CMG. I finally rallied the MMG HS in X8, potentially freeing up the only leader I had left to try and rally someone else. With so few units left, I had little to do as Patch swarmed in, determined to take me out as efficiently as possible, and start preparing for my coming reinforcements.
The Stuart popped around the corner, stopped, and fired the MG at the rear of the OT PzJg, getting a MC that I passed. Knowing there was just way too much more coming, I sat tight hoping the Stuart would miss, so I could still have a decent chance against everything else coming from the other direction. Besides, there was no way to win a Gun Duel. However, a Critical Hit put an end to that. The Crocodile in 43O10 started up, went forward, and parked adjacent to the 10V7-X8 building. My squad in the upper level found a PF, but missed, while breaking on a K/1 from the backblast. The 7-0 couldn’t find a PF, and I declined to try on the HS, hoping to be able to continue threatening his advance with the MMG. The FT scored a 3KIA, killing the HS and 7-0, destroying the MMG, and setting the Location aflame.
Patch moved a Sherman up the center to Bypass of R7, and we were both wondering if it had LOS to my last AFV in W7. I felt that it probably did, but didn’t see much choice than sitting tight and hoping it didn’t as there was still too much out there, and no chance in a Gun Duel. It was clear, but the shot missed purely due to the extra Bypass side-arc modifier, and the IF shot also missed. Then the Sherman on the left moved in, and I rotated and took the best shot I figured I’d get (which was still a HD shot), which missed, along with my IF shot. The Crocodile on the right came in and toasted the two broken squads in W4 with a 3KIA, and missed a MA shot at the JgPz. The Sherman in L10 started, and moved to Bypass of V7, giving it an adjacent rear shot at the PzJg and scored Multiple Hits for the kill.
That was my last intact unit on the board, with over a full game turn to go before my reinforcements showed up. With the amount of firepower out there, getting shot up as the Germans until the cavalry arrives is obviously part of the design, but I’m almost sure that I’m supposed to have done more than kill a single Churchill in the process.
My turn naturally did not have a lot going on. My surviving units surrendered, and the flame in X8 burst into a Blaze, which Patch had to self-break out of, taking some new prisoners with them. About the only thing to do was attempt escape and hope to do some lucky damage, but while they passed the TC, they didn’t do any damage to their captors, and the other units there killed the HS.
One exciting bit of news for Patch’s turn without me on the board was Gusts. This spread the fire from the dead Churchill (off-screen) into it’s woods hex (for the second time, actually, it had spread before, and then the Flame went out), and spread Flames from X8 into the lower levels of Y8 and V7, putting that entire building at risk of going up.
Patch grabbed all the stone Locations he could, shuffled all his guards with prisoners to the rear (wouldn’t do to let them escape and get re-armed, now would it?), and got leaders to the two broken units he had left. Most of the tanks went CE during APh, and naturally everyone gained concealment.
My entry started with a goof where I didn’t understand that FTs are… unique in their application against armor. No To Hit roll, no protection from good armor, just a straight up 8 TK roll with a few modifiers. I lost a Tiger II on my first move because of that. After a quick explanation, I scrapped my entry plan for another and we tried it again.
Patch got both of his broken units back during my Rally. Our calculations had Patch at 40 stone Locations out of a needed 38, so my plan was generally conservative. Patch had been fairly conservative himself, so my first goal was to keep him from advancing further into more stone Locations, and then try to find someplace to advance to get him under the limit towards the end of the game.
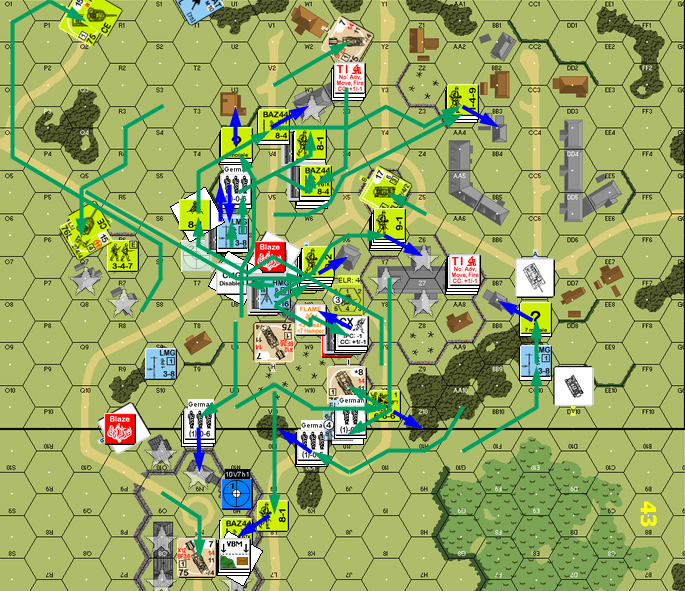
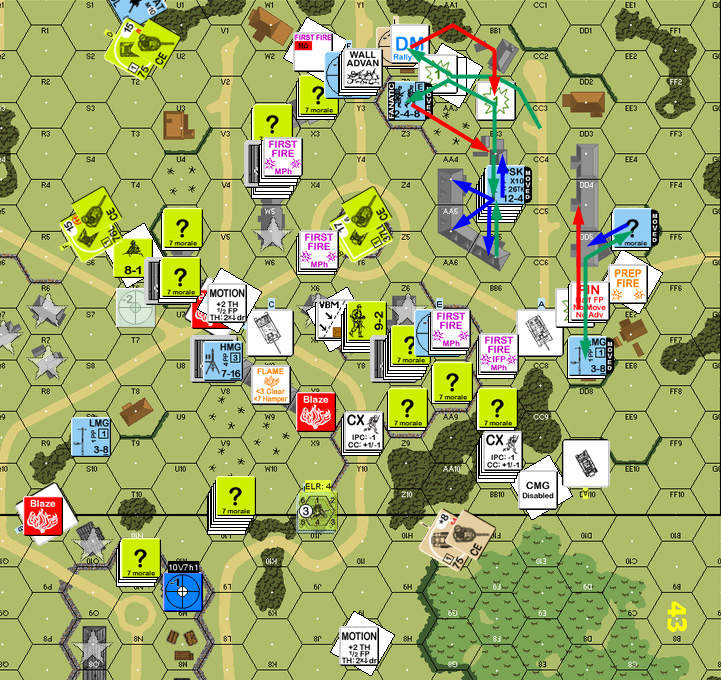
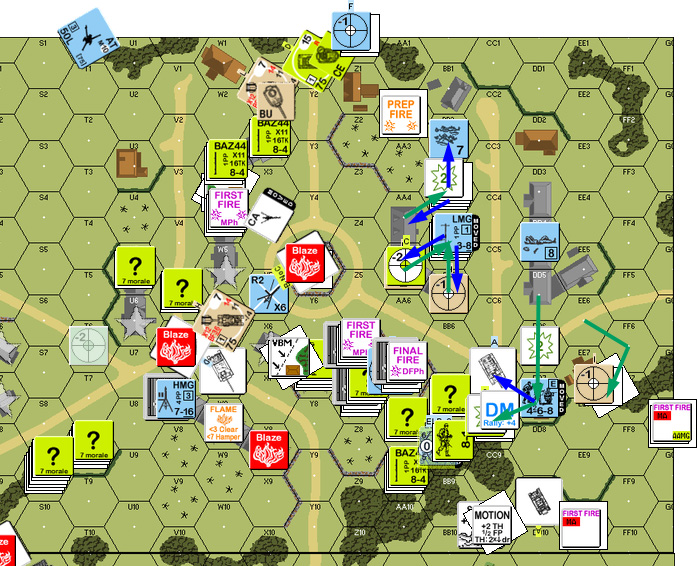
The sticking point was the one stack out front in BB3, and I moved up a couple HS purely to try and get him to fire and strip his ‘?’. Thanks to some actual good rolls from me, the second HS forced him (as opposed to anyone else in LOS) to fire, revealing a HS and Hero, and he still only got a Pin. After that, I got a couple squads adjacent in BB2, where SFF and (on a later move) FPF failed to phase me. I then went for getting a squad up front by going by his location in open ground, and Patch took a couple more FPF shots, with his HS breaking on the first one, and the Hero breaking my squad on the second one.
AFPh was exciting when I rolled a ‘2’ for a MA shot at his command post in W4h1. It was only an Improbable Hit of course, and I missed actually doing anything with a subsequent ‘4’. But it convinced Patch that it was time to leave. Also, I wounded the Hero in BB3. Rout forced my broken unit forward into BB5, but there was nothing to be done, while Patch’s HS surrendered. I advanced a squad and leader into BB3 for CC with the Hero, while the other squad went into AA3 to give some discouragement to a rush towards the brokie. I actually got an Ambush against his Hero, which at 6:1 odds was still a good thing, as I rolled an ’11’ for a kill.
Patch got his remaining malfunctioned weapon (an AAMG) back for rally, but the only effect he got on Prep was to kill the HS I’d taken prisoner last turn. He slowly turned up the pressure during movement, starting with a bit of skulking and some reshuffling in the center, but then ending with a lot of moves advancing both flanks. With minimal troops, and having just entered, I couldn’t even see the vast bulk of it, much less interfere. Especially troublesome was a unit with a captured PSK that moved to the north edge, and advanced into Y2 (I put Acq on Z0 to scare him away from the woods, not really thinking about the wall). Then in AFPh Patch found a trick shot from Y7 to AA3 that was clear, and avoided the wall I was hiding behind, and broke both units in that hex. Meanwhile, two of the flames caused by the earlier Gusts (G6 and V7) went out.
Thankfully, Patch’s desire to maintain concealment meant that no one had fired at the squad that had ended up routing to BB6 on the previous turn, and he self-rallied in my RPh. Even better, the squad and a half in BB3 rallied, with the HS going Fanatic.
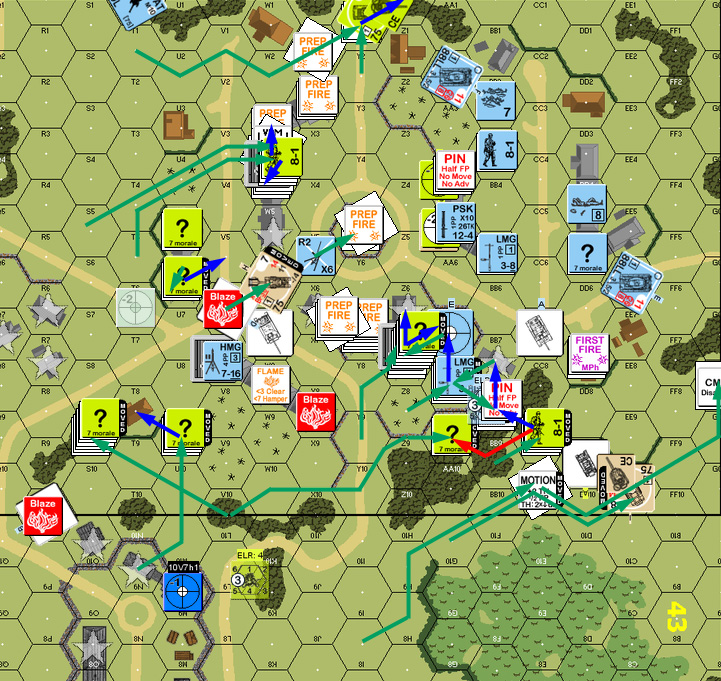
I had a big problem. There was a concealed unit in Y2 just waiting to take a PSK shot at a Tiger II (admittedly 26-26=0 isn’t a great TK, but a turret hit at 26-18=8 would get exciting, and keeping him from a flank shot was already being a problem), and there was a Crocodile a hex behind them. My Prep didn’t do anything, and I sent a HS up to Z1 to force some fire, surviving a 2MC on the way, only to break from a MA shot from the Crocodile once he got there. A second HS got into Z2 with no real trouble.
An MA Gun and a FT on the same tank is just evil.
On the other flank, I sent a squad and leader Dashing across the road into the cluster of wooden buildings Patch hadn’t gotten to yet. If I could hang on there, with support from the Tiger II on that flank, it was probably my best chance to get into a couple stone Locations and pull out a win. But, there were a lot of Americans over there…. The leader Pinned in the street, but the squad made it at least, giving Patch something to think about. It also caused one of his captured MMGs to malfunction.
DFPh lead off with the PSK shot, which hit… the hull and bounced off. That squad also fired at the fanatic HS in Z2, and broke him. The only other fire was a Sherman putting Area Acq on the (unoccupied) center of my line in AA5. I self-broke my leader stranded in DD6, as leaving him in the road for a turn was unlikely to be survivable.
The only thing that happened for rally was that I got my Fanatic HS back. Patch kicked off Prep by proving how much firepower he had lined up by rolling an ’11’ and still getting a PTC. Further fire had no effect, other than activating my Sniper, who Pinned a squad in BB8, diminishing the horde available to go after the squad I had gotten across the road. Patch mostly skulked in the stone buildings of that area, but sent a squad and leader towards my squad, but I broke the squad with defensive fire.
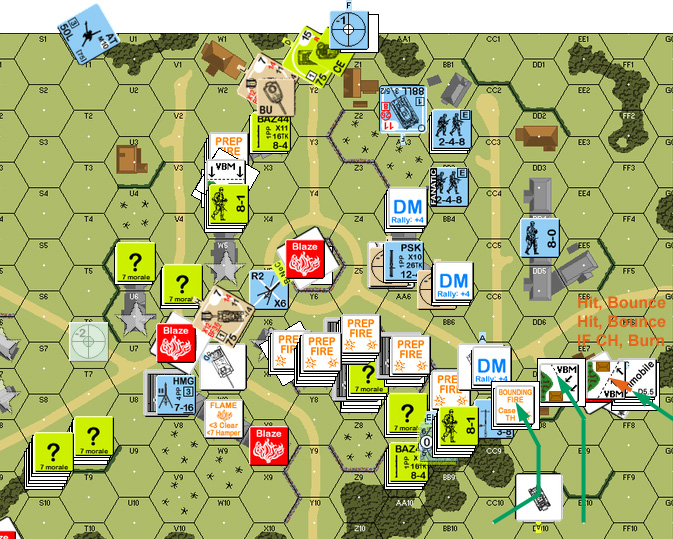
For the most part, Patch continued squeezing forward on both flanks. Truly worrisome was the number of tanks he had available on each flank. He managed to surround my little incursion across the road with infantry to the west, a Sherman to the east and a Churchill to the south, with a Crocodile still moving into position. In DFPh, I took a PSK shot at the Stuart in Y5 and burned it, at the expense of CRing on the Backblast. Patch had considered him a deliberate sacrifice as it meant any Tiger II parking there would have a +3 to fire out. I never considered it a good place to be as it was too exposed, and HD only protects the good armor. And now the HS that Patch had just moved in had the same Hindrance problem.
Nothing came back for either of us in my rally, despite me having two reasonable tries. The Tiger in AA2 had to Prep at Z0 to turn the front armor towards the PSK again, and missed. I had the left-flank Tiger II squeeze its way into the gap between the wood and wooden building where it could see the Churchill and oncoming Crocodile, and Patch’s DI attempt missed. Another squad Dashed across the street into DD7, and made it, despite several shots at them. I then sent the squad from the first turn forward, which surprised Patch, but I figured I had to go forward, and try to take out some of the front line of troops facing me, or I would be reduced to a last-turn charge across the street from building AA5, which I wanted to avoid. The Sherman parked in GG8 managed a hit which broke them, and forced their surrender though.
Patch didn’t have any other effective fire, though his PSK shot at AA2 eliminated the PSK, giving me one less thing to worry about there.
Everything came back in rally, which was a squad for him and a leader and HS for me. Patch opened up with most of his line, putting WP in AA5, breaking and ELRing AA4, pinning BB5, and of course breaking CC7, and my last hope of not committing hari-kari on my last turn.
Patch moved the Sherman on the extreme left flank into the woods (avoiding Bog) to tackle the Tiger at point-blank range from the side. Once again, having way too much else to deal with, I had to sit and take it. The first shot kept ROF and bounced off the turret, the second shot bounced off the hull, and then the IF shot scored a Critical Hit to burn it.
Patch then had the temerity to complain when he attempted to keep going with an ESB roll and Immobilized himself.
The other tanks on that flank moved up, and the Crocodile broke the squad in BB5 with a Bounding FT shot. At that point we ended the game because not only was I not going to have a chance at taking a couple Locations, but Patch was now in a position to take a good chunk of the AA5 building for free.
Postscript:
This is probably the most depressing game of ASL I’ve ever played. From turns two through four, I could not catch a break. I had a certain number of mistakes, but Patch was dicing me at the same time. What really hurts is that a lot of my collapse comes down to getting swarmed by the armor, and that comes down to the Stuarts getting loose in the back, and I had three decent-odds attacks against them that all failed before it came down to that point.
Patch needed to be a bit more aggressive with the free turn he was given, which allowed me to make it seem like a close game again when he didn’t grab the AA5 building. That part was interesting, but still hard to really do anything with, since the available material was so lopsided. Patch had some poor luck for parts of this, though he got a CH just when he needed it, and put the game out of its misery a Player Turn early.

Discussion ¬