
35 Blazin’ Chariots
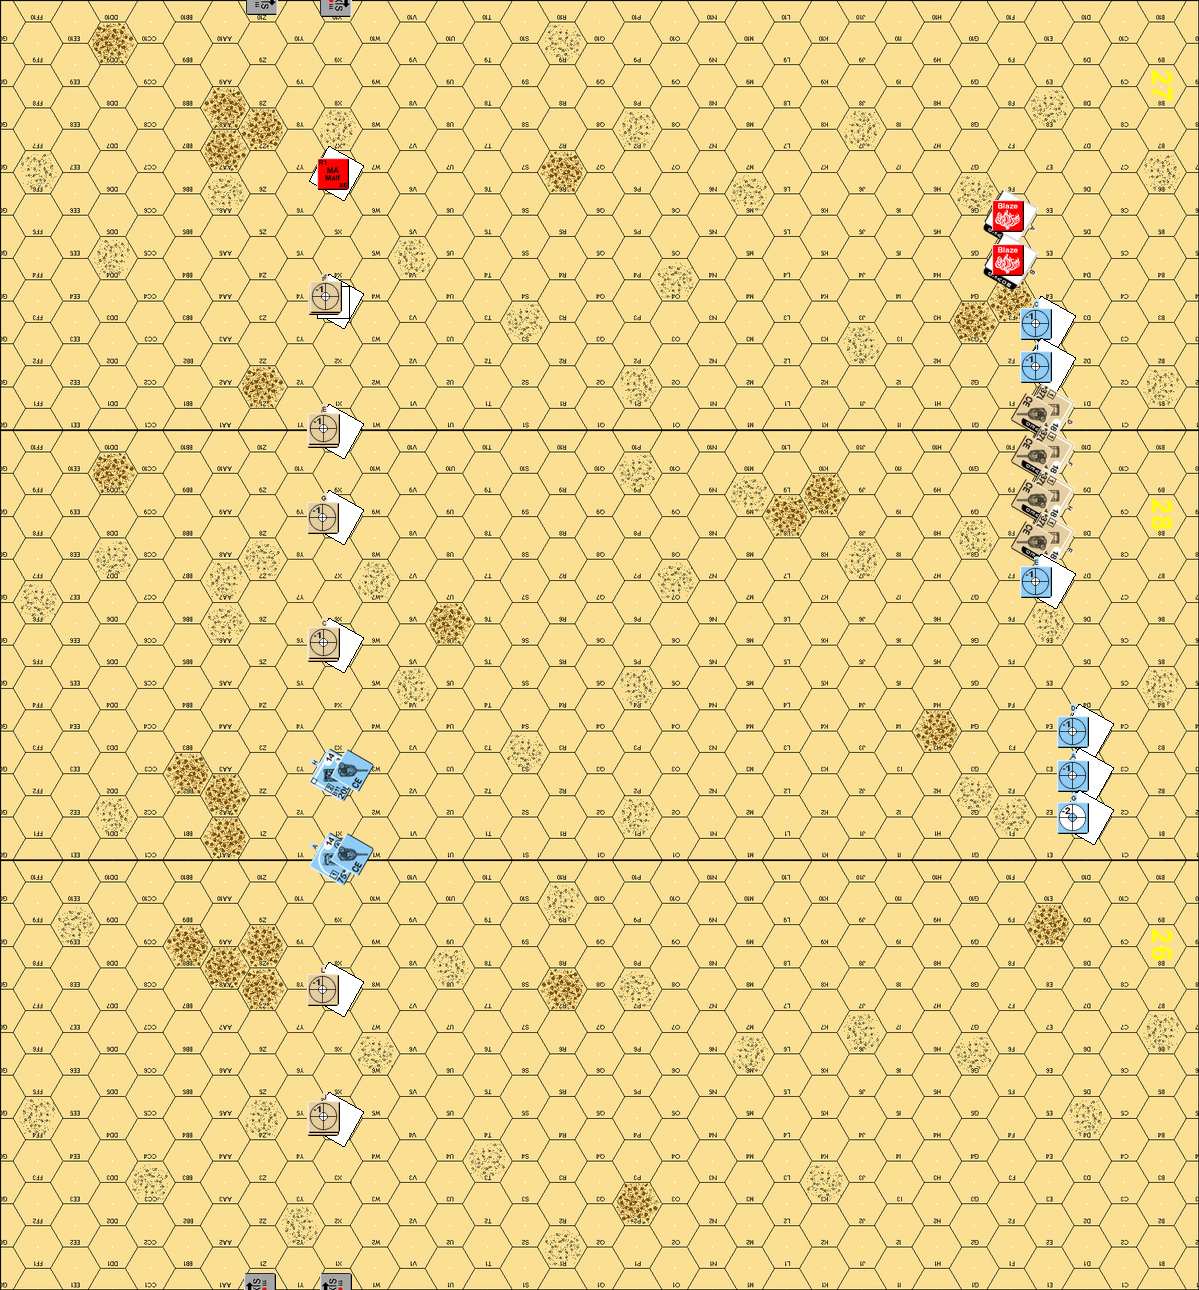
My last Advanced Squad Leader game with Patch finished up very quickly. So quickly, in fact, that I’m not going to bother with the normal detailed maps. There’s not a lot to show anyway. Imagine a featureless 33×30 hex plain, with occasional patches of rough terrain that double movement costs.
Yes, we went to the desert this time. I got West of Alamein way back when, and have always meant to try DTO, but with the number of rules goofs I’ve had with regular ASL, I didn’t want to add Chapter F to my problems. But, this time, we played “Blazin’ Chariots” an all vehicle affair on three desert boards with no overlays. It makes a decent introductory scenario. Now, if only I’d thought things through.
It’s the start of Operation Crusader, and the Brits are attacking with twelve Stuart Is, while the Germans set up with a pair of Panzer IIs, a pair of early Panzer IVs, and five Panzer IIIs, two of which are slightly heavier Pz III Hs (same armor as the Pz IVs). While the Brits enter, and the Germans set up on the board, this is done in secret from each other, and both sides have to spread out their forces.
Patch set up the Germans in a line with about three hexes between each tank, and the various types spread through the line. I put the minimum on the flanks, and half in the center, and mostly put them near the north area where the third set of Stuarts was, so I really had one big mass on the north, and the final three alone in the south.
While I didn’t do any research into the scenario, Patch produced a nice TH/TK aid that figured in all the gun size/length mods. It’s late ’41, so the American-made Stuarts use the Red TH#s, which along with small 37mm gun gives them poorer TH #s even after the ‘LL’ is figured in. Oh, and did I mention that the Brits are attacking to a sun blindness penalty? From somewhere I got the idea that Stuarts had ROF ‘3’ instead of ‘1’ and took quite a while to realize my mistake (I could have sworn I saw a boxed ‘3’…). So the Stuart’s only advantages are needing a lower DVP total to win, numbers (12 to 9), and mobility.
So I parked in a big line abreast and tried shooting it out.
This was also our first game with the new VASL 6.0 module, so we spent some time playing with the new features before getting down to the business of shooting each other. Initial ranges varied from 18 to 20 hexes, where even the more accurate Germans had some trouble getting hits. Just in the initial DFPh, Patch got three hits, one of which burned a Stuart, one bounced off, and one was a Possible Shock (I passed the TC). One tank also got a Critical Hit, rolled another ‘2’ to burn the target, and then rolled a ’12’ to malfunction the gun on the ROF shot. The CMGs also got a couple results on my CE crews, but I passed the resulting MC and PTC. With a +4 moved, and +2 Sun Blindness, my only goal was to not malfunction a gun while getting acquisition.
After the first turn.
Patch’s luck refused to be bad as he immediately repaired his gun on his turn. For prep, he just blazed away, the CMGs causing a couple checks against the CE crews (both passed), and the guns causing five possible shocks (all but one passed), immobilizing one Stuart, and burning another. I got three hits, two of which bounced off, and the other shocked his III H with the 8-1 armor leader (Patch naturally put his armor leaders in the two better PzIIIs).
My Stuart recovered from Shock immediately, while Patch’s flipped over to the UK side. With everyone in position, and acquisition counters out, I decided to keep blazing away (I was still under the delusion that I had better ROF, and was counting on that) with the south force, and the northernmost surviving tank, while moving the remaining five north and around so they could engage without suffering sun blindness. I only managed a single hit, which glanced off.
And then things got confusing for a bit in the logs. Patch picked off the lead tank as it moved, and just about everyone else ended up moving through the hex he died in. The problem was that the log malfunctioned, and halted the counters in that hex, so Patch at first though I had tried to park about four tanks in one hex. When all was said and done, Patch had killed two of the Stuarts in motion, and leaving me with a very abbreviated line of three tanks to the north, one of which he stunned in DFPh. He also burned two of the tanks that remained in the south, and immobilized the remaining one, breaking the crew as it bailed out.
The UK PzIII recovered for Patch’s turn, but couldn’t do more than Immobilize two of the four remaining active Stuarts with three of his. The remaining six tanks went into motion to get a better position on the remnants of my force. I tried firing on one as it started, but missed, and didn’t do any better in DFPh.
In my turn, with only one tank kill to go for the win, I figured firing was better than getting shot as I started. I finally had the low ROF of the Stuarts pointed out as I tried to claim it on a illegal shot. It should say something that this was only my second shot of the game with a ‘2’ or ‘3’ colored dr (Patch had missed one previous bad ROF shot, and I had had about two legal ones…). I finally got a kill on a Pz III G to keep it from being a shutout, got multiple hits on a Pz II, only for both shots to bounce off (both ’11’s). In desperation, I finally went for an IF shot with my last tank, and got a CH to burn a Pz IV.
And that was the end of the fun as Patch killed a Stuart on his second shot to get the needed 56 DVP.
Afterword:
Well, about a turn in, I had a much better idea of what I should have been doing. I think the grouping the tanks together as I did was generally fine, but I should have stayed in motion the first turn, and looked for positions to stop where at the least I didn’t have Sun Blindness, and the Germans might have had to deal with it. Of course, the Stuarts aren’t that much faster than the German tanks, and I’m not sure where that would end.
Discussion ¬