
AP52 Into Vienna Woods
Patch came over yesterday for some ASL goodness. A couple scenario suggestions fell through before we settled on “Into Vienna Woods” from Action Pack 5. As usual, I took the defense, since it allowed me to set up before Patch arrived, though Patch had been mentally reviewing the possibilities on the drive down.
Though it’s not all defense. The Germans enter eleven SS squads onto half of board 58 in this April ’45 scenario, and need to take the top of the hill from five and a half defending Russian 527 squads. At the end of turn 3, the Russians get ten elite 458 squads and a pair of SUs to retake the hill, and the Germans need to hold all six level three hexes (which all come with trench counters) at the end of turn 6 to win.
Board 58 is unusual, with no walls or hedges around, nor buildings, and a good number of orchards scattered about. Pine woods are in effect, which makes woods slightly easier to move through, and a taller obstacle to LOS, as well as alpine hills, which cuts off same level LOS. Combined with the orchards cutting of different-level LOS, and you can’t see much in this one.
I set up a shell defense that I hoped would be able to fall back to the hilltop for the last stand (with my lone leader at the top of the hill, hoping broken units could get at him). I had a suspicion that Patch would work his way around the south flank of the hill to surround me, and cut off the reinforcements, and so had a couple positions there to try and hold that down. For some reason, I developed a blind spot to the north, and only convinced myself to put something near the gully approach as I finalized my setup. However, I didn’t really check what I was doing, and ended up tying my north flank with a Dummy.
Patch arrived, and soon sorted out his assault. He went for a pincer, with the bulk of his forces in the south, a sizable force in the north, and just a couple units in the center. His entry went well enough, since I couldn’t see much, and he managed to break my squad in AA5, who was forced to rout away from the hill. As it turned out, I had the easiest time with LOS to the north, which ironically has some of the most jumbled terrain.
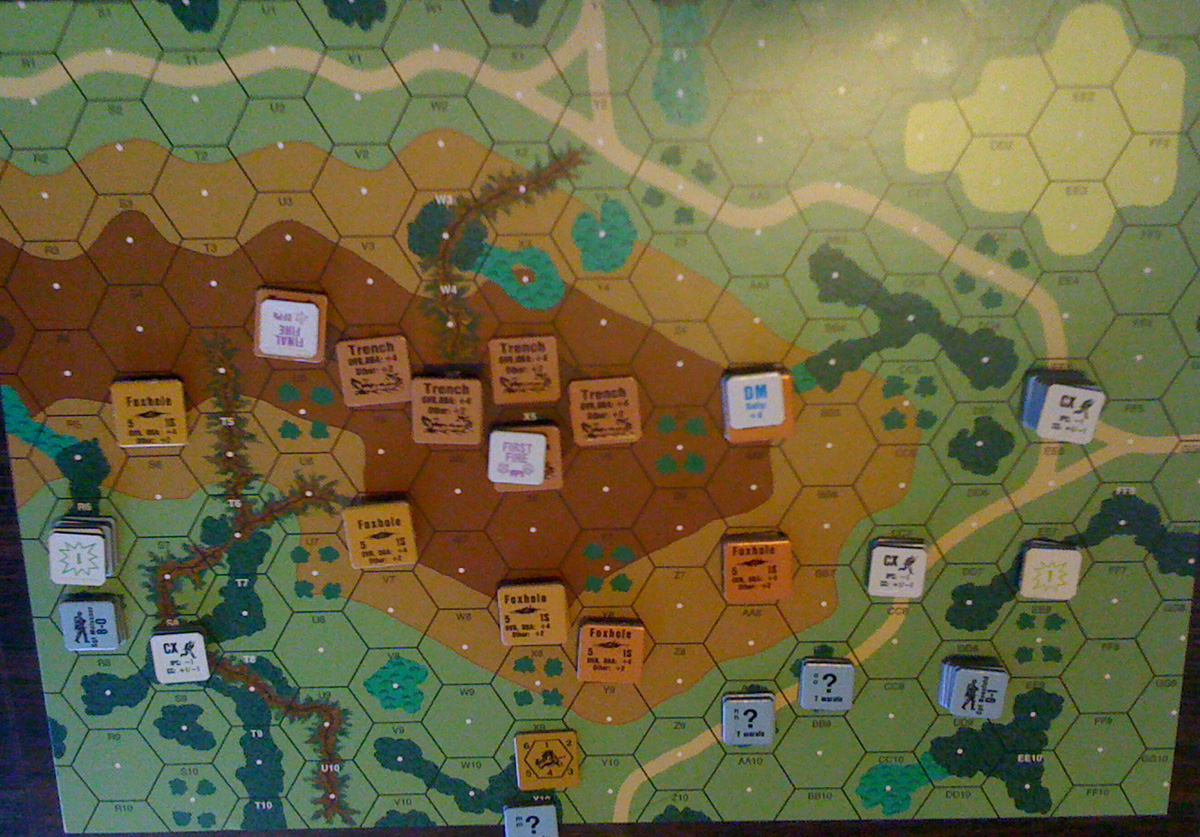
German Turn 1.
His second turn did not go very well for him. I had managed to pull a squad out of the center, and plug it into AA5, while my HS slipped up the slope, and my central LMGs found good targets. I rolled average, which was generally good enough for a NMC or 1MC, and Patch rolled high, so an amazing amount of his ML8 force broke, which delayed the assault. He got into CC in AA5, which remained tied up in Melee for about three Player Turns.
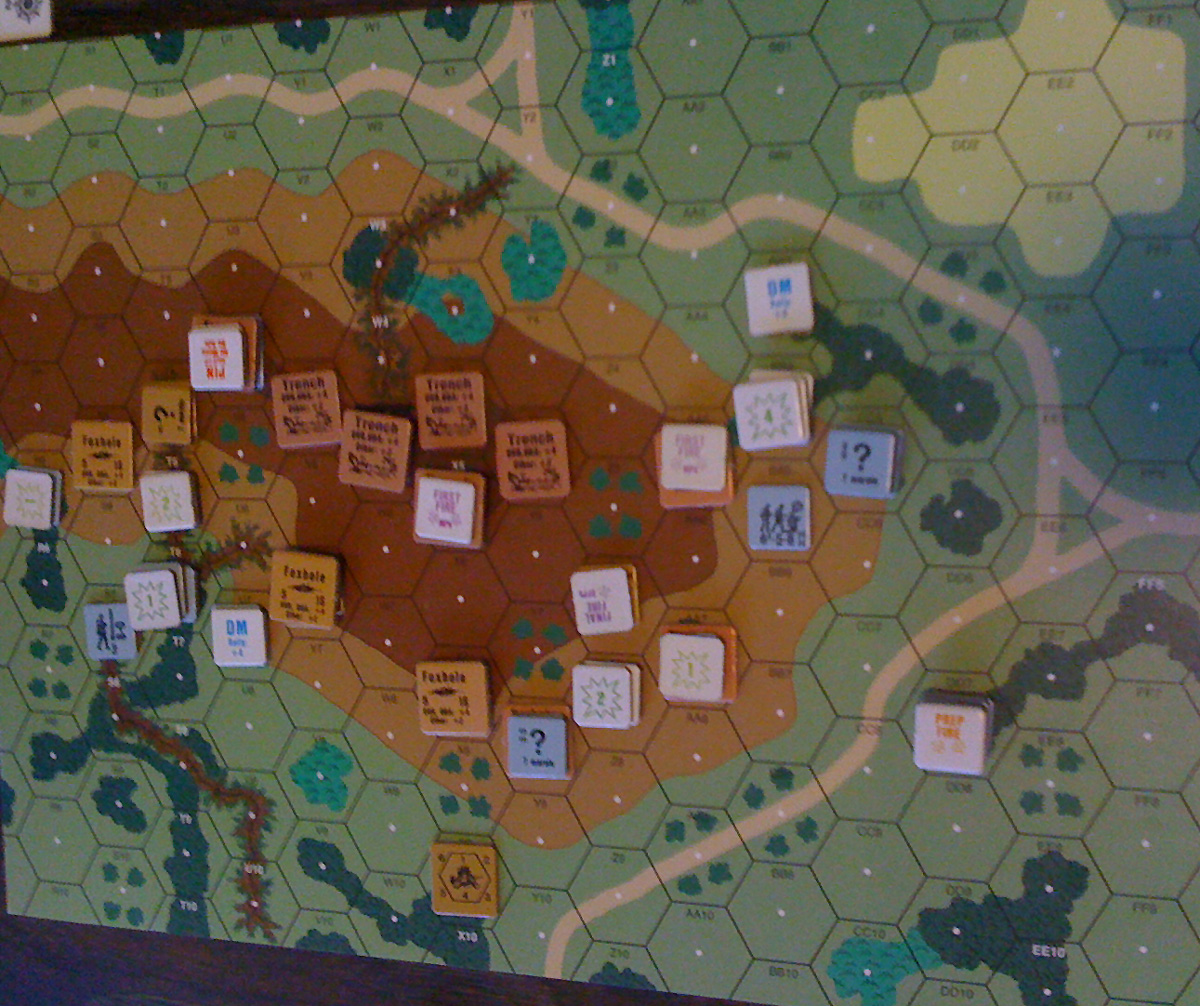
German Turn 2.
Still, for my turn 2, I only had two Good Order squads left, and he managed to break one as it tried to get into the trench system. The final defense on turn 3 saw my final stack desperately holding off the Germans as they closed in from both sides. My reinforcements came in just in time to see the trenches under attack from both sides. I roughly split my forces into two groups, north and south, and came on, with some assist from Armored Assault. Or tried to; Patch had found a very nice site for a LMG firelane that held up the advance.
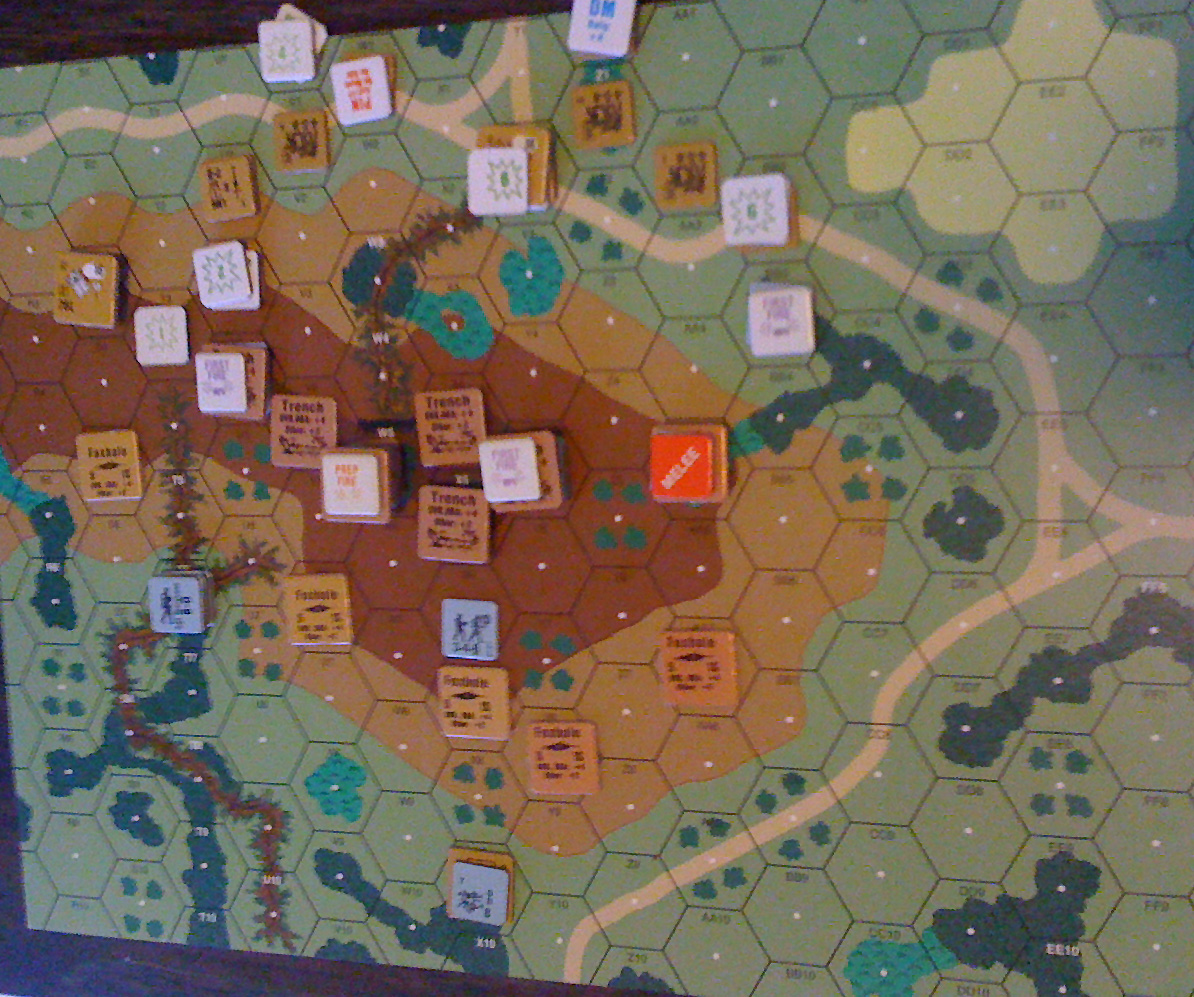
Russian Turn 3. Counteroffensive.
The Russian AFVs in the scenario are an odd pair: a SU-76M and a SU-85 which are both outmoded by 1945. The SU-85 only has limited HE ammo, and proved not to have any on board when I tried it, and the only alternative is 2FP attacks with the AP ammo.
Well, not the only alternative, I ended up smoking two hilltop hexes with it.
The 76M is an open-top infantry support vehicle, and Patch managed to get rid of it with a pair of stun results. But first, it drove up the hill for the armored assault, and scored a critical hit against his squad holding the end of the trench line, allowing me to retake it. I had a moment of thinking that I had just saved the leader and three squads still holed up in the center, the last of which had just broke. But Patch had encircled them and they surrendered instead of routing. Patch declared No Quarter rather than be saddled with that many prisoners.
The rest of the game involved a desperate struggle for the north end of the hill, as I tried to keep Patch from moving too much up there, while I also tried to shuttle more troops in there as backups. He managed to get some troops back down the hill as well, and blew up the SU-85 with a panzerfaust shot (Patch felt he probably sent too much after it, and he’s probably right, the smoke it was firing was a problem, but he really needed to be concentrating on the goal).
He naturally got in for CC on his final turn, but was unable to do more than CR a squad (out of two). I moved in my 9-1 and a fresh squad, but did not attack with them to keep them concealed. This forced Patch to do two attacks, one against the concealed units (he wounded the leader), and the other against the rest, which failed. I didn’t get anything. But with the Melee still raging, I held the hex control that I had regained on turn 4, and won a very tight game.
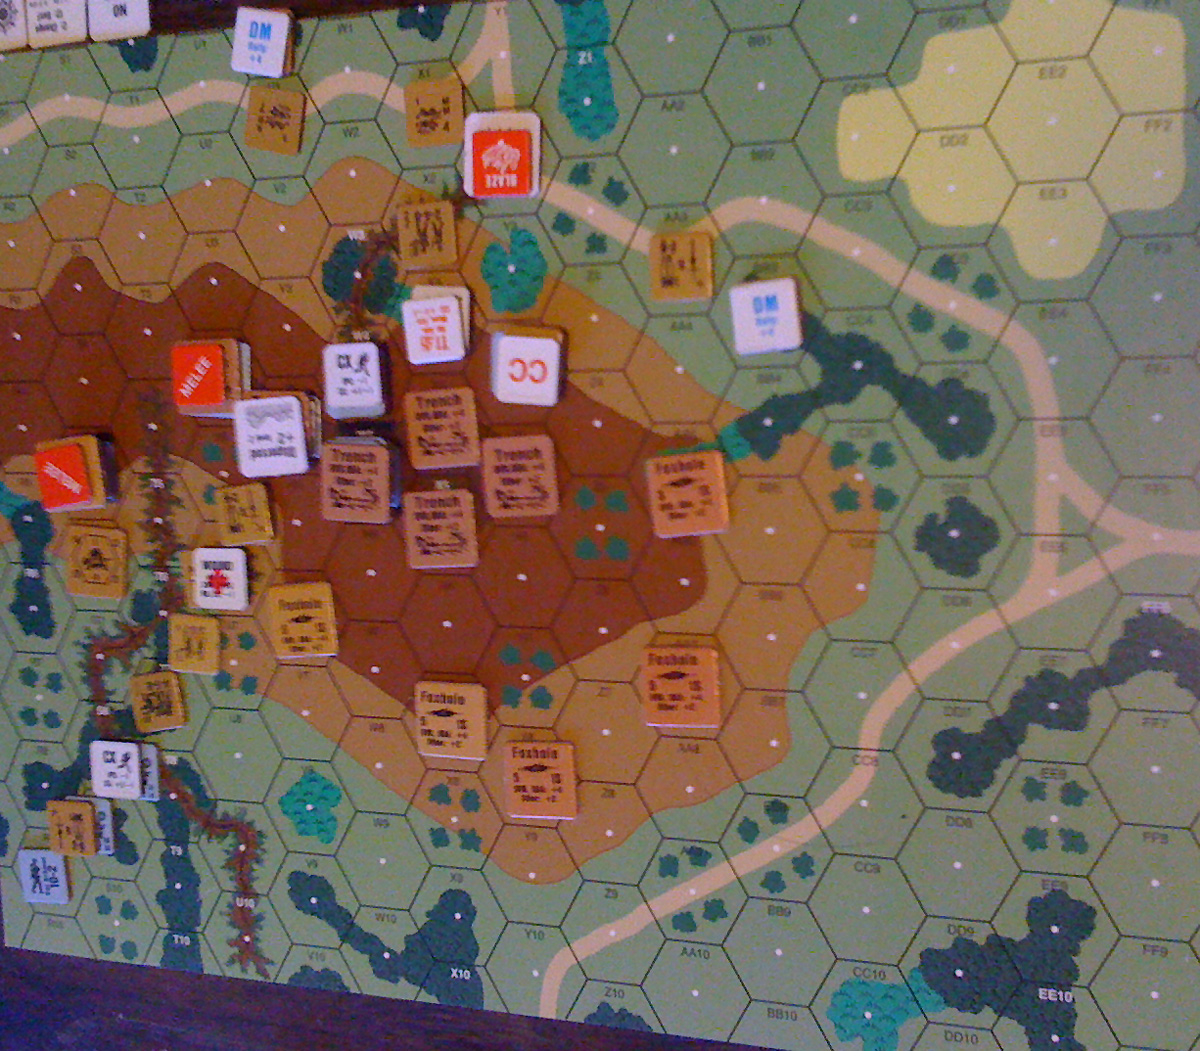
End of the game. The counters trailing off to the bottom-right are the final contents of U4.
Crazy game!!
I remember charging the hill and trying to clear before the Russians reinforce.
Was tough enough keeping them off the hill…
Any potential for Human Wave up the hill with Vehicle support?
Great job!!
Good question. Probably depends on how the top of the hill is going when the relief enters. I more go for things like armored assault and forget that HW exists. 😛