6 Red Packets
Continuing our tour through Beyond Valor scenarios, Patch and I picked up “Red Packets” in February 2012. It’s effectively the original introduction to vehicles in ASL, and has a good reputation as a fun, fast-moving scenario. Better yet, it’s a meeting engagement, which is a scenario type Patch and I always enjoy.
Set on the opening day of Barbarossa, a German recon group stumbles upon a Russian recon and AA section moving to set up a defensive line. The Germans (me, in this case) enter the west side of board 22 with a Pz IIIF, PSW 231, and SdKfz 251/10 (37mm AT gun) with a HS with LMG and leader on board. The Germans also get a 9-1 AL, which I put in the obvious Pz III. The Russians enter next on the east side with a motorcycle platoon, a IAG-10-AA, and five (two platoons) of BA-8s. They’ve got numbers, bigger guns, but, even less armor, and the BA-8s are radioless, reducing tactical flexibility. Patch needed to either get 18 EVP off my end of the board, or kill all three of my vehicles.
I was having a really off night as we started, mixing up east and west, forgetting that the Germans only get a half move as they enter…. It was bad. I stuck mostly to the northern route, trying to secure that bridge before Patch got there. The south bridge was entirely out of range, and the jumble of wooden buildings down there promised a hide-and-seek fight no matter who got there first.
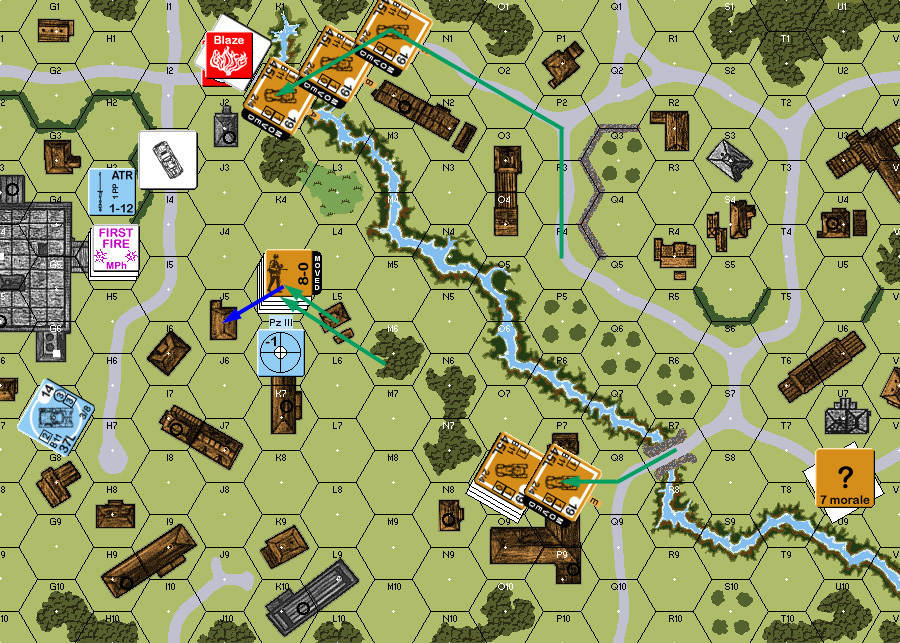
Patch drove his entire motorcycle platoon over the south bridge, unloading in O8. He backed them up with the understrength BA-8 platoon, while the other parked in the center with the lead vehicle parked behind a wall to take a pot shot at my PSW. …or so we thought. When Patch actually fired, we were both surprised to find the LOS blocked by O3. Meanwhile, the IAG detoured to the northern road, and parked to give him a shot down that road if I continued forward.
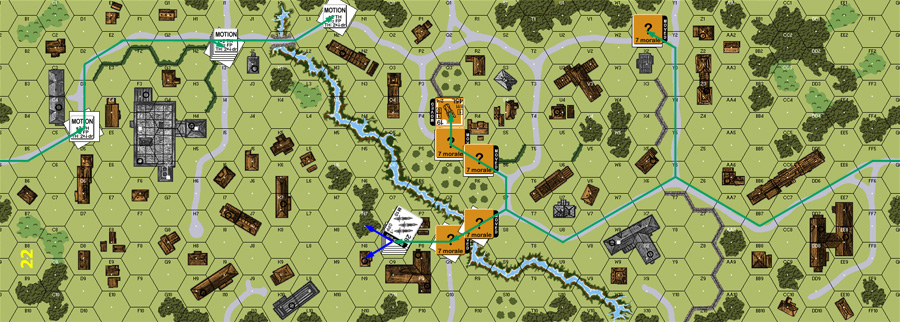
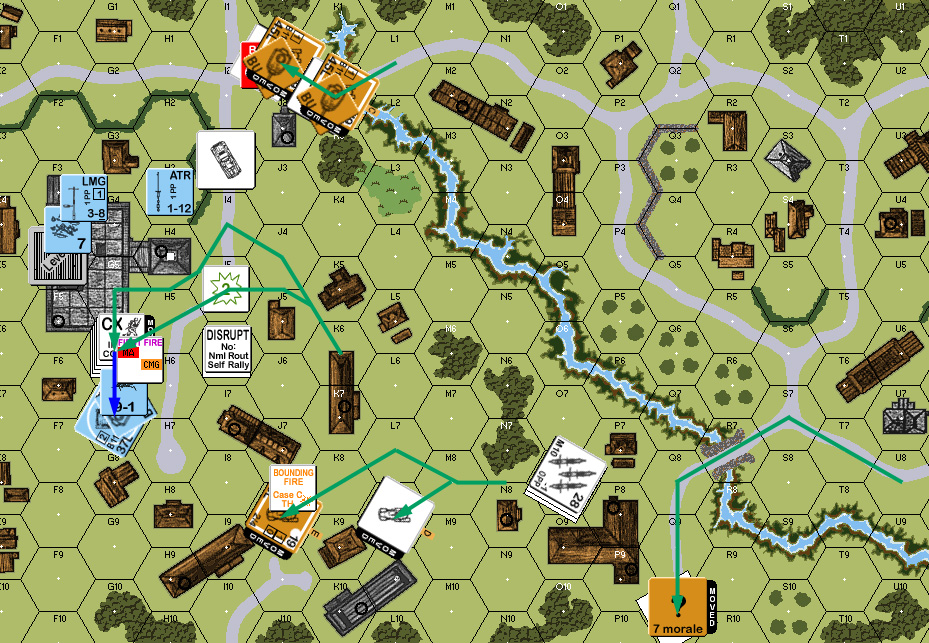
Opening moves, Turn 1.
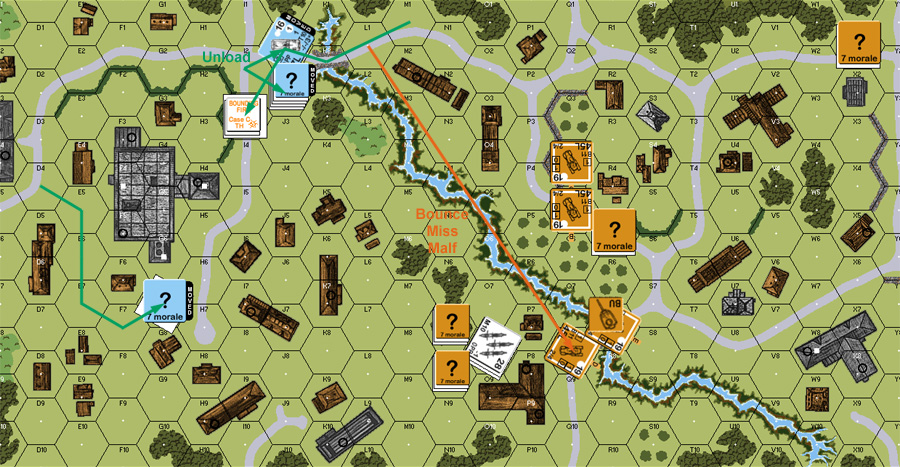
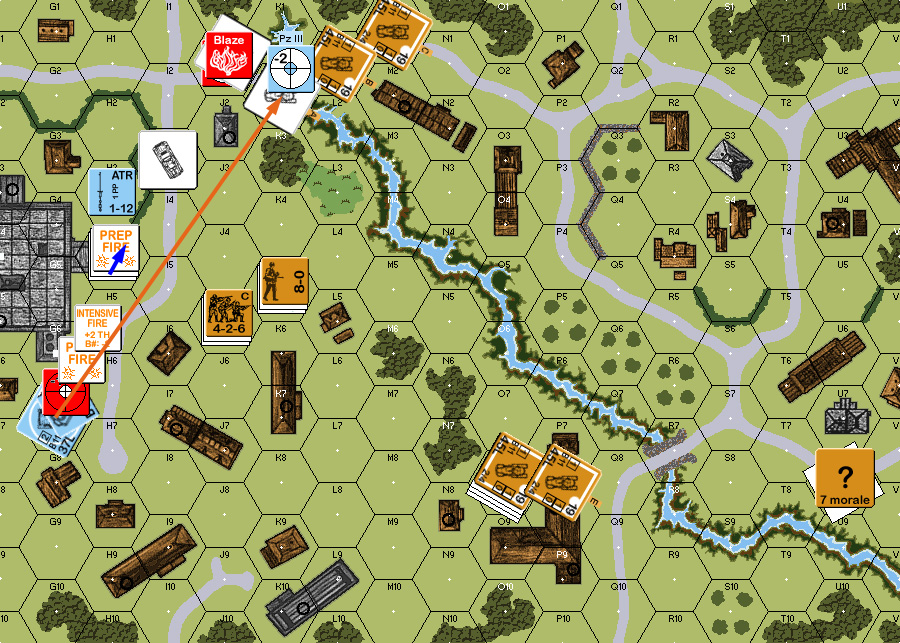
For my second turn, my PSW hit the brakes, and threw it into reverse for a hex. This put it solidly out of LOS of all the eastern forces, but gave it a nice LOS to his AC in Q8. The odds to hit weren’t bad, but with only a 20mm gun, my final TK# was a 4. I managed a hit and a miss, keeping rate before malfunctioning the gun on the third shot. Since he had plenty of movement left, he pulled back to I3, where he could train the MG on the buildings the infantry would soon be advancing into.
The 251 stopped, dropped off the infantry, which moved into J2, and then the halftrack moved up to cover the approach to the northern bridge. (The leader took the ATR the HT came with, so I had either a 6FP no mod stack, or a 4FP -1 stack.) Finally, the Pz III swung south and found a spot where it could be seen by just about everyone else, and it could keep the Russians from just trying to slip by.
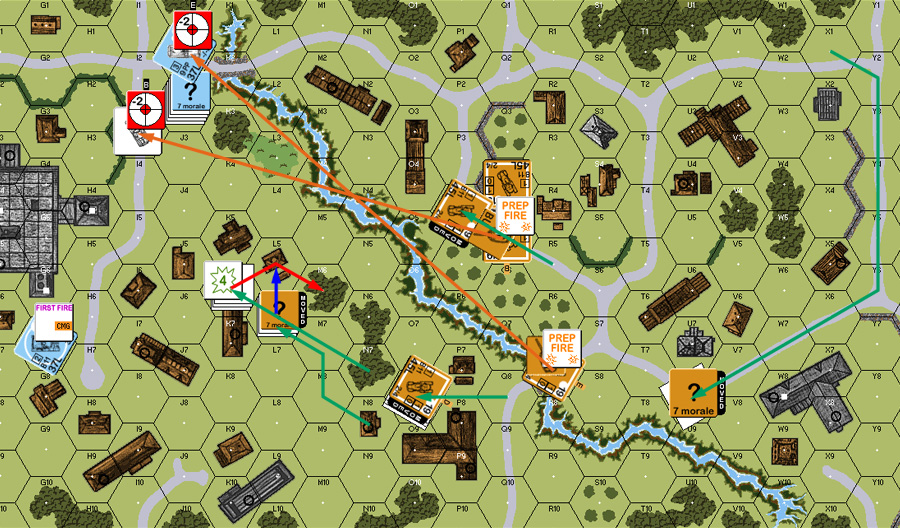
Patch showed that my new position was more exposed than I had thought during DFPh. Two of the center BA platoon were able to fire on the SPW, and with some hot dice, nearly connected despite high modifiers. (The ‘2’ on the 8 +8 TH shot was especially exciting. Thankfully the subsequent dr was a ‘6’ for a miss.)
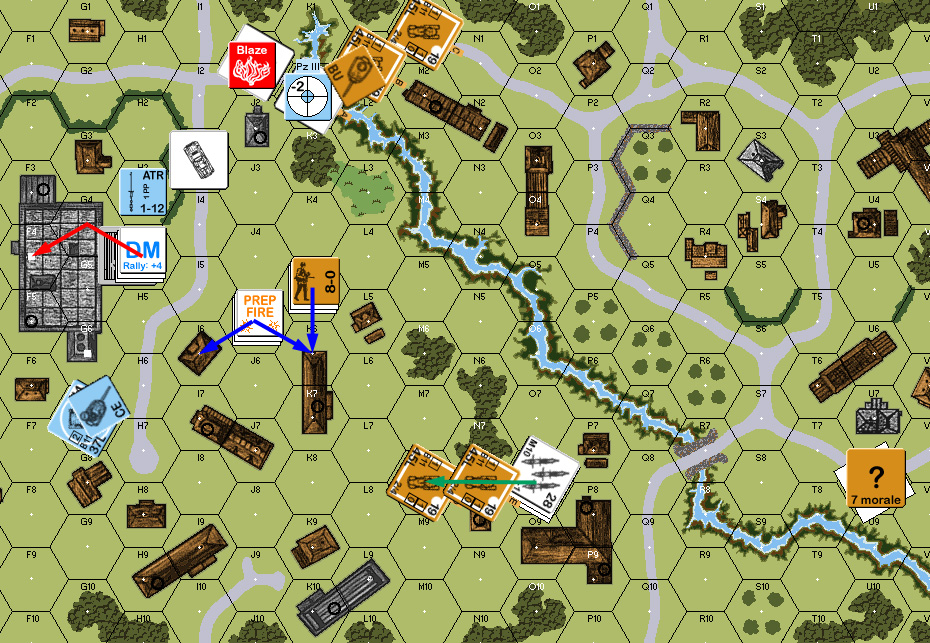
I didn’t manage to repair the SPW’s gun on Patch’s turn, but it didn’t matter, as he killed it on the second shot of the turn. His first shot was a try at the 251/10 from R8, but I had actually chosen that spot well, and he couldn’t hit through the +4 hindrance. Patch, for once, missed the obvious when he sent a squad and leader into LOS of the Pz III (sure, it squeezed between a couple buildings, but it was a pretty easy LOS to spot, and actually one of the reasons I parked in that particular hex). The leader survived the 1MC my BMG generated, but the squad ELRed. The remaining two squads proceeded more cautiously, staying out of LOS of everyone.
Patch wasn’t able to rally his freshly-minted conscripts on my turn. My plan was to pull back for something of a last stand in and around building F3. The HS+leader would pick off anything that came close, and support the Pz III. The 251/10 would continue to protect the north flank, but do it from around G2, behind the hedge where he could only be seen from the shooting gallery of the road over the north bridge.
That plan came apart during movement. The HS made it across the road fine, but Patch got a ‘2’ on the residual to kill the leader when he followed along. Then Patch just managed a hit on the 251/10 as it started. That kind of took the wind out my chances, but I certainly wanted to see if I could get the Pz III into action.
Naturally, Patch did get his squad back for his turn. The southern platoon was separated, so he could only get one of the BA-8s there to move, but it was the rear one, so he was able to re-form the platoon for next turn. The other platoon moved over the northern bridge and halted there, while the infantry moved up to K3. I was so focused on that, that I didn’t really look at the line between the lead BA-8 and the Pz III. Patch helpfully pointed it out in his AFPh.
I had kind of been thinking of a mad charge at his infantry. Use the Pz III for vehicle freeze sleaze, and then charge the HS over and hope to get really lucky. Of course, Patch just separated his infantry into two stacks, keeping that from even being an insane plan.
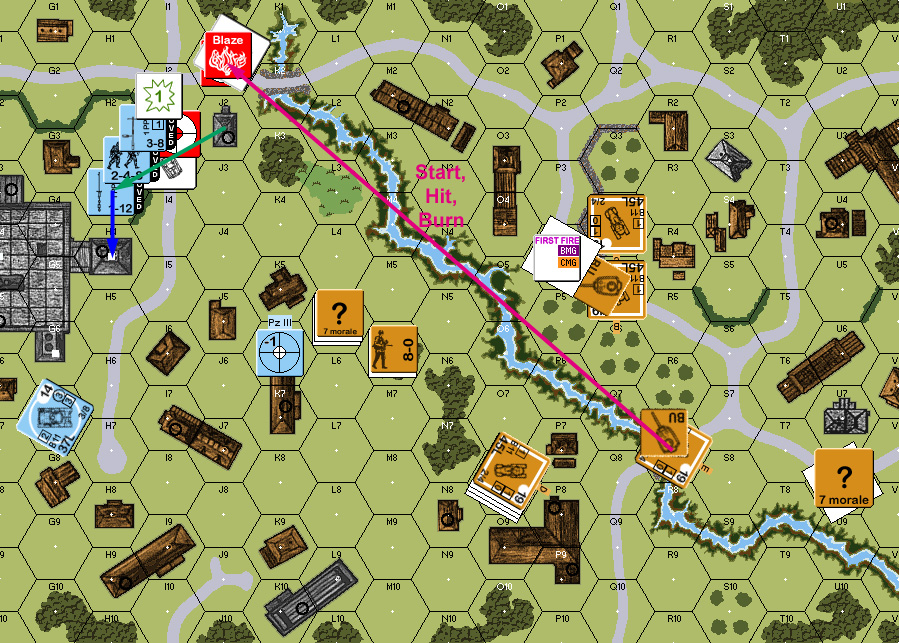
With the revelation that his platoon and my Pz III could see each other, I had a new plan anyway. I fired on the lead BA-8, and killed it on the IF shot. Now, Patch had to use platoon movement through a bridge with a wreck on it, and exit into the hex with my burning wreck. Even at armored car speeds, that would slow him down a bunch. Meanwhile, the other platoon was having a slog with non-tracked off-road rates. I had potentially bought myself some time.
Patch commented, “Man, you have two units, and I can’t find a nice way to break you.” …and then he broke my HS on his only prep fire attack. The southern platoon continued grinding it’s way forward, expending 18 MP for two hexes (including Start and Stop MPs). Patch then spent a little time calculating the MP expenditures to go over the north bridge (5 MP for K1 and then 4 for J1)… and proceeded to the DFPh without moving.
On the other hand, he did advance a squad into I6, while piling the rest of the infantry into K6.
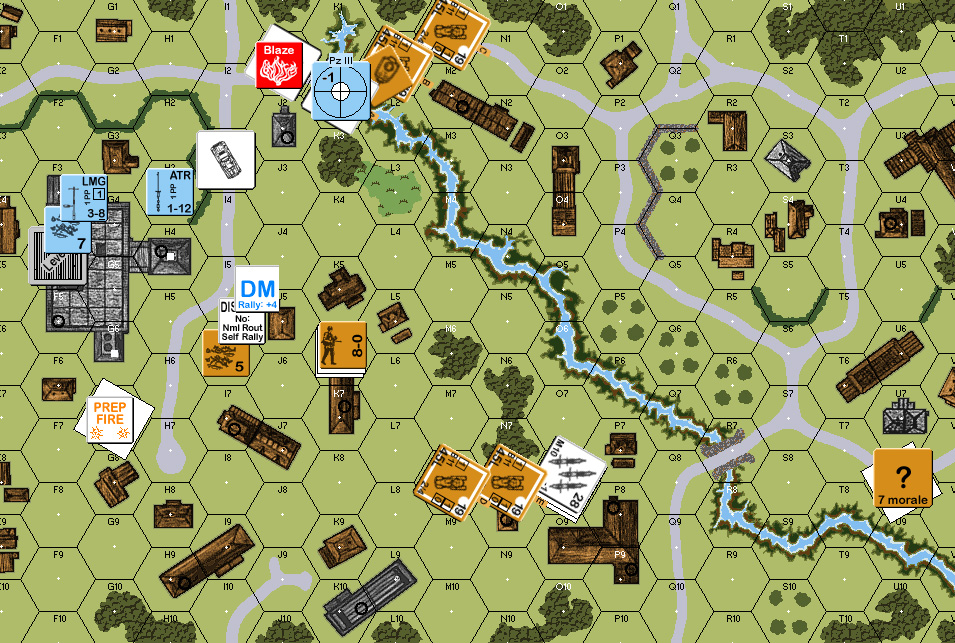
On my turn, my DM HS naturally failed to self-rally, leaving me only one unit to play with, the Pz III. I figured if I stayed where I was was, just about everything would come into LOS next turn, leaving me seriously overmatched. I wanted to go after the southern platoon, but couldn’t find a way around the buildings so I wasn’t attacking him head-on.
I finally decided that I had time (from a Soviet exit perspective), and stayed put. I fired the CMG on I6 and got a NMC. The conscript squad rolled… HoB. And then rolled a Surrender. There being no one around to take it, they Disrupted, which was more than good enough for me. I then put some area fire onto the bridge to get Acq there. (Should have put it in J8 or L8, the southern platoon could come into LOS there, and with red TH#s, the shorter distance was a bigger threat).
Patch decided it was ‘go’ time in his turn, and pushed the southern platoon forward. I figured L8 was in my LOS, whipped the turret around and fired on the lead BA-10, and revealed the 9-1 AL to gain a hit and kill. The remaining AC continued into J8 and stopped. I… decided I really didn’t like B9/X11 and declined the IF shot, while Patch narrowly missed with his BFF.
He then pushed the other platoon forward a couple hexes, and sent in the infantry to swarm the Pz III. I tried a CMG shot at the first squad, but rolled high and couldn’t do more than put down resid that forced the squad and leader following to go CX to go around. I should have rotated the tank to take a shot at H5, but I wasn’t expecting him to make it to G6, which only allowed a 6FP +6 Final Fire shot which I declined. He also finally moved the AA truck forward, and tried a sneaky shot from Q10 at my tank; thankfully, the LOS just clipped O9.
Patch only got one squad (and the leader) in for CC with the tank, and missed his roll. Thanks to the high CMG factor, I was able to kill them in CC.
I got my HS back on a ‘3’ for my turn. Technically, I was in better shape than last turn. I had two units again, and Patch was down a BA-10, two squads and a leader. However, he now had two more BA-10s with LOS on me, and the closer one already had Acq.
I figured sitting and dukeing it out would end poorly, so I started with a BFF shot at J8. Patch declared Gun Duel (which he won, since I needed to swing the turret back), and got a ‘2’ to hit, followed by a ‘2’ TK. Game Over
Postscript:
I think things went fairly well, considering. Patch certainly got some good luck when he needed it. I got some good luck too. I haven’t done that much with armor yet, so I figured it would go poorly, especially with how fragile the German force is. Once past the initial turn, I think I made some good choices, and really make Patch work to get a win. At any rate, it’s a fun, highly mobile, fast playing scenario, that’s definitely worth picking up again.

Discussion ¬