
4 En Avant Les Grelus
After our ‘current SFB‘ scenario, Mark and I returned to Great War Commander, with scenario 4. This is our second visit to 1915, with action during Vimy Ridge. The Germans start off in trenches with one pillbox and some wire on board 5. The French start with only modest advantage in numbers but do have artillery, and the special rules can cause for some German units to be suppressed and the fortifications reduced, and then the French get three artillery attacks right before play begins. The surrender limits expect a lot of losses, especially for the French, and both sides get reinforcements. Time starts at 0, and sudden death doesn’t get checked until 10, so it’s not a short fight.
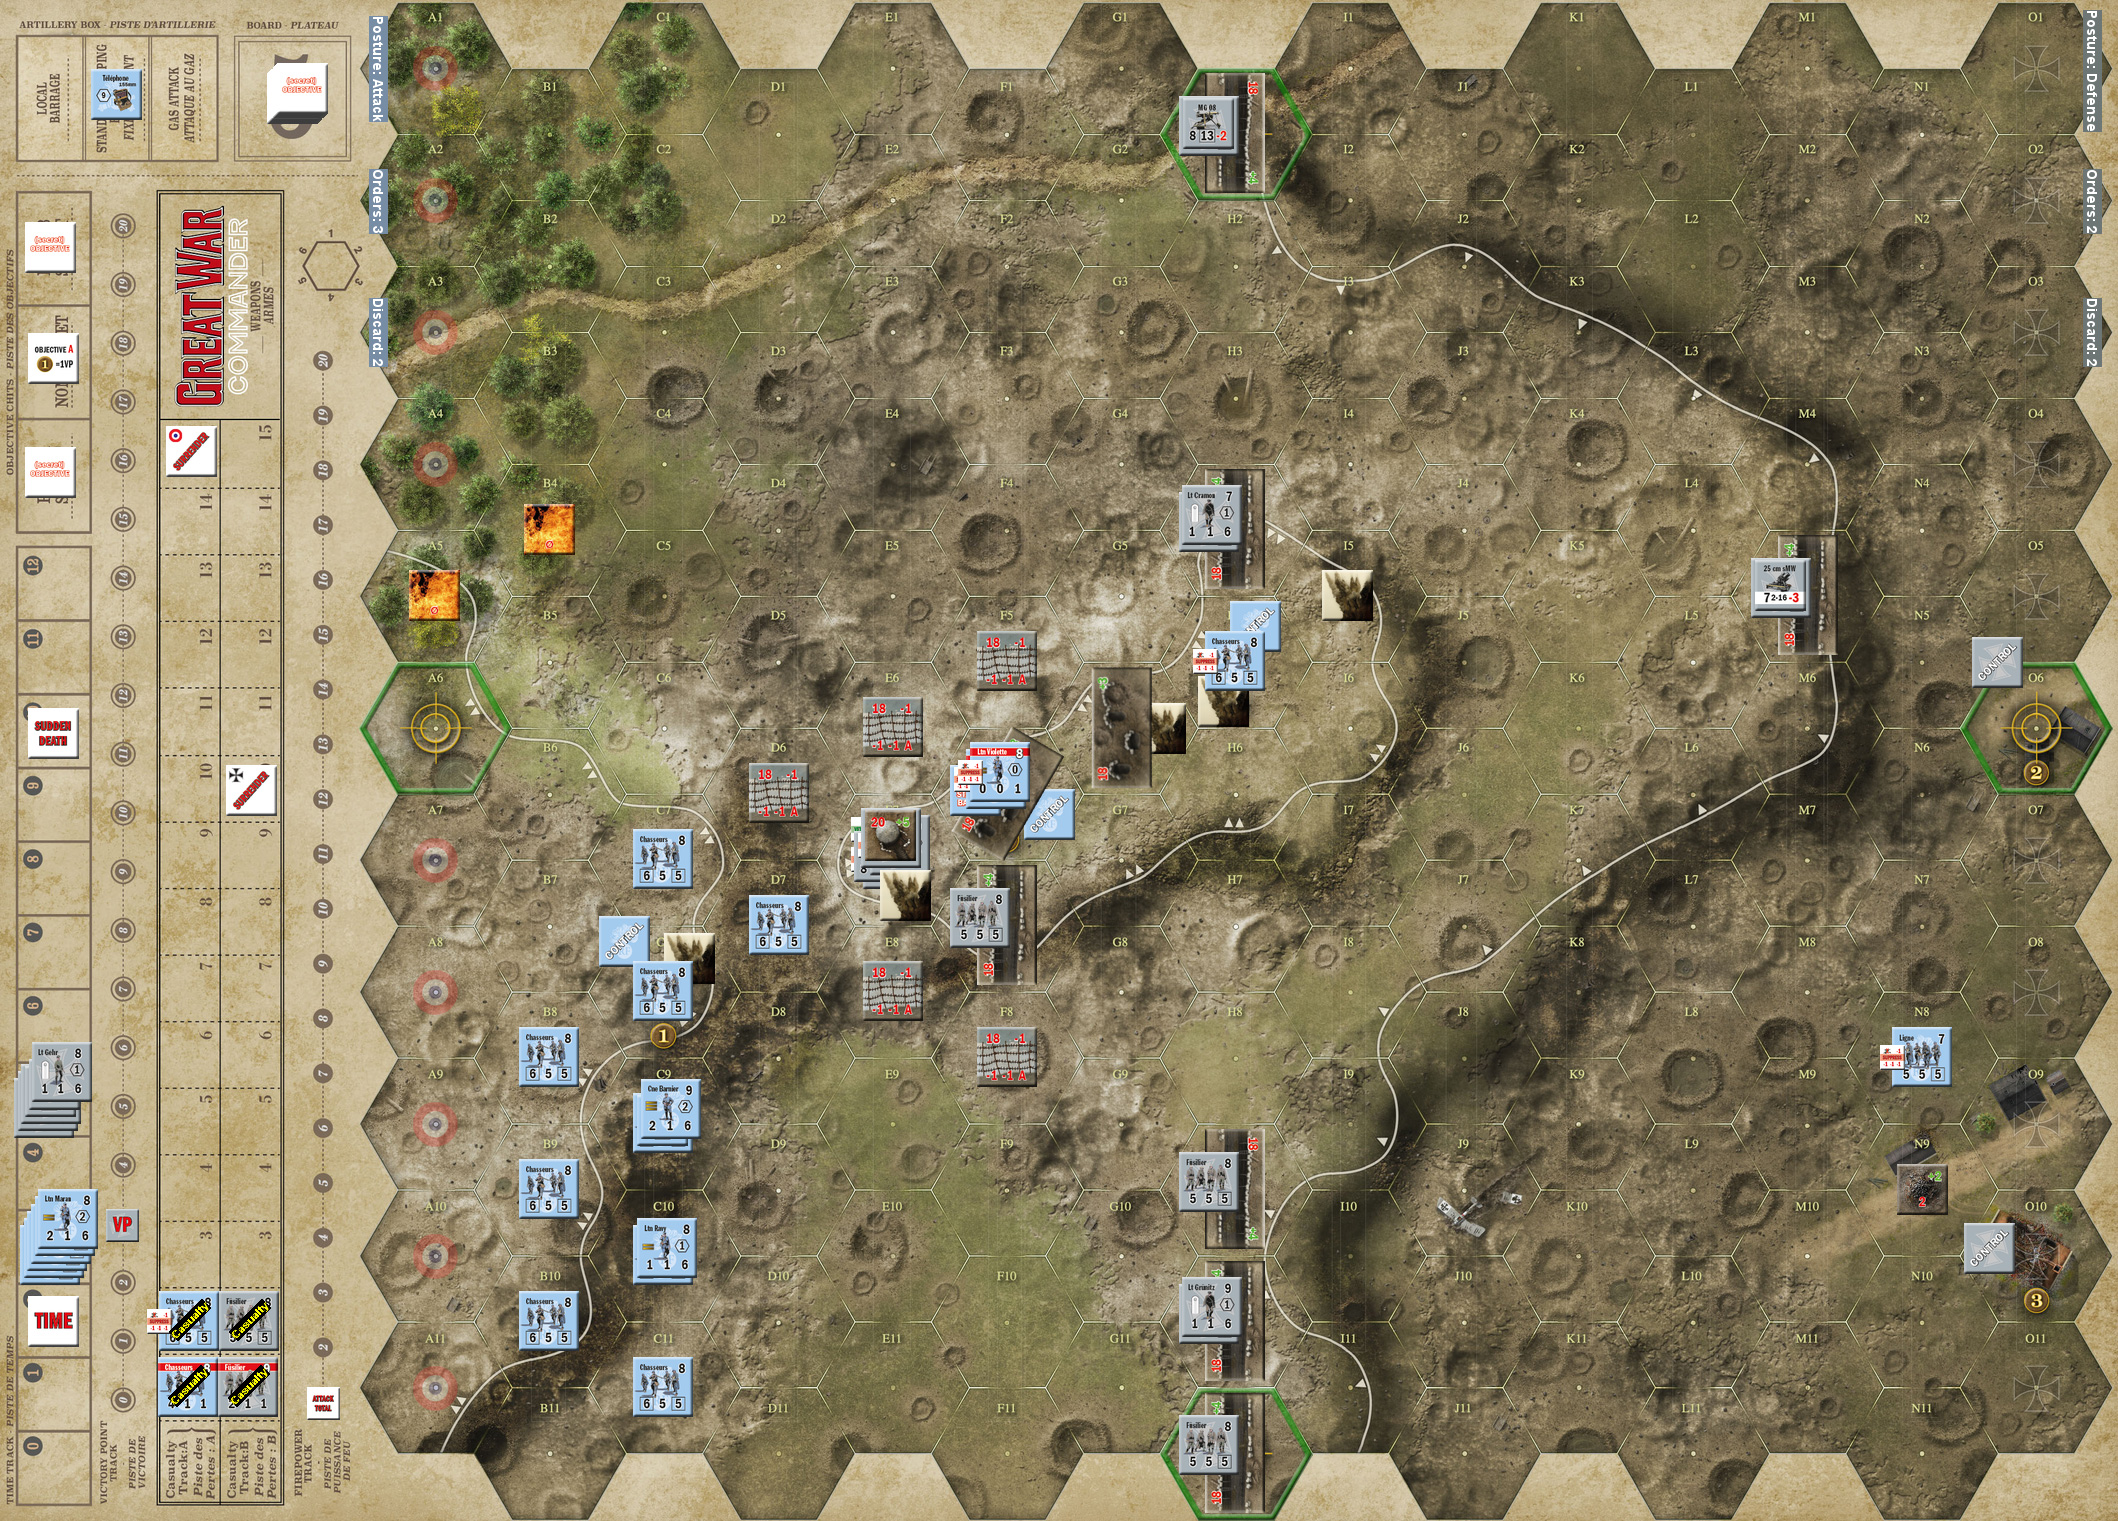
Mark had the Germans and set up a nicely protected hard point on the center ridge, with a MG and his best leader at the ‘point’ (with two objectives behind it), while the other MG was at the top edge, a group at the bottom edge, and his heavy mortar in the back, where it might support the top or bottom. The initial SSR did nothing, but the first barrage broke a platoon and reduced a trench to foxholes in F6. Initial objective was Objective 1 (C8) being worth a point.
I started with a Move which came under Fire, which broke almost everyone who moved, generally after the first hex. Events rallied one, killed a ligne platoon that wasn’t even moving, who then returned to the board in the German backfield from another event, and a sniper killed a broken chasseurs. The remaining four platoons went on the Offensive, which came under Fire from the top MG, which immediately jammed, letting me get onto the wire in front of the ridge, after a time trigger. Recover then rallied everyone.
Mark had to discard the remains of his hand, and I put a standing barrage on the ridge, hitting one of my own platoons, forcing me to give up Initiative to keep him from breaking, but eliminating a hex of wire, and reducing another trench to foxholes. The group on the wire then Moved with Assaults to move into the hexes up top. OpFire broke my leader, but not the platoon with him, and an Ambush cleared the hex. Next door we tied, and both lost a platoon.
The main German MG was suppressed, but the top one had repaired, and it killed Lt Violette on Mark’s turn, breaking the platoon with him. He then sent a platoon to reoccupy the empty foxholes, and my OpFire couldn’t do anything. A large attack against the pillbox did nothing, nor a creeping barrage. Mark’s fusiliers Advanced into F6 and eliminated my broken platoon in melee. A second barrage reduced the trench in F7 to foxholes and broke the platoon there, with a large follow up Fire eliminating him.
Mark was finally able to Recover, putting the main MG back into action, and I moved the creeping barrage into the line with the pillbox, hitting my platoon in H5 in the process. Reconnaissance revealed that Objective 4 (F6) was worth a point, Air Support suppressed E7 again, the foxholes in G6 were eliminated, and time advanced to 3, bringing on my second wave.
Further large Fire attacks finally got a good roll against E7, which turned out to have a Hidden Position. Nering and the platoon there broke, but were both saved by Probes. I Moved most of the second wave to go in where my first close attack had been, with no interference from Mark. Another standing barrage nearly did a 21 vs the pillbox, but Mark forced a reroll (negating a time trigger as well), and then used Concealment against another strong roll to keep out of trouble. Then F6 took a 21 (and time trigger) to eliminate the foxholes and break the platoon. The German reinforcements entered on top of the platoon I’d moved over to objective 3, and eliminated him. HMG Suppress put the new artillery piece out of action.
Later Fire finally broke Nering, but the other two units in E7 shrugged off a 24 attack. Mark managed to break my new leader and platoon in E5, while Counter Attack suppressed his men in H4. I Recovered, and broke the platoon in E7 with another large attack. Mark brought a barrage down right in front of my main line, but did no damage, while Fire broke Maran again. I Advanced into the pillbox at last, winning with a better die roll (the actual firepower was 6:5).
Thanks to all the casualties and time, VPs had been 11 in Mark’s favor, and this brought it down to a more manageable 5 with time at 5. Better yet, he was at 6 of a 10 surrender limit, which I figured was a far more likely bet for me. Recover put everything back in good order right before a creeping barrage broke Barnier, and Fire suppressed Maran and gave another time trigger. I called for an all-new barrage, which wandered out of the way.
I Recovered, and Mark Advanced his reinforcements. I Moved the top flank with four platoons breaking, and then the rest Moved towards his bottom flank with another three platoons breaking and a time trigger (7), Recovering all but one platoon (with Maran), but giving up Initiative to avoid a time trigger (and failed rally). The mortar Fired, breaking Ravy and his platoon, and revealing that objective 2 (O6) was worth 2 VP. I finally Advanced into F6, retaking (4) and killing a platoon in melee.
Ravy held out against further Fire, and my HMG Suppressed the bottom line, while I conducted an Offensive around H4. Three platoons broke during the advance, and there was another time trigger (8). Recover brought them all and Ravy back, and an event broke the German platoon in H4. A big attack there next turn failed to do anything (with help from Probe), and Mark Recovered everyone. A barrage reduced the trench in H1 and broke the MG platoon there, at the cost of another time trigger (9). Mark Recovered that, and the mortar crew, who had suppressed to Air Dominance. Another big Fire attack broke the platoon in H4 again, who promptly Recovered again.
Mark had slowly moved his reinforcements, breaking up into individual groups, with Lt Gehr and a platoon finally getting up the slope in between everything, where my Fire broke him, and he Recovered the next turn. An Offensive swept me forward at the bottom, occupying an abandoned trench, but lost that platoon to an event. Only one platoon broke, and he rallied thanks to an event. There was also a time trigger (10), but the sudden death roll was passed. And another event let Mark advance out of H4, killing a platoon in melee, retaking (5). This let me Move into the trench on the ridge, but little else.
I then Advanced into the trenches at the bottom, but the first melee roll was another time trigger, which ended the game at 24 German VP.
Afterword
I didn’t have a bad opening, and Mark couldn’t Recover for a long time, which made the advance on the ridge a lot easier. But after the initial assault (powered by a strategy card), I couldn’t get any more melees, and the very high firepower attacks I put together still couldn’t do much to the occupants of the pillbox, letting my initial advantage slip away. I’m not sure what I could have done if the four card hand hadn’t bit Mark as severely.
As it was, I was still bleeding VPs as time ticked by and losses mounted. My only real chance from early in the game was to put Mark over his surrender limit, and my final Advance had a shot at doing it, as I had the advantage in two melees, Charge for a bonus, and La Force Noire to cause an ambush in one of them. Winning both would kill two platoons and a leader to push him to ten losses and Surrender.
But, I was already on borrowed time after the first sudden death check passed, though the time triggers had been going by a bit fast all along.
Discussion ¬