
21 Gurkhas at the Chapelle
Mark and I cycled around to Great War Commander again in February, with scenario 21, “Gurkhas at the Chapelle”, from the BEF expansion. This is in March 1915, so we got to see the standing barrage rules in action. The board has an extensive trench system, which was also a first for us. Both sides get 9 FP artillery (the Germans as a reinforcement), which is heavier than seen in the 1914 scenarios.
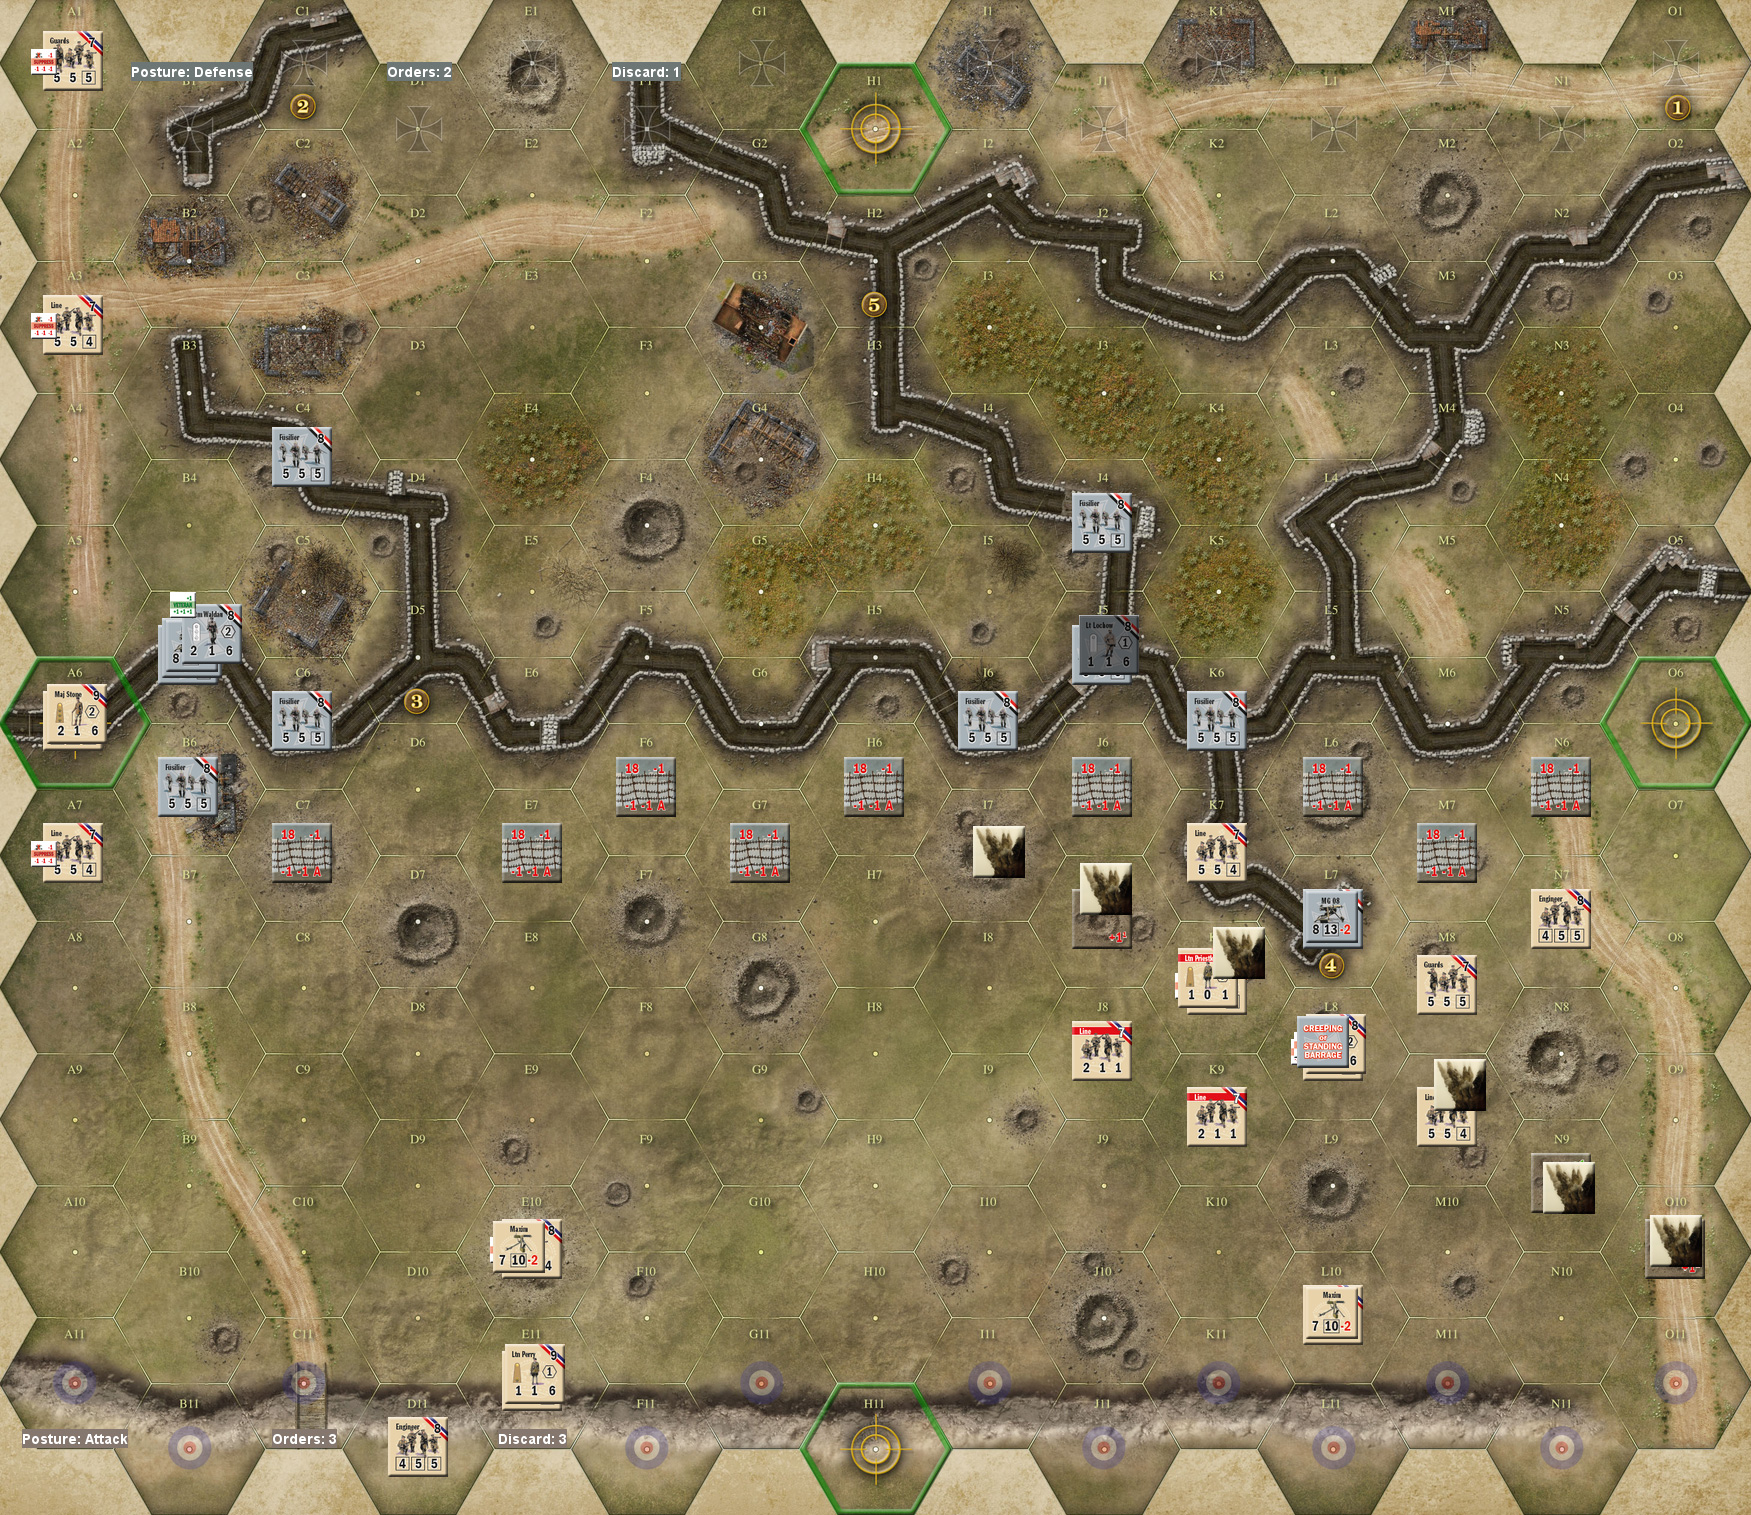
I had the defending Germans, with eight platoons, ten hexes of wire, and two MGs with teams to man them. This isn’t quite enough wire for the entire board, and I left gaps at either end. One of the MGs went on objective 4, which is a forward spur of the trench line. The better leader, and bulk of the troops were clustered around objective 3, while the remainder backed up the MG. The British have a mix of fifteen platoons, including three engineers, two MG (with teams), and four leaders. They also automatically have objective chit “Y”, which gives an extra VP per unit exited off the enemy side, and an Offensive card already in hand. The open objective made objective 3 worth 3 VPs, and my secret objective gave 4 VPs for objective 4.
The scenario starts with two local barrages from the British, the first of which scattered off map, and the second “hit”, but scattered into no man’s land for no effect. Mark’s first actual card play was an Artillery Request, which also scattered into no man’s land. After trying, and failing, to soften me up, he Moved his left flank up, getting a platoon into the trench. I redeployed a bit to have better line of sight on my own backfield, and used an Artillery Denied to break his phone. He Moved more of the flank up, and then went on the Offensive on his right, getting into the trench behind my forward MG. With use of a +1 from a strategy card, I was able to keep my MG crew down to being suppressed by his fire. He then Moved the first group off-board for nine VPs.
The next turn, he Fired on the forward MG again without result other than promoting my best leader (Waldau) to Veteran, and moved more of the left towards exiting. I used an Offensive to move closer to his string of units, and his Op Fire caused a time trigger to return his exited units, and give me artillery access. His fire broke Waldau and suppressed the MG team, while mine broke one of his platoons. Recover put everything to rights again.
Mark Fired on his right, breaking my forward MG, but Probe recovered him, and on my turn an Artillery Request put a standing barrage down in front of my trench, to break two platoons (and my sniper eliminated one on the other side of the board. Then a second one shifted it one hex up to break a leader and suppress a couple platoons as well as chew up the landscape. (And there was an error, I forgot I needed the overall commander for artillery, and had used Lt Lochow for the first request and then the FAO for the second. Of course, we also hadn’t yet realized standing/creeping barrage markers hung around from turn to turn either, and thought you had to do all of this inside one turn to make the adjustment work. We figured that out a little later. Not that it mattered for me, as you’ll see.)
Mark led off his turn with two Artillery Denied, breaking my brand new phone and eliminating it, and then Advanced on his right, getting into melee with the forward MG with Griffith and a guards platoon, and narrowly losing them to a good roll and my use of another +1 bonus. Right afterward, I Fired the MG to eliminate a broken platoon, and got a hero with the MG thanks to an event. Mark Moved up on his right, and conducted an Offensive on the left, but ran into Op Fire, breaking Maj Stone, and a platoon, and suppressing another, and setting off two time triggers. Then Mark’s attack at the end caused another time trigger (taking us to 7/10).
Mark Recovered, rallying all his broken units (which had really piled up), repaired his phone, and then put a standing barrage down in the middle of the trench, reducing three hexes to “foxhole” status (a scenario rule makes that slightly easier than normal) and suppressing the one platoon it hit. I Advanced along the trench on the left, and killed a British platoon, while an Offensive tried to shore up the right, with the only real result being my Lt Lochow breaking on an event. Mark went on the Offensive to exit two platoons and Maj Stone, taking control of objective 2 on the way.
I Recovered to rally Lochow, and Advanced to redeploy my flank a bit. Two creeping barrages moved his artillery across my units on his right, creating more shellholes, but not breaking anyone, though an event allowed me to eliminate a guards platoon. With Lt Priestly and his platoon suppressed, I decided to Advance in and try to deal them before Mark finally took out my forward MG, but lost the melee despite a 7 to 5 advantage. I Moved to start centering my defense with Waldau moving towards the center, and suffered a suppression on the MG team with him, but Mark’s MG jammed.
Mark Advanced in turn to take out another platoon in melee, which also advanced time to bring his exited units back. I finally continued my Move towards the center, and came under Op Fire, which caused two more time triggers to end the game.
Afterword
After adjusting for my hidden objective, Mark won by 5 VPs. Both of us were about halfway to a surrender (I was at 3/8 casualties, Mark was at 6/11), and things were getting thin on the ground by the end.
Overall, the scenario gave the fun back-and-forth experience that GWC does well at. However, the start of the game was the deeply frustrating experience that this kind of game can also provide, as I went a few turns with a pretty much dead hand. Move (when I’m where I want to be), Recover (with no one broken—yet), and Artillery Request (and no artillery). This let Mark get going, once he started to realize what was up, and set up the early exits which did a lot to give him the points he needed to win. The main problem of course was just being stuck twiddling my thumbs when discarding didn’t help.
Still, seeing the standing/creeping barrages in play was very educational. I think there’s too much control in there, as you get to adjust it how you want on the fly each time, but it’s not a bad match for the level of complexity, and certainly gets a lot of the right feel for the long artillery bombardments that would happen.
Discussion ¬