
Two Rounds of Asculum
So after our deep-space excursion, Patch and I were back for the second Pyrrhic battle, Asculum, from Expansion #1 of Commands & Colors: Ancients at the beginning of September It’s about the same mix as last time, but this time, both sides are pretty much back against their base lines, and the Romans only get four cards to Pyrrhus’ six (but they do go first). A unique twist is that while both sides get to leaders, they do not have a fixed set up; instead, you draw your initial hand, and then place them with whatever units you want.
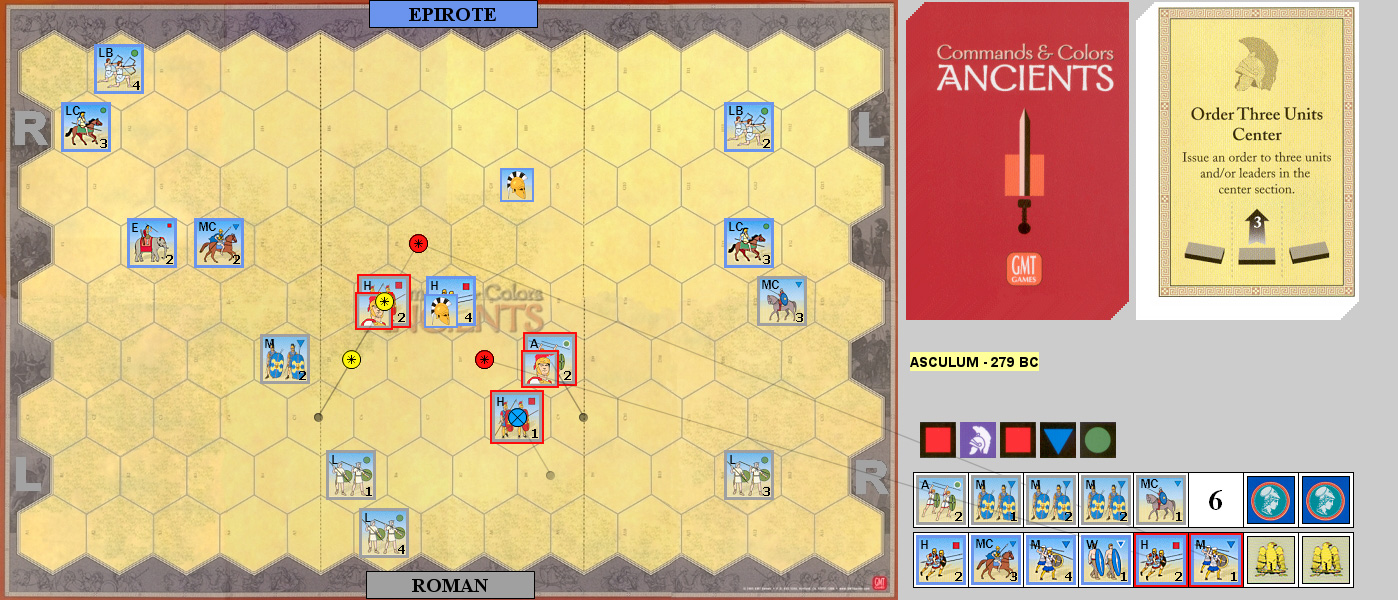
I had Pyrrhus the first time, and put my commanders at the right end of my Heavies, and with my left MC, while Patch put his at either end of his center. Patch started with a Line Command to move up, and I Ordered Two Left to move into skirmish range. Patch moved the flanks up with Out Flanked, and I used Move-Fire-Move, with hot dice to do three blocks to a Light, and forced another one to retreat. Patch mostly stayed in place while Ordering Lights, and caused a LB to retreat after losing a block. I used Move-Fire-Move again to move them back, and did two blocks to a Medium while forcing the wounded Light to retreat. Patch drove a LC with Order Three Left, and then Darken the Sky did a block and a banner to a Light and forced his wounded Medium to retreat. Order Two Left allowed him to engage my LB, who evaded back to the baseline.
I moved up with a Line Command, and Patch used Leadership Any Section to bring his left flank forward. Inspired Left Leadership brought my left up, and my Warriors (first time we’ve seen those in ages) charged in with a MC, knocking out an Aux while taking two blocks on the Warriors. Order Four Center brought most of his Mediums into contact, but only did three blocks across two Heavies while taking seven blocks across three Mediums. Inspired Center Leadership reorganized things a bit, and I finished off all three Mediums for no losses. A Coordinated Attack let him finish off a weak Heavy, and force a LB to evade, while assembling a better line in the center, but momentum advance with his Heavy did a block to me in return for taking two and retreating back to his line.
Order Mediums put our centers into contact, while on my right a pair of MC traded a block each. The center went horrible, doing two blocks to an Aux, who wiped out a MC and did another block to my Warriors. Order Two Center let him wipe out a Medium and finish off the Warriors at no cost. Order Heavies brought up my Elephants, who finished off a MC, while I did three blocks and a banner to an unsupported Heavy. Patch Ordered Three Center to finish off my Heavy and do two blocks and a banner to a Medium. He then used Momentum to chase it down and finish it off. 5-6
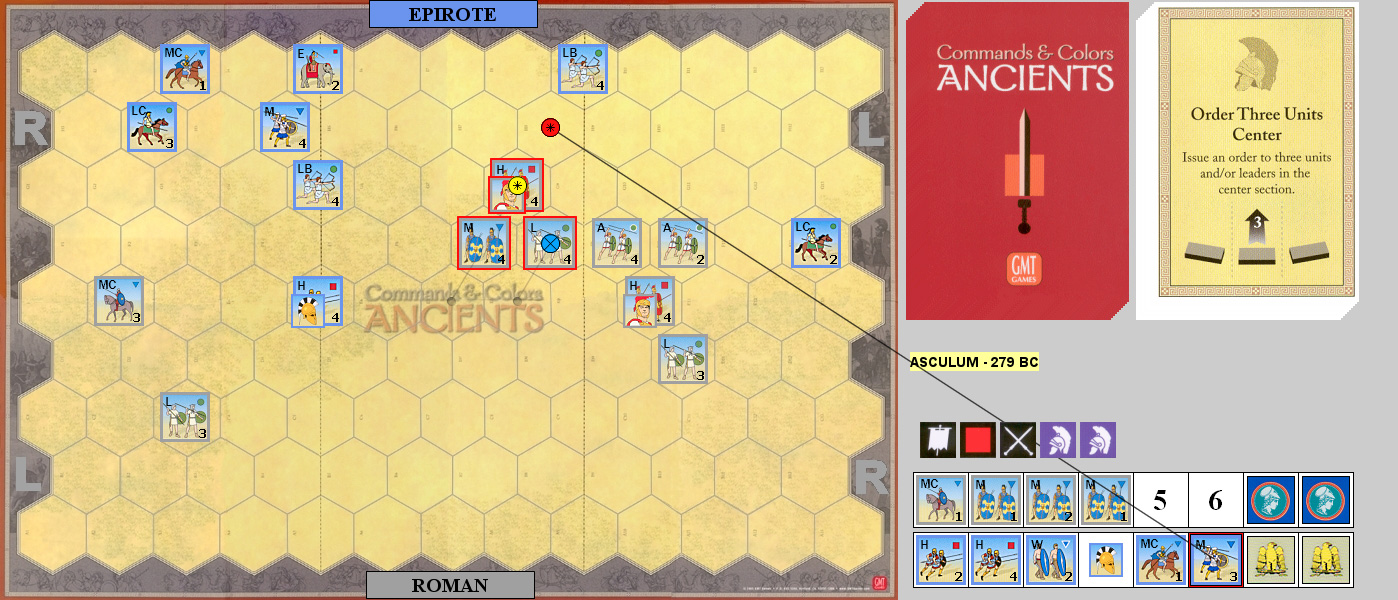
For the second go, I had the Romans, with only four cards. But led with one of three Line Commands after putting one leader on the right Heavy and the other near the left end of the main line. Patch put a leader with the Warriors, and the other at the right end of the Heavies, which moved up with an Order Two Center. Out Flanked (my fourth beginning card) got me to skirmish range while the MC moved up. Patch Ordered Three Left for our MC to trade blocks (and his took a banner to retreat to the baseline), and I Ordered Two Right to do a block to a LC while it evaded to the baseline. Patch Ordered Four Left to cut off my MC who died on a banner, while a Light evaded back to my line. A second Line Command got me closer, and ranged fire did a block to his Warriors. Patch Ordered Two Left to reorganize a little, and Inspired Right Leadership moved me up a little and let me do a block to a MC with ranged combat.
Patch Double Timed his heavies into my line, knocking out a Medium (five hits on his third try… a bit late) and doing two blocks to another, but lost a Medium block and three Heavy blocks, and had to retreat three units. My third Line Command let me wrap around his intact Heavy, and I knocked it out with two attacks, taking no damage myself. Patch Rallied, rebuilding two Heavies to full strength, who then came in and knocked out a weak Medium, reduced another to a block, and took no damage himself. I Ordered Three Center, and came up to the end of his line, and moved a leader who had just lost his unit to a new Heavy, and wiped out Patch’s second Heavy.
Patch Out Flanked, but his MC muffed a roll against a 1-block Medium who did two blocks and forced them to retreat back to the baseline. His Warriors did two blocks to an Aux, who did two blocks back, wiping them out, and then Patch lost the leader with them. Leadership Any Section moved my right up, and I forced his LB to evade, and finished off his 1-block MC. Patch Ordered Heavies, finishing off my weak Medium, and doing a block to an evading Light. I Ordered Three Center to move a solid core up and take out a Medium. 6-4
Afterword
The first game started with some punishing hot dice from me, especially on archery, and I dominated the initial exchange of blows. But one bad turn cost me three good units and put Patch into reach of a win, which he got two turns later. However, both sides were completely smashed with no semblance of a line left.
In the second, an amazing initial draw continued with more good cards which kept me in motion, and concentrated on the center. I despaired a bit when Patch pulled out that Rally, as I didn’t want to fight fresh Heavies all over again, but I got lucky with one of them, and advanced past the other.
Both Heraclea and Asculum live up to the promise of ‘Pyrrhic Battles’, as generally speaking even the victor will be fairly smashed up. My win here as the Romans is probably the best shape I was in at the end of any of the four matches. The Romans won both times for Asculum, but they were accompanied by a heavy dose of good luck.
Discussion ¬