
Two Rounds of Indus
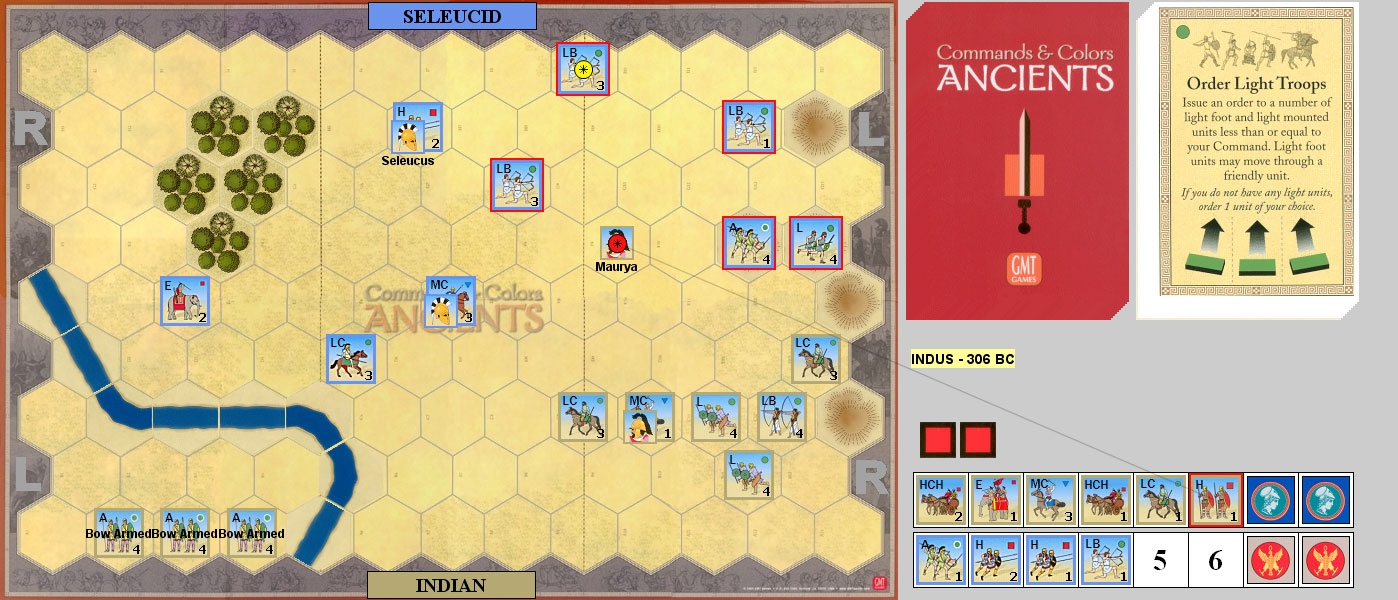
After finishing off yet another epic ASL struggle in Budapest, Patch and I did our usual two rounds in Commands & Colors: Ancients in the first half of March This time is a somewhat speculative battle (more so than normal, as there’s no records of particular battles for this campaign), pitting Seleucus against the Mauryans, from Expansion #1. The Seleucids have a nice solid body of Heavy Infantry in the center, and other forces scattered about, including cavalry and elephants behind a forest. The Mauryans have a more compact army with elephants and Heavy Chariots, and three units of Auxilia that have the three-hex range of Light Bows on their left, behind the Indus.
Patch started with the Indians/Mauryans, who go first, and Ordered Three Right to move up a LC, and drove my left Aux off the hills. I moved up various units (with ranged shots that did nothing), while Patch got his center in motion. Order Lights let me drive his LC off the hills, and did a banner and a block to his elephants, who then did a block to his Heavy as it retreated, and then I did a block to his HCH.
Patch followed with Mounted Charge, which slammed his main line into mine, forcing a Heavy back, doing two blocks to another, three blocks to Seleucus’ Heavy, and three blocks to an Aux. In return, he lost both HCH, the Elephants, and a MC. I brought up my better units, and Patch hit again with Order Three Center, destroying my damaged Aux and both damaged Heavies, but I drove off a LC, and did a block to another. I Ordered Four Center for everything that was left there (including Seleucus, who’d lost his unit), with both of our Heavies taking two losses. Patch Ordered Three Center, forcing a LB to evade, and knocking out my weakened one (they stood on a 2-die attack hoping for battle back… nope), and doing a block to another LB who did a block to his LC in return.
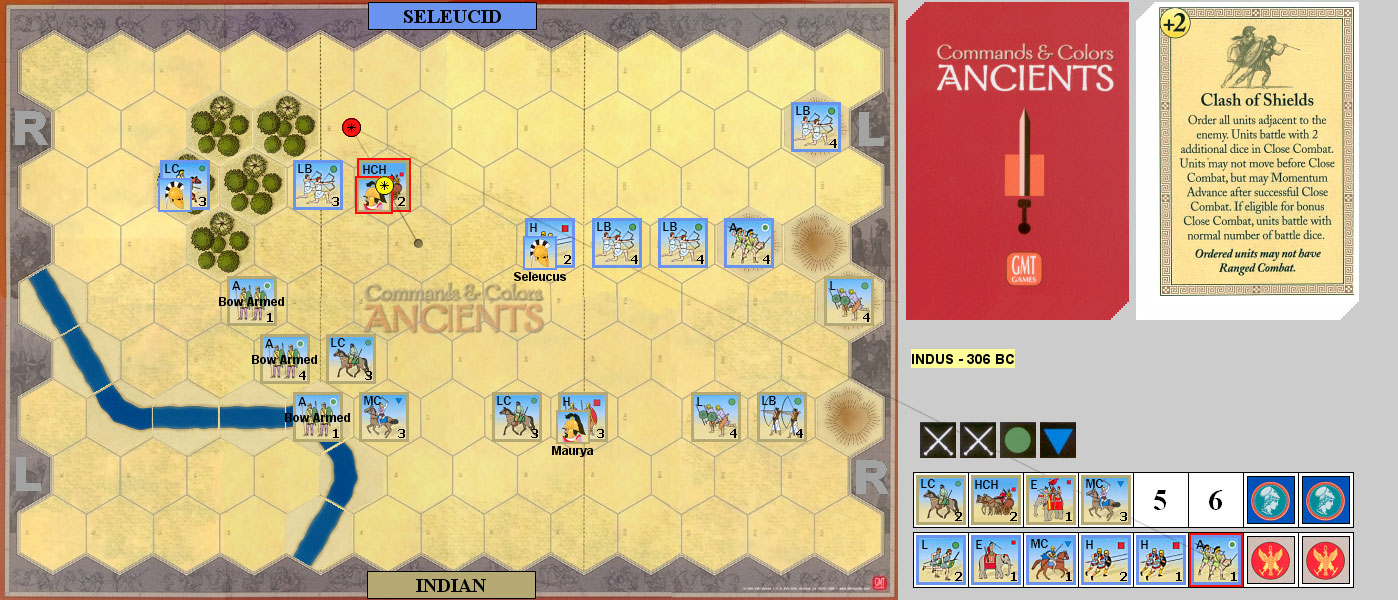
I Ordered Two Left to regain the hills and drive off his MC, then Patch hit with Clash of Shields. His Heavy did three blocks to an evading LB, but a LC missed my other evading LB. Leadership Any Section allowed me to bring in the cavalry, who finished off one of his LC. Patch moved the surviving leader off to his right, and I Ordered Lights for a round of archery that knocked out his Heavy. 6-4
I started the second game with Order Three Left to get my Bow Auxilia into the Indus, and Patch used Move-Fire-Move to bring his LB up, forming a solid line from his left to his center. Order Lights moved the Bow Auxilia up again, and I did two blocks to a Light, and drove off a LB. Line Command got Patch’s center closer, and drove off a LB and damaged a Light. Out Flanked put the LB back, and I knocked out a Light (it had taken all its hits from banners while trapped at the edge of the board), and drove off a LB.
Order Three Center put Patch into contact with my Bow Auxes; both sides retreated an Aux, and I traded an Aux block for a Heavy block. Order Two Left reformed my Aux line, but did nothing, while Patch’s Coordinated Attack brought his Elephants and LB up, while the forward Heavy did two blocks to my weak Bow Aux, who chased him off with a banner. Move-Fire-Move let me get a couple LC up, drive off a LB, and then move my weak Bow Aux back.
Patch then used Mounted Charge; thankfully, the Elephants were the only thing in range, and they traded blocks with a Bow Aux. Order Three Left finished off his Elephants after a Rampage that thankfully did no damage, and I did a block to his MC. Patch Ordered Three Right to bring up the cavalry (and a LB), and did another block to a Bow Aux in return for a block to his MC. I Ordered Four Left (though I only had the three Bow Aux there), and drove off his LC while finishing off the MC. Patch shifted his right flank a little, and Inspired Center Leadership let me finally deploy into a line there. Patch Ordered Two Right, which did a hit to my Heavy, and wiped out a LC when it was forced to retreat. Order Lights drove off three units with missile fire, and did a hit to a LB. Order Two Center moved two of those up again, and did a block to a Bow Aux.
Order Mounted let me get to his line with most of my heavier units; Patch used First Strike on my Elephants, doing one block, before they did two blocks to him, and they retreated a hex. The Elephants used Momentum to get at the next Heavy in line, which took three blocks and retreated. I also knocked out the already-damaged Heavy and forced an Aux back, but lost a HCH in the process. Patch Ordered Three Center to finish off the Elephants and wipe out a MC, but he lost a Heavy in return. I’d lost the MC by not evading because the average was (barely) in my favor, and I wanted them there for Clash of Shields, which only ordered my remaining HCH. I did three hits and a banner to an Aux, and then finished them off with Momentum. 6-4
Afterword
The second round went a lot longer than the first, as I made use of all the left-section cards I was drawing, but both finished in a hurry once the centers got into the fight. Seleucus only has three heavy units to five Indian ones, but other than a single Heavy Infantry, the Mauryan units are a lot more fragile. The Bow Aux were very handy (especially with all the cards I had for them), and helped weaken things just enough that I could use my center with some confidence.
The terrain is a lot more jumbled than you usually get in these battles, and army compositions and deployment are also unusual. Definitely a fun battle even (especially?) if it’s going to turn into a demolition derby right before it ends.
Discussion ¬