
The Road To Sarikamis
Jason recently made it over for another FtF session last Thursday, and we finally tried out the copy of Osmani Harbi that I picked up nearly two years ago for cheap. Thankfully, we had some time to read through the rules before hand; I was having trouble fitting it all in my head at the same time, even though much of the system is nothing especially new.
I went with the 1915 Caucasus scenario to try it out because, 1) it’s the first one in the book, and 2) it looked to need fewer of the Osmanli-specific rules (since there’s no desert, and it uses the normal Winter turns instead of the Summer turns). With most of my knowledge of this part of WWI still coming from Pursuit of Glory, I needed the victory conditions to confirm that the Ottomans are on the offensive here (the general goals are to take Kars, Sarikamis, and be less demoralized than the Russians). A random roll gave me the Ottomans, and off I went!

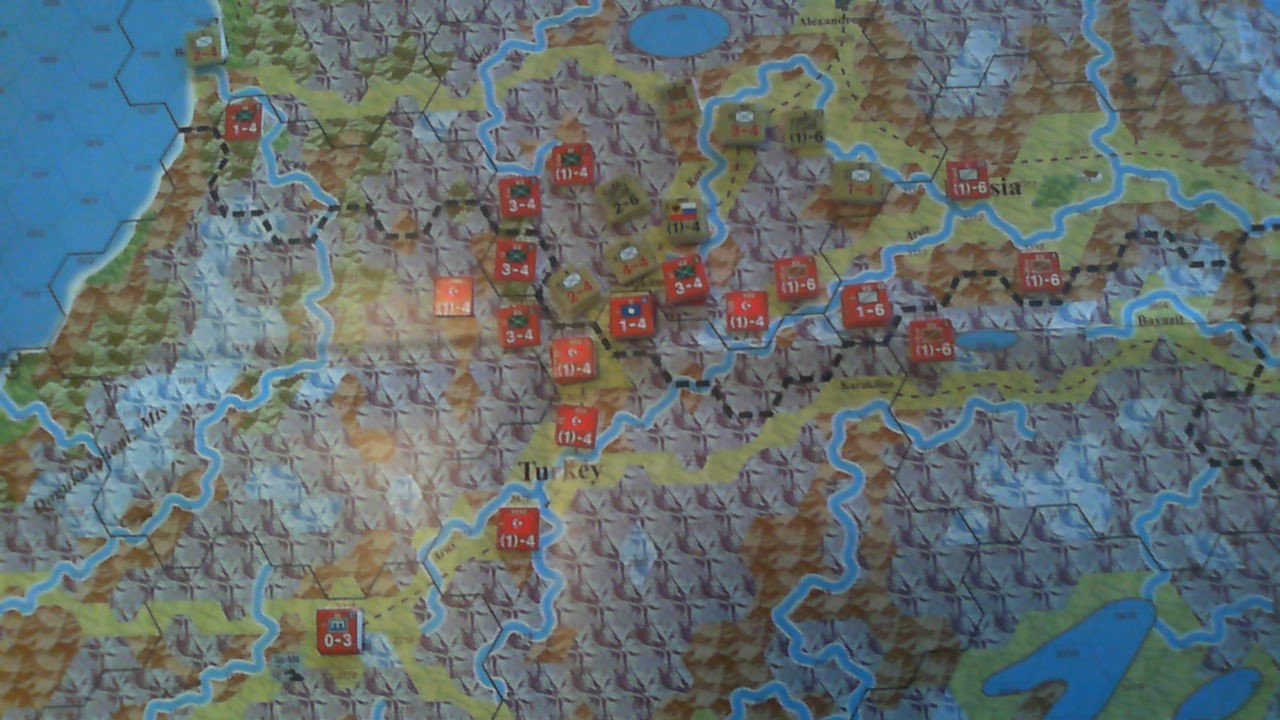
The initial look at the situation didn’t seem promising. The Russians have already advanced slightly past the border, and are in good defensive terrain (then again, the terrain in the entire map isn’t good for much other than defense). It sure didn’t seem that I had enough on hand to mount a real offensive. But there were a few possibilities. My main moves were against the ends of the Russian line, and I tried one combat, against a one strength Armenian division, and only took a point of damage myself.
The idea of the defender getting a ‘counterattack’ in which their strength is tripled takes some getting used to. The actual point is to effectively build the combat system around the old idea of a 3-1 attack being equal odds, while using strength factors instead of odds calculations. But it really makes you pause on attacking, and feel it’s so unfair. I needed to remember, that at around 3-1 odds, both sides should take about equal losses, and there’s only a third as many defender to absorb them.
An interesting wrinkle is that it seems that the attacker only ever gets negative modifiers and the defender only positive ones. However, I was usually attacking in mountains, which has no (attacking) modifier, but halves the attacking SP. This gives the attacker the ability to get a wide range of results compared to being stuck with the low ones as some of the other heavy terrain causes.
Jason consolidated his line slightly on his turn and I tried again against the Armenian division, getting a 6-1 die roll to knock it out for no losses. The next turn I moved in on the slightly shorter line, and continued working my way around the west flank, and concentrated on the center. My big attack there had another good set of die rolls, and I pushed the Russians out of a hex.
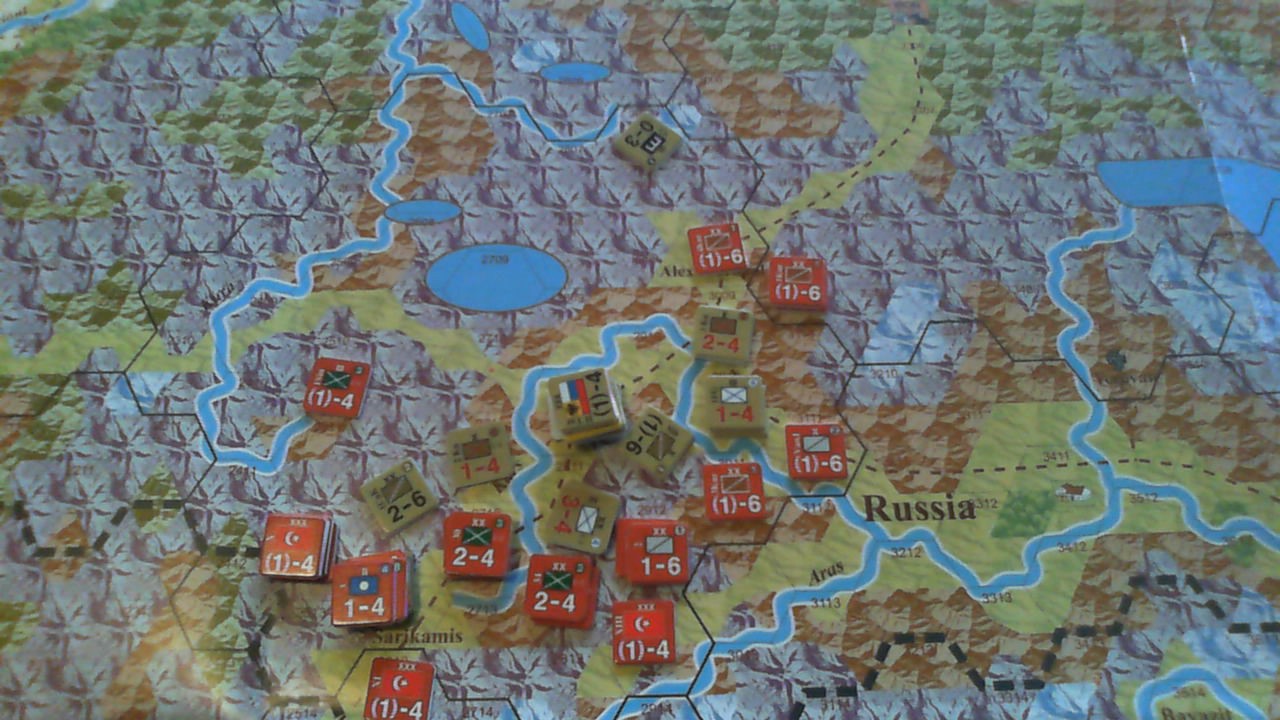
With things going poorly on the flanks and the center, Jason started pulling back. I think he pulled back too much, and let me take ground while he was reorganizing, instead of trying to make me pay for it, even if he lost a couple units in the process. By the end of December I was repositioning some extra cavalry to continue trying to threaten cutting him off from Batu, and was close to Sarikamis itself.
We ended up calling the day early, but got halfway through January, and could have finished the month if other events hadn’t gotten in the way. Still, by that point there was probably going to be a lot less activity. I took Sarikamis in a large attack from the SE, which meant I was only facing broken ground. This in turn surrounded three 2-4 infantry brigades that ended up surrendering after a failed breakout.
I had a Substantial Victory pretty well in hand, but was rapidly running out of supply, so short of being handed a really tempting target, I was planning on settling on something near the current line and waiting it out. The Ottoman ability to not need supply for defense had already been handy a time or two, and meant that I could basically exhaust my supply while doing this. (To be sure, the Ottomans get less supply to compensate for this.)
We’re both pretty happy with the system so far, and we may be giving it another go soon.
Questions:
Can you inspect enemy stacks? You can’t inspect the supply status on the charts (that is stated), but can you inspect the contents on on-map stacks? (I think you can, but an explicit statement eludes me.)
The depots on the map have no supply points listed, are they supposed to be empty? (I’m pretty sure that’s a yes, but stating ‘0’ in the scenario would have been preferable.)
There’s one railhead marker on the map, which makes it clear where that line ends. The scenario rule about ‘rail lines in Russia’ implies that the branch out to Tabriz exists. Does it stop at the Russian border (i.e., not go in Persia, and not reach the Tabriz depot) too?
Is there anything for the two engineer units in the scenario to do other than perhaps allow a HQ to move into a trench?
A 1-4 unit has (1)-4 on the reverse. Does flipping it resolve a SP of losses? Does removing it after being flipped also satisfy an SP of losses?
Can you supply some units for an attack, but not others? Or can you only provide supply on an ‘all-or-nothing’ basis? (Probably not ‘all-or-nothing’, as supporting a breakout attack is already an exception.) Can you just supply by number of strength points? i.e., provide 5 supply for a 21-point attack, which would then become a 20+0.5*1 attack or 20 SP.
Discussion ¬