

HF8 Fahrenheit 352
After Patch retook a hill in North Africa, we returned to Hatten in Flames. Up this time was the final scenario of the set, “Fahrenheit 352”, featuring an American attack on the village and a couple Flam Hetzers. I decided to take the defense in this one to try them out.
The main goal is a little unusual; there are two victory buildings, and all the Americans need is to have one non-crew Good Order MMC in each at the end of six turns. The Germans get eleven 467 squads, plus the usual other assortment of goodies, six foxholes, and four pre-game rubble Locations (plus the HF standard matching locations). On turn 3, three 548 squads (each with an LMG) come in with a 9-2, DC, two Flam Hetzers and two Pz IVs. The Americans are coming from the south, and there’s enough room to come at the victory area from either direction. Setup is along X11-N26 road, which means the distance to the road the victory buildings is on varies from four to nine hexes.
This last bit had an effect on a setup I was never happy with. I had a big dispersed zone in the east, and then a smaller one in the west. The general idea wasn’t bad, but I just couldn’t adequately defend the west end with all the resources the east gobbled up, and I didn’t see where the problem was in time.
The Americans get thirteen squads with good leadership, three each MMG, BAZ 45, a couple light mortars, and three Shermans. On turn 2 they get another three Shermans, with a 9-1 AL. Patch logically set up on the west side of the line, facing was suddenly a too-thin defense at two-hex range.
Things led off nicely with both of Patch’s MTRs running out of WP immediately (and this with an SSRed depletion of 9 on the first turn). The only other result of initial prep fire was breaking my PSK squad in N25 (which was more exposed than they should have been, but I certainly wanted to contest that area and keep tanks out; M27 and M25 might have been better locations, though the former is still vulnerable—it just has a building right behind it).
I didn’t have any defensive fire, and AFPh revealed L28 to be dummies after a failed search in movement (a ‘6’…).
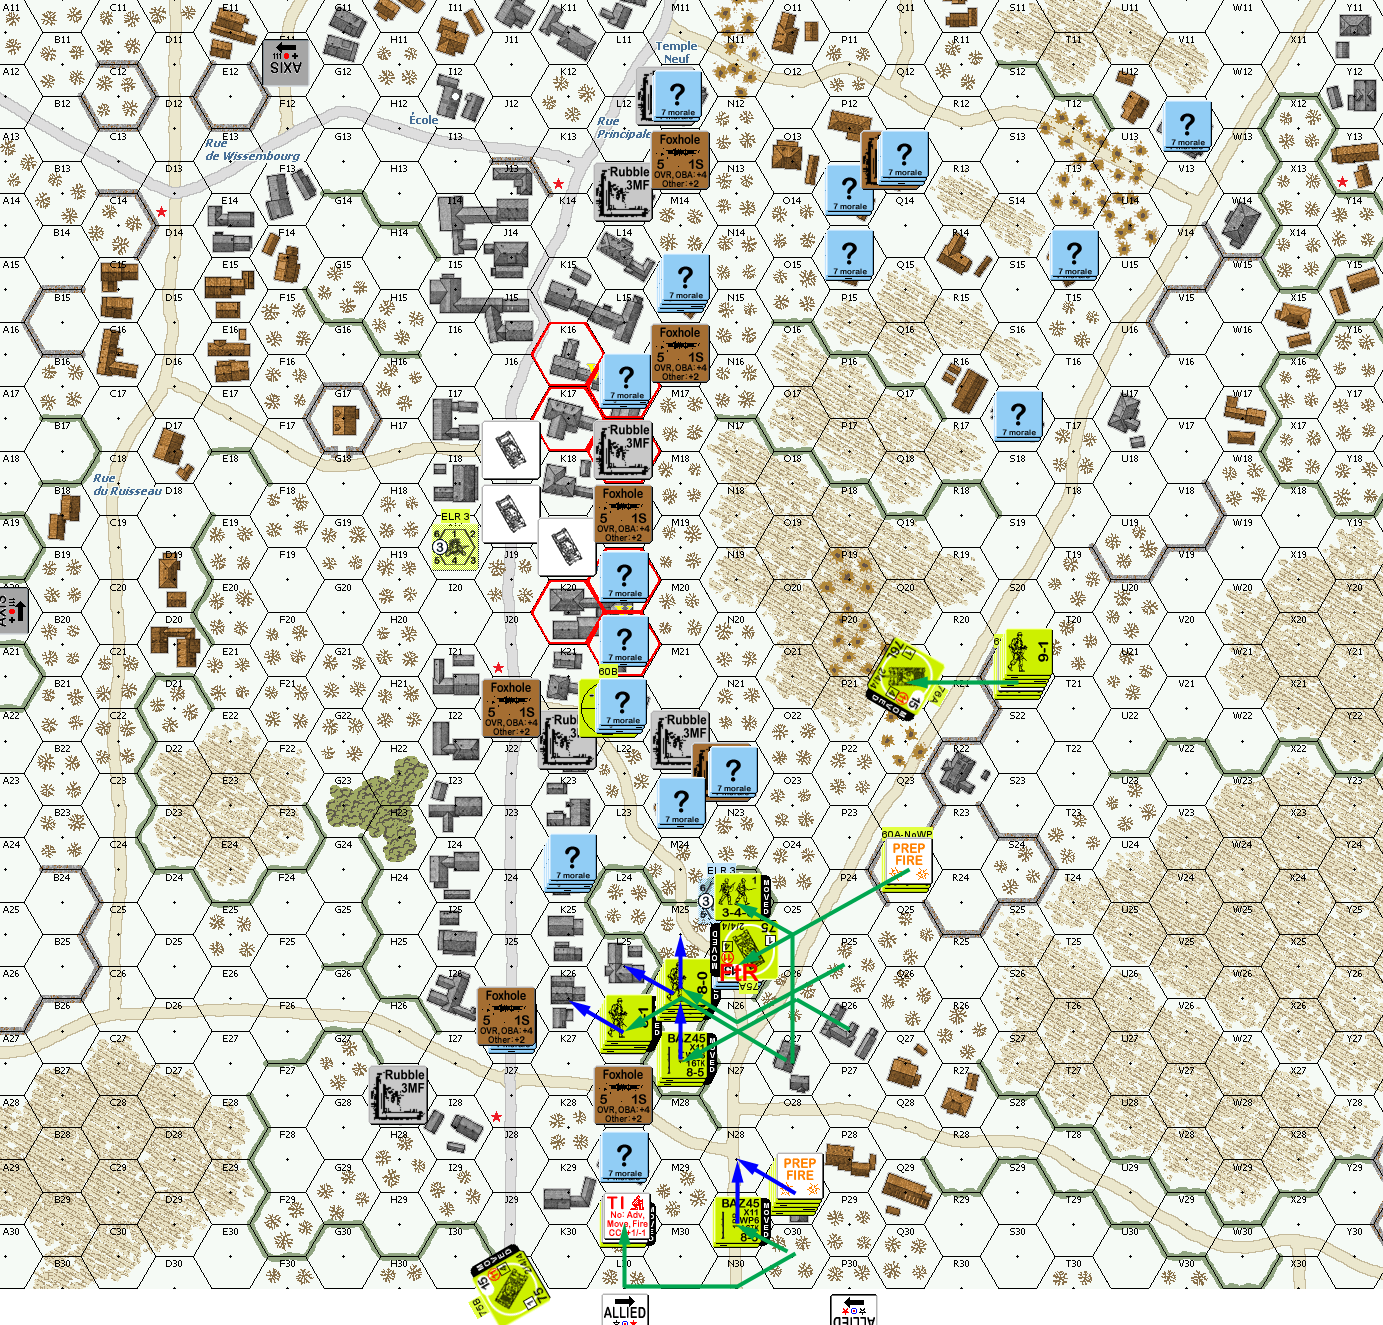
Situation, American turn 1, showing the full area of the map. North is to the left.
I had one bit of Turn 1 prep, which pinned most of the K26 stack (if only that had been a NMC instead PTC…). I eliminated one of my own dummies when I missed that one of Patch’s units could see W13. I had hoped to give Patch something to worry about back there while everything else raced back to the main road, largely out of sight thanks to the hedges.
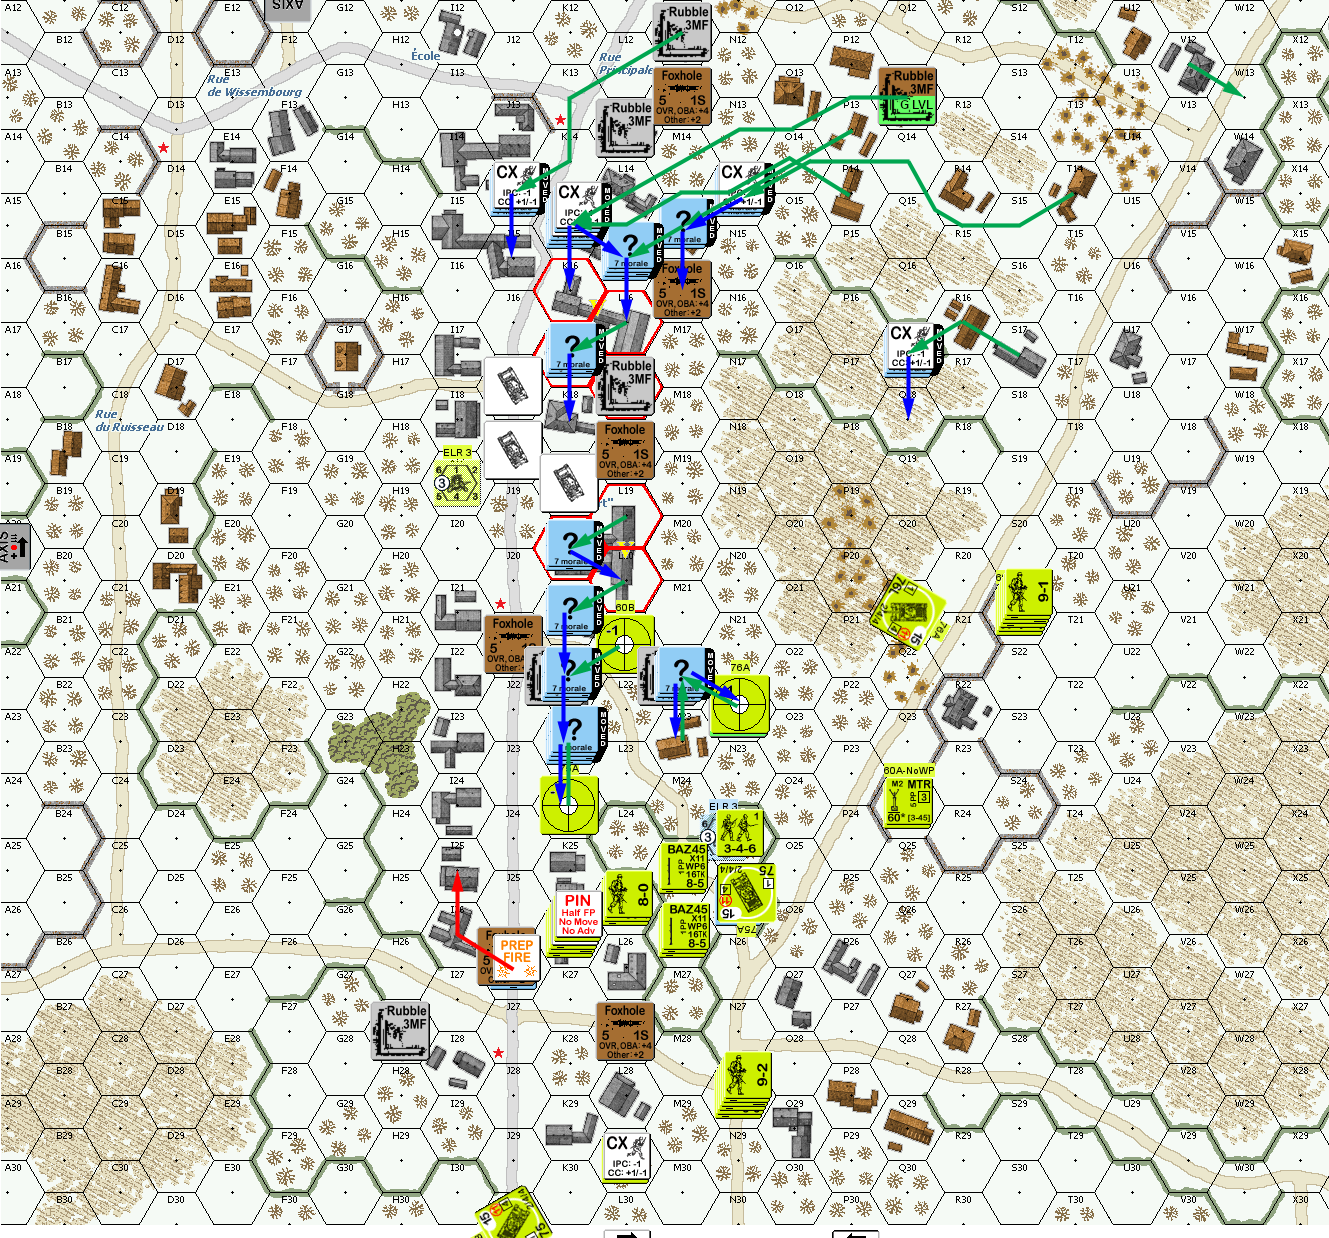
Situation, German turn 1.
Patch led off his second turn placing smoke rounds in J25, and after a few tries, got a CH with his MTR on Q18, wiping out the HS there with a ’12’ MC. He also knocked out another dummy in N22 during AFPh, but that was after another failed search. He sent a squad into K24, and even with my “?” there was no ambush, and I refused to attack, while the Americans got no result.
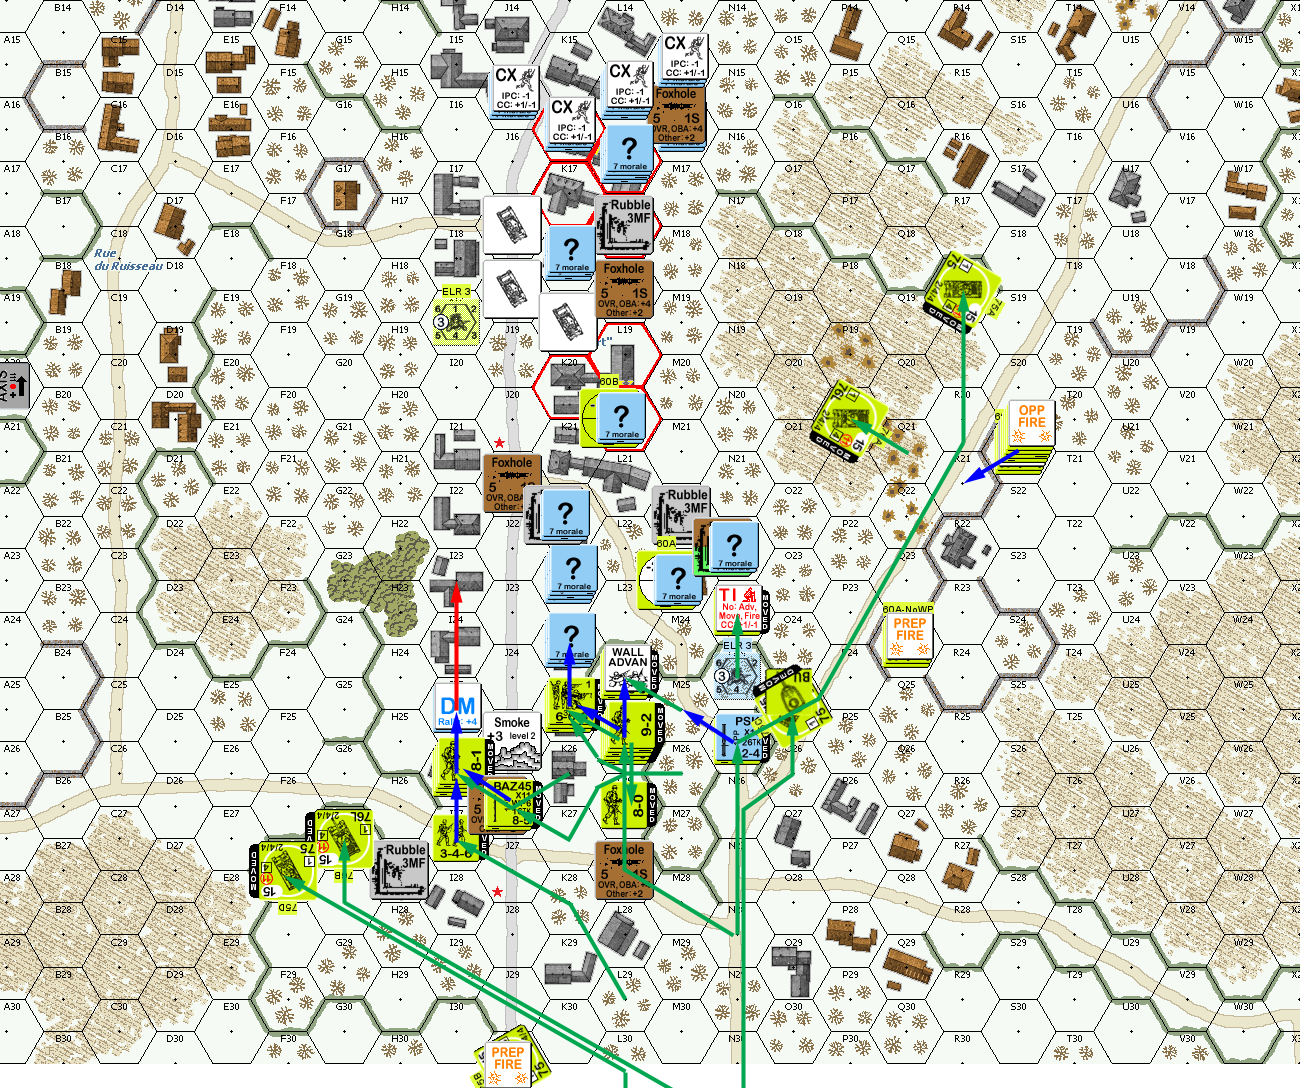
Situation, American turn 2.
The Germans have the option to bring in two vehicles a turn early, and I took it to get one each of the Flam Hetzer and Pz IV. This was a mistake. Possibly, bringing in both of the Pz IV would have been better (to support each other), but anything that enters on turn 2 is assumed to have already used half its movement, and that limited where they were going to much. One mass of four vehicles seems even better to me.
The big thing was getting out from adjacent to a lot of Americans (TPBF in K24 was tempting, but there’d be a 32 +1 and 24 +3 shot in return…). I also got across the main road and into I18/I17, which was shaping into an important outpost against the American advance. The Pz IV put itself into C19, which wasn’t bad, but there was too much cover in the area. A second one in E17 would have helped, but probably not enough. Fire from R21 broke and ELRed the squad in M22, the K23 squad broke, and a PTC revealed K22, but didn’t get a result.
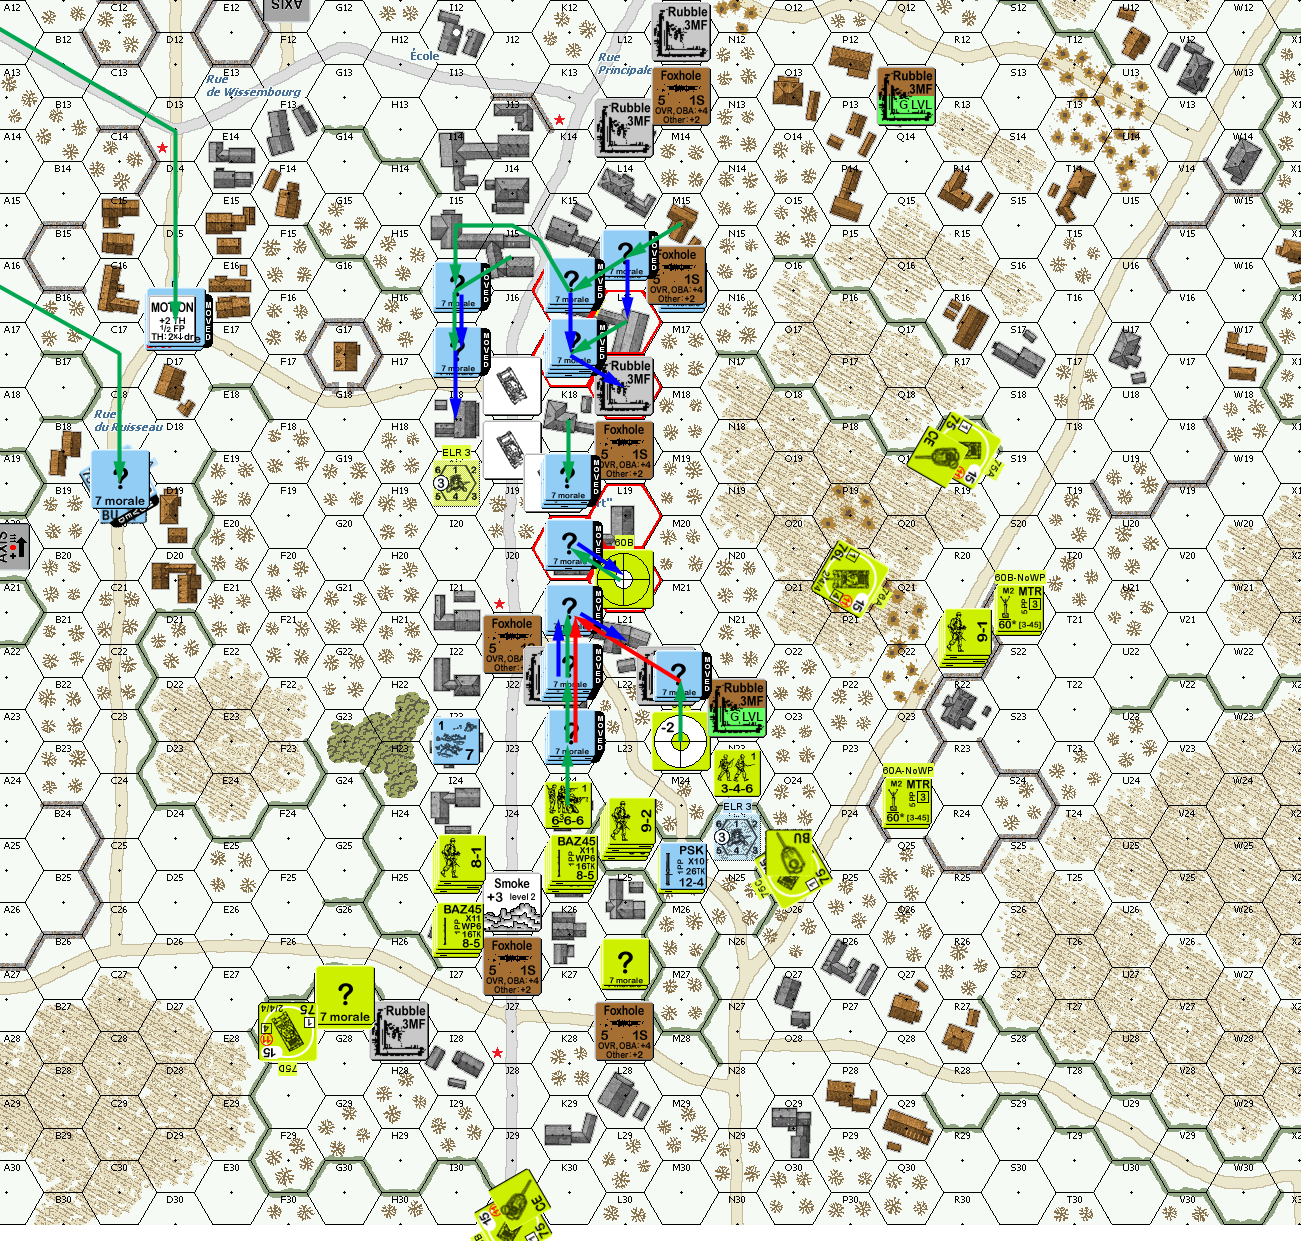
Situation, German turn 2.
Thankfully, both of the newly broken squads got back to a rally point, and a “2” got me the ELRed squad back, and a hero. Prep fire broke K22, a MTR CH revealed the HS in M16, but amazingly didn’t break them with a 3MC, and another three hits on the Location couldn’t get a result. I pinned a squad as it moved up, but didn’t have much else to do. Some of the Shermans moved to more effectively fire on my line of defenses, while half of them deployed to good positions to watch for my incoming armor. Patch fired on K22 in AFPh, which passed a 1MC, but set off Patch’s sniper to break I17.
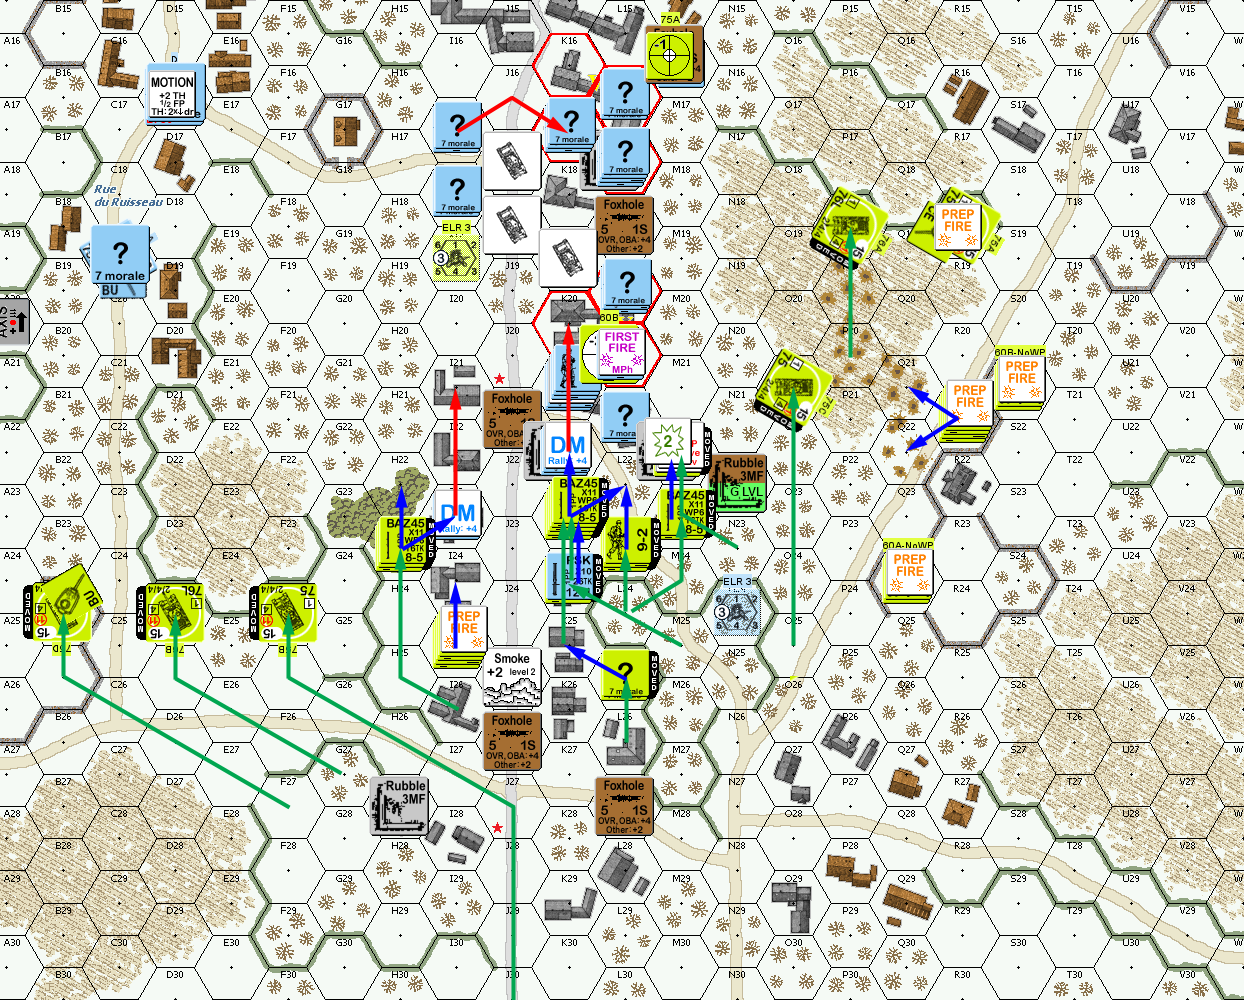
Situation, American turn 3.
My turn 3 first MMC self-rally got me the squad in I21 back, and I also rallied the squad in K17. With troops in the open near me, L21 prepped to pin the 9-2 in L22 and ELRed one squad there. They then found a PF and shot it into the M22 rubble, breaking from the backblast, but breaking the BAZ HS there. K21 also prepped, and broke both squads in K22.
The Pz IV dropped sN smoke and backed out of sight, while the Flam Hetzer maneuvered over to the main road. The new Pz IV parked in F15, where it could see the open area, and +4 hindrance would hopefully protect it, and the new Flam Hetzer moved along the east side. Patch’s DFPh shot at L21 cowered for a ‘mere’ 1MC, which the broken squad survived.
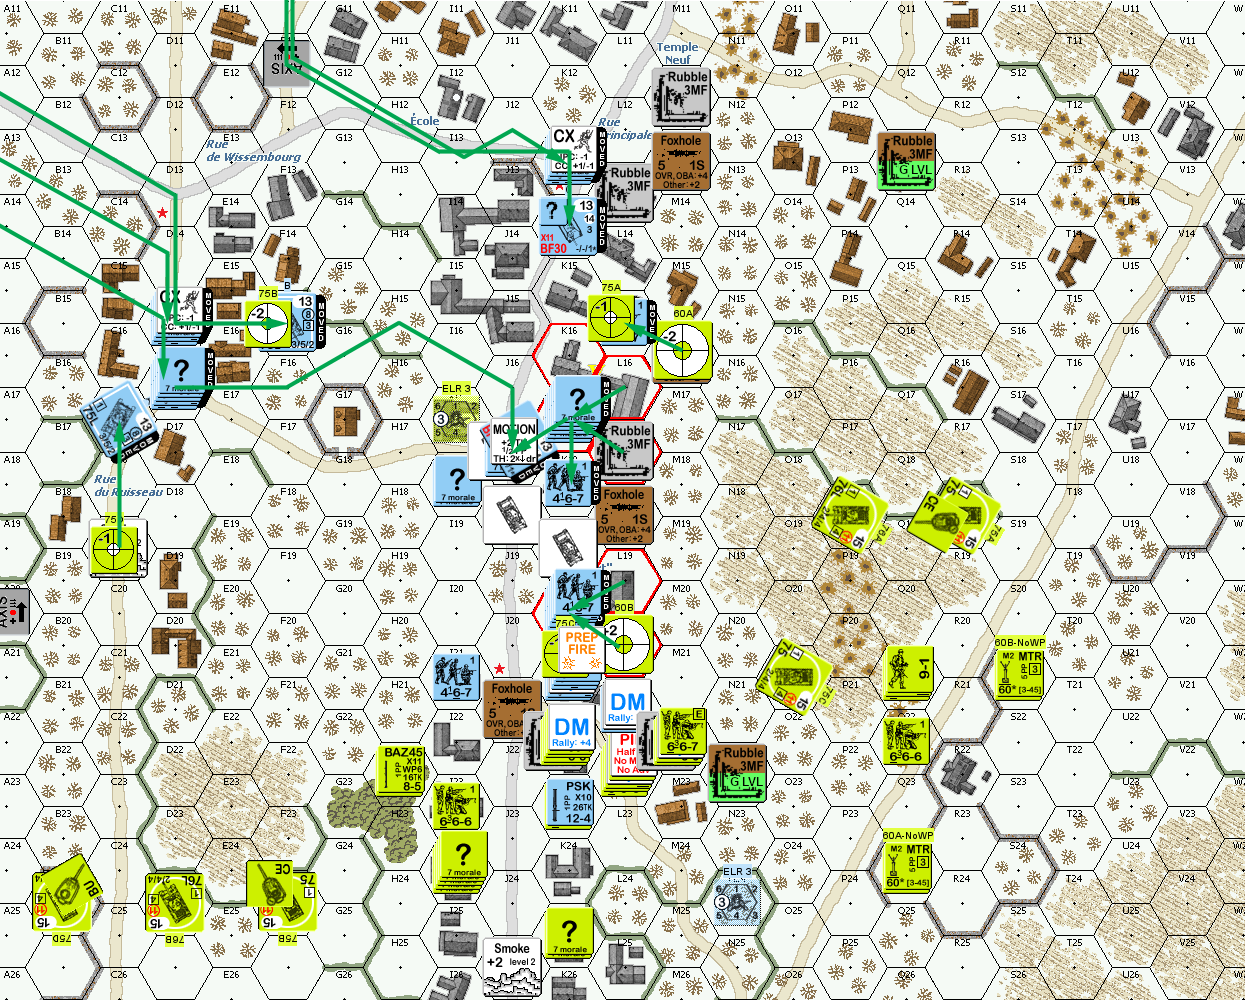
Situation, German turn 3.
I rallied a squad in Patch’s turn 4 RPh. Patch fired WP into K21, pinning the squad there. The Sherman in F24 got a hit on Pz IV in F15 and burned it. So much for four hexes of orchards. L21 broke to adjacent fire, and L18 battle hardened to BMG/CMG fire… and was promptly killed by a MA CH. The north side with the Shermans largely stayed in place, but one of the south-side Shermans took off, heading around to the east to work up the road there next turn. I lost another squad in L21 to FtR, and Patch got a squad and 9-2 into K21, got ambush, and wiped my squad and hero out in HtH.
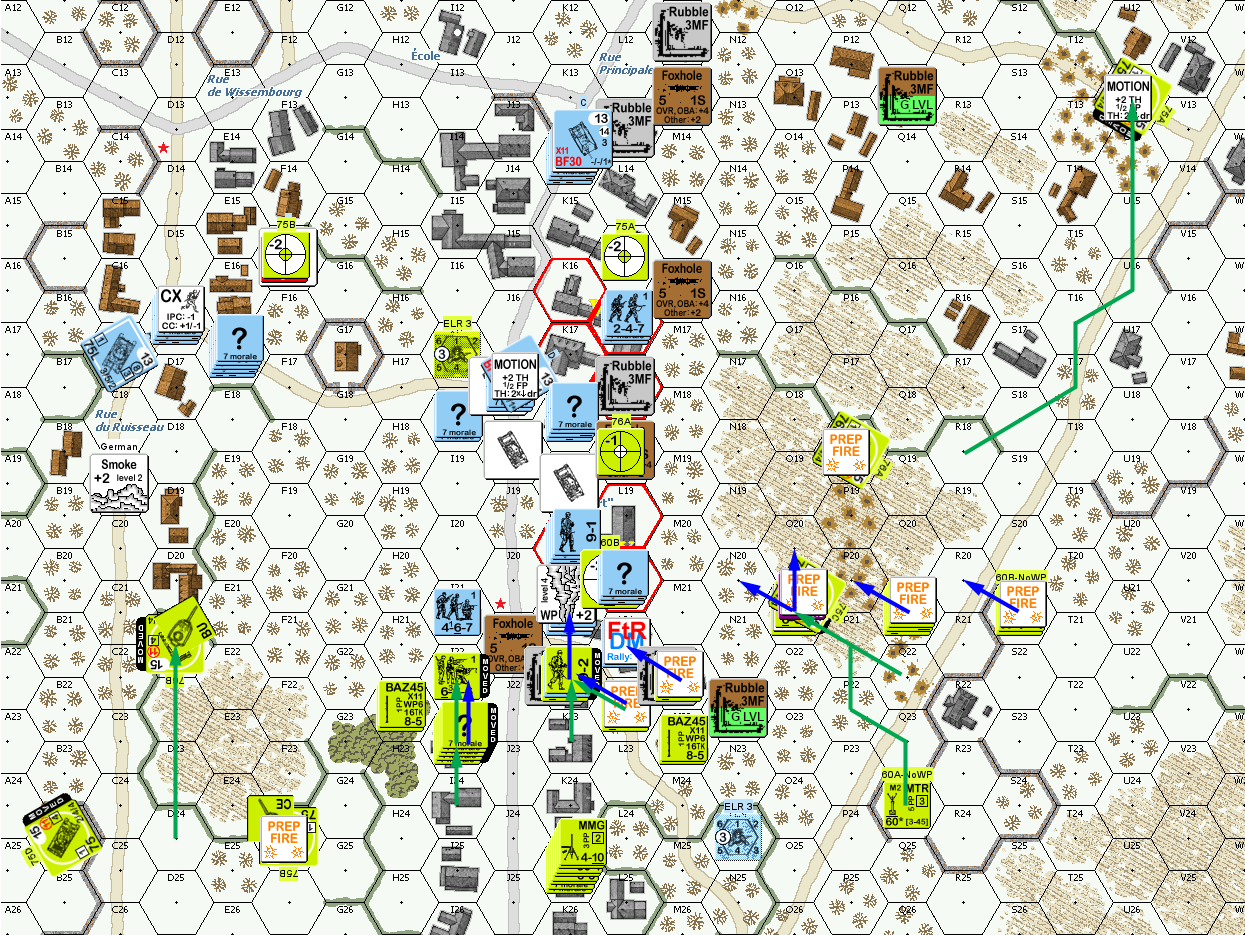
Situation, American turn 4.
Patch rallied most of his stack in K25 for my turn 4 RPh, and my prep pinned a squad in I22. The surviving Pz IV parked itself in H16, where nothing could currently see it’s position, and it could see the more likely avenue of approach. The main infantry stack tried to follow, but took a 1MC (I forgot about the darn AAMG on Shermans that Patch for once was leaving CE) to pin the leader and CR the squad on a 12. One Hetzer went to take on the Sherman coming up the east, relying on the fact that being in motion isn’t really a problem for a flamethrower, but it couldn’t get there in one turn. The other one ducked into K20, hoping the +3 terrain would help, and pinned the 9-2 with a bounding FT shot. DFPh reduced I21 with a K/2, but the HS generated a hero, and then broke on a second shot.
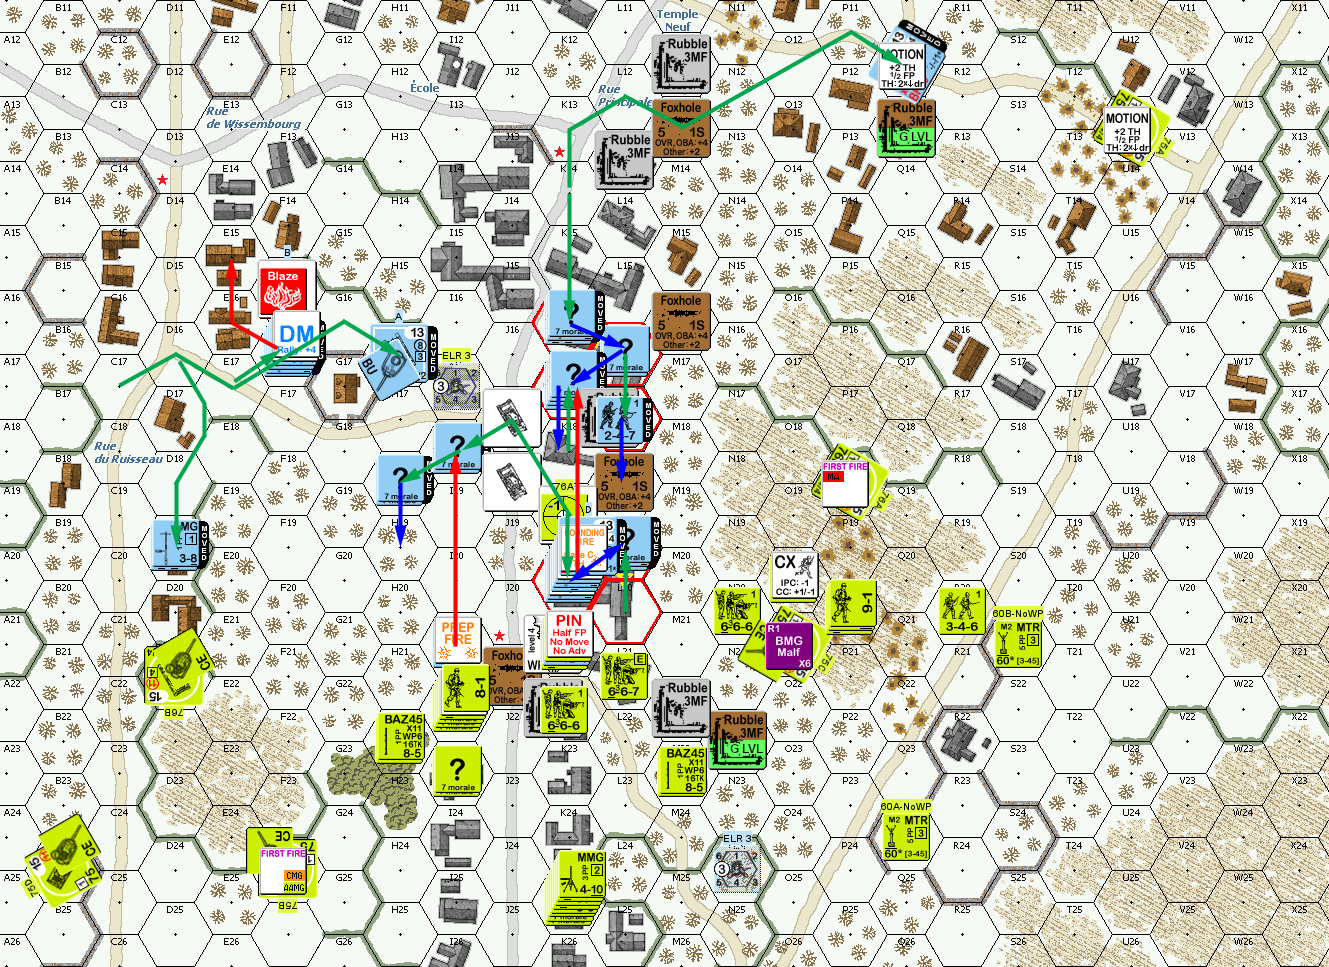
Situation, German turn 4.
Patch rallied his remaining two squads for his turn 5 RPh. He sent a Sherman behind my Pz IV, but I missed a decent shot (10TH +4), caused it to BU with CMG fire, continued on to H15, passed ESB to halt there, won a Gun Duel, and got a hit to destroy the Pz IV with the crew bailing out. He then moved another Sherman up a hex and fired a sM into L19, then moved up to M18, but my HS in the foxhole pinned on a PF attempt. A second Sherman came up, fired a sM into M17, and then headed north for a rear shot at my Hetzer.
My hero managed to pin his 8-1 and a HS in I22, but a squad battle hardened and generated a hero, and his sniper went off and broke my crew. A later shot broke one of the squads. AFPh broke my squad in L19. Patch got a squad and hero into I21, which promptly killed my hero.
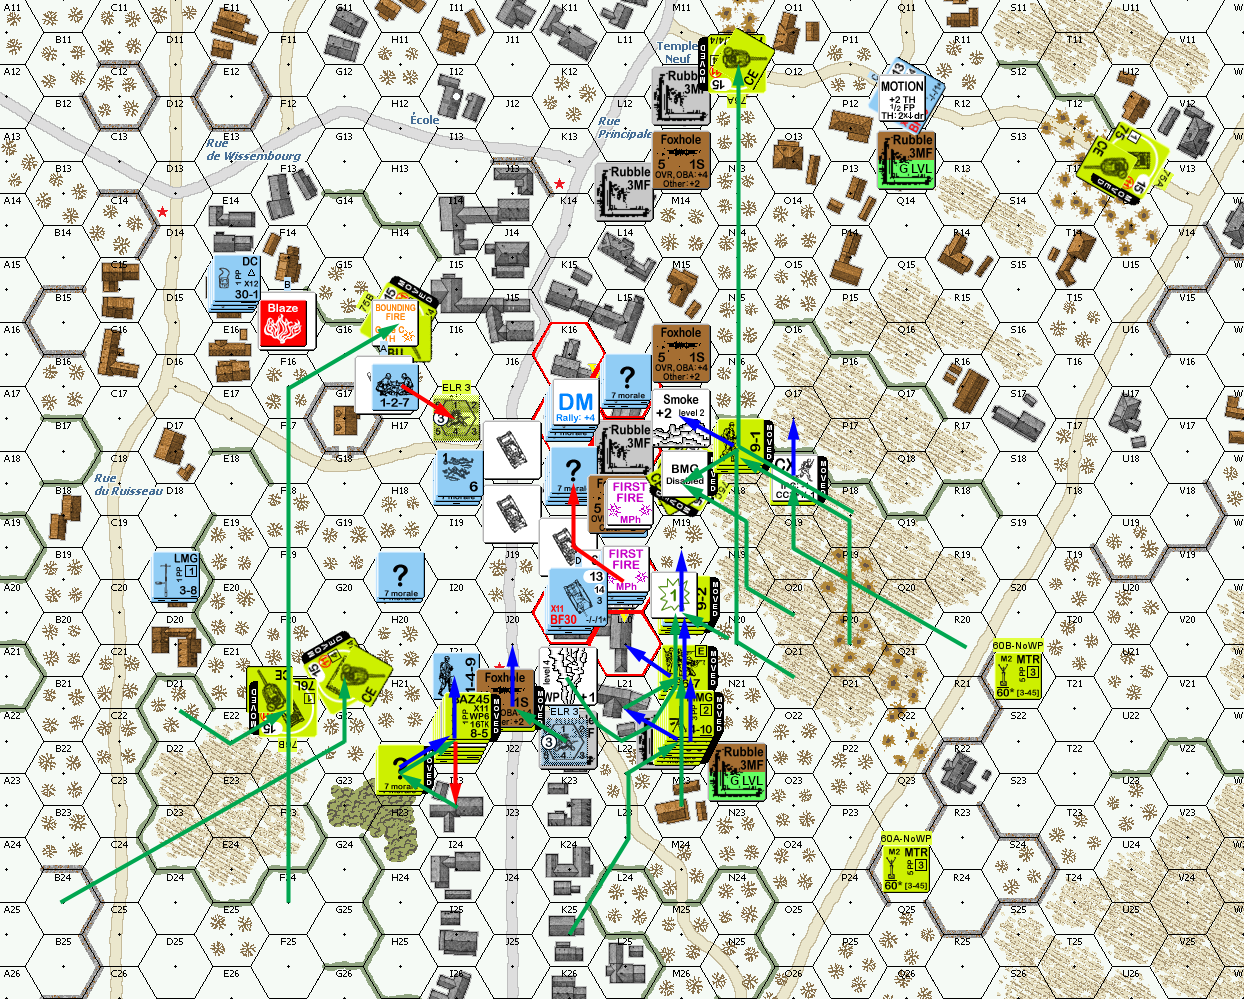
Situation, American turn 5.
I rallied the 9-2 and HS in E15, and the squad in K17 for my turn 5 RPh. While the Germans do get a final half-turn, this was certainly the real chance to break up the successful attack Patch was conducting. I manged to break both squads in M19, and L18 found a PF to burn a Sherman (it needed maintenance anyway, both the BMG and AAMG were disabled). The Flam Hetzer pivoted but didn’t manage a result against the squad in J20.
The Flam Hetzer on the east side went off road; the plan was to try and get out of LOS come around the buildings and try a shot between U12 and V12. N11 missed, tried again with APCR, didn’t have any, and missed again. The Flam Hetzer had to move back into LOS again with a side shot to U13, which hit, even with the limited LOS penalty to destroy it. I tried running the 9-2 and HS in, but the leader got pinned and the HS broke to a hit from H15, despite the TCA change needed. The D19 squad tried working around for a PF shot, and was immediately broken by MG fire. Patch also got a hit on K19 in DFPh to break my squad there.
One of the east-side Shermans came down the road to J16; my 7-0 tried for a PF but merely pinned himself. The Sherman tried for a sM in L16, but had nothing.
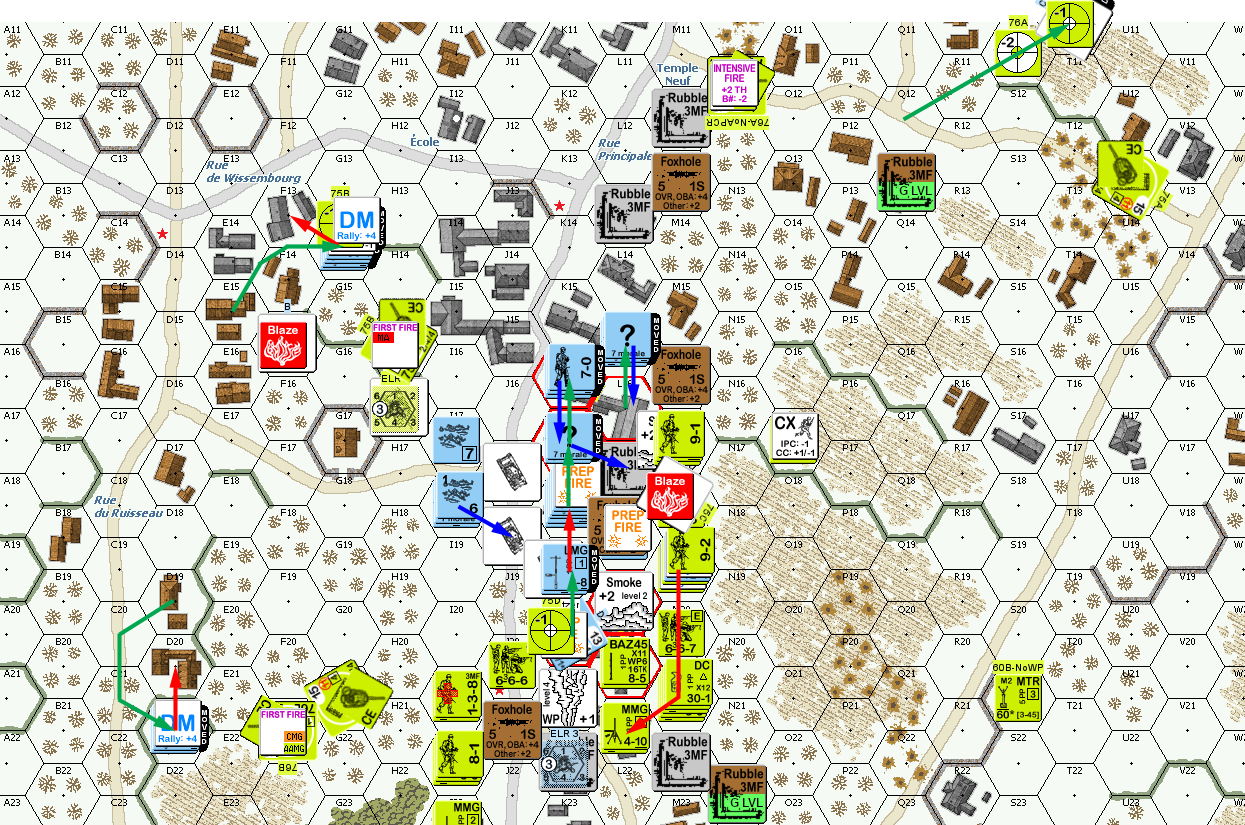
Situation, German turn 5.
Patch self-rallied the squad in I23, and rallied one of the two squads in L21 for his final turn, while my crew self rallied. My primary goal was to keep him out of the K16 building, with the secondary goal of having something left for a counterattack/tying him up in CC. However, I was down to 4 1/2 intact squads, only three of which were in the final victory building, and the Flam Hetzer, and Patch already had 1 1/2 squads adjacent to that building.
Patch finally got a hit on the Hetzer in Prep, killing it with a BAZ, and breaking to backblast. The H15 Sherman found there was no WP in prep, and so moved forward, but my crew found a PF and burned it. I pinned a squad going into J19, but they still threw smoke grenades on J18. Another Sherman came up to J17, and was killed by another PF, but my squad broke to a K/1. Patch moved the HS on the south side, and finally had a successful search, revealing the squad in L16, and that L17 was… an 8-1. The G21 Sherman moved up, and my J19 squad missed with a PF, and then the foxhole HS found one to hit and burn it. [This shortly led to an interesting rule lookup: A burning wreck just produces +2 smoke TEM/Hindrance, but a second (non-burning) wreck is still a separate +1 TEM.]
Patch moved into K19, but fire broke the squad, and my sniper went off to pin a squad in L21. Another squad put smoke on L18. During this, the MMG got established as pointing towards the north side, as I was worried about the guys around I21. Patch considers this a crucial mistake; and as there really wasn’t a way into the building without going through German bodies outside the building there, he’s right on the mistake end. But between the smoke in L18 and the guys already starting adjacent, I felt that was all compromised already.
Final Fire broke the 8-1 and pinned a squad in K19, and the entire M16 stack pinned. That left 2 1/2 squads and a 9-2, most of them ready to advance into L17. Patch’s fire encircled L16, and broke the 8-1 in L17. Rout killed the 8-1, two squads, and two HS for FtR. CC in L16 went to melee, and K18 was an American ambush, which wiped out the defenders.
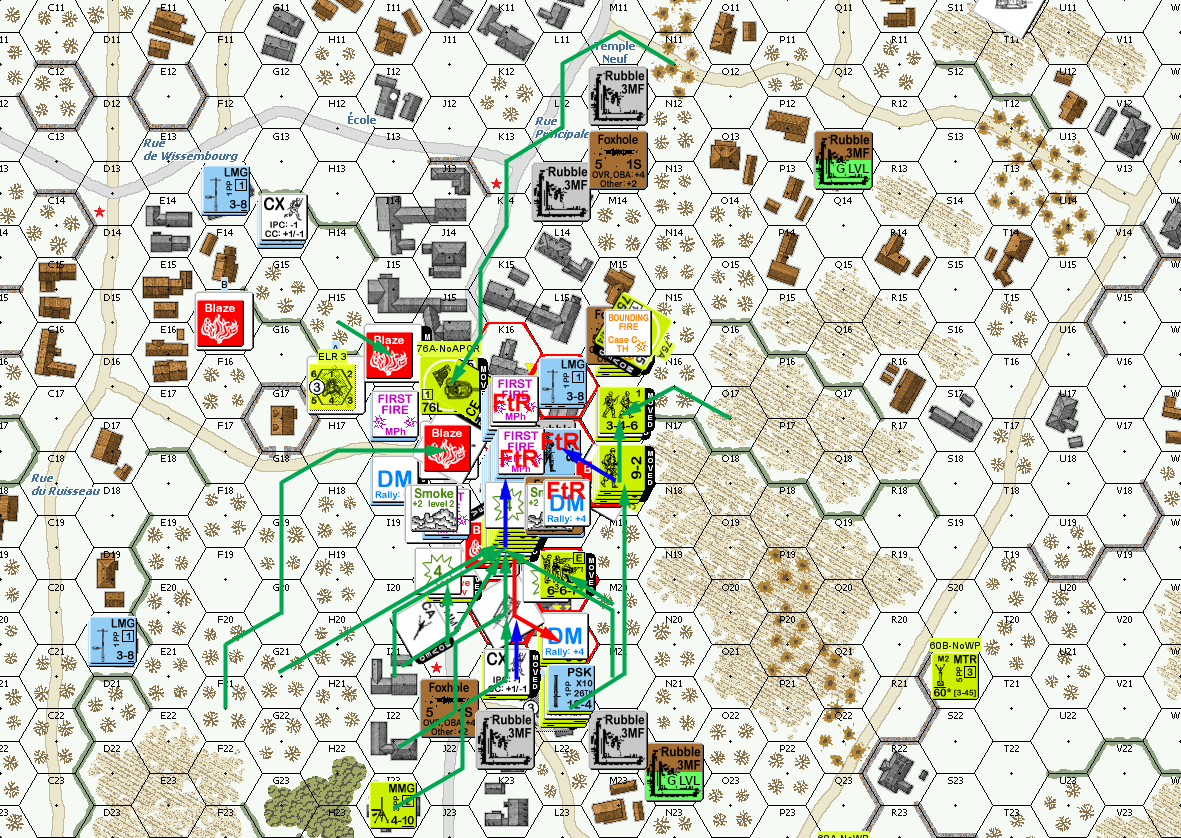
Situation, American turn 6.
I had a couple guys left outside the building, but they had no chance to get in and do something about two squads in L17, so I conceded at that point. If I’d one of the CCs, I would have fired on them and hoped for the best, but now that option was gone.
Afterword
A hard to appreciate bit about Hatten is that the larger buildings tend to be linear, with K16 in particular being a two hex building connecting to two other buildings with wings. This allows shots from J16 to L16 through what is technically part of the same building. Rubbling K16 or K17 to prevent that would have been a good idea, given the ability of armor to cruise around things.
One thing that certainly worked was the M16 and L18 foxholes, with the latter becoming critical near the end. Having both manned would have been better, but I was running out of guys. But having backblast-free Locations in front of the “open” south was important, and it did generally work out.
A little into the game, we had a chance to talk about how his initial drive had gone well, but he’d gotten trapped into crawling along a line of stone buildings. I couldn’t stop him, but it was going to inevitably take too long to get to the second building. This played out about how we figured, but again, I ended up with too few units to stop him from doing practically whatever he wanted at the end. The real problem is my reinforcements barely did anything. Only one squad got to the main area, and only one vehicle really did much (admittedly, distracting two Shermans with one Hetzer was worth something, as long as it lasted).
In the final charge, I used more PFs than almost any other scenario (7 “Dash for the Bridge” is the only thing that might tie or beat the 7 here), but that was still chewing up important fire opportunities, and not getting J16 sealed my fate with FtR. At any rate, splitting into two for a pincer attack is the type of thing my setup would have done better with. One of my concerns was a slow crawl from the south through the fields, with the orchards and armored assault giving just enough cover. Certainly, there is no great way to attack this position.
Discussion ¬