
Chance Encounter
After trying Congress of Vienna, Mark and I decided to try out Renegade Legion: Centurion. I’d been interested in it since it came out in ’89, and got a second edition copy around ’94; I had started priming the miniatures in the set when I got interrupted by a job and a move.
It is FASA’s tactical ground combat with hover tanks that grew out of their Star Wars bid (which is why a space fighter game was the first entry in the series). Movement is geared around the idea of tanks that don’t have solid contact with the ground, and damage is done by template shapes for various types of ammo overlayed on a a grid diagram of armor and vehicle systems.
It took a bit for me to find the basic sample scenarios in the set, as they’re hidden in the center of the booklet with all the tank record sheets to copy for use. The base scenario has each side bring three platoons (of three tanks each), which is actually a fair bit to keep track of. Proper excuses are given, but the sides are generally symmetrical, with a medium tank, medium APC, and light APC platoon each (all platoons—start as—three vehicles). The details of armament and armor/shield layout are different, which is a nice bit to explore.
The scenario begins with each side entering from opposite sides of the map. We both started feeling out with our light APCs, and Mark largely came in on the center, while my APCs went on the flanks, while my tanks came in at low speed in the center, and worked on climbing a hill. We were largely out of LOS, but got one lucky hit each to do laser damage which penetrated armor, but not the ballistic protection (free “internal” hits).
During the second turn all three of my tanks (“Liberators”) stopped, fired digging charges, and grounded in the resulting craters, making them hull down, but immobile (until the start up again, which I never did). My light APCs maneuvered into light woods, and one stopped to drop off a squad. One medium APC on the other flank went hull down and dropped its squad, while the rest continued to maneuver. Mark’s mediums came up the center while the light APCs (“Lupus”) turned south towards mine.
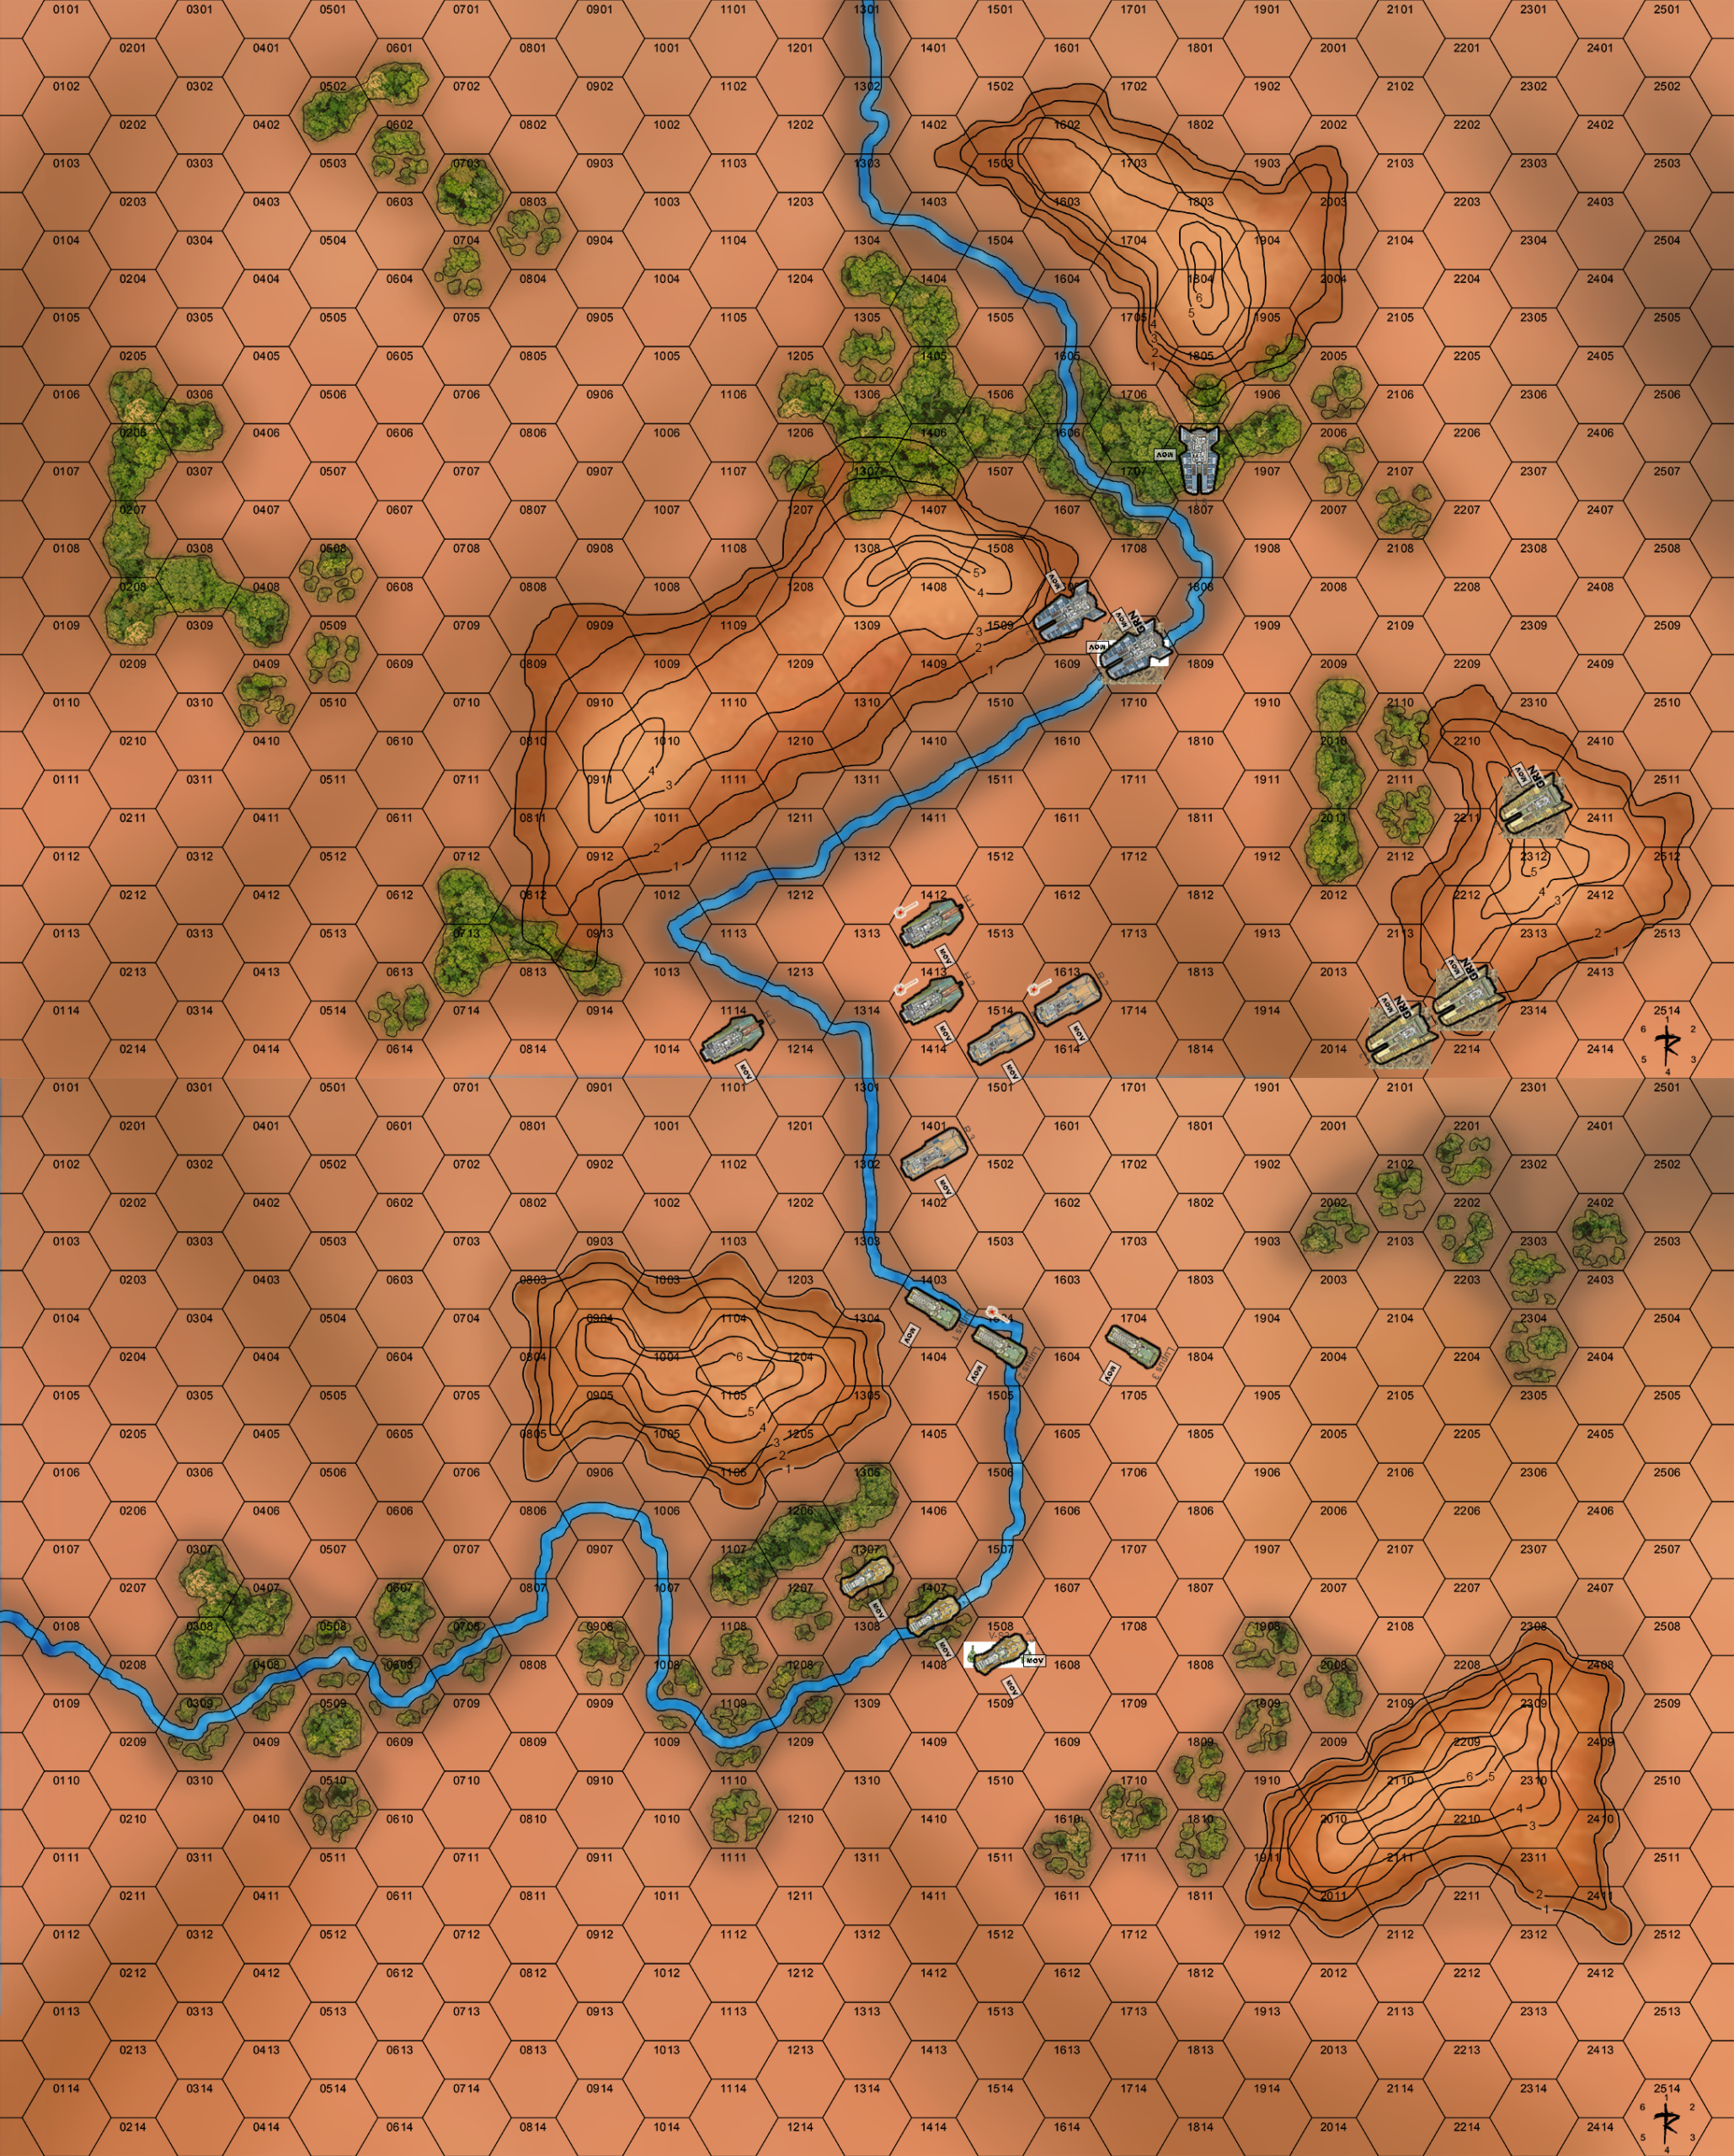
I manged to paint two of his tanks (“Horatius”) and one each of his APCs, while nothing connected for him. This was largely due to the modifiers from cover or being hull down, but the Renegade Legion units also have a bit more shields (and less armor) than TOG, so it was easier all around for me. And I got a bit lucky. Painting lasers are an interesting idea. Missiles and lasers can be deflected by shields that are a to hit penalty against vehicles. The gauss cannons that are the technical main cannons ignore shields, and if you can manage to “paint” a target with a targeting laser, everything else ignores the shields too. And you can do out-of-LOS missile fire on them. The medium APCs don’t actually have gauss cannons, so painting targets is pretty important here.
 Mark did some damage to a Liberator and a Spartius (medium APC), but took a pounding in return. Three vehicles took a nasty number of hits, and a laser followed other hits in to punch straight through the driver into Vehicle Destroyed territory on Horatius #2.
I set the Liberator platoon for opportunity fire on the third turn. (That rule is pretty nice; you have to already be stopped to do it, and you can’t paint or take advantage of laser painting with it, but if you don’t actually op fire you go back to normal fire rules.) Mark started with the surviving Horatiuses, and my fire punched through the front armor with 150mm HEAP to take out the #1 vehicle. #3 took some solid hits, but got turned around to get out of accurate short-range fire. The Lupuses circled around to come at my tanks from the south, while the Romuluses (medium APC) headed north and started letting off infantry. My Spartiuses continued forward a bit, and a second one let off its infantry, while my Vipers let off the rest of their infantry, grounding at the south end of the clear battle area.
Again, painting went better for me than Mark, getting the remaining Horatius and the mobile Romulus, while he painted my hilltop Liberator. This took some good hits, taking out the turret weapons and the backup right shield (primary was still fine).
The final Horatius took hits all over, which largely kept anything important from being taken out (just the primary terrain sensor, still had the backup). All three Romuluses were knocked about some.
There was more op fire setup in the fourth turn, and the last Horatius took a couple shots to the stern as it moved away, and while they penetrated (150 HEAP followed by 50mm Hammer Head on the same column), it merely reduced available thrust (I think there should probably be an automatic 1 point reduction in velocity every turn for wind resistance; as is, a vehicle can go forever without taking any action).
Two of the Spartiuses turned to face back towards the Romuluses, and the Lupus platoon moved into the central area. The lead one (#2) went through the hex of a Liberator, and at point-blank took fire from another, which did no more than take out a shield generator. Lupus #3 moved next to a Spartius, and took four hits from it through the front armor, with two lasers hitting the same column for destruction.
Laser painting again went my way. Romulus #3, was painted again, and lost comms and the targeting computer. Romulus #2 and Lupus #2 also took some bad hits, but they generally didn’t get past the ballistic protection.
Afterword
We called it after all firing on turn 4. Mark had lost a lot, and would, at best, be disengaging. It really wasn’t worth the time to play out. I kind of had a plan as of middle of turn 1 movement, and it worked well enough. Once the Liberators got into position, they did effective work. The 150mm Gauss cannons do a lot of damage. I assume it would take a heavy vehicle to get to the 200mm version.
Okay, there’s a lot to go through here:
First, its nice that there’s a Vassal module for a 1989 game that doesn’t see a lot of play, but it does need some help. The graphics are taken from the first edition fold-up box tanks, and the counters. Fine enough, but the settings to label them in-module (so you can tell one tank from another) are medium gray text which is often nearly impossible to see (especially as it tends to hit hex borders). You also have to just know what the various tanks look like, and which color is which for the infantry. (Mark had trouble remembering which end was the front and which the rear. FASA’s, at best, ‘okay’ tech design wins again.) The counter controls are locked out per side for no real reason; so you can’t, say, mark that you just painted an opposing vehicle (the control and marker exists, your opponent just has to do it for you). Finally, everything is set to ‘don’t stack’. This makes having multiple vehicles in the same hex a problem (especially if they’re facing the same way). Now, the general assumption with the physical miniatures is that you won’t be doing that, but the rules do say there is infinite stacking (hexes are 200 meters across) with no stacking penalties, so the module needs to make provision for that.
Maneuvering the grav tanks is one of the interesting parts of the rules, as the design does give some feel for the fact they’re sliding around. (Honestly, it should probably end up with some sort of vector system since it should be possible to keep going in one direction while turning around to face the front armor at the guys you just blew past.) You have limited points each turn to change velocity each turn, and you only spend to accelerate at the start of the move, and decelerate at the end of the move. This requires some good planning ahead, and I recommend trying to stick to lower speeds so you don’t find yourself in trouble. However, the penalty for doing anything wrong (notably, needing more velocity to enter the next hex than you have) is immediate grounding, which turns into ramming the ground at your current speed) is harsh so you need to preplan your entire move in advance, and can’t afford to ‘wing it’ at all. (Oh, and one insoluble question: You use all your velocity [0 left], but thanks to a downslope, the next hex would be 0 to enter. Can you keep going until there is a hex with a non-0 entry cost? Must you keep going?)
Weapons fire is a bit fiddly, with laser painting rolls, to hit rolls, location (turret/body) rolls, and armor location (column) rolls. Worse, most vehicles have a couple of direct fire weapons, plus missiles to fire off, so the amount of work is high on a per-vehicle basis (one turn logged 47 shots taken by 15 vehicles and 6 squads). Also, the firing arcs are overly generous, at 120 degrees. This is especially bad on the Horatius, which has a fixed mount main cannon on the hull. I think 60-degree arcs would be better. The ASL solution to that is to point the vehicles at a hexspine for an easy covered arc, but that would have vehicles going back and forth if they want to go ‘straight’, which would feel really odd here, so I think going with alternate-hexrow boundaries (or shield boundaries, if you know SFB) would be better. Not that it matters much; most weapons, even large ones, are turret mounted, and it’s easy to understand why turret facing is ignored here. But the occasional hull-mounted direct fire weapons do end up feeling far too generous.
Sequencing everything is also a pain, as you’re to go back and forth declaring all fire, and then resolve it all. Sensible, but remembering it all between declaration and resolution does require notes, especially as the main guns have three different types of ammo to choose between. I think some sort of command/initiative system like Panzer‘s might do better here.
Terrain is a really big sticking point. First, everything is inherent terrain without it being explicitly so. If LOS goes down a hexspine with blocking terrain on one side, you ask the other guy if you can see him, and of course he’ll say ‘no’. Saying ‘yes’ won’t even let him fire back, as you always ask the defender in these situations if you can see the target, and you’ll say ‘no’ when he wants to fire on you, even if he let you fire on him. Worse, hill levels have a well-done effect on movement, but you’re always at the highest level depicted in the hex. Well, that wouldn’t be a problem, except there are plenty of places where an elevation line wanders just a little bit into a corner of a hex, which immediately raises the entire hex to that level. Also, the maps tend to give two or three elevations at a time, so there’s not a lot of subtlety. If I were to re-do it, I’d get rid of all the corner cases, have at least some rolling areas with lots of little ups and downs, and maybe look into Last Hundred Yard‘s intermediate levels.
That also brings up the maps. Technically, there’s four, but they’re two backprinted sheets, so you can’t have more that two in use at the same time. Battletech maps will work with Centurion, but they have different hex sizes, so you can’t use them together. They’re fairly attractive, but I’d say four separate maps would have been a lot more valuable (and borrowing from the future, doing them on good cardstock would have been a big plus).
Overall, there’s lots of good ideas, rules that need a rework… and a high degree of per-unit fiddlyness for a game where the intro scenario has eighteen vehicles and twelve squads.
Discussion ¬