Rindis.com

All my hobbies, all the time
  • Home
  • My Blog
  • Games
  • History

Categories

  • Books (503)
  • Comics (10)
  • Gaming (917)
    • Boardgaming (673)
      • ASL (154)
      • CC:Ancients (83)
      • F&E (78)
        • BvR – The Wind (26)
        • Four Vassal War (9)
        • Konya wa Hurricane (17)
        • Second Wind (5)
      • SFB (78)
    • Computer games (162)
      • MMO (77)
    • Design and Effect (6)
    • RPGs (66)
      • D&D (25)
        • O2 Blade of Vengeance (3)
      • GURPS (32)
  • History (10)
  • Life (82)
    • Conventions (9)
  • News (29)
  • Technology (6)
  • Video (49)
    • Anime (47)
  • Writing (1)

Patreon

Support Rindis.com on Patreon!
Become a patron at Patreon!

Other blogs:

RSS Inside GMT

  • Coast Watchers – Session Report – “The Airfield” June 5, 2026

RSS Playing at the World

  • Playing at the World 2E V2 Arrives May 5, 2025

RSS Dyson’s Dodecahedron

  • Cyberstyle 8.4 June 6, 2026

RSS Quest for Fun!

  • The Expense Post May 24, 2026

RSS Bruce Heard and New Stories

  • Pain, Exhaustion, and Morale in D&D BECMI June 7, 2026

RSS Chicago Wargamer

  • The 2 Half-Squads - Episode 310: Cruising Through Crucible of Steel January 27, 2023

RSS CRRPG Addict

  • BRIEFs: Black Crystal (1982), Creepers (1982), Chitei Tanken (1982) June 8, 2026
SF&F blogs:

RSS Fantasy Cafe

  • The Leaning Pile of Books May 24, 2026

RSS Lynn’s Book Blog

  • Booking Ahead/Weekly Wrap Up June 7, 2026
ASL blogs:

RSS Sitrep

  • Cardinal ASL Sins March 18, 2026

RSS Hong Kong Wargamer

  • FT114 Yellow Extract After Action Report (AAR) Advanced Squad Leader scenario April 16, 2025

RSS Hex and Violence

  • This still exists? March 25, 2025

RSS Grumble Jones

  • AAR Slides for Schwerpunkt SP96 Husum Hotfoot June 5, 2026

RSS Desperation Morale

  • How to Learn ASL March 16, 2025

RSS Banzai!!

  • October North Texas Gameday October 21, 2019

RSS A Room Without a LOS

  • [Crossing the Moro CG] T=0902 -- Rough start July 18, 2015
GURPS blogs:

RSS Dungeon Fantastic

  • Felltower House Rules Examined June 7, 2026

RSS Gaming Ballistic

  • B-Scale: Damage That Scales from Tardigrades to Kaiju June 5, 2026

RSS Ravens N’ Pennies

RSS Let’s GURPS

  • Review: GURPS Realm Management March 29, 2021

RSS No School Grognard

  • It came from the GURPS forums: Low-Tech armor and fire damage January 29, 2018

RSS The Collaborative Gamer

  • Thoughts on a Town Adventures System January 18, 2022

RSS Don’t Forget Your Boots

  • GURPS Supers Newport Academy #6: “Old Friends, New Again” June 7, 2026

RSS Orbs and Balrogs

  • Bretwalda - Daggers of Oxenaforda pt.4 - Fallen King May 27, 2017

Two Rounds of Camalatrum

by Rindis on March 26, 2025 at 12:00 pm
Posted In: CC:Ancients

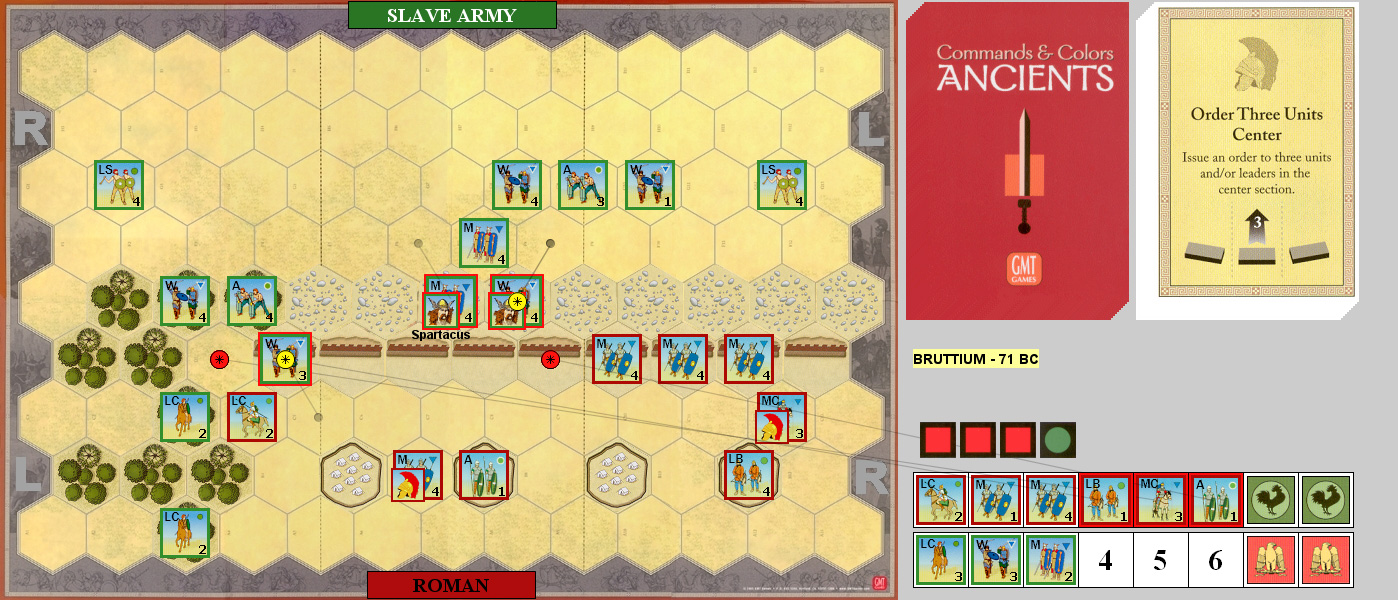
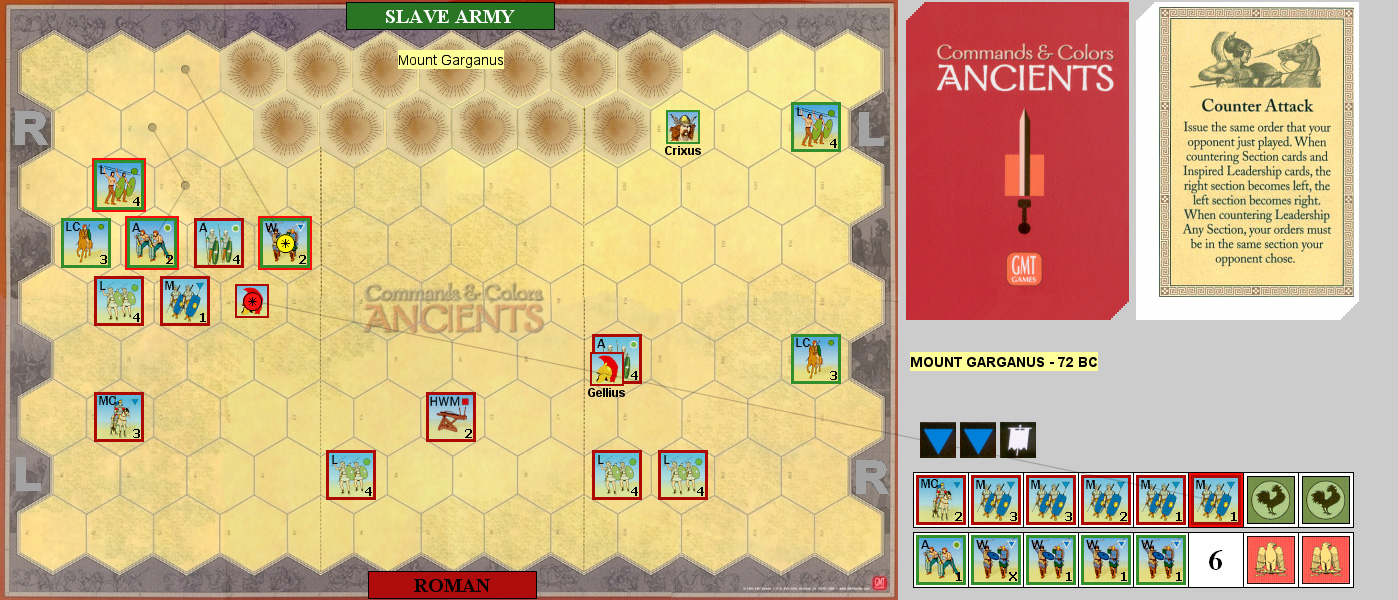
After Jackpot Jones’ untimely death, Patch and I did our usual pair of games of Commands & Colors: Ancients. Up this time was the Battle of Camalatrum, near the end of Spartacus’ rebellion. Both sides have separate detachments on the “wrong” side of the board. There is a camp that the Romans get a banner for as long as they occupy it. Also the ex-slaves start on hilltop positions, which can make them harder to deal with.

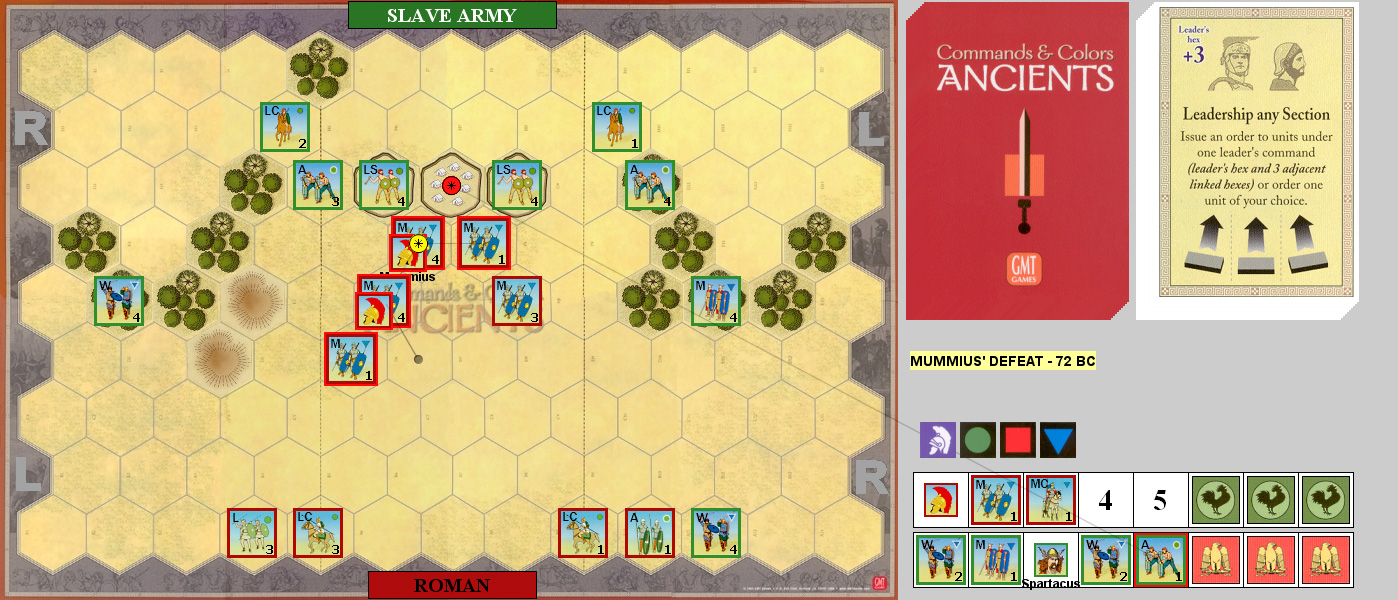
I had the slave army first, and started with Order Mounted to cycle it and move two LC. Patch Ordered Four Left to bring his detached force into contact with my center to take a block off an Auxilia. I Ordered Two Left to transfer a LC to the center and Patch advanced with Order Three Center. Order Two Right moved my detached force into the tree line and Patch used Leadership Any Section to bring his detached force to bear, knocking out my Lights at the corner of the hill, and then doing two blocks to a Warrior on momentum, and he took two blocks in exchange.

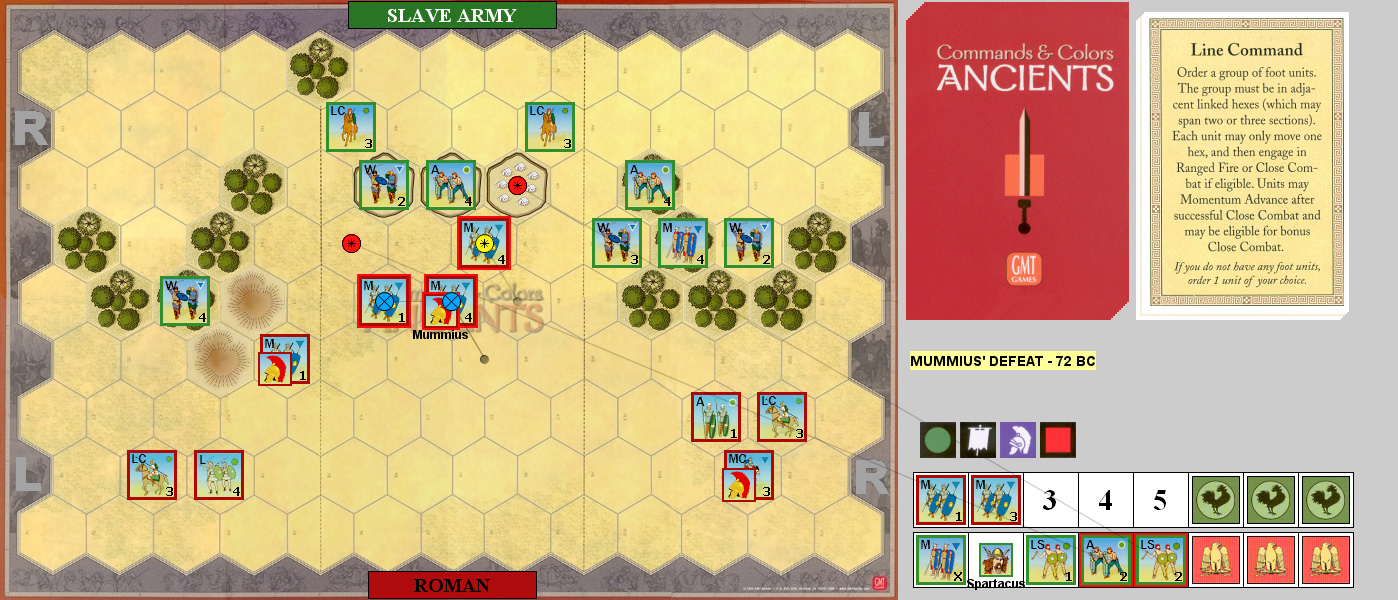
I Counter Attacked to drive Patch back off the hill, finishing off an Auxilia, knocking out a Medium, doing three blocks to another, and killing the surrounded Marcius, in exchange for four hits on three units. Patch Ordered Three Left to finish off a Warrior and Inspired Right Leadership let me engage with the remainder of my center to finish off a Medium and do three hits to the only Roman unit left there. Patch Ordered Two Center to kill an evading LC. I Ordered Mediums to bring my flanking force out of the woods (Patch had just advanced their target out of the way…) and finished off his Medium.

Patch Ordered Lights to occupy the camp, and I used Inspired Left Leadership to come down off the other hill and charge my own camp, doing two damage to the Light. Patch Out Flanked to knock out a Warrior and do a block to a Medium, taking one block in the process. I Double Timed my flanking force to the camp and finished off the Light. 6-4

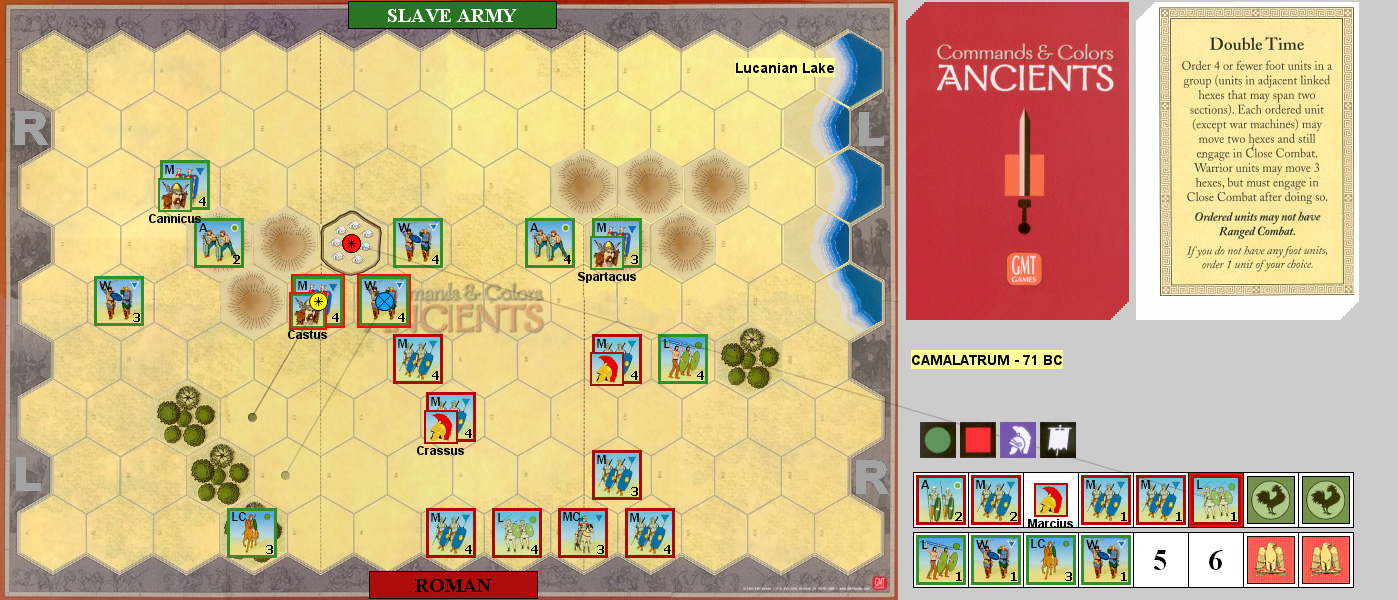
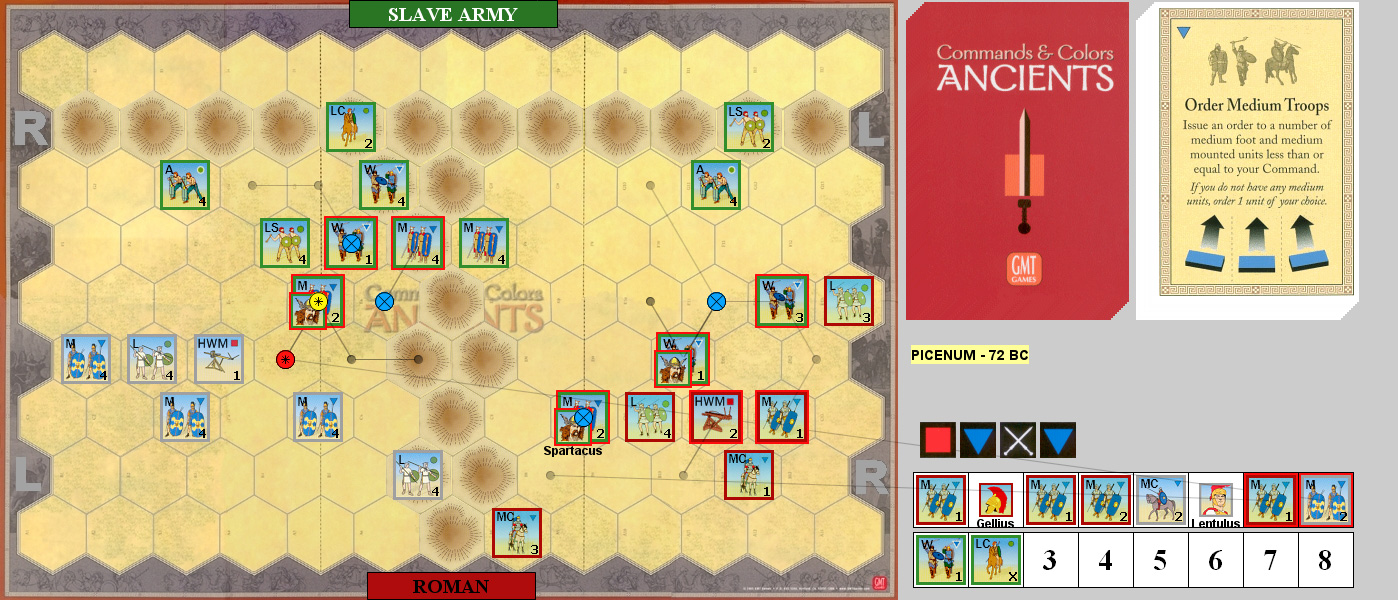
The second game started with moves on my right, with Patch doing a block to a Medium. I Ordered Mediums to assemble a line in there, wipe out a Warrior, and trade a block between Mediums. Inspired Left Leadership had Patch charge in again, finishing off my Medium, but taking four blocks on two units in return. I Ordered Three Center, finishing off a Warrior, a Medium, and an Auxilia, but losing my MC in the process.

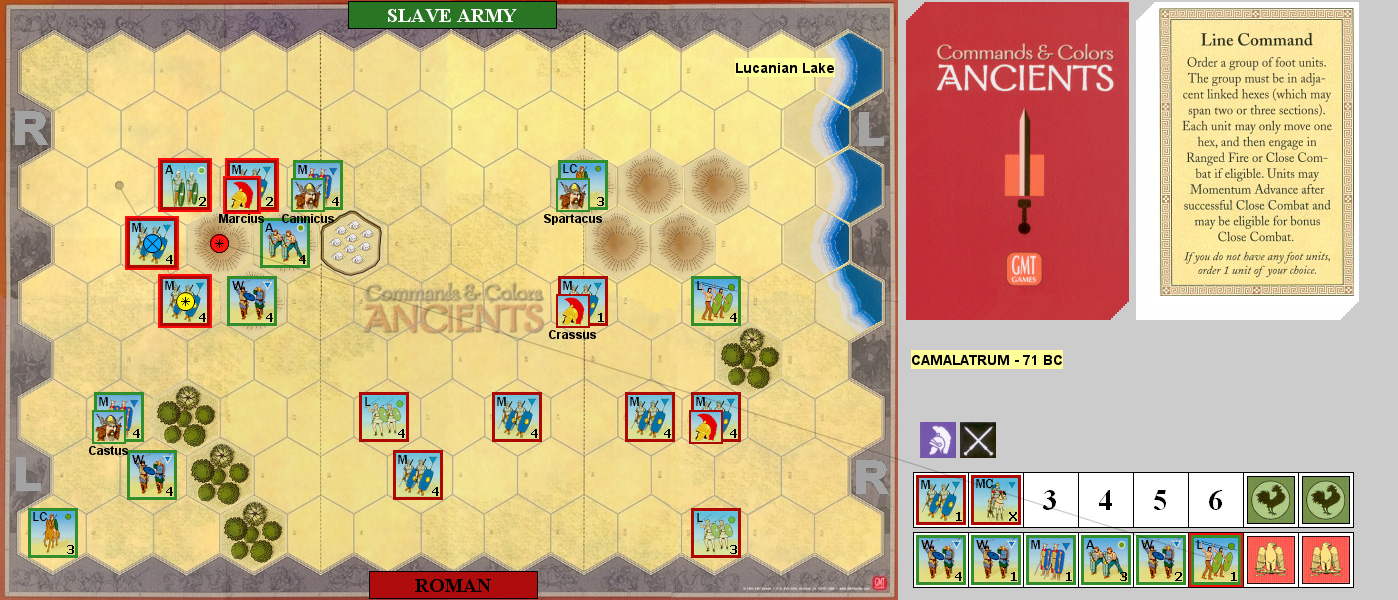
Patch Ordered Two Center to get Spartacus to a new Warrior, and we did two blocks to each other. I used Line Command to bring in the separated group, doing one block to two against the corner Light. Patch Ordered Two Right for ineffective ranged combat and I used a second Line Command to envelop the hill, and we traded one block each again. Patch Ordered Three Center, doing four hits across two Mediums, but lost a Warrior. A third Line Command kept me going around the hill, where two attacks finally got the last two hits on his Light. 6-2

Afterword

I generally don’t like ‘set up in the enemy’s rear’ scenarios, because the rules don’t let them operate right. However, with both sides doing it here, it’s easier to take, and is unusual even for those.

I had to be a little cautious at the end of the first scenario, since occupying the camp put him at five banners, and a leader death (he wasn’t going to kill a unit, but the 1-in-36 could still happen) would actually give him the win. Both of us complained of poor cards at the start, and the scattered nature of the armies also hindered things. Once I got going, I kept moving, but the opening had little I could do.

My cards were better than Patch’s in the second game, but more importantly, my dice were amazing. Except for the uphill attacks, I had really good dice, and largely swept everything ahead of me.

└ Tags: C&C Ancients, gaming
 Comment 

Two Rounds of Bruttium

by Rindis on March 2, 2025 at 12:00 pm
Posted In: Boardgaming

After the failed defense in southern France, Patch and I did our between games round of Commands & Colors Ancients. We’re in the later part of Spartacus’ rebellion, with the Battle of Bruttium. The Romans have a nice wall, but it’s not well manned, and there is enemy cavalry behind it (in woods) already. There’s a ditch in front of the wall, which stops movement, but does nothing else. Also, Sparticate foot units can exit the Roman side of the board for banners.

I started the first game with a slave Mounted Charge, nearly killing a LB with two retreats and two hits, and doing a block to a LC, but taking two hits on a LC in return. Patch Ordered Mediums to finish off my LC and chase off another. I Ordered Lights to finish off his LB, and do a block to another. Patch used Mounted Charge to shift left and chased off my only LC still behind the wall. Order Two Right only got me a couple casualties, and Patch chased me off his flank by calling I Am Spartacus. I Counter Attacked (8 dice!) to order five units, moving up some Warriors and doing one block with ranged combat. Patch Ordered Lights to trade a block each.

I used Leadership Any Section to rush the wall, and did three blocks to an Auxilia. Patch Coordinated an Attack to pull him back, and move up replacements. I Ordered Four Right to consolidate at the wall, and drove off a Medium. Patch Double-Timed to get more guys at the wall, but not where I was, and I moved up with Order Two Center. Patch Darkened the Sky to force a couple retreats and finish off a LC. Inspired Center Leadership got me into contact, and a couple Warriors over the wall, but I took slightly heavier losses than I gave. Patch struck back with Line Command to finish off a Warrior, but lost a Medium in return. Leadership Any Section got me to the wall over to my left, drove off a LB, but took one more block than I did again. Order Two Center let Patch join a leader with a new unit, who finished off a weak Medium. Order Mediums let me bring up a good number of fresh units, and I finished off four different units for the win. 6-4

In the second game, Patch opened with Order Lights and brought up a couple units on his right, and did one block at range. I Move-Fire-Moved to stiffen my left, while Patch approached the ditch with Order Three Left, and chased off a LB. I then Double Timed Mediums into that part of the wall, and Patch shifted slightly with another Order Three Left. Mounted Charge mixed things up on my left, and we each lost a LC to banners. Double Time did two blocks each to an Auxilia and LB, while also chasing off my LC. I started towards the left wall with Inspired Center Leadership, but could only do two blocks damage.

Patch came into contact with Order Three Center to destroy two Mediums, and a hit to a LB while taking three blocks across two units. Order Two Center nearly lost me a weak Auxilia, but I finished off a Medium, and sent Spartacus running back outside the walls. Line Command got him into the ditch, doing three hits to an Auxilia in return for one each on two units. I used Line Command to shuffle the defense over a hex, doing three blocks to a Warrior who retreated along with an Auxilia. Patch Ordered Three Center to regain the ditch, finished off a weak LB, wiped out a MC, and finished off my Auxilia. 3-6

Afterword

Both games finished very suddenly with multiple units going down in one turn. The combined fortification and and woods make for a very unusual battlefield, and I like how that works out. I think seeing the ditch for a Roman camp stop movement is something that needs to show up more often. For one thing, it really focused attention on the wall, since an enemy can’t just get through an empty space, and (with cards) get a chance to react.

The action was fast and furious, but didn’t see a complete collapse anywhere. Patch commented how I was closing up gaps as fast as he made them in the second game, and I was trying to hold cards to do a few things like that. But, just couldn’t bring enough force bear to hold him off.

└ Tags: C&C Ancients, gaming
 Comment 

Two Rounds of Mummius’ Defeat

by Rindis on November 30, 2024 at 12:00 pm
Posted In: CC:Ancients, Technology

After trying out a chase in SFB, Patch and I moved back to a round of Commands & Colors: Ancients. We’re in Spartacus’ rebellion, this time with a defeat of part of Crassus’ army under Mummius from Expansion #2. The Roman army is concentrated in the center, and there’s three camps on the barbarian side; taking two of them is worth a banner.

Patch had the Romans first, and started with Order Four Right (pity there’s only three units there), with each of us losing two blocks, and Patch’s LC losing another on a retreat. I Ordered Three Left to push the remaining units back with another two losses. Move-Fire-Move let him redeploy, but he couldn’t get any hits, and I Ordered Three Center to cause one loss with missile fire. Patch did a Line Command in the center to drive off my LC with losses. I Out Flanked, driving Patch to the baseline, and he lost a leader, but he finished off the Warrior that was weakened at the start.

Another Line Command brought Patch up to the camps in the center, where he weakened my Auxilia, and did a block to a Medium with ranged fire, at a cost of two blocks to a Medium. I Ordered Three Right to come in on the flank of the advancing Romans, knocking out a Medium, but taking two blocks in the process. Inspired Center Leadership let Patch react, knocking out two Mediums, and killing Spartacus as he was forced to evade through a Roman unit, while I did four blocks back. Order One (Leadership Any Section—I only had one leader) let me finish off a MC, but momentum only let me force his Auxilia to retreat to the baseline. Leadership Any Section let Patch finish off my weak Auxilia in the center. 3-5

In the second game, I led with Double Time to get at the camp in a hurry, and took two losses while severely depleting the two LS in the camps. Patch hit me in the flank with Leadership any Section, knocking out two Mediums and nearly destroying another, while taking three blocks in return. I closed up with Order Four Center which saw me take another two hits, but knock out a Medium, LS, and kill Spartacus. Patch Out Flanked to force a weak Medium to retreat, while I forced a Warrior to retreat in the center, while on my right we traded three blocks. Line Command let me advance in the center and finish off two units. 5-2

Afterword

Both games saw very bad Roman starts suddenly turn around for a quick victory. In the first game, I concentrated on the weak flanks, and they were pretty much gone when Patch rolled up the center for a win. The second time, my quick march into contact in the center went very wrong, but Patch couldn’t hold out when I kept the pressure up. Also, this is the first time we’ve a leader be the first casualty of the game.

It’s a fun quick scenario. Five banners is always fast, and the units are close enough that there’s not a lot of time spent trying to get into range. The Roman four-card hand is a real problem, but if they get the cards (and dice) they have what they need to win here.

└ Tags: C&C Ancients, gaming
 Comment 

Two Rounds of Picenum

by Rindis on October 29, 2024 at 12:00 pm
Posted In: CC:Ancients

After my too-close win in Hatten, Patch and I went to our between-games round of Commands & Colors: Ancients. Up this time was the Battle of Picenum from Expansion #2. There’s a line of hills down the center, and the Romans have two separate armies; one on each side of the hills. Any command card can only order units from one army or the other, so things like Out Flanked aren’t nearly as useful. The slave rebellion has no such problem, and can roll burning logs down onto the Romans (‘rolling fire’). It costs them a block to use, so we hardly did it, but it can generate a series of two-die attacks. Almost as unusual as that, each Roman force has a heavy war machine. Also the slaves can get banners by exiting units off the Roman side of the board.

I had the rebellion first, and we spent a few turns trying to maneuver before I charged down out of the hills with a Coordinated Attack and drove off a unit of Lights. Patch hit back with a Line Command, but merely took three hits for his trouble. I then Out Flanked to knock out the weakened Medium and drive off the Light again, but lost three blocks to nothing on momentum. Inspired Center Leadership finished off my weak Warrior, drove another off, where it took a hit from the HWM, and did two hits to another Warrior.

Order Mediums put me in contact on both sides, and we both had a unit nearly knocked with, with Gellius getting killed. Out Flanked (more Order Two here) let Patch reshuffle while Move-Fire-Move let me move up and knock out a couple blocks. I advanced along the hills with Order Three Center, and finished off two Mediums. Order Three Left drove off my LC with a hit, and Patch did a hit to a Medium, but lost his MC and Lentulus in return. Order Four Left got me into his fraying line, but I only took a hit to my LC. Patch Counter Attacked to finish them off with a blocked retreat, and two of my units barely hung on, but did equal hits in return. Order Mediums finished off a Medium and drove off another with three losses (taking a banner to retreat, and then retreat again on momentum). A final Medium took two hits, and drove off the attacker, survived a second attack, retreated from a third attack, but was finally knocked out on momentum. 8-2

Again, it took a couple turns to get to grips with each other in the second round, and the action started on the Roman right (Gellius) when Patch Double-Timed up to my line and knocked out the HWM, a light trapped against my line, and did three blocks to a Medium, but lost five blocks and a full Warrior in return (18 blocks gone in the first turn with combat!). Line Command let me finish off a Warrior and Medium, and Patch pulled back with Four Units Left. He sent a LC into the middle hills, who evaded a Mounted Charge, which did nothing.

Patch Ordered One (Heavy) for a rolling fire attack that did nothing, and I tried telling the slaves that I Am Spartacus to order three units to do one hit, and take one in return. Patch Ordered Mediums to finish off a MC, and I Ordered Four Right to do two damage while taking one. Patch Ordered Two Center to pull back a weak Medium and knock out one of mine, followed by Order Three Center to get a LC through the lines and finish off a weak Medium. I Out Flanked on the right to wipe out a full Medium. Patch Ordered Three Center for the exit and I Ordered Three Right (with only two left…) to lose two blocks for no gain. Patch Darkened the Sky to finish off a Medium, and knock out the other HWM. 4-8

Afterword

Okay, this is a highly unusual scenario. I think the rolling fire is too costly for what you get, and is really complicated (hard to get around that though). But the terrain is interesting, and the ‘two armies’ bit really takes a lot of wind out of the Roman’s sails.

Thanks to the cards, the fighting stayed on the Roman right in both games. Also, the initial Roman set up is strung out, which led to the game being slow to get going. The slave revolt could rush down to try to pick off units… but they’re out of rang for that too. At any rate, it’s a really wild situation.

└ Tags: C&C Ancients, gaming, Rome
 Comment 

Two Rounds of Mount Garganus

by Rindis on May 20, 2024 at 12:00 pm
Posted In: CC:Ancients

The death of the Alpini HQ staff meant it was time for Patch and I to play another set of Commands & Colors: Ancients games. Up this time was the Battle of Mount Garganus from Expansion #2. This is Spartacus without Spartacus, as he’s split his army, and his deputy, Crixus, has allowed himself to be surprised by the Romans. This shows up by having a large, impassible, hill mass directly behind the slave army center. The Romans go first, get an extra card, and have a slightly bigger army, including that rarity, the heavy war machine.

Patch had the Romans for the first game, and led off with Order Three Left, getting some of his Mediums in motion. I Move-Fire-Moved, getting both wings moving, and forced a Light to retreat. Patch advanced the rest of his Mediums with Order Three Right, and I Ordered Three Right to force another Light to retreat with ranged combat. Patch forced off a LC with Order Two Left, and I did nothing with Order Four Left.

Patch Ordered Three Right to get his Mediums into contact, trading a block with an Aux. I Ordered One (Heavy) to do a hit and banner with my LC against his MC, which routed it off the field. Patch Ordered Three Right again to hit my Aux, which he destroyed, but not before it did three blocks to a Medium, and a block to a second one from a First Strike. Momentum got a block on Crixus’ Warriors, with another two going on a blocked retreat, though battle back finished off the Medium, and sent Gellius running back to an Aux.

Leadership Any Section saw my Warriors scatter, doing two blocks to a Medium, and trading three blocks for a lost Warrior in another combat (from combined hit and retreat losses). Patch Ordered Three Center, but only did a block of damage from making Warriors retreat. I Out Flanked, and finished off two Mediums, and traded three blocks to three on Momentum. Patch Ordered Two Center to finish two weak Warriors, and reduce another to a block.

I Ordered Two Center, but didn’t do more than force a Light to evade; Patch’s Order Three Center finished off a weak Warrior, and did a block to another, forcing it to flee to the baseline. Line Command ordered one unit who traded two blocks for one and retreated. Patch Double Timed his left in pursuit, but couldn’t do more than a block to me. I Counter Attacked to bring in a line of units and finished off a Medium. 6-5

I started the second game with Move-Fire-Move (with all of four light units to my name…), did one block to a Warrior and ended pretty well where I started. Patch Ordered Three Left and did one block to a Light at range. I Ordered Four Right to drive off a couple units and do a block to a Light. Patch Counter Attacked to wipe out two Mediums. I used Line Command to move up most of the Roman army, driving off Crixus and doing two blocks to a Warrior with a blocked retreat.

Patch Ordered Mediums to bring his entire set of Warriors slamming into my line, doing five blocks across two Auxes, who did one hit each to three units. Order Three Center drove off a weak Warrior, and lost me an Aux to a First Strike. Patch Ordered Three Center and knocked out a weak Aux and the HWM (I was desperate enough to not evade against three dice), and drove off a Medium with losses.

I Ordered Four Units Left and finally finished off a Warrior, and did a hit to an Aux. Patch Ordered Two Center to hit me on my own baseline, and finished off the Medium there. 1-6

Afterword

Both plays saw inconsistent, but fairly solid die luck for the (ex-)slaves. Patch did well in the late game to make a comeback that was a little too late, but got him within reach of a win. In the second game, I had just drawn a Mounted Charge, and hoped to use it next turn to drive in his flanks, but my center was gone, and I wasn’t going to get out of the situation easily.

The mountain really has a large effect on the scenario, largely because Warriors, who retreat 2 hexes, are stuck in front of it, which can make them evaporate fast, even if they get some distance. The Romans should be favored here, as they have the heavier army, a larger army, and don’t have the mountain, but dice were solidly on Crixus’ side. It makes for a nicely different scenario.

└ Tags: C&C Ancients, gaming
 Comment 
  • Page 2 of 17
  • «
  • 1
  • 2
  • 3
  • 4
  • 5
  • »
  • Last »

©2005-2026 Rindis.com | Powered by WordPress with ComicPress | Hosted on Rindis Hobby Den | Subscribe: RSS | Back to Top ↑